Austin Mini till Suzuki Swift GTi-konvertering

Getting ready to install a Swift GTi engine in my 1975 Austin Mini 1000 cc. Going from 35 bhp to 105 bhp, or more. It is also going to get just a bit of a style makeover.
  • 114 Följare
  • 307 319 Visningar
  • Uppdaterades senast 27 januari
Cuefa Ain't no place like home...
18 februari 2021 · 4 628 Inlägg

Gaaaaaaaaaaah!

Vilket pill-göra...!
Men det ser onekligen jäkligt snyggt ut! 👍🏼

Autopilot: På.
Projekt: Skogsmulle on a budget
Cupra Born "Gruvbilen" (2022)
Mercury Grand Marquis LS "Murklan" (2000)
Lucif3r
18 februari 2021 · 2 207 Inlägg

martinhejdesten skrev:
Får se huruvida det blir med frakt mm nu när UK faktiskt lämnat EU.

Du åker på tull + moms + postnords avgift. Samt herrejösses lång leveranstid...
Väntar fortfarande på mitt paket från UK som tyvärr inte hann över gränsen innan årsskiftet. Det har legat hos postnord och "tulldeklareras" sedan 29e jan nu utan att dom lyft ett finger.... hmm

martinhejdesten
20 februari 2021 · 484 Inlägg

Korrekt Cuefa. Pill, pill och återigen pill... det är detaljerna som gör helheten. Och visst blir det bra?!

Hmm, det har du rätt i Lucif3r. Trist att det tagit en sådan lång tid för dig. Jag satt och fyllde på beställningslistan igår och lär väl skicka order imorrn. Sen får jag se när det dimper ner och vad prislappen blir efter Postnord och tullen gjort sitt.

Ska man ändå göra någonting, så kan man lika gärna göra det ordentligt. Även om det tär på både tålamod och plånbok. Och tar tid. Men det kommer bli galet tillfredsställande när det är klart!

Ena sidans dash card var ju modifierad och inpassad. Nöjd och glad. Men det där fläktmunstycket med slang tog ju lite plats och gjorde så att panelen buktade. Jag värmde dem med värmepistol och tryckte till dem "en aning". Och skruvade fast dem för att pressa samman dem ytterligare. Provmonterade min panelmall och visst satt den bra. Skönt.

Vänstra sidans dash card blir lite knöligare då jag måste göra hål för varvtalsräknarens sladdar mm. Men innan jag påbörjar denna del så ville jag plocka bort den centrerade instrumentpanelen, plocka bort visarna (vattentemp, hastighet och oljetryck) eftersom jag tänker spraya de kromade listerna mattsvarta. Så det var bara till att skrida till verket. Plockade bort en del sladdar och glödlampor men fick knappt bort det ovala höljet då en skruv trilskades rejält. Som jag tidigare sagt, det är svåråtkomligt på den här bilen.

Jag började med att ta bort vattentempmätaren och kunde konstatera att gummipackningarna haft bättre dagar, jösses. Tog också bort hastighetsmätaren och oljetrycksmätaren. Tvättade rent glasen, slipade bort lite ytrost och tog även några tag med metallpolish på de kromade detaljerna. Men, de ska ju förvisso lackas mattsvarta senare så det var ogjort arbete.

Nu när jag har plockat ut hastighetsmätaren så har jag en annan idé gällande den, men det låter jag vara osagt fram till premiärturen, hehe. Vet bara att min idé kostar allt ifrån 2 300 kr till 6 100 kr om man får tro Mini-butikerna i UK. Holy crap! Men... jag tänkte spara pengar och köpa begagnat till en rimligare prislapp, men måste först vinna en auktion på eBay för att den idén ska gå i lås.

Innan jag kunde lyfta bort instrumentpanelens hölje så var jag tvungen att kapa ett spår i höljet eftersom jag fört in sladdar och kabel till styrboxen via ett borrat hål. Orkade inte koppla bort sladdarna så jag sågade ett snitt i botten på höljet och trädde ut allt. Och nu var höljet fritt.

Den kromade ovala listen plockades bort genom att böja till clipsen på baksidan av höljet. När den var av så skrubbade och tvättade jag hela höljet och vattenslipade de tre kromlisterna (två runda och en oval) så att primern fäster ordentligt innan jag mattlackar dem alla tre. Har lagt med en visualiseringsbild på det helsvarta utseendet som jag eftersträvar.

Därefter blir det nog vinylglans på höljet innan ihopmontering. Nu ska det lagas lördagsmiddag. Kanske sprayar primer på kromlisterna senare. Mello blir det INTE, haha!

• • • TRANSLATION • • •

Reply to post: Gaaaaaaaaaaah! What a fiddly task...! But it certainly looks damn good! 👍🏼

Reply to post: You'll incur customs duty + tax + PostNord's fee. And good lord, such a long delivery time... Still waiting for my package from the UK that unfortunately didn't make it across the border before the new year. It has been with PostNord and "customs declared" since January 29th without them lifting a finger... hmm

Correct, Cuefa. Fiddling, fiddling, and more fiddling... it's the details that make the whole. And it does look good, doesn't it?!

Hmm, you're right, Lucif3r. It's sad that it has taken so long for you. I was sitting and adding to the order list yesterday and will probably send the order tomorrow. Then I'll see when it arrives and what the price tag will be after PostNord and customs have done their thing.

If you're going to do something, you might as well do it properly. Even though it takes both patience and money. And time. But it will be insanely satisfying when it's done!

One side's dash card was modified and fitted. Happy and content. But that fan nozzle with hose took up some space and made the panel bulge. I heated them with a heat gun and pressed them "a bit." And screwed them in to press them together further. Test-fitted my panel template, and indeed, it fit well. Nice.

The left side's dash card is a bit trickier since I have to make holes for the tachometer wires, etc. But before I start this part, I wanted to remove the centered instrument panel, take off the needles (water temperature, speed, and oil pressure) since I plan to spray the chrome trims matte black. So it was just a matter of getting to work. Removed some wires and bulbs but barely got off the oval cover as a screw was quite stubborn. As I've said before, it's hard to access on this car.

I started by removing the water temperature gauge and could see that the rubber gaskets had seen better days, oh my. Also removed the speedometer and oil pressure gauge. Cleaned the glasses, sanded off some surface rust, and also took a few strokes with metal polish on the chrome details. However, they are supposed to be painted matte black later, so that was unfinished work.

Now that I have taken out the speedometer, I have another idea about it, but I'll keep that a secret until the maiden voyage, hehe. Just know that my idea costs anything from SEK 2,300 to SEK 6,100 if you believe the Mini shops in the UK. Holy crap! But... I thought of saving money and buying used for a more reasonable price, but first, I have to win an auction on eBay for that idea to work.

Before I could lift off the cover of the instrument panel, I had to cut a groove in the cover because I threaded wires and cables to the control box through a drilled hole. Didn't feel like disconnecting the wires, so I sawed a cut at the bottom of the cover and threaded everything out. And now the cover was free.

The chrome oval trim was removed by bending the clips on the back of the cover. Once it was off, I scrubbed and washed the entire cover and water-sanded the three chrome trims (two round and one oval) so that the primer adheres properly before I matte paint all three. I've included a visualization image of the all-black look that I'm aiming for.

After that, it's probably vinyl gloss on the cover before assembly. Now, it's time to make Saturday dinner. Maybe I'll spray primer on the chrome trims later. No Eurovision (but the Swedish competition) for me, haha!

https://www1.garaget.org/gallery/images/219/218366/218366-dbd973604f8d7a4b782d2830cb2ebe57.jpg
https://www1.garaget.org/gallery/images/219/218366/218366-c2105b453a4859fb92c16d6742974416.jpg
https://www1.garaget.org/gallery/images/219/218366/218366-4605877dd43950df0d23a3e3a73713cb.jpg
https://www1.garaget.org/gallery/images/219/218366/218366-f2d7f4ccfb6ed53fd88fc1e9f28a1e9d.jpg
https://www1.garaget.org/gallery/images/219/218366/218366-67ea9400d18a6f5a4d9a8f8d0f90f4bd.jpg
https://www1.garaget.org/gallery/images/219/218366/218366-f63b5188e0f8907f07392ac4b0b10cb5.jpg
https://www1.garaget.org/gallery/images/219/218366/218366-18c9818ca6c20f03ea64b3007d538547.jpg
https://www1.garaget.org/gallery/images/219/218366/218366-e5d89bd136bda3a5aae6a9ed33517873.jpg
https://www1.garaget.org/gallery/images/219/218366/218366-d7616021a2bfb9fe6b8514ee4ec04c26.jpg
https://www1.garaget.org/gallery/images/219/218366/218366-84d377373f0e82128592a706a06fa7b4.jpg
https://www1.garaget.org/gallery/images/219/218366/218366-ec9f3d52e06ba2baf3ca1f1af42eeb5e.jpg
https://www1.garaget.org/gallery/images/219/218366/218366-c7af870317614b4ce17239ba7b5d7fed.jpg
https://www1.garaget.org/gallery/images/219/218366/218366-d37410c1eb3c904f67b1d6e02119fd0c.jpg
https://www1.garaget.org/gallery/images/219/218366/218366-e7d60c1d6cef837270f41591420f888a.jpg
https://www1.garaget.org/gallery/images/219/218366/218366-f9614fb76f9f1f7d6bcf28dc6e636263.jpg
https://www1.garaget.org/gallery/images/219/218366/218366-398b0dce3c69a0cf96f49b6cc5108a09.jpg
https://www1.garaget.org/gallery/images/219/218366/218366-3e637aa9f38e82c02b676993b727806c.jpg
https://www1.garaget.org/gallery/images/219/218366/218366-a29793eed6dd39db82a85b83d262129e.jpg
https://www1.garaget.org/gallery/images/219/218366/218366-28abcbe63a0518d6b3559fe64bf48d75.jpg
https://www1.garaget.org/gallery/images/219/218366/218366-25533f96ba3e8d3b2c28a2201bfcbd32.jpg
https://www1.garaget.org/gallery/images/219/218366/218366-96a545dcfb83f4dc2dd2433a83fd0056.jpg
https://www1.garaget.org/gallery/images/219/218366/218366-65993ce0601f25fd7ff5124c31075467.jpg
https://www1.garaget.org/gallery/images/219/218366/218366-20c36e810a82c657b39032a93e07e32f.jpg
https://www1.garaget.org/gallery/images/219/218366/218366-4fd0617e3669917de833a098e58914dc.jpg
https://www1.garaget.org/gallery/images/219/218366/218366-5304f795ede0d20f4151bacdac922810.jpg
https://www1.garaget.org/gallery/images/219/218366/218366-2a38611a8c019ae0094328bdf2793a42.jpg
https://www1.garaget.org/gallery/images/219/218366/218366-550f4873cd3afe3607f1bbab234723a9.jpg
https://www1.garaget.org/gallery/images/219/218366/218366-9ed85ba07830081554a90e2a1b9c195c.jpg
https://www1.garaget.org/gallery/images/219/218366/218366-42aa148fb1da33348a6acabced32e85b.jpg
https://www1.garaget.org/gallery/images/219/218366/218366-a8c7db2a718ad87449107374cc8402c1.jpg
https://www1.garaget.org/gallery/images/219/218366/218366-9670e0d28d89ae6dc39b2ef2ac4bbd81.jpg

Senast redigerat av martinhejdesten (29 december 2023)

Cuefa Ain't no place like home...
20 februari 2021 · 4 628 Inlägg

Riktigt snyggt! 👍🏼

Autopilot: På.
Projekt: Skogsmulle on a budget
Cupra Born "Gruvbilen" (2022)
Mercury Grand Marquis LS "Murklan" (2000)
stingray-ragge
21 februari 2021 · 1 506 Inlägg

Detaljrikt och noggrant arbete 👍👍

martinhejdesten
21 februari 2021 · 484 Inlägg

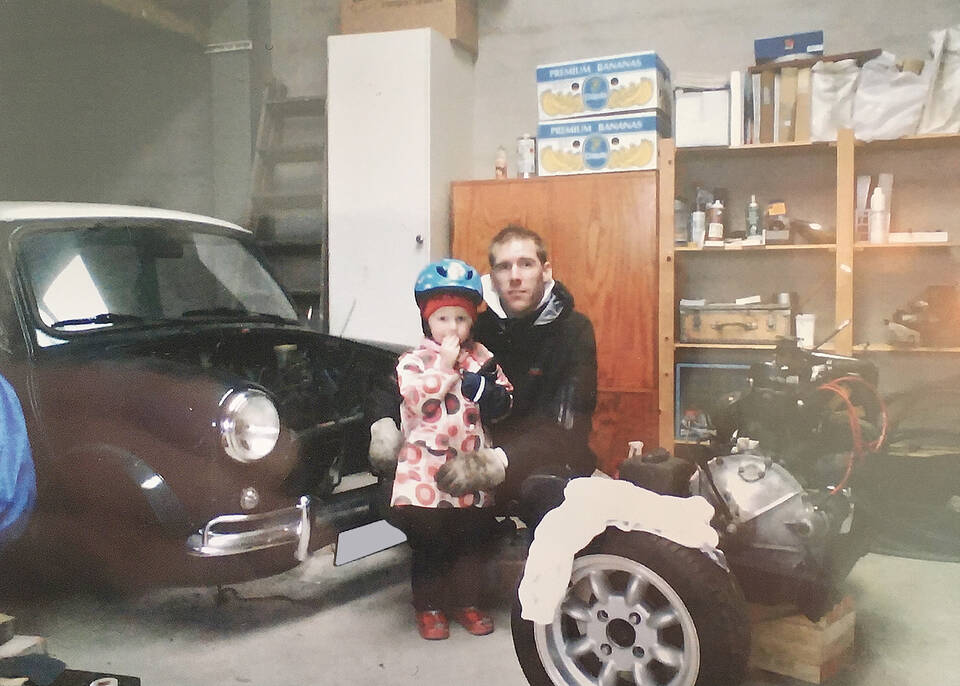
Kära dagbok, idag har det varit en bra dag. Mycket pill. Igen. Men visst är det något speciellt med bilmekande? Egentid. Harmoni. När det går bra.

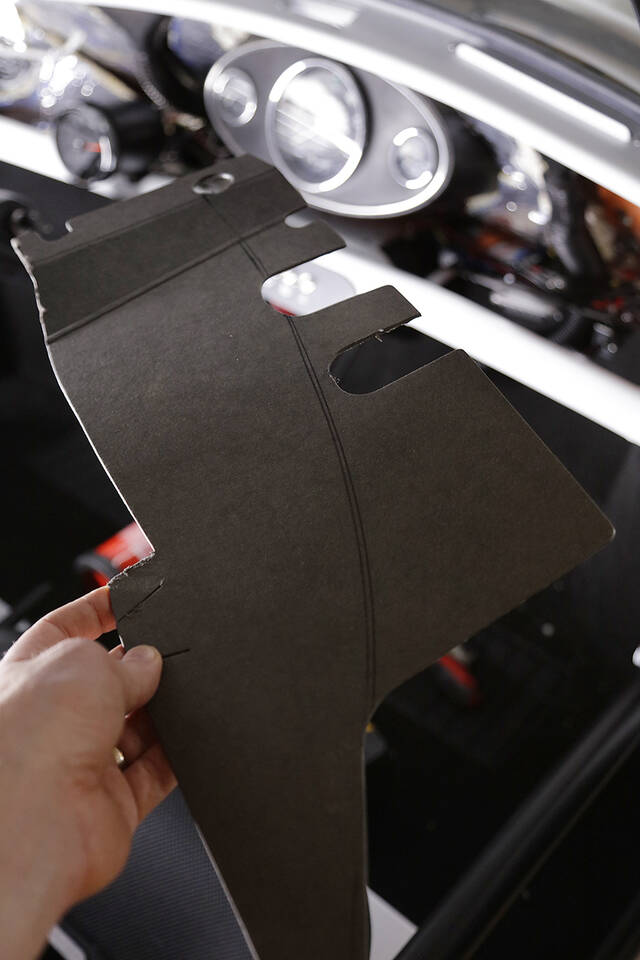
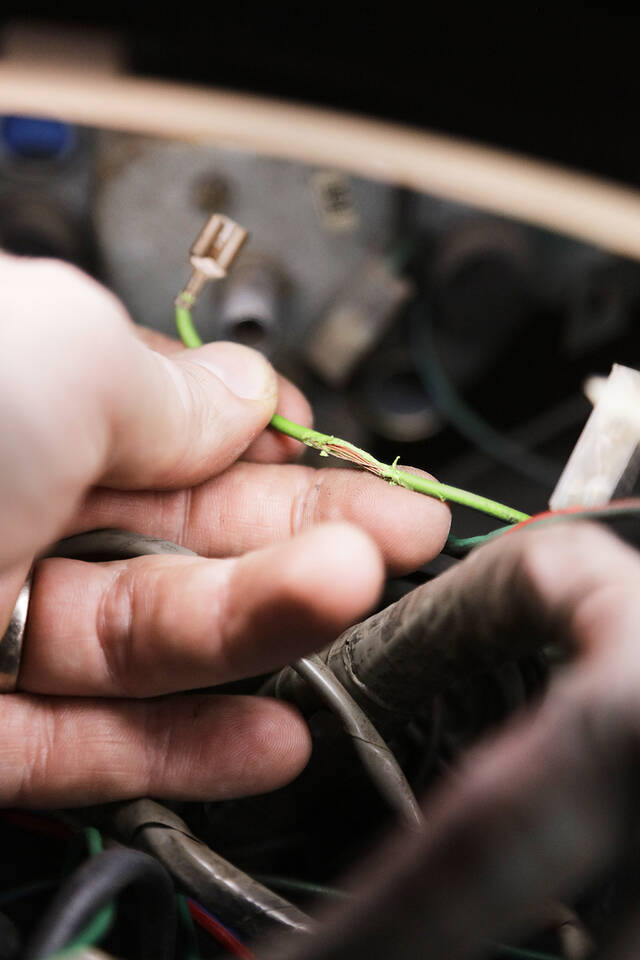
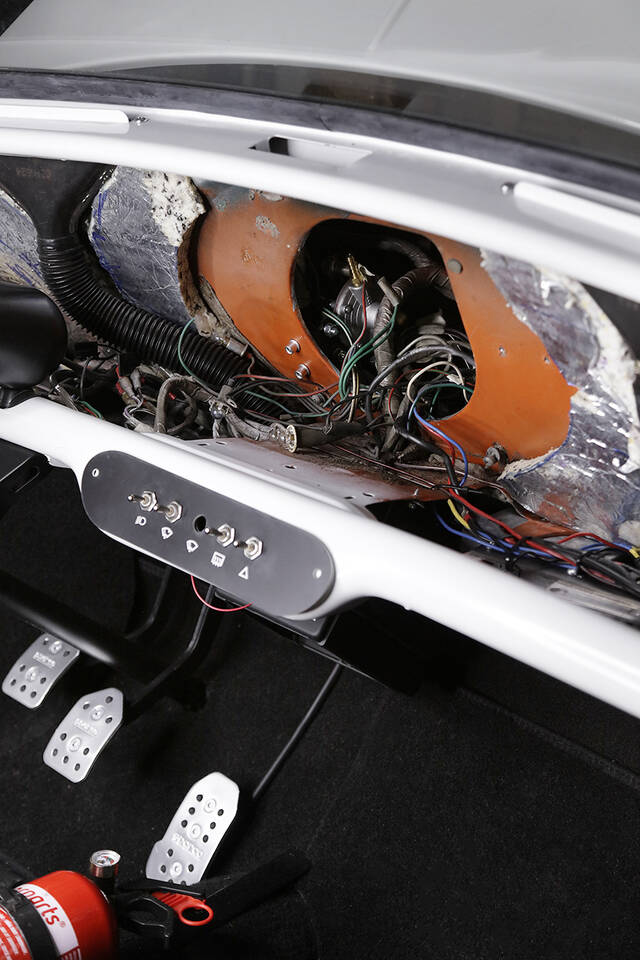
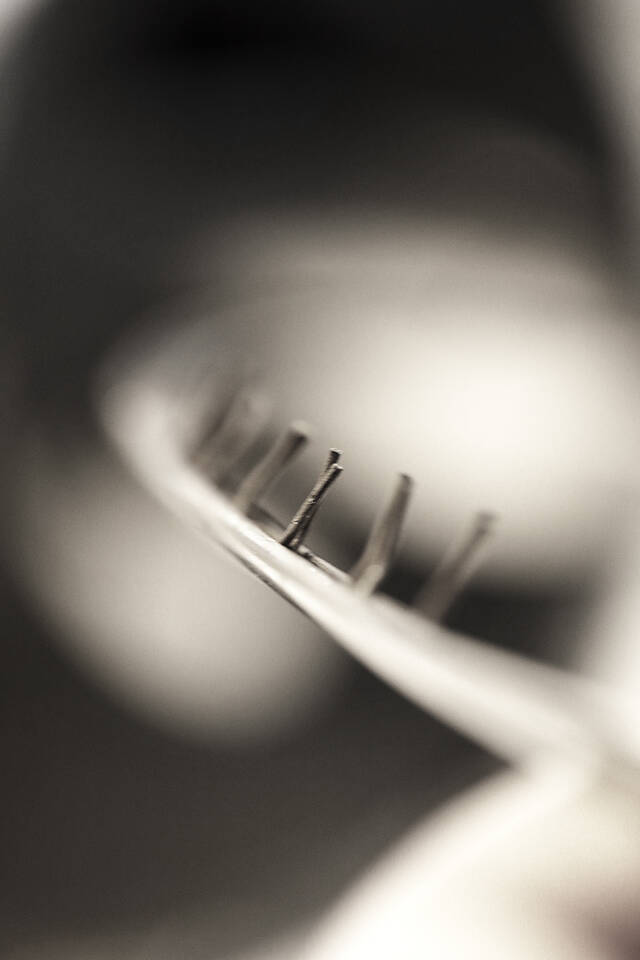
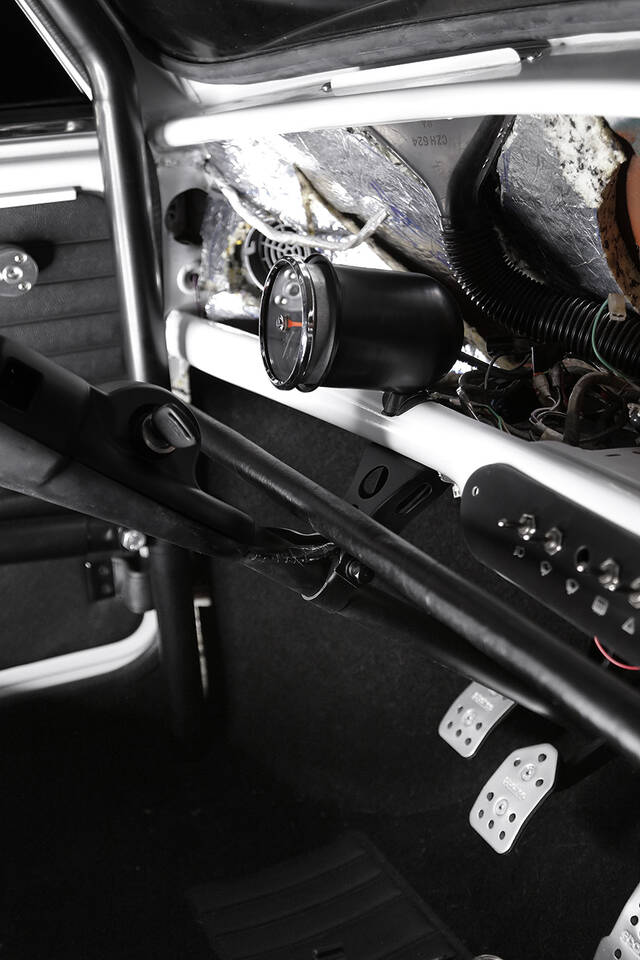
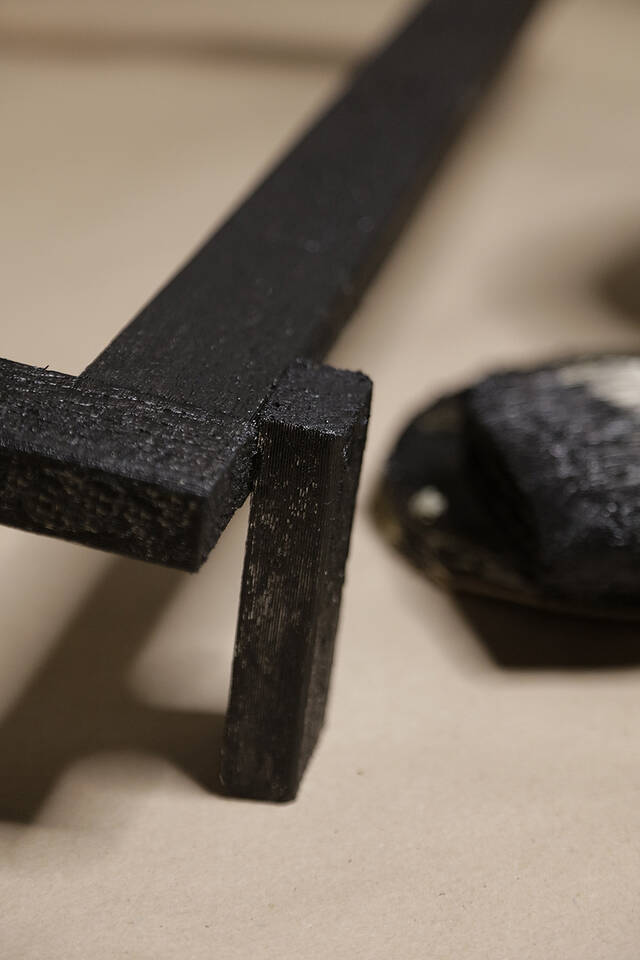
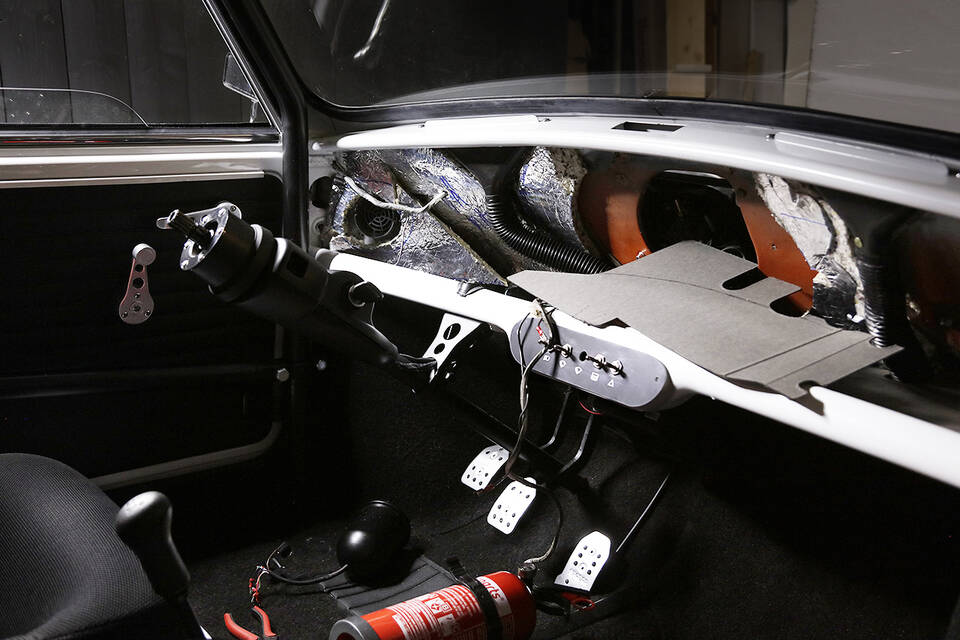
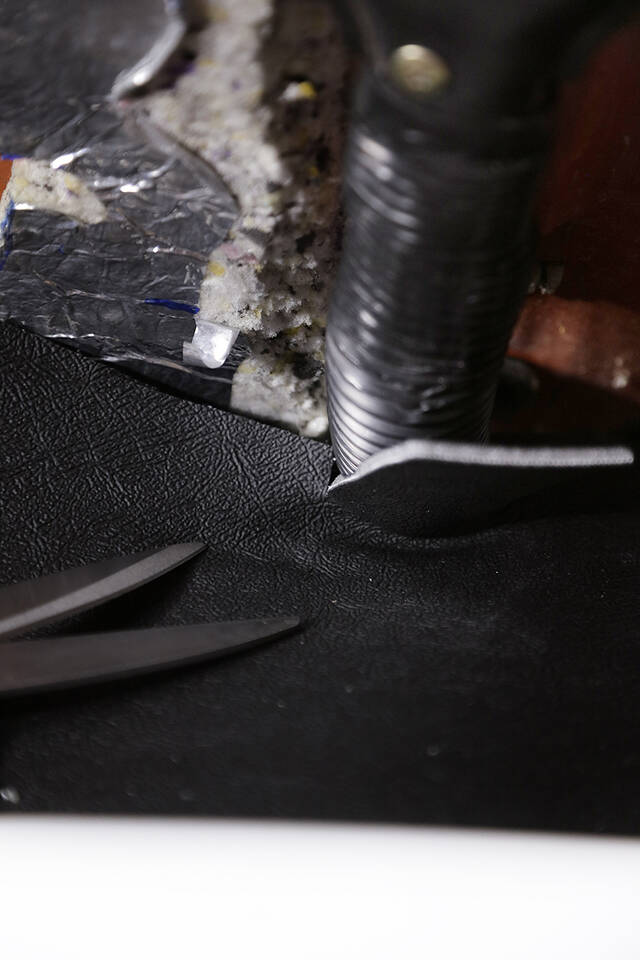
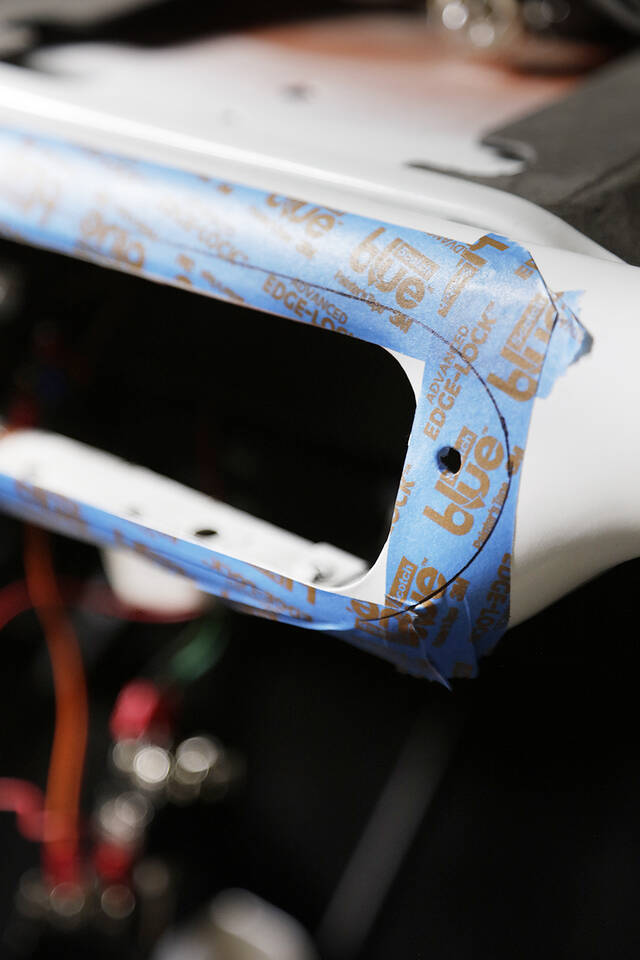
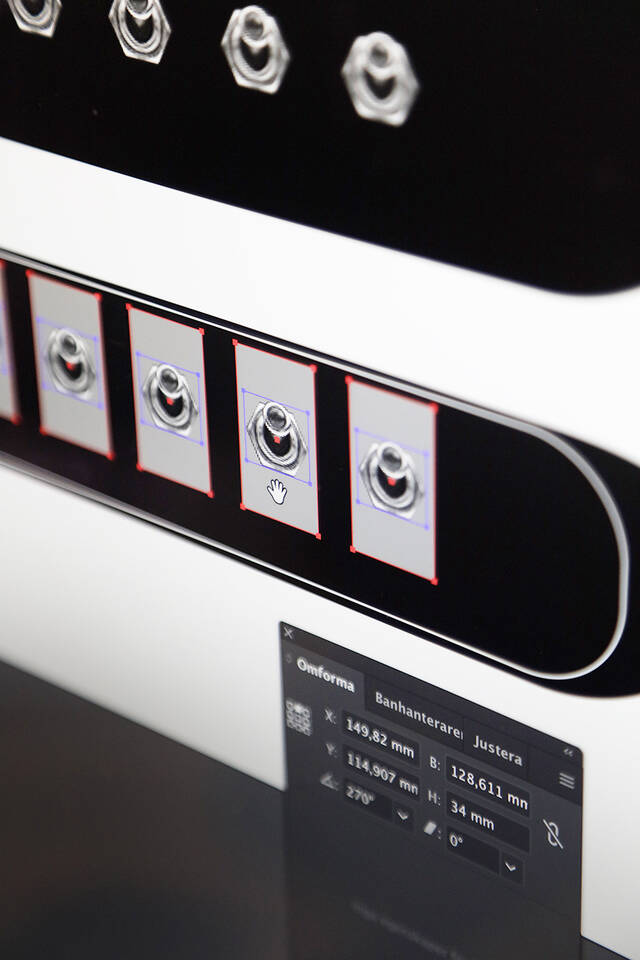
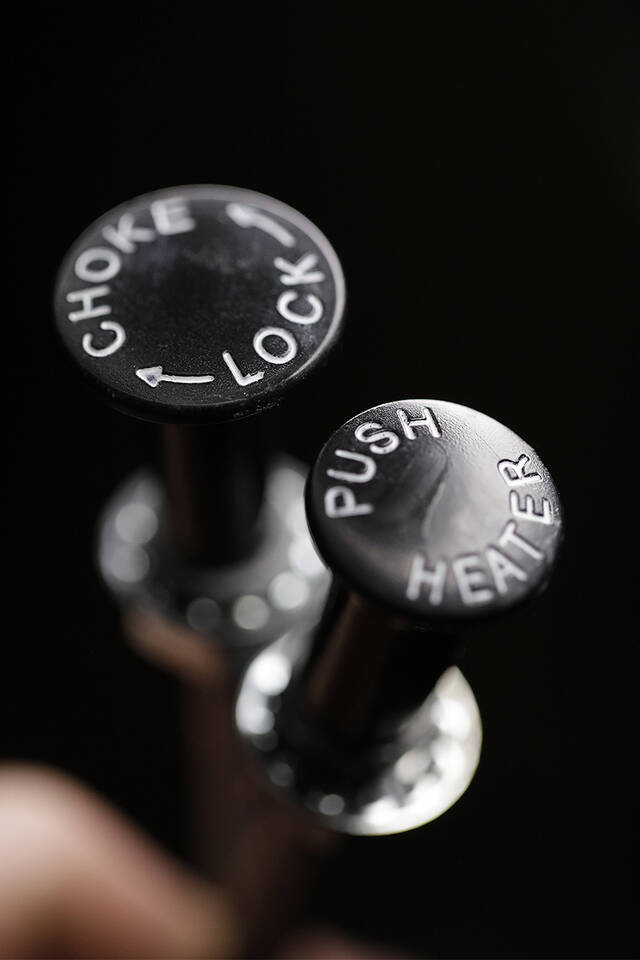
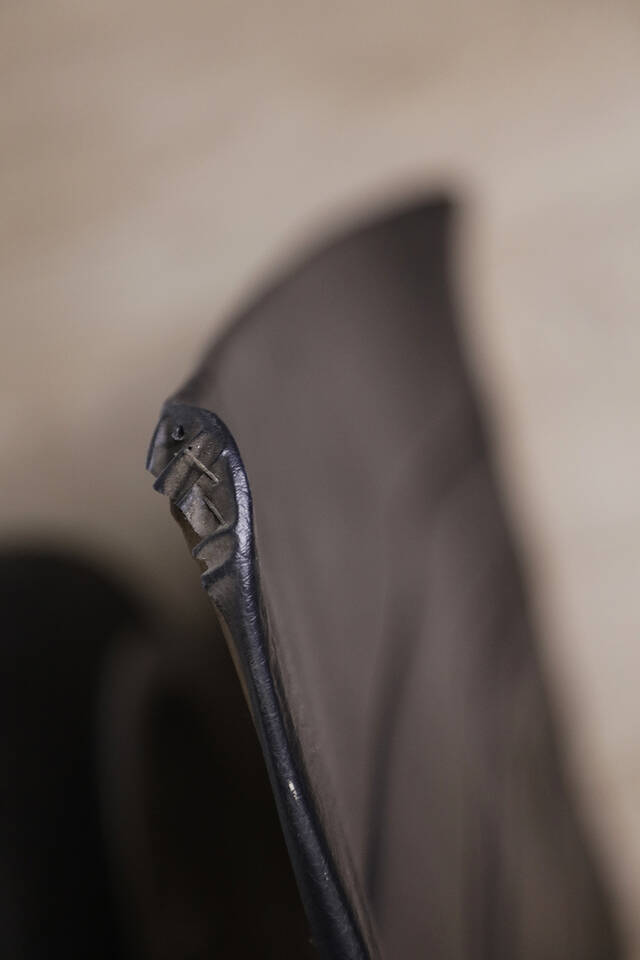
Jag lekte med tanken att sätta en dash bar mellan burens A-stolpar för att styva upp det hela ytterligare. Och skydda mer förstås. Adderar tyvärr extra vikt, men jag får gå på en diet eller nåt för att viktkompensera, haha! Jag tog helt enkelt pappkärnan från en rulle presentpapper och lackade svart lite hafsigt och höll upp på plats. Klick. Satte mig också i förarsätet och kollade så att denna dash bar inte skulle komma i vägen för mina långa ben. Ingen fara. Och så testade jag att nå switcharna på panelen. Jodå. Jag har visserligen svårt att nå dem oavsett vad eftersom jag sitter så pass långt bak i de skålade stolarna, som dessutom sitter 12 cm längre bak än i originalutförandet. Jag skaffade faktiskt förlängningsdelar till switcharna för ett tag sedan i tron om att de var i bakelit/hårdplast, dvs helt enkelt en pinne man trär på switcharna så att de blir 6 cm längre. Men de var mjuka. Hallå? Vad har man för nytta av sådana? Jag når dem bättre, absolut, men när man ska manövrera dem så är de slaka och ställer inte switcharna i annat läge. Crap.

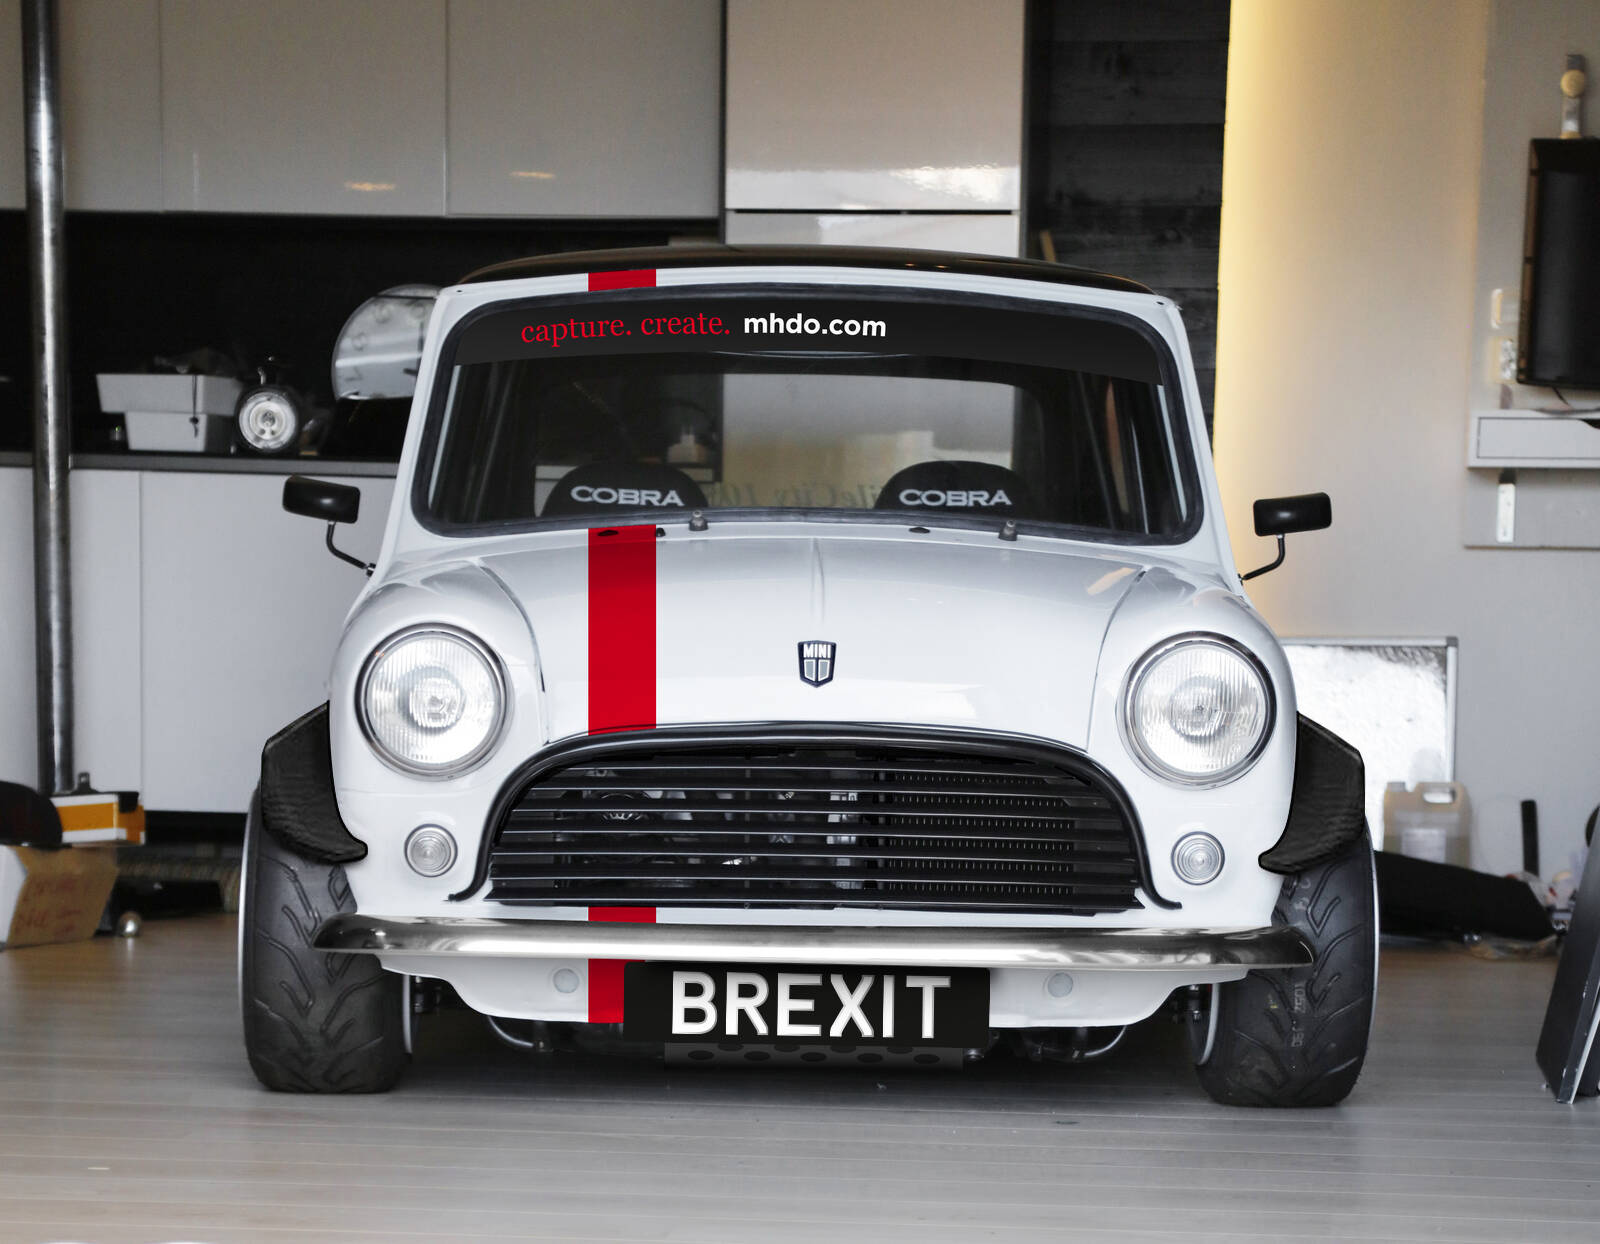
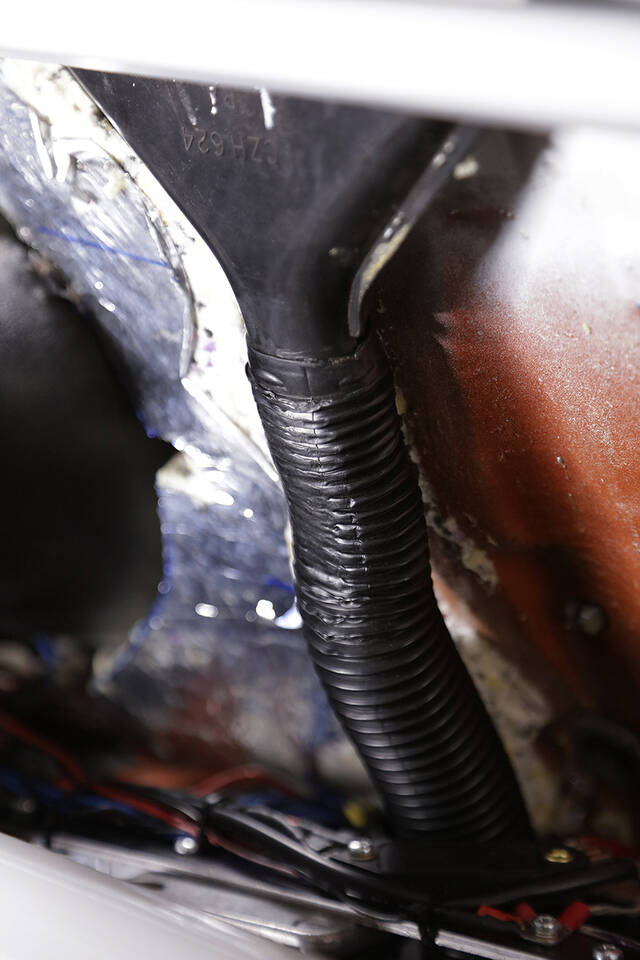
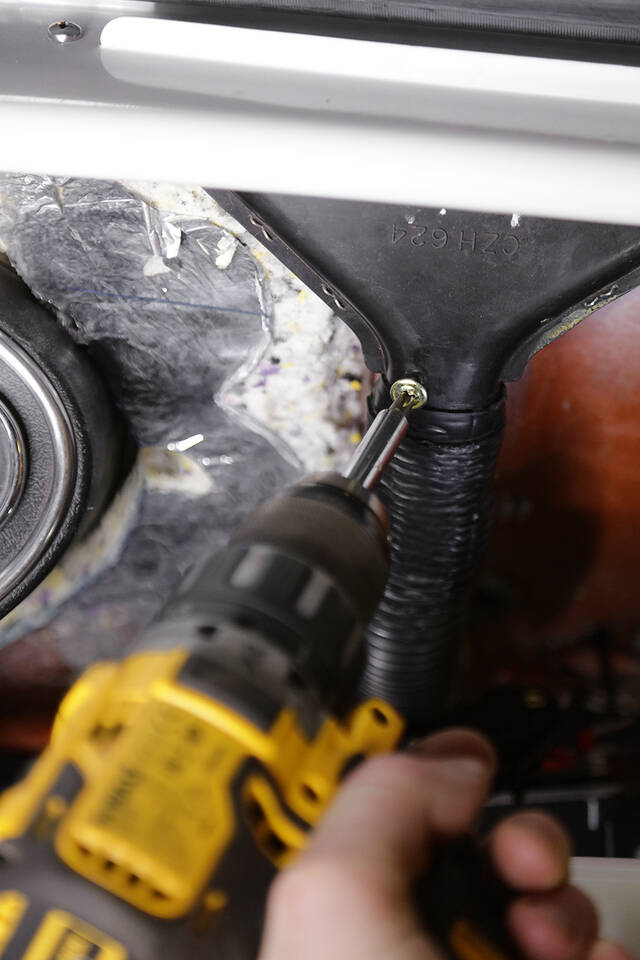
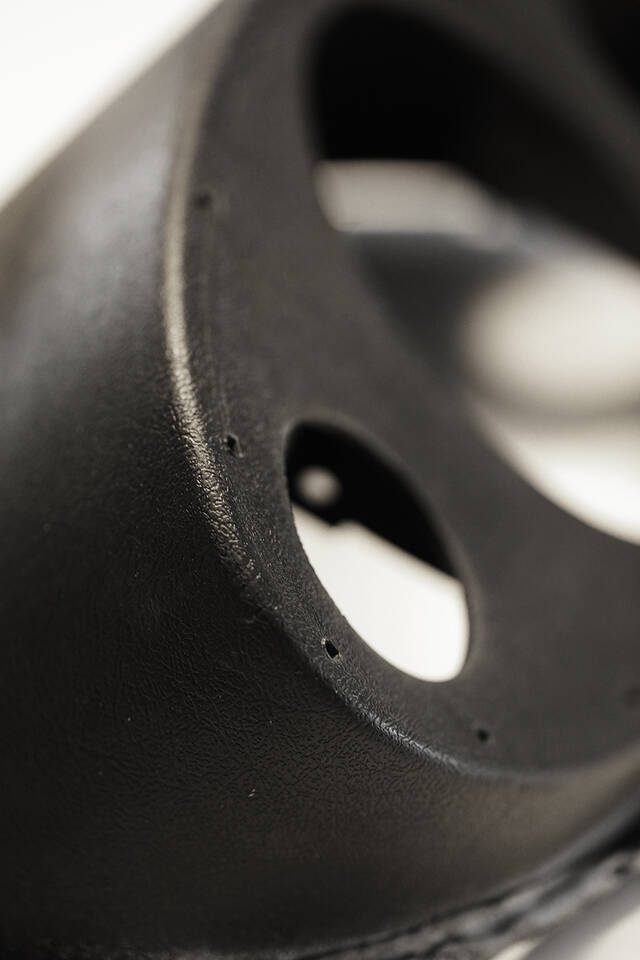
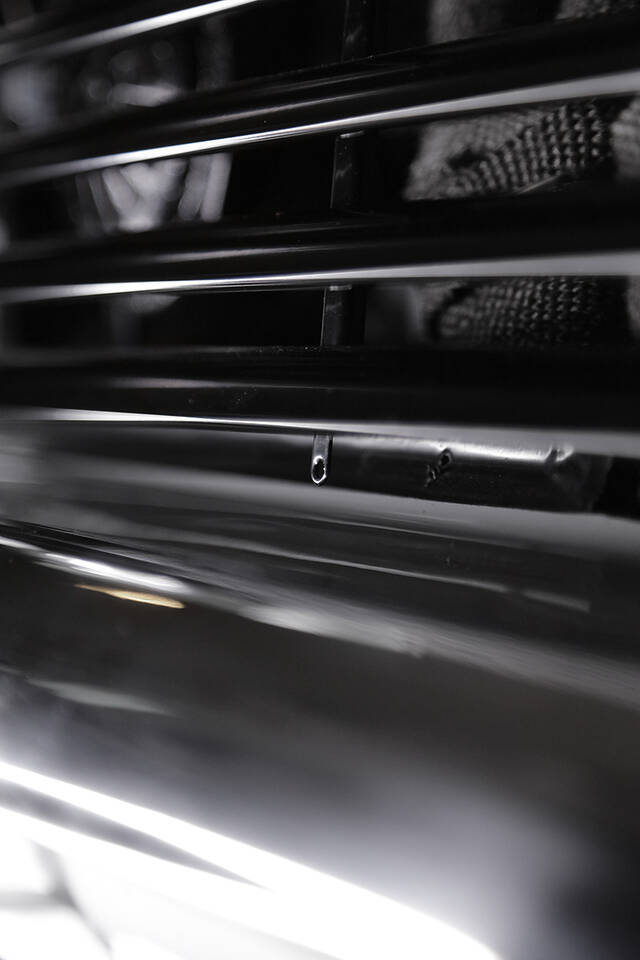
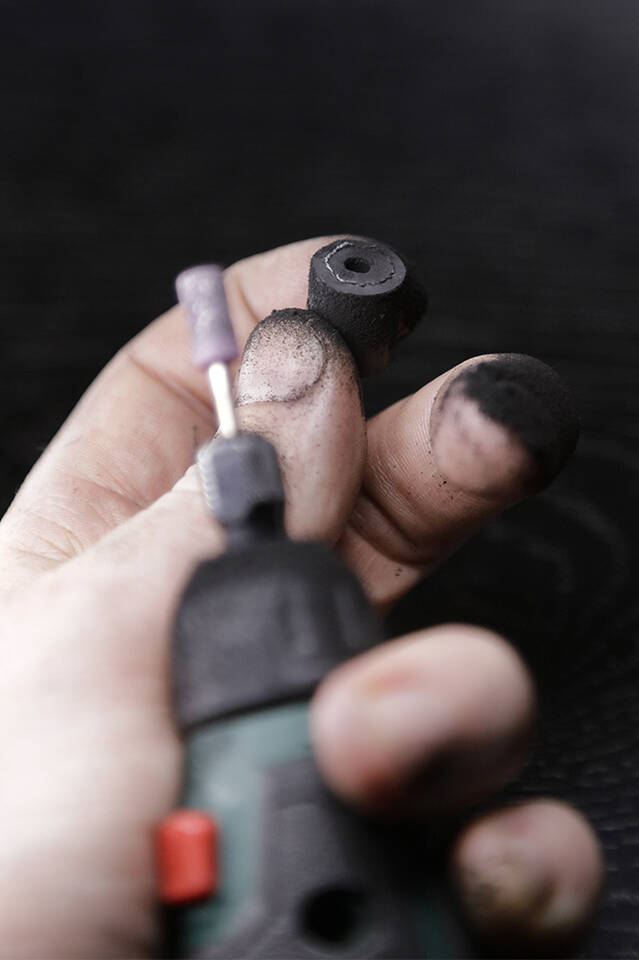
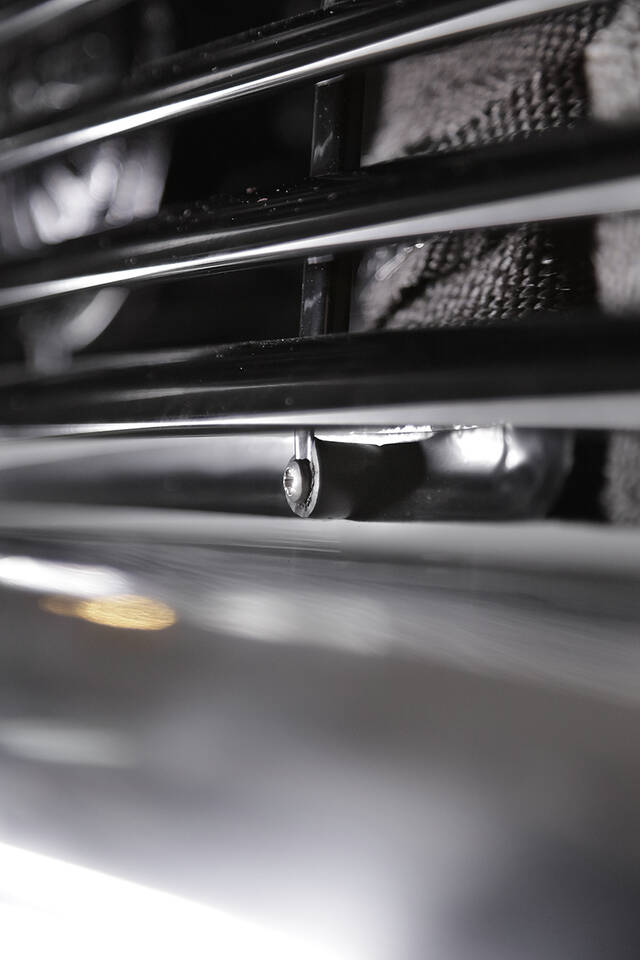
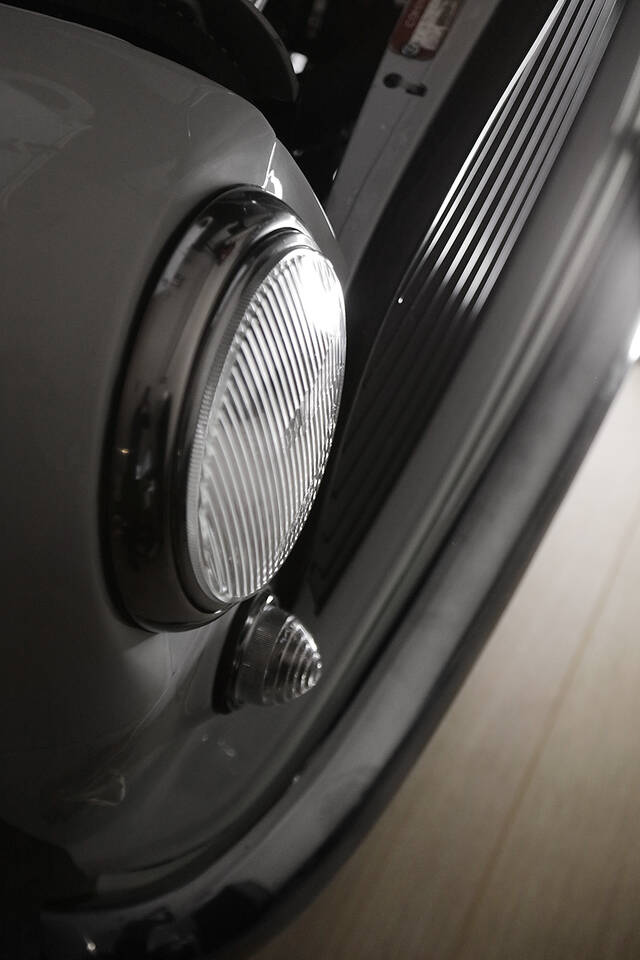
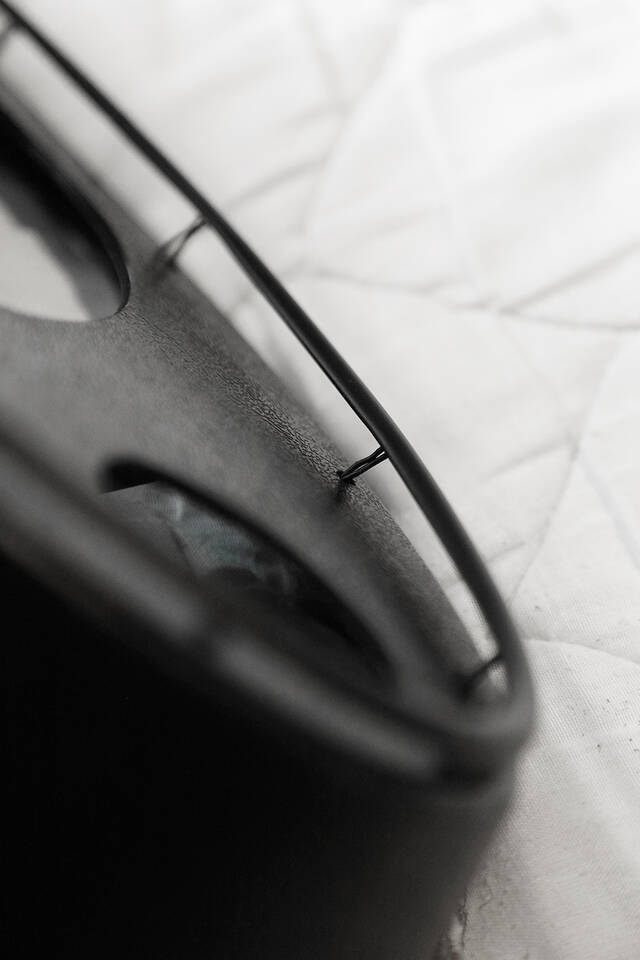
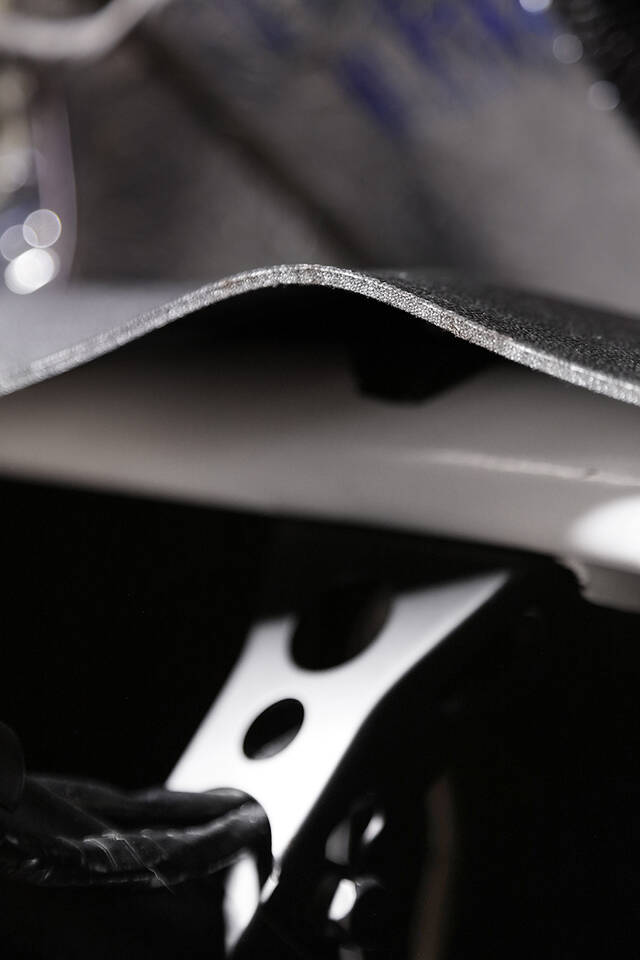
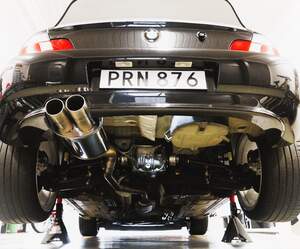
Och så har jag tidigare bara fäst grillen provosoriskt i ovankant. Det finns fler infästningar däribland i underkant. Men det nya grenröret från "Down under" byggde tyvärr ut en bit vilket gör att det ligger an mot grillen. Så jag var tvungen att tillverka distanser för att flytta ut grillen en aning. Så det blev till att kapa en bit bränsleslang och modifiera lite med en minislipmaskin. Smack, där satt dem!

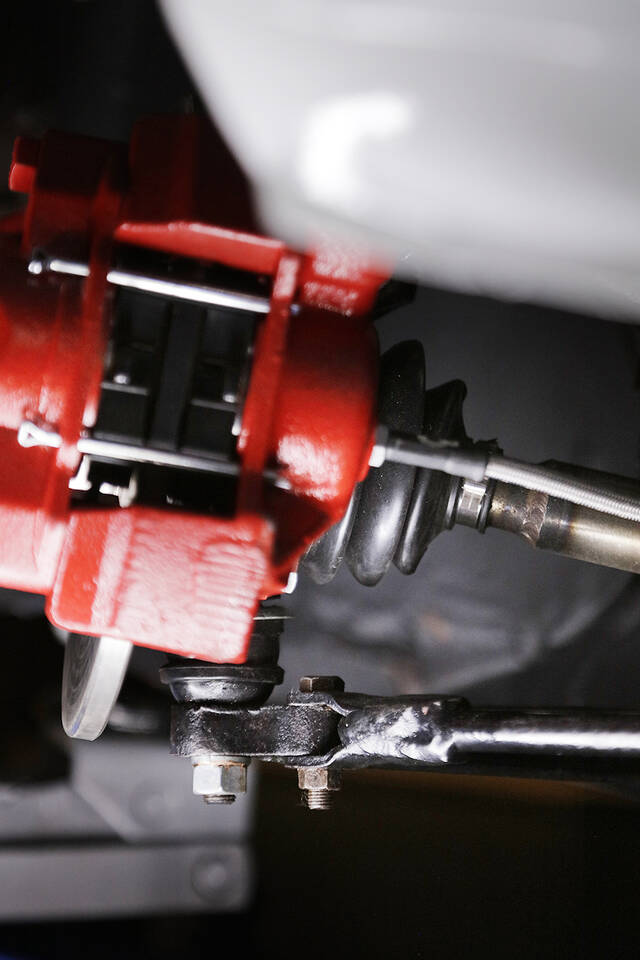
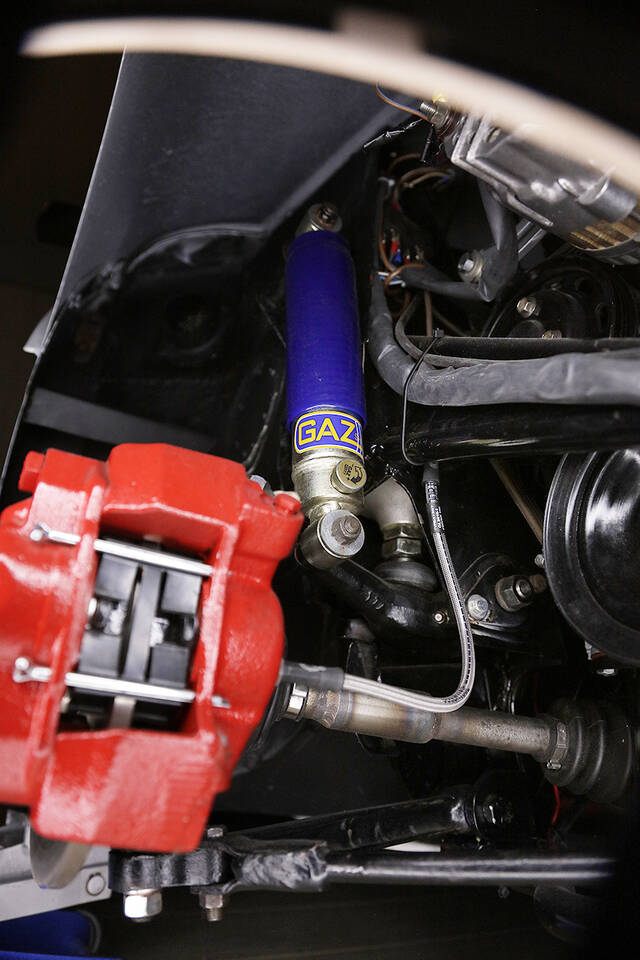
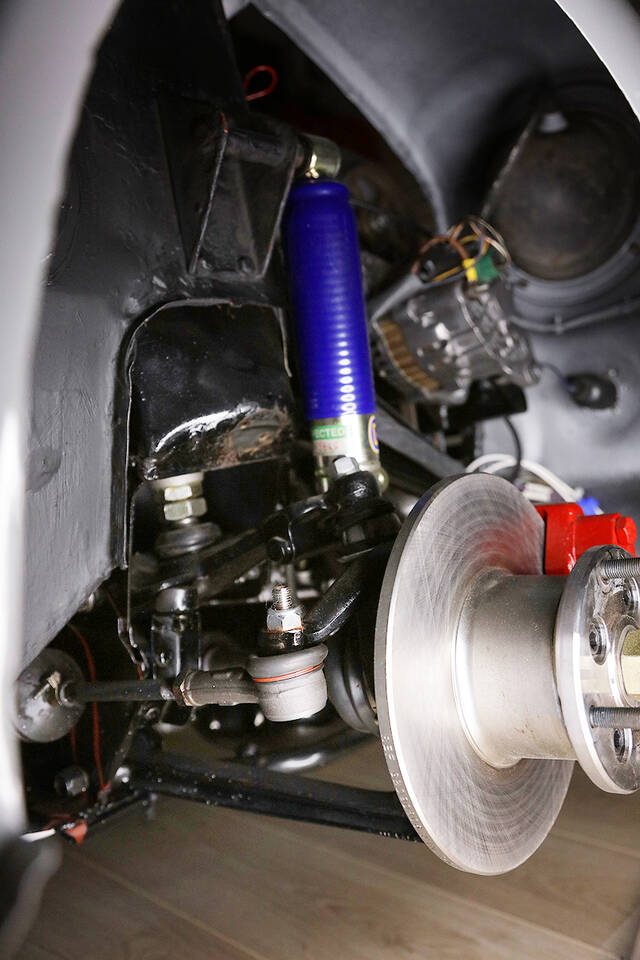
Tog även en snabbkik på hjulinställningen med blotta ögat. Hiskeligt mycket Toe out, men enligt papper ska det vara så på framhjulen, men inte sååååå mycket. Får justeras senare. Men... hjulen lutar en hel del också. Mina trotjänare Google och Youtube berättade för mig att det kallas Negative camber (man lär sig något nytt varje dag). Laddade genast ner appen Angle på mobilen och höll den upp mot en längre linjal längs med fälgkanten. Jodå, det "digitala vattenpasset" visade på 2° Negative camber. Vet visserligen inte hur exakt appen/telefonen mäter. Rent estetiskt tycker jag att bilen ser "kobent" ut, men läste vidare på brittiska minispecialisters sajter att racingbilar körs med Negative camber för att utnyttja centrifugalkrafterna vilket ger rappare hantering och grepp i svängarna. Ja, eller nåt åt det hållet. Nu ska ju detta inte bli en racingbil, så jag funderar vidare kring att kanske justera cambern till att vara mer neutral. Vad jag vet så är hela hjulupphängningen i originalutförande så jag förstod inte varför det var så mycket lutning. Kan hända att de nya fjädrarna, sänkningen samt den tyngre Suzuki-motorn gör sitt.

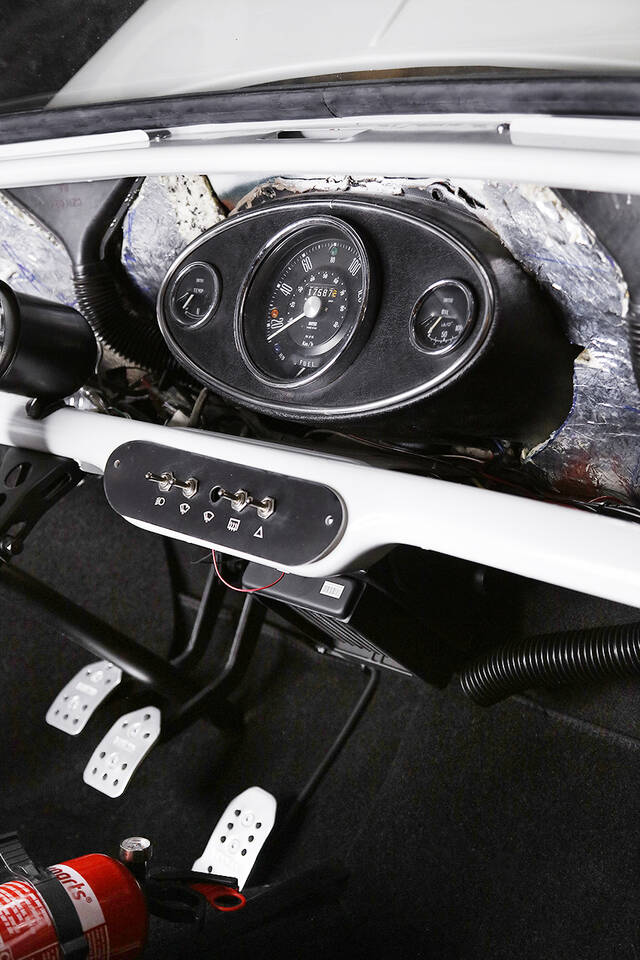
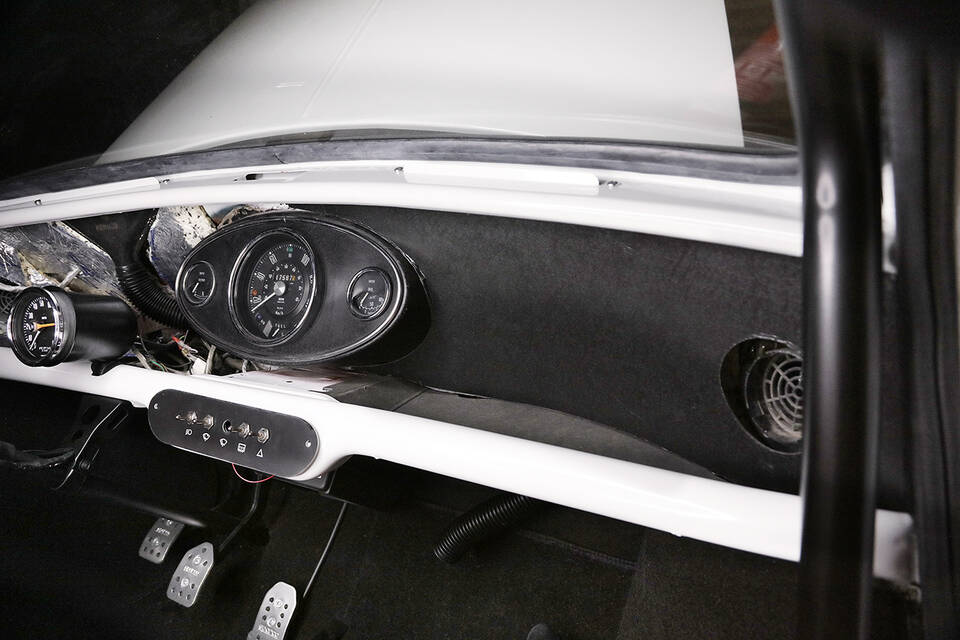
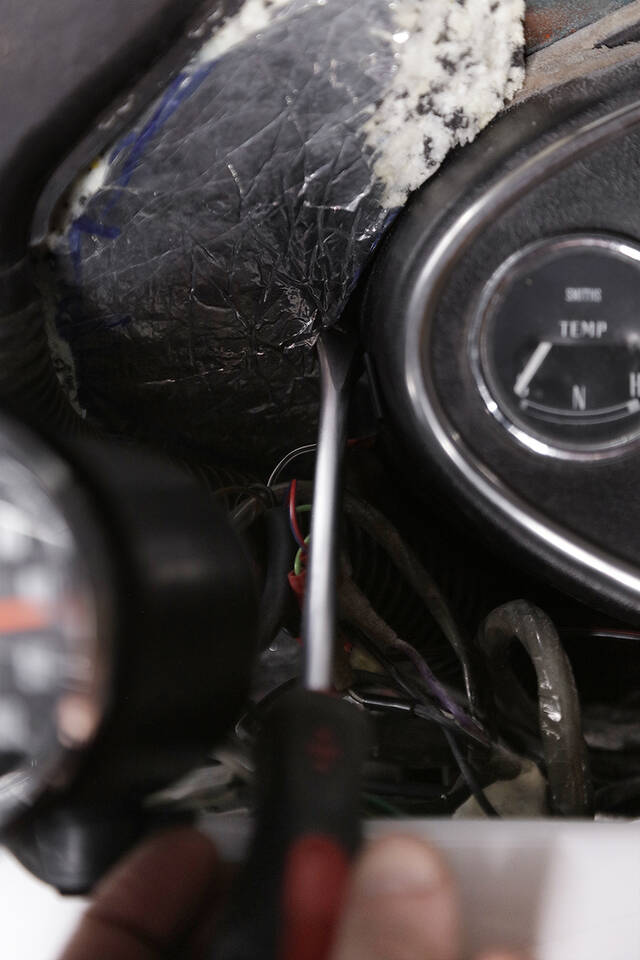
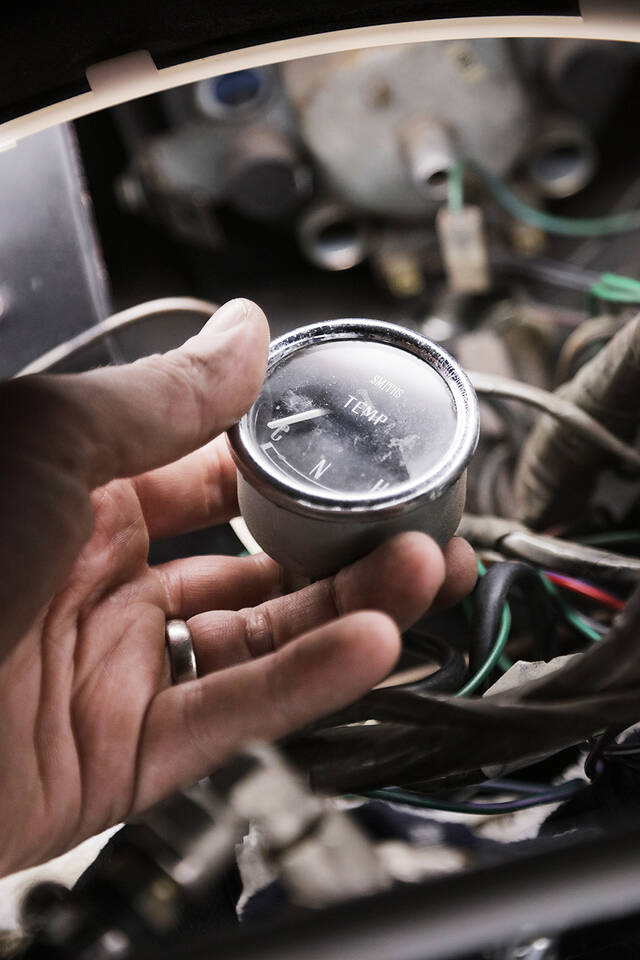
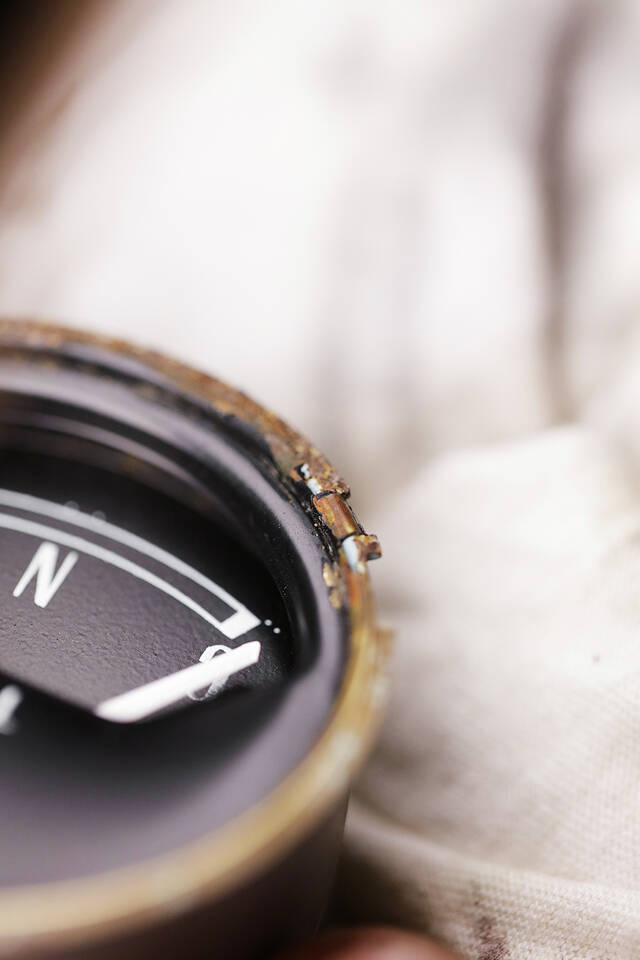
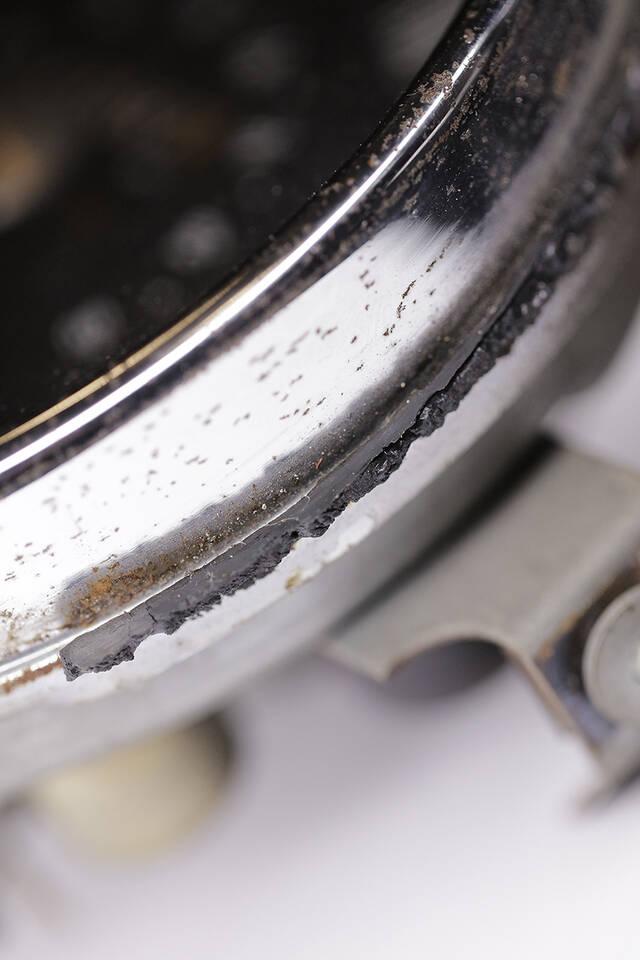
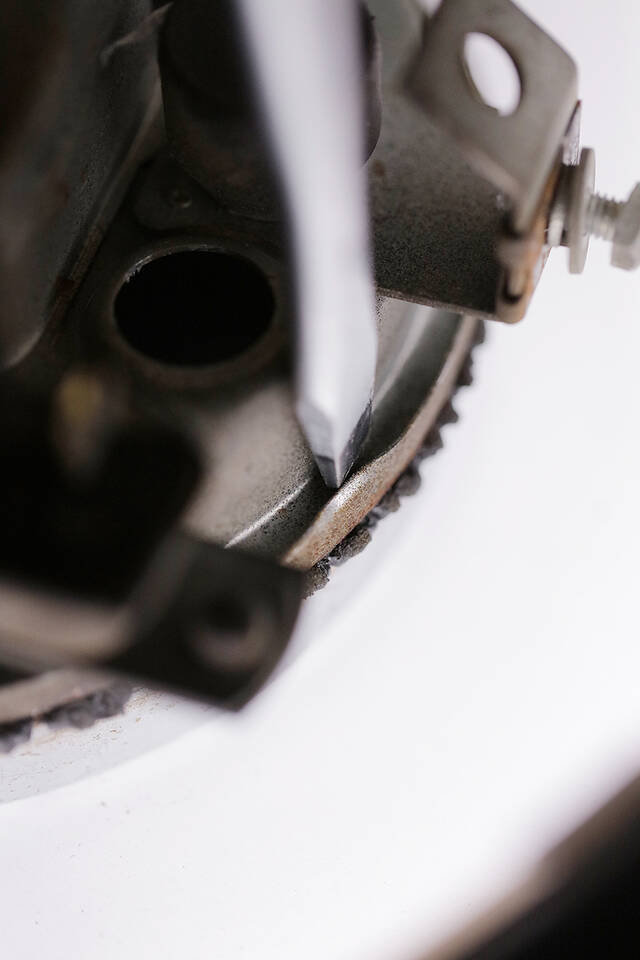
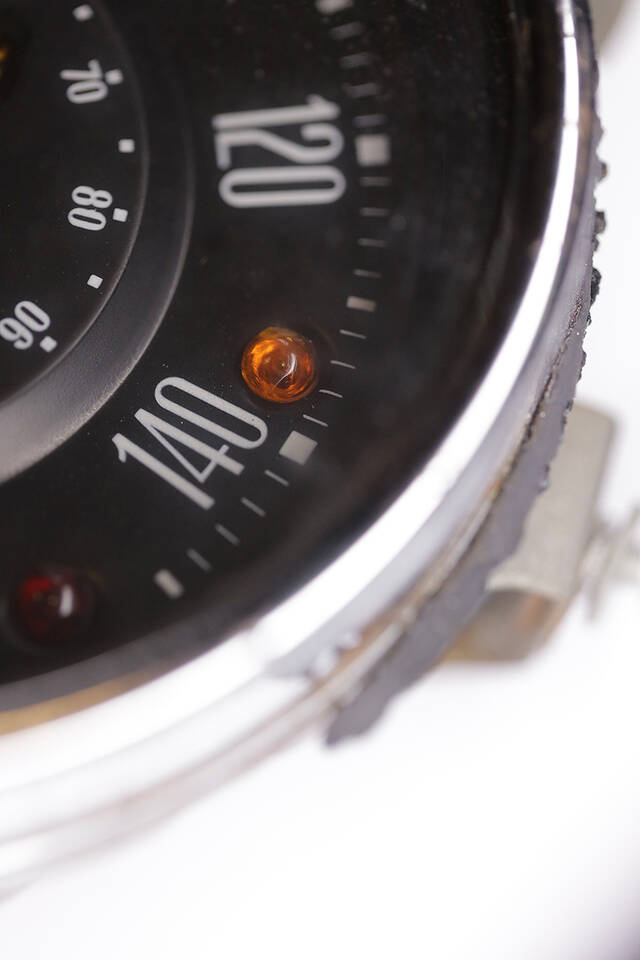
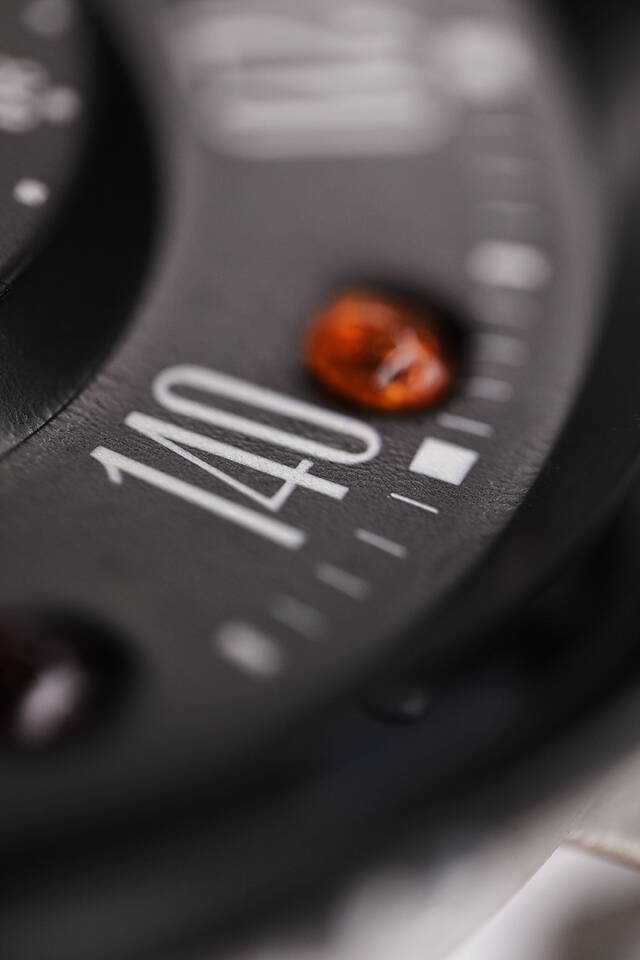
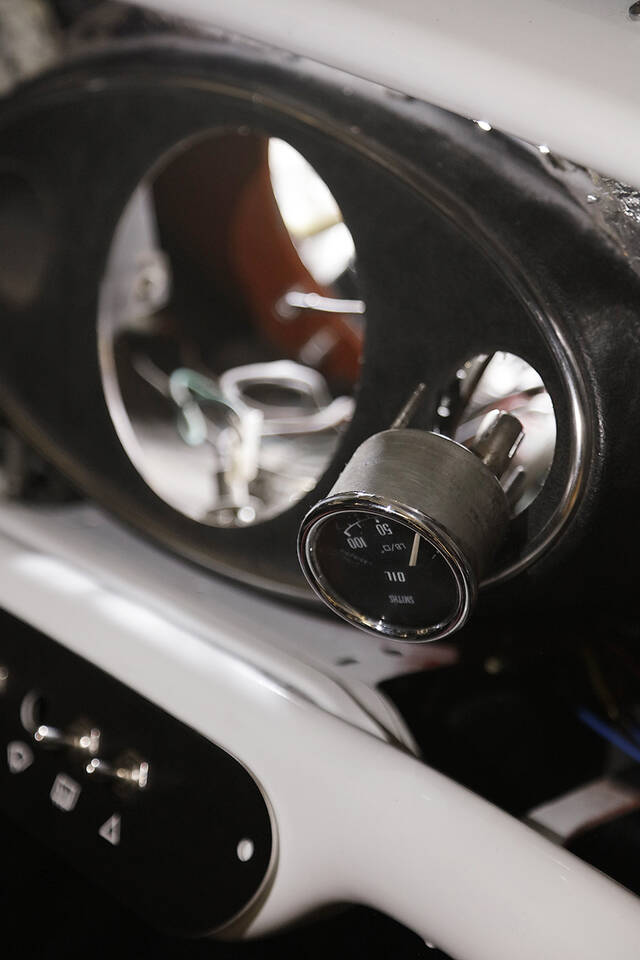
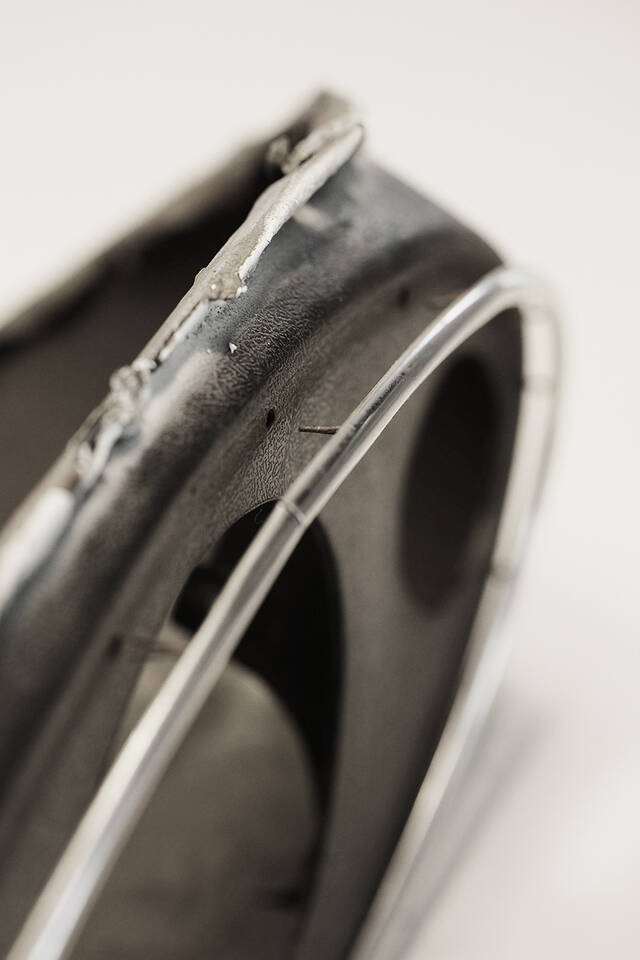
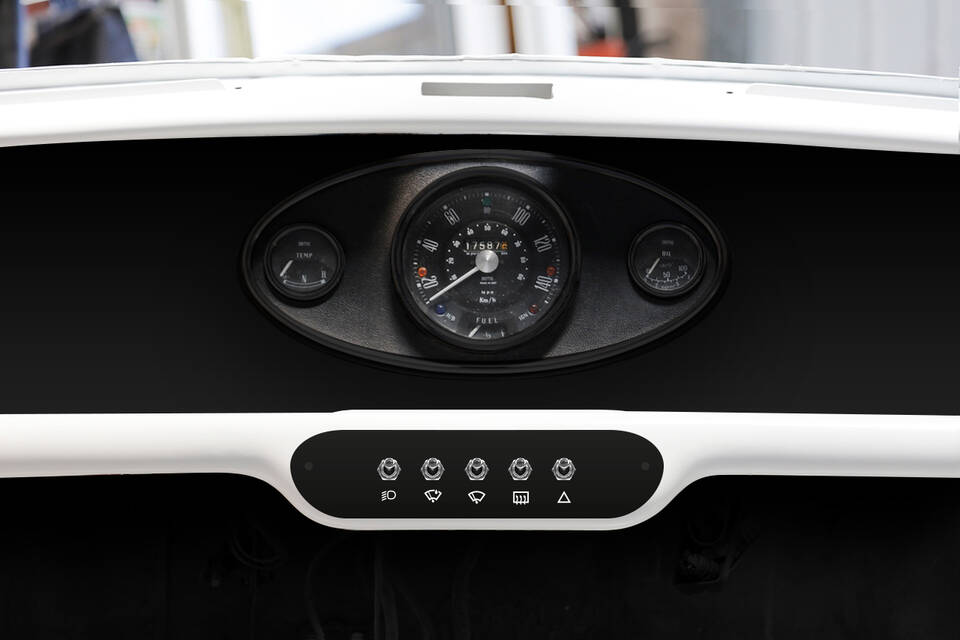
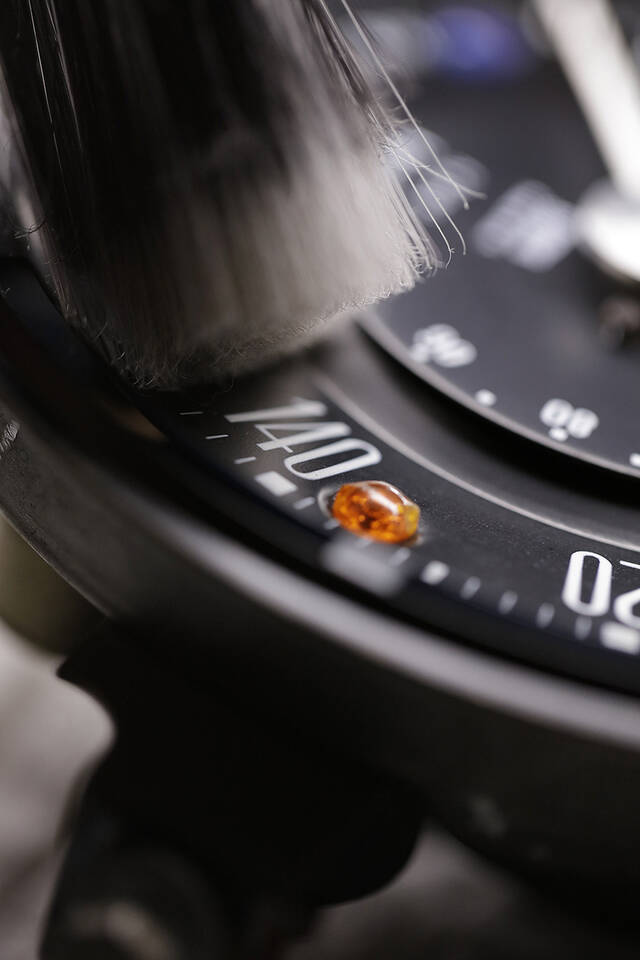
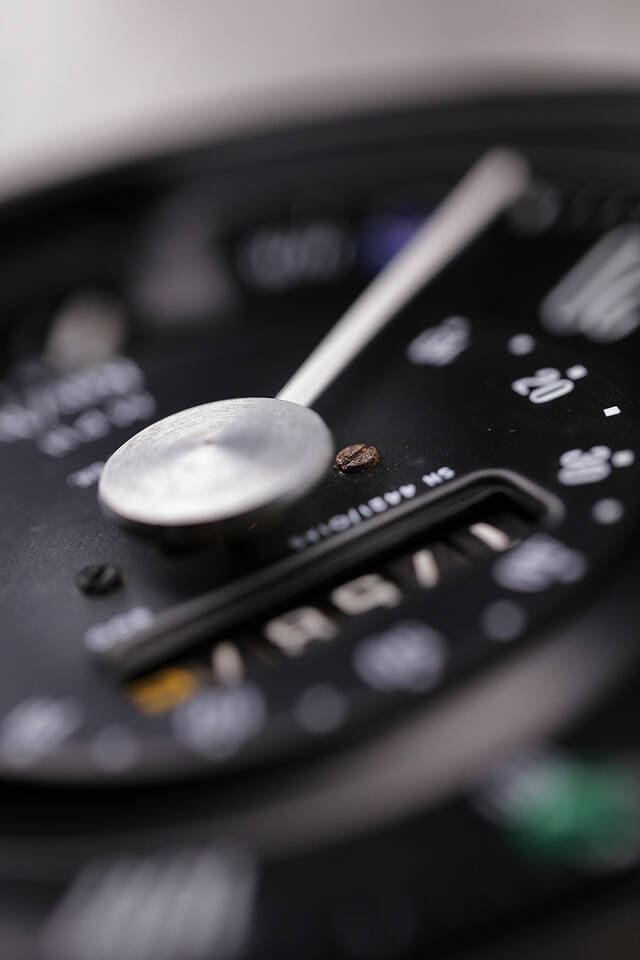
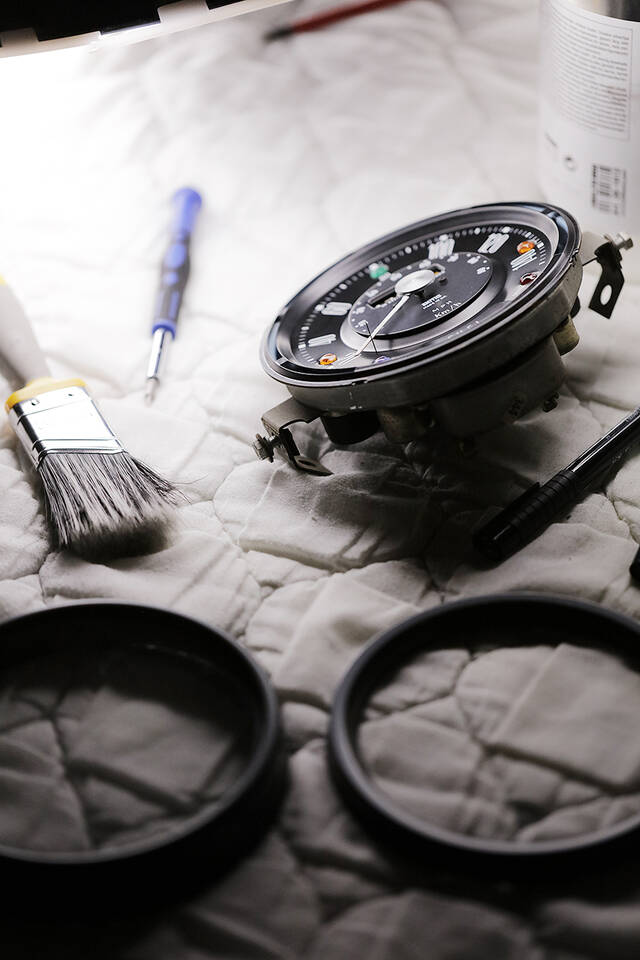
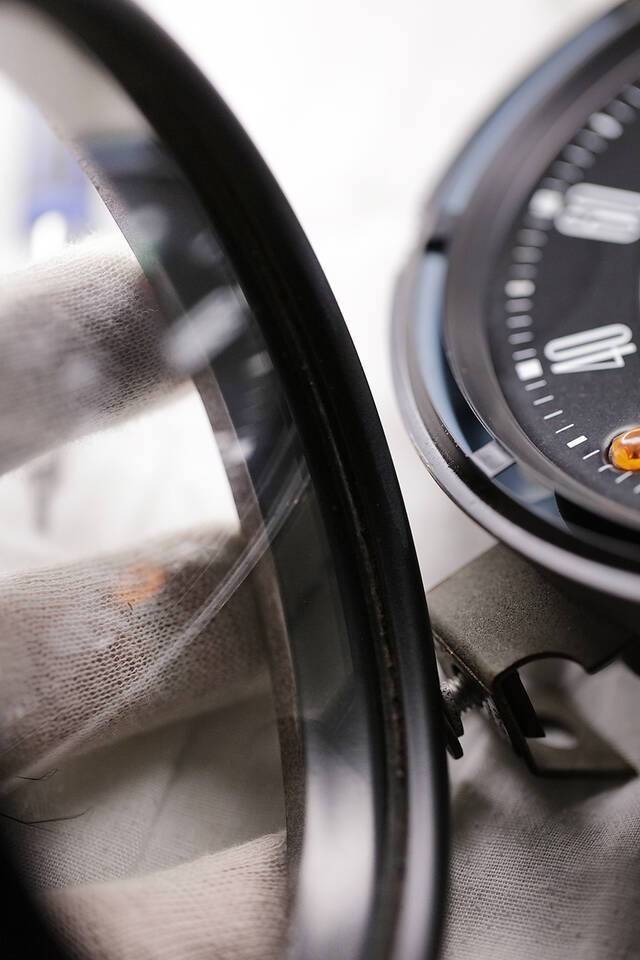
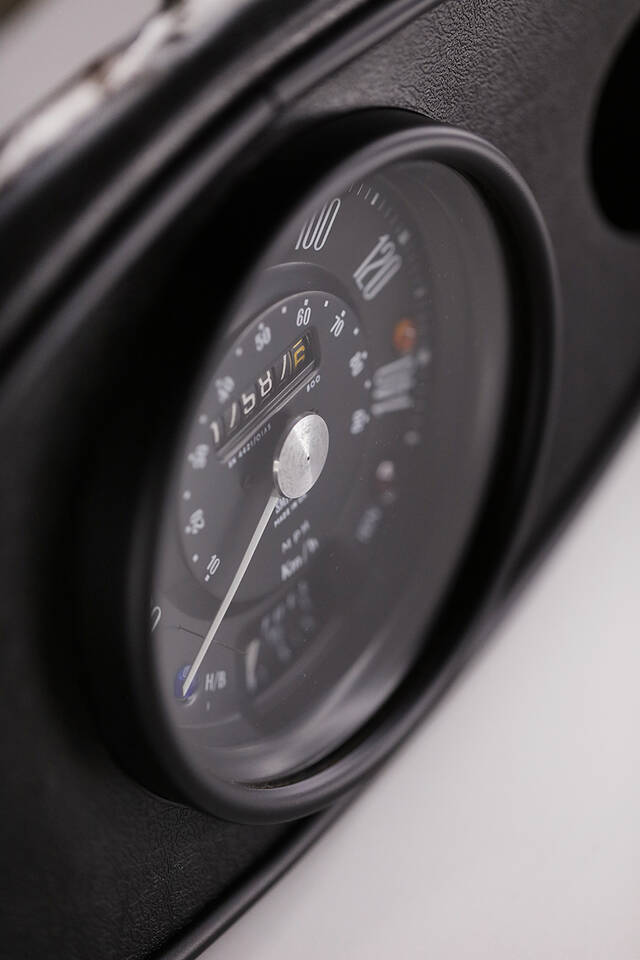
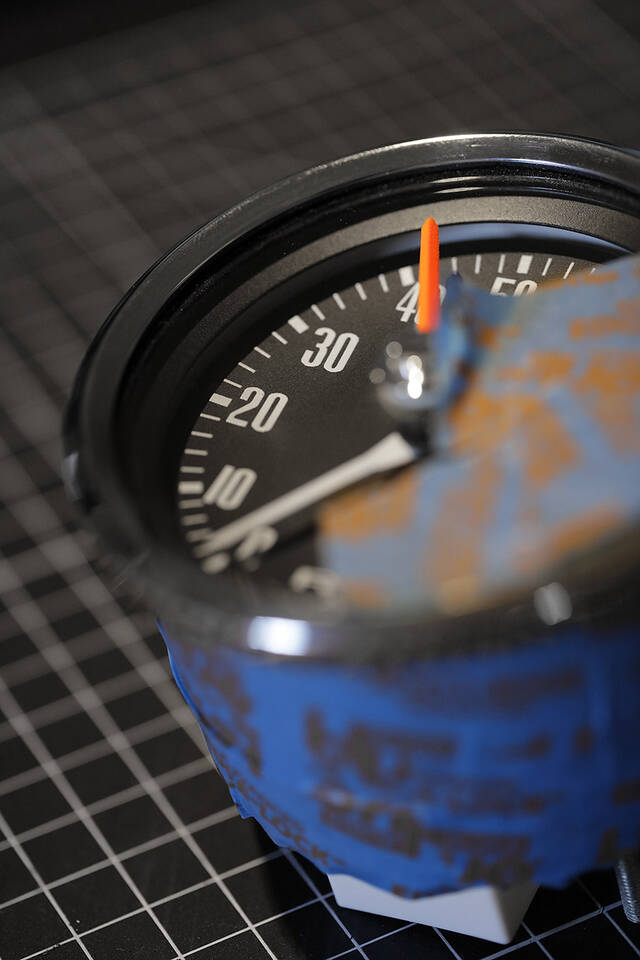
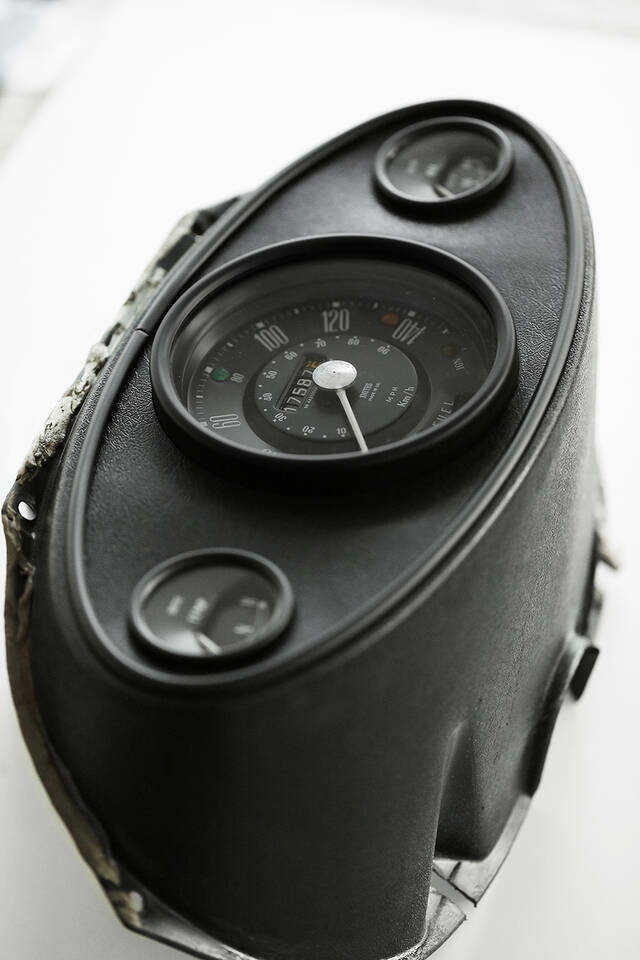
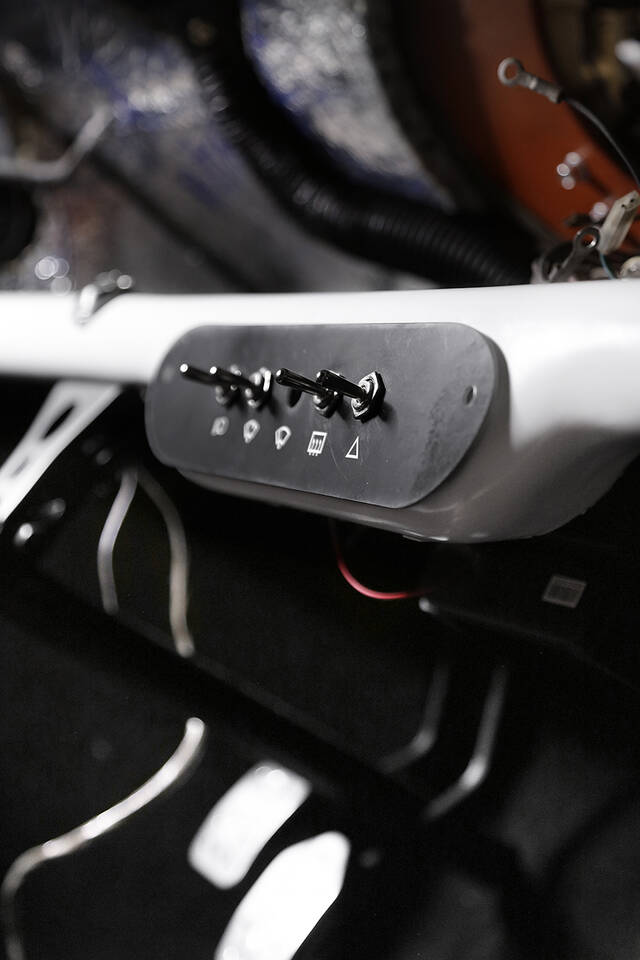
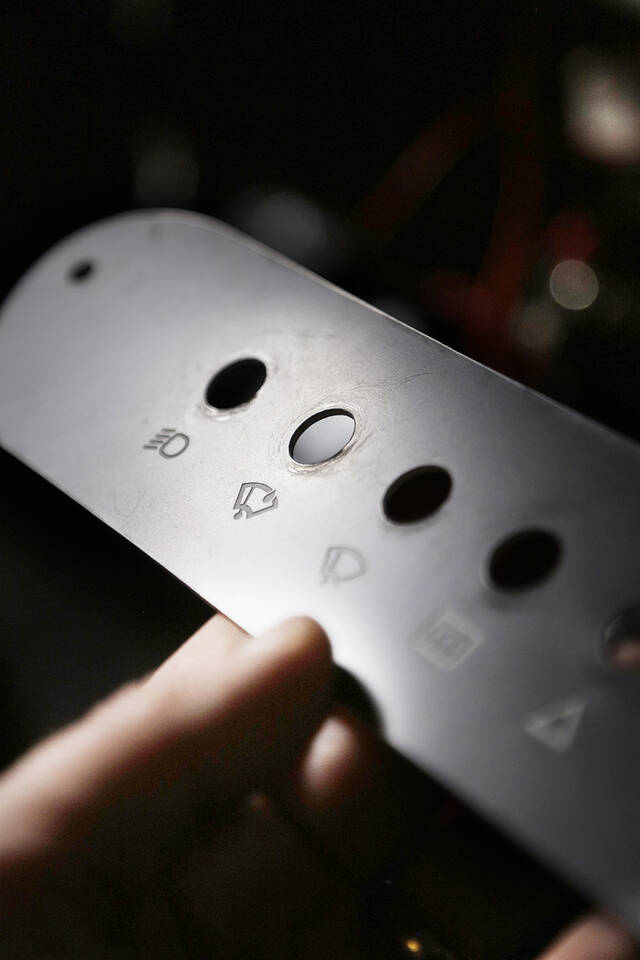
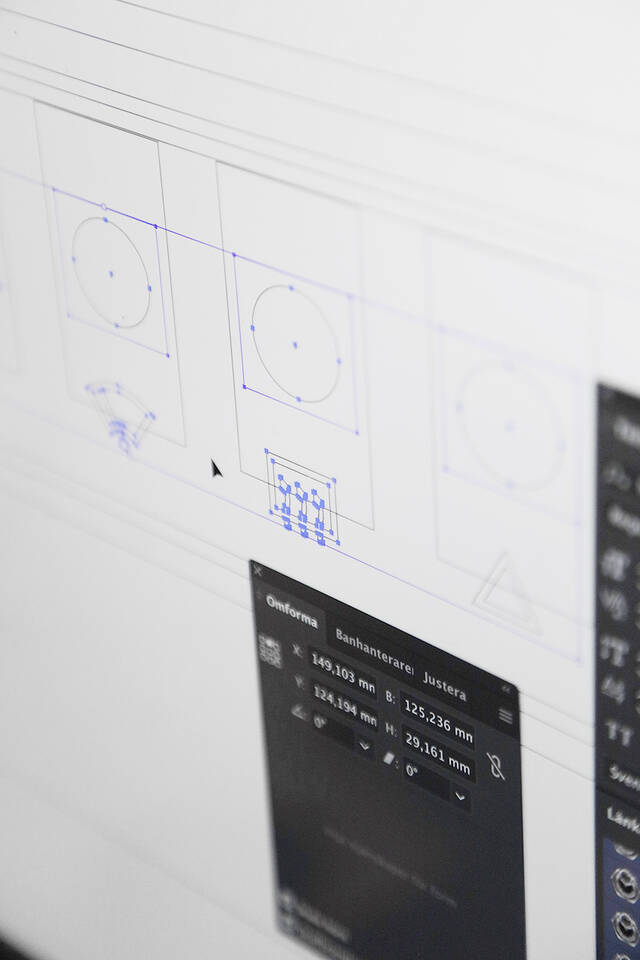
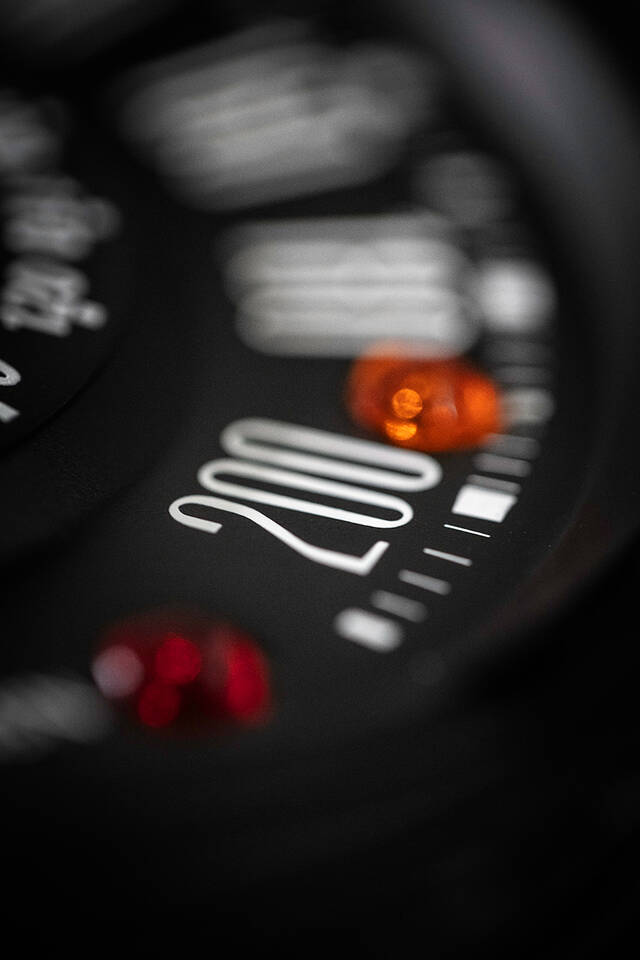
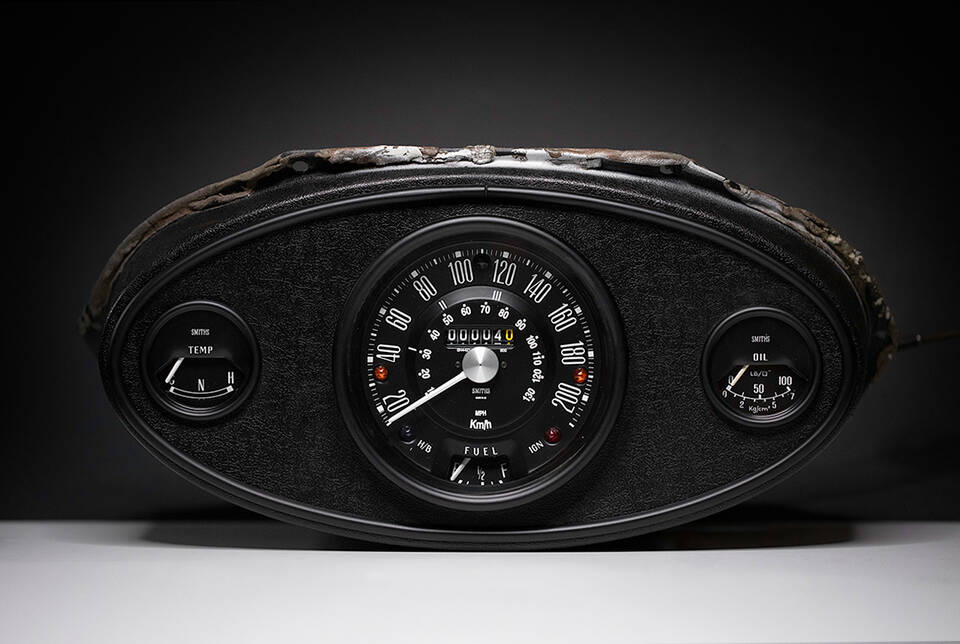
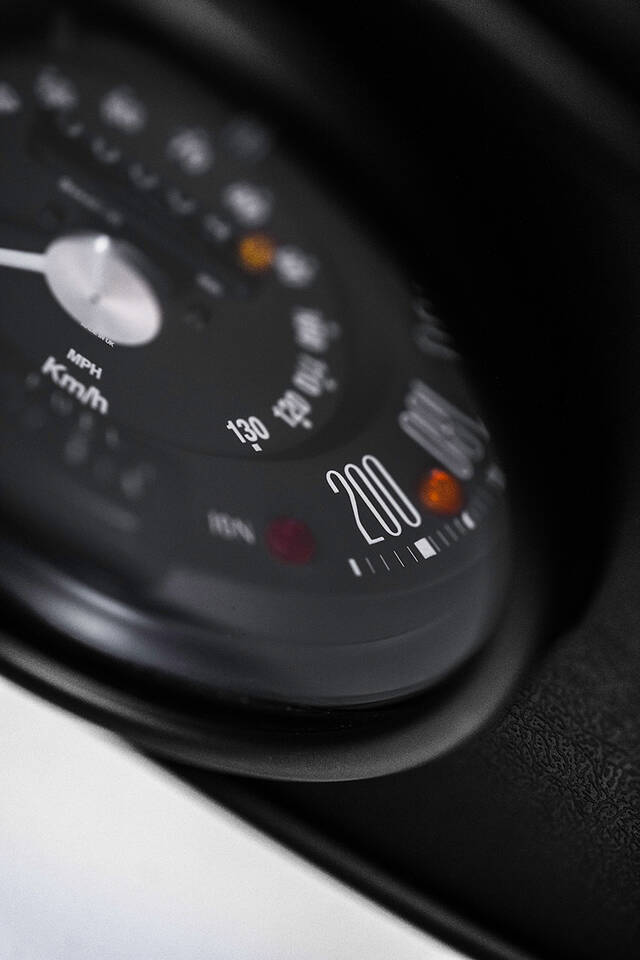
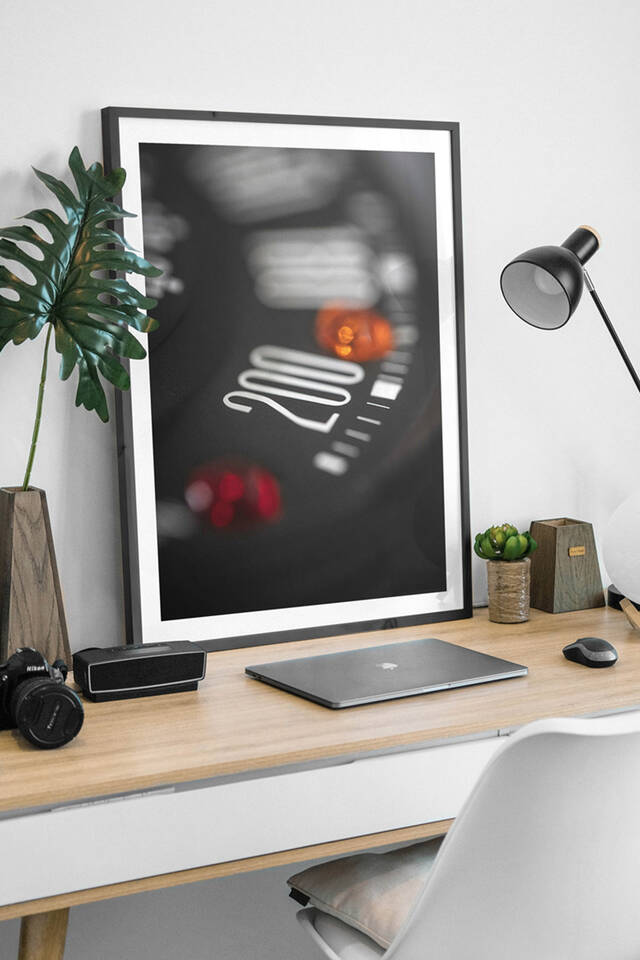
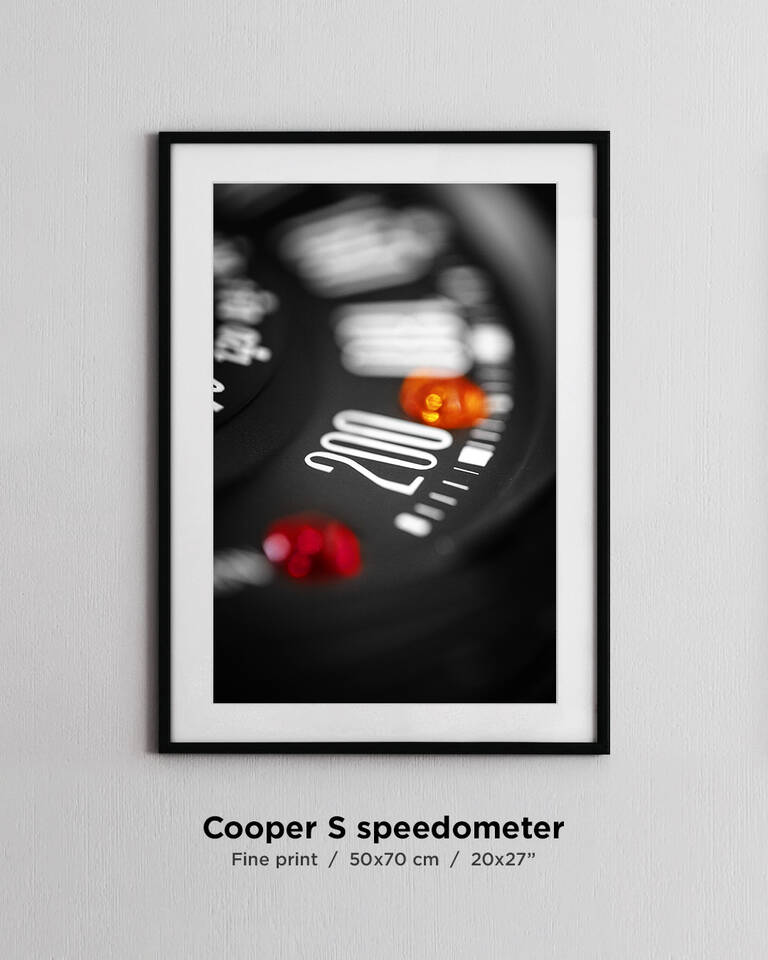
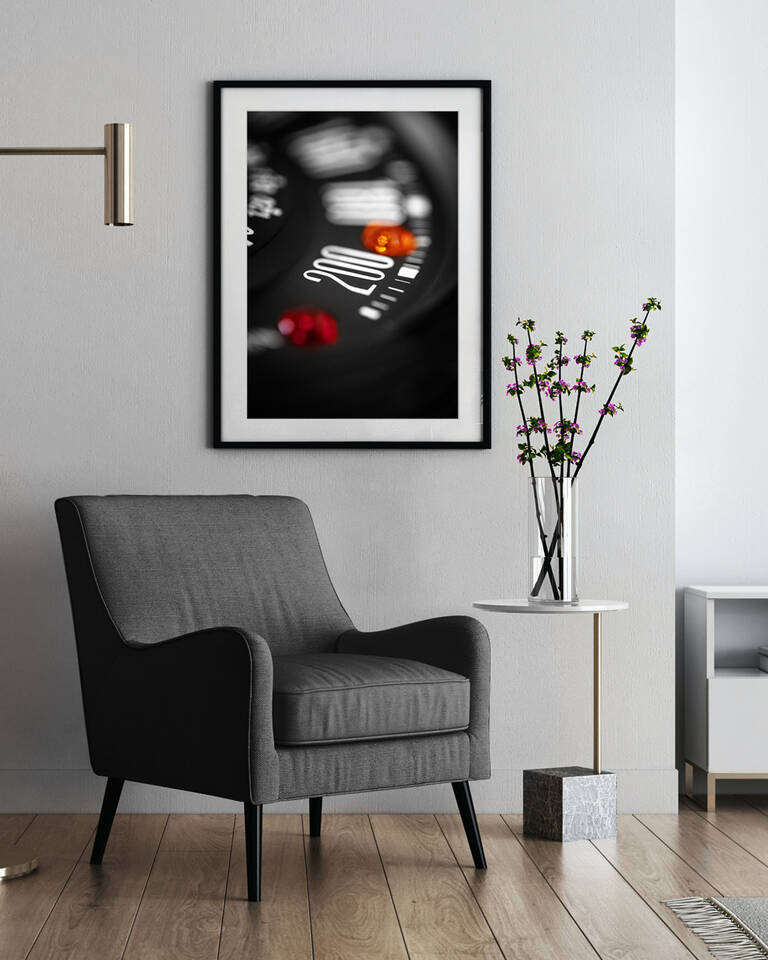
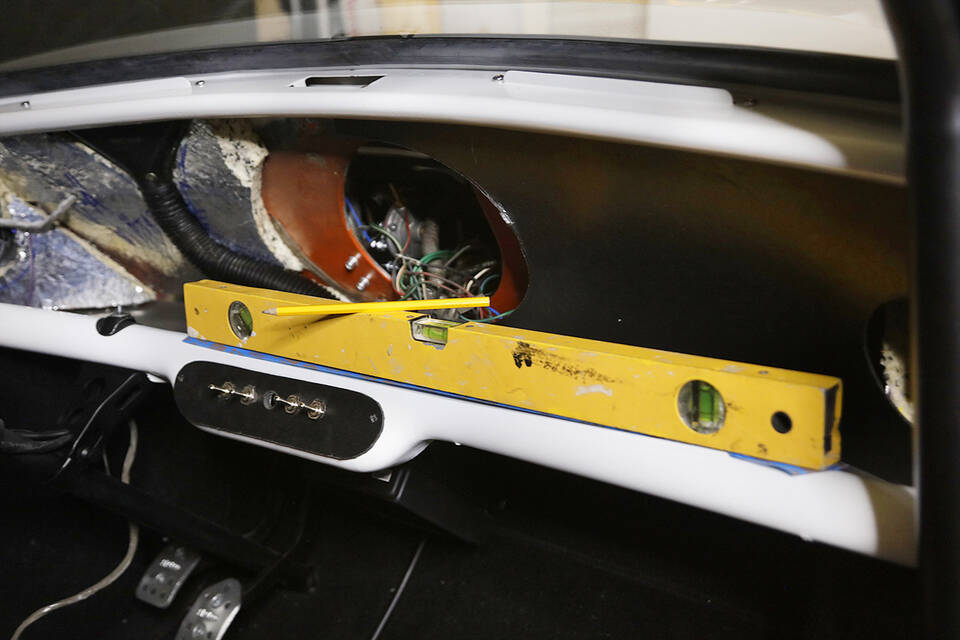
Och mycket riktigt blev kromlisterna till instrumentpanelen sprayade med primer igårkväll. De härdade fint fram tills lunch idag då jag lade på ett första lager med mattsvart färg. Så nice! Kör ett lager till imorrn. Kromlisten till hastighetsmätaren gjordes aldrig men jag hade ju som sagt en idé gällande den. Men jag lär nog prima och lacka den mattsvart ändå, ifall min idé inte faller väl ut. Lär få veta senare i veckan hur det blir.

• • • TRANSLATION • • •

Reply to post: Really nice! 👍🏼

Reply to post: Detailed and careful work 👍👍

Dear diary, today has been a good day. A lot of tinkering. Again. But isn't there something special about working on cars? Me time. Harmony. When things go well.

I toyed with the idea of putting a dash bar between the cage's A-pillars to further stiffen it. And protect more, of course. Unfortunately adds extra weight, but I'll have to go on a diet or something to compensate, haha! I simply took the cardboard core from a roll of gift wrap, hastily painted it black, and held it in place. Click. I also sat in the driver's seat and checked that this dash bar wouldn't get in the way of my long legs. No problem. And then I tried reaching the switches on the panel. Sure thing. I do have a hard time reaching them regardless because I sit so far back in the bucket seats, which are also positioned 12 cm further back than in the original design. I actually bought extension parts for the switches a while ago, thinking they were made of bakelite/hard plastic, basically just a stick to slide onto the switches to make them 6 cm longer. But they were soft. Hello? What's the use of those? I can reach them better, absolutely, but when you operate them, they're loose and don't put the switches in a different position. Crap.

And I had previously only attached the grille provisionally at the top. There are more attachments, including at the bottom. But unfortunately, the new exhaust manifold from "Down under" built out a bit, which means it contacts the grille. So I had to make spacers to move the grille out a bit. So I had to cut a piece of fuel hose and modify it a bit with a mini grinder. Smack, there they were!

Also took a quick look at the wheel alignment by eye. A heck of a lot of toe-out, but according to the paperwork, that's how it should be on the front wheels, just not so much. Needs adjusting later. But... the wheels are tilted quite a bit too. My trusty Google and YouTube told me it's called negative camber (you learn something new every day). Immediately downloaded the Angle app on my phone and held it against a long ruler along the rim edge. Indeed, the "digital level" showed 2° negative camber. Don't really know how accurately the app/phone measures. Aesthetically, I think the car looks "knock-kneed," but I read further on British mini specialist sites that racing cars run with negative camber to take advantage of centrifugal forces, providing sharper handling and grip in corners. Yes, or something like that. Now, this is not going to be a racing car, so I'm considering adjusting the camber to be more neutral. As far as I know, the entire suspension is in the original design, so I didn't understand why there was so much tilt. Maybe the new springs, the lowering, and the heavier Suzuki engine are having their effect.

And sure enough, the chrome trims for the instrument panel were sprayed with primer last night. They cured nicely until lunch today when I applied the first layer of matte black paint. So nice! Will do another layer tomorrow. The chrome trim for the speedometer wasn't done, but, as I said, I had an idea about it. But I'll probably prime and paint it matte black anyway, in case my idea doesn't turn out well. Will find out later this week how it goes.

https://www1.garaget.org/gallery/images/219/218366/218366-a2dfd79e27d78370e716aa279889168a.jpg
https://www1.garaget.org/gallery/images/219/218366/218366-9481c94f75c5b14e7e4ec607828587b6.jpg
https://www1.garaget.org/gallery/images/219/218366/218366-7e00c2464a869a17bad350f86123e290.jpg
https://www1.garaget.org/gallery/images/219/218366/218366-46d467de5926cb7f2a87b9a2731fd483.jpg
https://www1.garaget.org/gallery/images/219/218366/218366-350e11c6a9441964cc426e1ce859767f.jpg
https://www1.garaget.org/gallery/images/219/218366/218366-c8786533d91b5d50cf1cbcd8ad5a6173.jpg
https://www1.garaget.org/gallery/images/219/218366/218366-419d525c3a1ef182d54d7ba832a3ddfe.jpg
https://www1.garaget.org/gallery/images/219/218366/218366-314f1a008c6a59f0ad89c1ee6a730ec2.jpg
https://www1.garaget.org/gallery/images/219/218366/218366-064ae767f7daa3064a106782db74fb89.jpg
https://www1.garaget.org/gallery/images/219/218366/218366-00d49c59e929d8a6a72190531528139e.jpg
https://www1.garaget.org/gallery/images/219/218366/218366-cc40c6aeec0b9746ad3766666d7450a9.jpg
https://www1.garaget.org/gallery/images/219/218366/218366-d759b4f0f67bbfb7617185b8267f37d9.jpg
https://www1.garaget.org/gallery/images/219/218366/218366-324d4ae227151a54a80a164a6f6462c8.jpg
https://www1.garaget.org/gallery/images/219/218366/218366-c258e7c7bbb4feac186572c730b66ce6.jpg

Senast redigerat av martinhejdesten (29 december 2023)

Cuefa Ain't no place like home...
23 februari 2021 · 4 628 Inlägg

Riktigt fina detaljer 👍🏼

Autopilot: På.
Projekt: Skogsmulle on a budget
Cupra Born "Gruvbilen" (2022)
Mercury Grand Marquis LS "Murklan" (2000)
martinhejdesten
26 februari 2021 · 484 Inlägg

Idag kändes det som om man vore en schweizisk urmakare – skruvade ur miniskruvar, målade dem svarta, skruvade i dem igen, borstade bort damm och smuts från urtavlan, hanterade övriga detaljer med bomullsvantar medan jag försiktigt monterade ihop hastighetsmätaren.

Den mattsvartlackade kromlisten på hastigehtsmätaren gick först inte i det ovala höljets runda hål, så det fick jag karva ur litegrann. Innan dess hade jag monterat dit den även numera mattsvartlackade ovala kromlisten på höljet. Lite trixigt med de små clipsen men jösses vad galet snyggt det blev! Sen var det bara att montera hastighetsmätaren och dra åt fästena. De två mindre runda mätarna (vattentemp och oljetryck) är också färdiglackade men saknar dessvärre o-ring mellan glas och mätare så sådana är beställda. De lär dyka upp i början på nästa vecka och då slutmonteras även mätarna i det ovala höljet. Men det ser onekligen lovande ut bara genom att titta på hastighetsmätaren och de nylackade listerna.

Och eftersom jag inte har reservhjul i bagagerummet (rymligt är det inte!) så behövde jag snickra ihop en liten träram som håller den filtklädda bagagerumsinredningen på plats. Den var föga smickrande i vitt så den har nu målats svart. Plats för reservhjulet finns i botten och rymmer ett 4x10" hjul. Ett 8x13" hade naturligtvis fått plats, men inte så mycket mer, haha!

• • • TRANSLATION • • •

Reply to post: Really nice details! 👍🏼

Today felt like being a Swiss watchmaker – unscrewing tiny screws, painting them black, screwing them back in, brushing off dust and dirt from the dial, handling other details with cotton gloves while carefully assembling the speedometer.

The matte black-painted chrome trim on the speedometer initially didn't fit into the round hole of the oval casing, so I had to carve it out a bit. Before that, I had already mounted the now-matte-black-painted oval chrome trim on the casing. A bit tricky with the small clips, but wow, it turned out insanely nice! Then it was just a matter of mounting the speedometer and tightening the fasteners. The two smaller round gauges (water temperature and oil pressure) are also painted and finished but unfortunately lack an O-ring between the glass and the gauge, so those have been ordered. They should arrive early next week, and then the gauges will be finally assembled in the oval casing. But it undeniably looks promising just by looking at the speedometer and the newly painted trims.

And since I don't have a spare wheel in the trunk (it's not spacious!), I needed to craft a small wooden frame that holds the felt-lined trunk interior in place. It wasn't very flattering in white, so it has now been painted black. There's space for the spare wheel at the bottom, accommodating a 4x10" wheel. An 8x13" would have fit, of course, but not much more, haha!

https://www1.garaget.org/gallery/images/219/218366/218366-6eeb4d350c8601e859c9fc2b15d2b3c7.jpg
https://www1.garaget.org/gallery/images/219/218366/218366-d6ed85778ade407c1b05c05b082748f1.jpg
https://www1.garaget.org/gallery/images/219/218366/218366-58e3ffe7a7209ac2b22100129b028078.jpg
https://www1.garaget.org/gallery/images/219/218366/218366-0581c0bb6a365dafe5d17858360d93fc.jpg
https://www1.garaget.org/gallery/images/219/218366/218366-7df859445b7debaf5ea586ff00116ddb.jpg
https://www1.garaget.org/gallery/images/219/218366/218366-e4d036686e87dc3cb19fe379fa45e2d2.jpg
https://www1.garaget.org/gallery/images/219/218366/218366-7d85d79d8e5d7831bc9967ff56feac66.jpg
https://www1.garaget.org/gallery/images/219/218366/218366-cd016c79c6108111efc1bcb46c6b4415.jpg
https://www1.garaget.org/gallery/images/219/218366/218366-be5f87e04fcdb9158b4562111d493c96.jpg
https://www1.garaget.org/gallery/images/219/218366/218366-82212279eefcd199fd8a14bf72a9b965.jpg
https://www1.garaget.org/gallery/images/219/218366/218366-01d584c070c487464aea060cba3f2568.jpg
https://www1.garaget.org/gallery/images/219/218366/218366-ccdb3abef2ece919e3a4d6e8c4546645.jpg
https://www1.garaget.org/gallery/images/219/218366/218366-71706477e4d7879a53c7248083b2b293.jpg

Senast redigerat av martinhejdesten (29 december 2023)

martinhejdesten
1 mars 2021 · 484 Inlägg

Häromdagen slipade jag varvtalsräknarens kromlist då även den skulle mattsvartlackas. Maskerades, primerlackades och sedan två lager mattsvart på det. Suveränt! Märkte dessvärre att mätaren var svår att få in i själva hållaren som jag fäst på den vita tvärbalken mellan A-stolparna. En inbuktning i hållaren (skålat hus) ser till att själva mätaren ska skjutas i ganska trögt. Men jag hade svårt att få i den överhuvudtaget. Så jag knackade till denna inbuktning så att mätaren gled in betydligt lättare. Ska borra hål i hållaren och gänga så att jag kan skruva in en skruv som håller fast mätaren istället.

Och idag vandrade blicken ofta från bildskärmen på skrivbordet ut mot brevlådan – när kommer Postnord med kuvertet med o-ringarna jag beställde i torsdags? Och så var väntan över, så jag satte genast igång med att montera ihop vattentempgivaren. Oljetrycksmätaren var det lite mer jobb med. Jag märkte nämligen att den tvådelade urtavlan med ordet TEMP och själva sifferskalan inte var parallella. Hmm, så det blev till att pilla upp små låsmekanismer på urtavlan och försöka vrida den ena delen någon grad så att all text blev parallell. Vore trist att linjera mätarna på instrumentpanelen men att ändå delar av dem visuellt var sneda.

Båda mätarna fördes in i respektive hål i det ovala höljet utan problem, skruvades på plats och – voila! Tjusigt. Innan hela detta kit monteras på plats så ska jag se till att passa in dash card på förarsidan. Hittills var ju bara passagerarsidans dash card klar. Och eftersom jag plockat bort varvtalsräknaren så blir det bra mycket lättare att finjustera passningen även på den vänstra sidan. När det är gjort så ska jag finjustera själva "hatthyllans" vinylmatta, montera dash cards och sätta dit varvtalsräknaren på nytt. Sen är hela instrumentpanelen klar. Så gött!

Den där auktionen på eBay som jag nämnde nyligen blev ett mindre fiasko. Tänkte lämna bud men innan jag visste ordet av så var mitt maxbud redan passerat och det drog iväg ohyggligt mycket. En begagnad pryl nästan lika dyr som en ny. Men glädjande nog såg jag att det fanns fler att köpa på eBay, dessutom till ett hyfsat fastpris. Sen skulle jag bara dubbelkolla priset på denna pryl på Minispares.com och såg att deras motsvarighet åter var In Stock. Ha, jösses. Tillfälligheter. Hade ju förstås varit bättre ifall deras konkurrent Minisport.com också hade haft den In Stock och dessutom till det priset, men icke. Jag har ju nyss beställt grejor därifrån. Så det blir troligtvis till att lägga en beställning på denna pryl från Minispares.com inom kort.

• • • TRANSLATION • • •

The other day, I sanded the chrome trim of the tachometer since it was also going to be painted matte black. Masked, primed, and then two layers of matte black on top of that. Excellent! Unfortunately, I noticed that it was difficult to fit the gauge into the holder that I attached to the white crossbeam between the A-pillars. An indentation in the holder (a scooped-out housing) ensures that the gauge should slide in quite snugly. But I had a hard time getting it in at all. So I tapped on this indentation so that the gauge slid in much easier. I will drill holes in the holder and tap so that I can screw in a screw to hold the gauge in place instead.

And today, my gaze often wandered from the computer screen on the desk to the mailbox – when will Postnord deliver the envelope with the O-rings I ordered on Thursday? And the wait was over, so I immediately started assembling the water temperature sender. The oil pressure gauge took a bit more work. I noticed that the two-part dial with the word TEMP and the numerical scale wasn't parallel. Hmm, so I had to pry up small locking mechanisms on the dial and try to turn one part a few degrees so that all the text became parallel. It would be sad to align the gauges on the instrument panel but still have parts of them visually crooked.

Both gauges were inserted into their respective holes in the oval casing without a problem, screwed in place, and – voila! Fancy. Before this whole kit is mounted in place, I'll make sure to fit the dash card on the driver's side. So far, only the passenger side's dash card was ready. And since I removed the tachometer, it will be much easier to fine-tune the fit on the left side as well. Once that's done, I'll fine-tune the vinyl mat of the "hat shelf," mount the dash cards, and put the tachometer back in place. Then the entire instrument panel will be ready. So good!

That eBay auction I mentioned recently turned into a bit of a fiasco. I thought about placing a bid, but before I knew it, my maximum bid had already been exceeded, and it shot up tremendously. A used item almost as expensive as a new one. But fortunately, I saw that there were more to buy on eBay, and at a fairly fixed price. Then I just had to double-check the price of this item on Minispares.com and saw that their equivalent was back In Stock. Ha, wow. Of course, it would have been better if their competitor Minisport.com also had it In Stock and at that price, but no. I've just ordered things from there. So it's likely that I'll place an order for this item from Minispares.com soon.

https://www1.garaget.org/gallery/images/219/218366/218366-463859d725c1807354227630e7ebf444.jpg
https://www1.garaget.org/gallery/images/219/218366/218366-199992b469155225433d27dd539cfb92.jpg
https://www1.garaget.org/gallery/images/219/218366/218366-5906dae63373f1ecbae8cf249730e468.jpg
https://www1.garaget.org/gallery/images/219/218366/218366-e7ceb3b61fd844d4be4231d4bbd855c4.jpg
https://www1.garaget.org/gallery/images/219/218366/218366-d6ec29fbb4412805d034a3eed8402d4a.jpg
https://www1.garaget.org/gallery/images/219/218366/218366-499e3185dbc87c4554dab4d52b55bce6.jpg
https://www1.garaget.org/gallery/images/219/218366/218366-a69e91cc6a518df5fc0586c562193444.jpg
https://www1.garaget.org/gallery/images/219/218366/218366-2aa159503d471bfab9617fd8dd0f2429.jpg
https://www1.garaget.org/gallery/images/219/218366/218366-0a0e8604b0d1ff0e1684ec527de4bd9d.jpg

Senast redigerat av martinhejdesten (29 december 2023)

Cuefa Ain't no place like home...
2 mars 2021 · 4 628 Inlägg

Riktigt snyggt, ja! 👌🏼

Autopilot: På.
Projekt: Skogsmulle on a budget
Cupra Born "Gruvbilen" (2022)
Mercury Grand Marquis LS "Murklan" (2000)
martinhejdesten
4 mars 2021 · 484 Inlägg

Igår ägnade jag kvällen åt att montera det svartmålade ramverket och inredning i bagageutrymmet. Häftade också fast en mattbit i framkant för att minimera insynen under själva golvet på inredningen. Insåg där och då att det inte var särskilt nödvändigt att måla ramverket. Lätt att vara efterklok. Men det tystar designfascisten som sitter på vänster axel om inget annat, haha!

Jag fixade också med fläktmunstycket och tillhörande slang. Same procedure som den högra förstås. Hettade upp slangen med värmepistol och pressade samman slang och munstycke så att inte vänster dash card skulle riskera att bukta ut. Done.

Sen gick jag raskt vidare med inpassningen av pappskivan och vinylmattan (dash linern) på vänster sida. Det blev ju lite småpill eftersom denna vinylmatta har en skumgummibeklädd undersida som bygger en del på höjden. Mitt på instrumentpanelen finns nämligen ett smalt spår man ska trä in både pappskivan och linern i, om man vill att det ska se snyggt ut alltså. Tyvärr byggde även pappskivan en del på höjden så det var svårt att klämma in allt i spåret, så jag fick helt enkelt karva bort lite.

När det var klart så plockade jag fram kniv och sax – det var dags för finliret. Den där vinylmattan (dash linern) är inte billig så det gällde att hålla tungan rätt i mun så att det inte blev fel. Nu återstår det bara att göra hål i vinylmattan för några mindre skruvskallar, hål för sladden till varvtalsräknaren och eventuellt småjustera här och där, sen är det klart! Vinylmattan spraylimmas troligtvis fast på pappskivan som sedan läggs på plats. Lägger nog en order på en manick från UK som ska sitta i samband med den ovala instrumentpanelen. När den dyker upp monteras rubbet.

Jag hade som sagt lagt ner lite möda och pengar på att fixa med CAD-ritning till instrumentpanelens "hatthylla". Det visade ju sig att denna laserskurna plast var hiskeligt repkänslig. Det märktes framför allt på den lilla panel där switcharna sitter. Den blev repig bara av att jag skruvade åt fästbrickorna, alltså av fingrarna, inte fästbrickorna. Jösses. Så jag har beställt extra "liner" att klippa ut och limma på denna lilla panel. Då går även den hand i hand med övrig inredning. Då blir det förvisso inga ikoner, men jag får ha en fusklapp sittandes ovanför några dagar tills man lärt sig vad switcharna går till. De är ju trots allt bara 5 st.

Andreas är tillbaka från välbehövlig och välförtjänt semester och har riggat ett nålventilsäte i en minisvarv. Han skulle försöka hinna med att svarva ner sätena ca 1 mm nu i veckan. Det krävs nämligen för att de nya nålventilerna ska komma längre ner i sätena och täta. När svarvningen är klar så ska dessa fyra förgasare skruvas ihop, monteras i bilen och... wroom?!

• • • TRANSLATION • • •

Reply to post: Really nice, indeed! 👌🏼

Yesterday, I spent the evening assembling the black-painted framework and interior in the trunk. I also stapled a piece of carpet at the front to minimize visibility under the floor of the interior. Realized at that moment that it wasn't very necessary to paint the framework. Easy to be wise after the fact. But it silences the design fascist sitting on the left shoulder, if nothing else, haha!

I also dealt with the vent nozzle and the corresponding hose. Same procedure as the right side, of course. Heated up the hose with a heat gun and pressed the hose and nozzle together so that the left dash card wouldn't risk bulging out. Done.

Then I quickly moved on to fitting the cardboard and vinyl mat (dash liner) on the left side. It was a bit intricate since this vinyl mat has a foam-backed underside that adds some height. In the middle of the instrument panel, there's a narrow groove where both the cardboard and the liner should be inserted if you want it to look neat. Unfortunately, the cardboard also added some height, so it was difficult to squeeze everything into the groove. I had to carve away a bit.

When that was done, I brought out a knife and scissors – it was time for the finishing touches. That vinyl mat (dash liner) isn't cheap, so I had to be careful not to make any mistakes. Now, all that's left is to make holes in the vinyl mat for a few smaller screw heads, holes for the tachometer cable, and possibly make some minor adjustments here and there. Then it's done! The vinyl mat will probably be spray-glued onto the cardboard, which is then placed in position. I might place an order for a tool from the UK, which will be installed in conjunction with the oval instrument panel. When it arrives, the whole thing will be assembled.

As I mentioned, I had put some effort and money into creating a CAD drawing for the instrument panel's "hat shelf." It turned out that this laser-cut plastic was extremely prone to scratches. It was particularly noticeable on the small panel where the switches are located. It got scratched just by tightening the fastening nuts, that is, by fingers, not the nuts. Jeez. So, I have ordered an extra "liner" to cut out and glue onto this small panel. Then it will harmonize with the rest of the interior. There won't be any icons, but I'll have a cheat sheet sitting above for a few days until I learn what the switches are for. After all, there are only 5 of them.

Andreas is back from a much-needed and well-deserved vacation and has set up a needle valve seat in a mini lathe. He's planning to try to lathe down the seats about 1 mm this week. It's necessary for the new needle valves to go further down in the seats and seal properly. When the lathe work is done, these four carburetors will be screwed together, installed in the car, and... wroom?!

https://www1.garaget.org/gallery/images/219/218366/218366-2ee47eada00a89e930d7bf95ed8f4640.jpg
https://www1.garaget.org/gallery/images/219/218366/218366-10ae18b2f065f57a9dbdcad06a1f6ad5.jpg
https://www1.garaget.org/gallery/images/219/218366/218366-a7613ef1f47b619a83fc2a9a21fccb71.jpg
https://www1.garaget.org/gallery/images/219/218366/218366-0768cf9582a14ddcb43cc9246208e815.jpg
https://www1.garaget.org/gallery/images/219/218366/218366-a8fb319dd685331c22c0a1472379a23c.jpg
https://www1.garaget.org/gallery/images/219/218366/218366-387676aa0adb5dc7b7a055c03d1243fa.jpg
https://www1.garaget.org/gallery/images/219/218366/218366-9f1e4a76627dfc7f70456f97b8049a42.jpg
https://www1.garaget.org/gallery/images/219/218366/218366-40d5021027a5f6ca68041a2c3345b619.jpg
https://www1.garaget.org/gallery/images/219/218366/218366-ca4ba59370e24639b4feab37a7d5a3e6.jpg
https://www1.garaget.org/gallery/images/219/218366/218366-4353e3f8249f9cfc8634099a124d0173.jpg
https://www1.garaget.org/gallery/images/219/218366/218366-fefb3f07dc8e5074c8348a2adacb1a51.jpg

Senast redigerat av martinhejdesten (29 december 2023)

martinhejdesten
11 mars 2021 · 484 Inlägg

Farsan hittade en bild från förr, rättare sagt från 2009. Äldsta dottern var fyra år vid tillfället. Och om en vecka ska hon börja övningsköra. Jösses, vad tiden går!

På bilden ser ni den motor som satt i senast, inte originalmmotorn (1000 cc), utan en 1275 cc som är borrad till 1293 cc. Den fick vi plocka isär för att byta kolvringar då förre ägaren renoverat allt fint och borrat, men glömt att byta till nya kolvringar som matchade den nya diametern på cylinderhålen. Denna motor är till salu eftersom jag kom på bättre tankar – Suzuki Swift GTi-motorn. Mini-motorns cylinderhål bör honas och ses över för den som är intresserad då toppackningen gick.

Jag beställde ju grejor från UK för ett tag sedan. Efter 8 dagar kollade jag orderstatusen – Processing. Huh? Hur kan det ta 8 dagar att plocka ihop en liten order? Mailade den engelska kundservicen och undrade vad som pågick, eller snarare inte pågick. ”We are doing our best to provide you with your order" fick jag som svar. Kollade orderstatusen ytterligare tre dagar senare. Fortfarande "Processing". Hmm. Mailade kundservice på nytt och påminde dem att senast jag beställde av dem så avbröt jag ordern då jag fick vänta alldeles för länge. Detta var på fredagskvällen. På måndagseftermiddagen fick jag mail att ordern skickats, nice. Och, den levererades dagen efter med UPS. Galet. Vilken fraktfirma valde du Lucif3r? Mitt paket hamnade inte hos tullen heller. Och inga extra avgifter.

Men... jag beställde ju även från en annan leverantör och denna order skickades dagen efter den förra. Nice. Skulle anlända två dagar senare då jag beställde Courier Express via DHL. Men det som inledningsvis gick smidigt blev tvärnit i tullen. Nu har paketet plötsligt gått en dag över leveranstiden. Jag ringde och undrade eftersom de fått en del orderinfo av mig redan vid ordertillfället eftersom det skulle importeras nu pga Brexit. Fick svar att kvittot med produktvärde och fraktkostnad skulle skickas in. Jaha, kunde DHL inte frågat efter det redan vid beställningen av frakten och därmed kapat ett par dagars väntetid? Nu var det dessutom fullt upp på tullen så mitt ärende skulle tas om hand först efter 2-3 arbetsdagar. Men hallå?

Nåja, jag har en del att göra på bilen ändå, så jag är inte sysslolös. Men det som sitter fast i tullen vore på sin plats att ha nu nu nu. Typ. För sen ska hela instrumentpanelen på för sista gången. Jag beställde också extra blinkersglas (bakre). De är gulorangea i originalutförande men jag tänkte lacka dem rödare för en minimalistisk stil. Jag behåller förstås de gulorangea som jag har tidigare. Byter bara vid några specifika tillfällen om lusten faller på. Jag fick också fästen för svingarmarna bak så att jag kan justera Camber och Toe in/Toe out även på bakhjulen. Andreas tyckte också det vore på sin plats att skaffa en choke-vajer att fästa på mc-förgasarkitet, så en sådan trillade också ner i UK-kundkorgen när jag beställde häromdagen.

Ikväll så justerade jag storleken på switchpanelen som jag hade laserskurit ut i plast och dessutom gjort ikoner på. Men som jag tidigare sagt så var plasten väldigt repkänslig. Det blir till att minska storleken på själva switchpanelen ytterligare och sedan limma på den svarta vinylmattan, då blir utseendet rent och helt, dessutom med samma stil rakt av på hela instrumentpanelen. Eftersom vinylmattan är fast i tullen så skar jag snabbt ut en justerad mallpanel i hårdare papp. Finishen förväntas bli betydligt bättre inom kort. Kanske blir aktuellt att göra ytterligare hål för värmereglage och choke i denna switchpanel, eller om jag sätter dem lite dolt under instrumentpanelen. Återstår att se.

• • • TRANSLATION • • •

Dad found a picture from the past, to be precise, from 2009. The eldest daughter was four years old at the time. And in a week, she'll start practicing driving. My, how time flies!

In the picture, you see the engine that was in it last, not the original engine (1000 cc) but a 1275 cc bored to 1293 cc. We had to take it apart to change the piston rings because the previous owner had beautifully renovated everything and bored it, but forgot to replace the piston rings to match the new diameter of the cylinder holes. This engine is for sale because I had a change of heart – Suzuki Swift GTi engine. The Mini engine's cylinder holes need to be honed and inspected for anyone interested since the head gasket failed.

I ordered parts from the UK a while ago. After 8 days, I checked the order status – Processing. Huh? How can it take 8 days to put together a small order? Emailed the English customer service and asked what was going on, or rather, not going on. "We are doing our best to provide you with your order," was the reply. Checked the order status another three days later. Still "Processing." Hmm. Emailed customer service again and reminded them that the last time I ordered from them, I canceled the order because I had to wait too long. This was on a Friday night. On Monday afternoon, I received an email that the order had been shipped, nice. And, it was delivered the day after by UPS. Crazy. Which shipping company did you choose, Lucif3r? My package didn't even end up with customs. And no extra fees.

But... I also ordered from another supplier, and this order was shipped the day after the previous one. Nice. It was supposed to arrive two days later when I ordered Courier Express via DHL. But what initially went smoothly came to a sudden halt in customs. Now the package has suddenly exceeded the delivery time by one day. I called and asked because they had already received some order information from me when placing the order as it would be imported now due to Brexit. I was told that the receipt with the product value and shipping cost needed to be sent in. Oh, could DHL not have asked for that when ordering the shipping and thus cut a couple of days of waiting time? Now, customs were also busy, so my case would be handled after 2-3 working days. But hey?

Well, I have some work to do on the car anyway, so I'm not idle. But what's stuck in customs would be nice to have now now now. Kind of. Because then the whole instrument panel goes on for the last time. I also ordered extra turn signal lenses (rear). They are yellow-orange in the original version, but I thought of painting them redder for a minimalist style. Of course, I'll keep the yellow-orange ones that I have previously. Just swap them out on specific occasions if the mood strikes. I also got brackets for the rear swing arms so that I can adjust Camber and Toe in/Toe out on the rear wheels. Andreas also thought it would be appropriate to get a choke cable to attach to the motorcycle carburetors, so one of those also fell into the UK shopping cart when I ordered the other day.

Tonight, I adjusted the size of the switch panel that I had laser-cut in plastic and also made icons on. But as I said before, the plastic was very scratch-sensitive. I'll have to reduce the size of the switch panel even more and then glue on the black vinyl mat, making the appearance clean and consistent, also with the same style throughout the entire instrument panel. Since the vinyl mat is stuck in customs, I quickly cut out an adjusted template panel in harder cardboard. The finish is expected to be much better soon. It might be necessary to make additional holes for the heater control and choke in this switch panel, or if I put them a bit hidden under the instrument panel. We'll see.

https://www1.garaget.org/gallery/images/219/218366/218366-80e8ad7492df56083457919254baa270.jpg
https://www1.garaget.org/gallery/images/219/218366/218366-61414bb6c8c3ef3ea29d33da412014fb.jpg
https://www1.garaget.org/gallery/images/219/218366/218366-675e13d9f3f92dafe8e7f1b93597efab.jpg
https://www1.garaget.org/gallery/images/219/218366/218366-9c3630ad655f634263aa1850094a929b.jpg
https://www1.garaget.org/gallery/images/219/218366/218366-d9ad3ab40679dd2f6d6f27fa17f3fbcd.jpg
https://www1.garaget.org/gallery/images/219/218366/218366-fffd35b7c7b06164fbbacd51c41614ec.jpg
https://www1.garaget.org/gallery/images/219/218366/218366-0a921e7fe0ab3276e5c8e0d7215975c3.jpg
https://www1.garaget.org/gallery/images/219/218366/218366-e66cc300128b932c1237e1adbe58c40c.jpg
https://www1.garaget.org/gallery/images/219/218366/218366-d7428786a1a84d0e9fbbd515725ddbff.jpg
https://www1.garaget.org/gallery/images/219/218366/218366-593b2827ed2c50c7aede622f0195eb99.jpg

Senast redigerat av martinhejdesten (29 december 2023)

martinhejdesten
16 mars 2021 · 484 Inlägg

Oh no! Spiralfjädern knäcktes på bruksbilen (BMW 520D -08). Den där bilen har gett mig ordentligt med huvudvärk den senaste tiden. Inte nog med all tid man lägger på den för konstgjord andning, men även pengarna. Pengar som jag hellre lägger på Minin. Förra året skar ju vattenpumpen och då blev jag 9000 kr fattigare. Och för en ruggigt kall månad sedan var jag tvungen att köpa nytt bilbatteri för 2100 kr. Dottern messade och ville bli hämtad "–Japp, kommer, ska bara skruva fast det nya bilbatteriet" och backade ut från uppfarten och så, pang! Så nu har jag köpt ett par nya spiralfjädrar och hunnit byta dem med. Ena sidan tog fyra timmar. Den andra, som tämligen borde gå snabbare då man lärt sig saker och ting på vägen, strulade då den viktigaste bulten inte lossnade och jag fick därmed inte ut fjäderbenet från hjulhuset. Nåja. Fram med vinkelslip och... äh, ni vill inte höra om det, det är ju hundkojan som är det roliga här.

Expressfrakten från Minispares gick ju undan men dessvärre höll tullen paketet som gisslan i fem dagar och krävde "lösensumma". Betalade i rask takt och igår anlände det efterlängtade paketet.

Ni vet den där mojängen som skulle monteras på instrumentpanelen... det är en Cooper S hastighetsmätare med mätartavla till 220 km/h smile för visst betyder de båda 110-skyltarna på motorvägen att den sammanlagda hastighetsbegränsningen är 220 km/h, höhö?!

Så nu är det ovala höljet komplett och monteras asap. Och därefter följer montage av dash cards mm som avslutar jobbet med instrumentpanelen. Jag blir tvungen att kalibrera hastighetsmätaren då den har en annan utväxling jämfört med Swift-motorn. Men det hade jag ju fått göra med Minins originalmätare med om jag behållt den.

• • • TRANSLATION • • •

Oh no! The coil spring broke on the daily driver (BMW 520D -08). That car has given me a lot of headaches lately. Not only do I spend so much time on it for artificial respiration, but also money. Money that I would rather spend on the Mini. Last year, the water pump went, and I became 9000 SEK poorer. And about a chilly month ago, I had to buy a new car battery for 2100 SEK. My daughter texted and wanted to be picked up, "Sure, coming, just need to screw on the new car battery," and as I backed out of the driveway, bam! So now I've bought a couple of new coil springs and managed to change them. One side took four hours. The other, which should go faster as you've learned things along the way, gave me trouble because the most important bolt wouldn't come loose, and thus, I couldn't get the strut out of the wheel housing. Oh well. Bring out the angle grinder and... well, you don't want to hear about that; the fun is in the Mini here.

The express shipping from Minispares was quick, but unfortunately, customs held the package hostage for five days and demanded a "ransom." I paid promptly, and yesterday the long-awaited package arrived.

You know that gadget that was supposed to be mounted on the instrument panel... it's a Cooper S speedometer with a dial up to 220 km/h 😊 because, of course, the two 110 signs on either side of the the motorway mean that the total speed limit is 220 km/h, hehe!

So now the oval casing is complete and will be mounted asap. And then follows the assembly of dash cards, etc., which concludes the work on the instrument panel. I'll have to calibrate the speedometer as it has a different gear ratio compared to the Swift engine. But I would have had to do that with the Mini's original meter too if I had kept it.

https://www1.garaget.org/gallery/images/219/218366/218366-dd6244627f2577bf646e0b85b479b225.jpg
https://www1.garaget.org/gallery/images/219/218366/218366-d12175232fda3605310af2ef55fa7bfa.jpg
https://www1.garaget.org/gallery/images/219/218366/218366-0dbd5bfced135192af07789c6207c948.jpg
https://www1.garaget.org/gallery/images/219/218366/218366-79261f69a0f92206abc1059e9741842f.jpg

Senast redigerat av martinhejdesten (31 december 2023)

martinhejdesten
19 mars 2021 · 484 Inlägg

Idag pratade jag med ännu en leverantör gällande mc-reservdelar, ni vet de där nålventilerna. Men icke, den modellen verkar inte gå att få tag på. Så vi blir tvungna att svarva de där nålventilsätena och därefter hålla tummarna att det gör susen. 

Och tänk att en oplanerad snapshot i garaget ledde till en 50x70 cm-förstoring...

• • • TRANSLATION • • •

Today I talked to yet another supplier regarding motorcycle spare parts, you know, those needle valves. But no, it seems that model is not available. So we'll have to lathe those needle valve seats and then keep our fingers crossed that it does the trick.

And imagine that an unplanned snapshot with my DSLR (hi-res camera) in the garage led to a 50x70 cm (19.7x27.6") enlargement... want one? Let me know! I can print other sizes as well.

https://www1.garaget.org/gallery/images/219/218366/218366-be3aa6fa39cb8dce9aacc01658df76ba.jpg
https://www1.garaget.org/gallery/images/219/218366/218366-835e5788372f6a8479dfb5287d094aec.jpg
https://www1.garaget.org/gallery/images/219/218366/218366-f7639eea0790a39d837ebeb51de1dbfc.jpg

Senast redigerat av martinhejdesten (31 december 2023)

eastmotorsport -sommar ska de va....
19 mars 2021 · 4 524 Inlägg

Snygg förstoring!

Tack till alla som följer och tittar i våra projekttrådar .
martinhejdesten
23 mars 2021 · 484 Inlägg

Det verkar som om jag ha tagit detaljarbetet till en ny nivå. Häng med nu...

Jag köpte ju nya dörrpaneler som har ribbor/veck och har både ett specifikt vinylmönster och djup. Jag skaffade också en bit vinylmatta till "hatthyllan" på instrumentpanelen. Och tidigare hade jag köpt vinylklädda "dash cards". Nu senast beställde jag en extra bit vinyl för att klä in switchpanelen så att alla paneler får exakt samma vinylmönster. Tyvärr visade sig att vinylmönstret inte stämmer – varken på dash card-panelerna eller på vinylen till switchpanelen. Hmm. Jag har alltså tre helt olika vinylmönster. Det enda som stämmer är dörrpanelerna och vinylmattan till "hatthyllan". Och det vore synd ifall man lägger ner så mycket tid på det här projektet och att sedan inte se till att paneler som sitter jämte varandra inte stämmer överens. Det rycker irriterat i mitt designöga när jag ser sådant. Hmm, vad göra? Ska jag rentav köpa ytterligare ett par dörrpaneler av samma sort som jag redan har och skära ut nya dash cards utifrån dessa? Då blir ju mönstret spot on.

Turligt hade jag mina gamla dörrpaneler i original (mörkt marinblåa) liggandes i gömmorna. Fel färg och fel mönster förvisso. Och definitivt inte vackert sett till skicket, men det var inte poängen. Grejen var ju att se ifall hur jag skulle skära ut dash cards ur dessa paneler så att ribborna/vecken blev horisontella när de väl satt på plats. Så jag tog fram lodstock, mätte noggrant på min vita dash bar och tejpade upp en horisontell/parallell linje på min dash card-mall enbart i kartong. Därefter överförde jag detta streck till min gamla dörrpanel, ritade konturen och skar samt sågade som en tok då den var i vinylklädd masonit.

När jag sedan provböjde detta nyskapade dash card så veckade sig vinylen. Hmm. Attans. Hur blir det då när det sitter på plats? Jodå, det blev lyckligtvis bra. Med en gnutta finlir så blir det spot on.

Och ikväll är det nog dags att svarva nålventilsätena. Håll tummarna för att det går bra! Sen ska jag vara kvick med att skruva ihop förgasarna och stoppa dem i motorrummet – sen måste motorn bara gå igång!

• • • TRANSLATION • • •

Reply to post: Nice poster print!

It seems like I've taken the attention to detail to a new level. Follow along now...

I bought new door panels with ribs/folds, featuring a specific vinyl pattern and depth. I also got a piece of vinyl for the "hat shelf" on the instrument panel. Earlier, I had purchased vinyl-covered "dash cards." Recently, I ordered an extra piece of vinyl to cover the switch panel so that all panels have exactly the same vinyl pattern. Unfortunately, it turned out that the vinyl pattern doesn't match—neither on the dash card panels nor on the vinyl for the switch panel. Hmm. So, I have three completely different vinyl patterns. The only matching components are the door panels and the vinyl for the "hat shelf." It would be a shame to invest so much time in this project and then not ensure that adjacent panels match. It irritates my design eye when I see such discrepancies. Hmm, what to do? Should I perhaps buy another pair of door panels of the same kind I already have and cut out new dash cards from these? Then the pattern would be spot on.

Luckily, I had my old original door panels (dark navy blue) lying around. Wrong color and wrong pattern, for sure. Definitely not beautiful in terms of condition, but that wasn't the point. The idea was to see how to cut out dash cards from these panels so that the ribs/folds become horizontal when they are in place. So I took out a plumb rule, measured carefully on my white dash bar, and taped a horizontal/parallel line on my dash card template made of cardboard. Then I transferred this line to my old door panel, drew the contour, and cut and sawed like crazy as it was vinyl-covered hardboard.

When I then test-bent this newly created dash card, the vinyl wrinkled. Hmm. Darn it. How will it be when it's in place? Well, fortunately, it turned out fine. With a bit of fine-tuning, it becomes spot on.

And tonight, it's probably time to lathe the needle valve seats. Keep your fingers crossed that it goes well! Then I have to be quick to assemble the carburetors and put them in the engine bay—then the engine just has to start!

https://www1.garaget.org/gallery/images/219/218366/218366-6e3374461855cac9813c17b5c3013e86.jpg
https://www1.garaget.org/gallery/images/219/218366/218366-10ad2fa995081fba460765dd3f3d952d.jpg
https://www1.garaget.org/gallery/images/219/218366/218366-2281178344aaf2404d57fda432b55e87.jpg
https://www1.garaget.org/gallery/images/219/218366/218366-7f5d8e01c331b8b5816a6b298fed96c4.jpg
https://www1.garaget.org/gallery/images/219/218366/218366-dd36f24eadcd48292aa2e85a6d40da6c.jpg
https://www1.garaget.org/gallery/images/219/218366/218366-619c7862563d723dbfbee9edebcf1aed.jpg
https://www1.garaget.org/gallery/images/219/218366/218366-5059e444a73f61d326a0a2a2a1802248.jpg
https://www1.garaget.org/gallery/images/219/218366/218366-811a0fe66b35ea4caad92f418928e7e6.jpg
https://www1.garaget.org/gallery/images/219/218366/218366-43116c1afef2d4cd7d3d0e7743c4cc06.jpg
https://www1.garaget.org/gallery/images/219/218366/218366-aa90d9d018dcae12241dc053ae92acf9.jpg
https://www1.garaget.org/gallery/images/219/218366/218366-bcfffcc6a43c0a79bd8b5bd3e8a7980f.jpg
https://www1.garaget.org/gallery/images/219/218366/218366-897f732c7ca73812cb61834af2d1d4dc.jpg
https://www1.garaget.org/gallery/images/219/218366/218366-f91559ab6f4946d343e2ec399427e5aa.jpg
https://www1.garaget.org/gallery/images/219/218366/218366-77cad84f427187239a15d9aeff0d34db.jpg
https://www1.garaget.org/gallery/images/219/218366/218366-7024d498ae19a468c0a4d49eeebd05d1.jpg
https://www1.garaget.org/gallery/images/219/218366/218366-70544c27f6a3563680682cda968bea4c.jpg
https://www1.garaget.org/gallery/images/219/218366/218366-88d818a8b35e012fac0b932e598a48b1.jpg

Senast redigerat av martinhejdesten (31 december 2023)

martinhejdesten
24 mars 2021 · 484 Inlägg

En bild säger mer än tusen ord, sägs det. Japp, instämmer helt, särskilt när det är drygt tusen mässingsspån (räknade inte värst noga, höhö) som svarvas bort. Andreas hojtade nämligen så jag pinnade bort till honom. Han riggade ett nålventilsäte i minisvarven illa kvickt, måttade noggrant med både lupp och skjutmått mm och så satte han igång.

Han svarvade bort 0,6 mm på samtliga nålventilsäten efter att vi hade räknat ut längdskillnaden på den gamla kontra den nya nålen. Han var också noggrann med att inga grader fanns kvar på de nysvarvade kanterna. Efter provmontering av en ny nål så konstaterade vi att svarvningen var ypperligt högklassiskt utfört. Gott jobbat Andreas!

Vad händer nu då? Jag ska helt enkelt skruva ihop rubbet, utefter suddiga minnesbilder då det var ett tag sedan, och när det är klart ska väl allt vara i sin ordning och det blir hög tid att göra det tredje försöket till motorstart – håll tummarna, gott folk!

• • • TRANSLATION • • •

A picture is worth a thousand words, they say. Yep, I completely agree, especially when it's over a thousand brass shavings (didn't count very precisely, hehe) being turned away. Andreas called, so I hurried over to him. He quickly set up a needle valve seat in the mini lathe, measured carefully with both a magnifying glass and calipers, and got to work.

He turned away 0.6 mm from all needle valve seats after we calculated the length difference between the old and the new needle. He was also careful to ensure that no burrs remained on the newly turned edges. After a test assembly of a new needle, we concluded that the turning was excellently high-class. Well done, Andreas!

What happens now? I simply have to screw the whole thing together, based on vague memories since it's been a while, and when it's done, everything should be in order, and it's high time to make the third attempt to start the engine – fingers crossed, folks!


https://www1.garaget.org/gallery/images/219/218366/218366-e2b1cc86b29968b53d96d8c2f5bfdfdb.jpg
https://www1.garaget.org/gallery/images/219/218366/218366-083b90a39a1a8e2b9e48be6805c6ead6.jpg
https://www1.garaget.org/gallery/images/219/218366/218366-890d0d1626ff88f57eb4540b47b1223f.jpg
https://www1.garaget.org/gallery/images/219/218366/218366-09b46aa9496b6d5b74739a3115156594.jpg
https://www1.garaget.org/gallery/images/219/218366/218366-898180143bbec061ad7295ee3171f7e5.jpg
https://www1.garaget.org/gallery/images/219/218366/218366-dede0b4ee9f8cbdd2ca90750dd310a04.jpg
https://www1.garaget.org/gallery/images/219/218366/218366-9f2d21c6d9c7cf43f02f42500830456d.jpg

Senast redigerat av martinhejdesten (29 december 2023)

martinhejdesten
2 april 2021 · 484 Inlägg

Långfredagen. Tänkte skruva ihop de totalrenoverade mc-förgasarna. För sista gången. Men det var ett tag sedan jag skruvade isär allt så ihopmonteringen blev en lång process.

Först rispade jag bort grader från kanterna på nålventilsätena innan nålarna lätt gled ner i sina spår. Skruvade sedan fast sätena och la i flottörerna, stoppade i låspinnarna och stängde allt med locken. Hittade en del överblivna skruvar och... kikade i fotoalbumen här på bloggen för att klura ut vart de skulle sitta. Fiffigt, men tog sin tid.

Sen la jag provosoriskt alla förgasare bredvid varandra i rätt ordning, men även denna gång fick jag klura på vart alla distanser, skruvar och T-fördelare skulle sitta... med hjälp av fotoalbumen, förstås. Men jag lyckades inte klura ut hur jag skulle pressa samman förgasarna till ett stycke då axlarna till spjällen tog i varandra och knappt kunde fösas ihop mer. Och då ska allt ihop ytterligare ca 20 mm för att slutligen kunna montera skruvarna. Men det får bli morgondagens uppgift.

Men nu är förgasarna rejält genomgångna i alla fall och jag hoppas verkligen att detta ska göra susen.

• • • TRANSLATION • • •

Good Friday. I thought I'd assemble the completely overhauled motorcycle carburetors. For the last time. But it's been a while since I took everything apart, so the assembly became a lengthy process.

First, I scraped away burrs from the edges of the needle valve seats before the needles easily slid into their grooves. Then I screwed the seats in place, added the floats, inserted the retaining pins, and sealed everything with the lids. I found some leftover screws and... checked the photo albums here on the blog to figure out where they should go. Clever but time-consuming.

Then I temporarily arranged all carburetors side by side in the correct order. Still, this time, I had to figure out where all the spacers, screws, and T-distributors should go... with the help of the photo albums, of course. But I couldn't figure out how to press the carburetors together into one piece, as the throttle shafts were rubbing against each other and could hardly be pushed together further. And then everything needs to compress another 20 mm to finally mount the screws. But that will be tomorrow's task.

But now the carburetors have been thoroughly examined, and I really hope this will do the trick.

https://www1.garaget.org/gallery/images/219/218366/218366-4d777710d6b5e4753dda3e0eb2c7e1e7.jpg
https://www1.garaget.org/gallery/images/219/218366/218366-89defb9a4020e2cf231039633c0d1599.jpg
https://www1.garaget.org/gallery/images/219/218366/218366-012be2fa307fe950816fadeb66e0726c.jpg
https://www1.garaget.org/gallery/images/219/218366/218366-5961f5ac17b8505fd934cff75e2014ce.jpg
https://www1.garaget.org/gallery/images/219/218366/218366-f128f1232f14f06ee57f8d0f1d7c5423.jpg
https://www1.garaget.org/gallery/images/219/218366/218366-dea1b5baf48bef6ae2bc1e4d8b2ec7bf.jpg

Senast redigerat av martinhejdesten (29 december 2023)

Lucif3r
3 april 2021 · 2 207 Inlägg

Ja det är ju en stor fördel med att ha en projekttråd eller liknande - man är ofta duktig på att dokumentera/fota saker under processen så man kan gå tillbaka när man glömt av hur något ska sitta ihop tongue

martinhejdesten
3 april 2021 · 484 Inlägg

Exakt, håller med dig Lucif3r. Problemet är att jag plåtar med kort skärpedjup, för kort i vissa fall, så även om detaljen jag söker tekniskt finns i bild så är den kanske rejält suddig. Så idag ägnade jag säkert två timmar till att googla, bildgoogla och kolla diverse Youtube-filmer med mc-förgasare i allmänhet men ZX-6R i synnerhet. ALLA vinklar och vrår visades på bilder och i filmer, men INTE just den vinkeln/detaljen jag sökte. Jösses.

Men jag vred och vände på saker och ting, dubbelkollade med både farsan och Andreas och till slut så nailade vi hur förgasarnas spjällaxlar skulle sitta för att kunna skruva ihop hela kitet. Och så blev jag också upplyst vart den överblivna distansen och fjädern skulle sitta.

Jag saknar dock en skruv för ett chokereglagefäste, men övriga tre skruvar gör att reglaget sitter som det ska. Däremot krävs en fjäder som ska dra tillbaka chokereglaget i ursprungsläget. Och så måste jag fästa chokevajern på något sätt.

Förutom det så ska jag bara dra ur de där rörbitarna från de fyra slangarna mellan motorblocket och förgasarna innan hela kitet monteras på plats. Jag lär också få göra hål för chokevajerdragning i torpedväggen och fästa chokereglaget under instrumentpanelen. Sen är det minsann dags!

• • • TRANSLATION • • •

Reply to post: Yes, it's a significant advantage to have a project thread or something similar – one is often good at documenting/taking photos during the process so that they can refer back when they forget how something should be put together. 😛

Exactly, I agree with you Lucif3r. The problem is that I take photos with a short depth of field, too short in some cases. So even if the detail I'm looking for is technically in the picture, it might be quite blurry. So today, I spent probably two hours googling, image searching, and watching various YouTube videos about motorcycle carburetors in general, but ZX-6R in particular. ALL angles and corners were shown in pictures and videos, but NOT the angle/detail I was looking for. Oh my.

But I twisted and turned things, double-checked with both my dad and Andreas, and finally, we figured out how the carburetor throttle shafts should be positioned to assemble the whole kit. I also found out where the extra spacer and spring should go.

However, I'm missing a screw for a choke lever bracket, but the other three screws secure the lever as it should be. However, a spring is needed to pull the choke lever back to its original position. And I also need to attach the choke cable somehow.

Apart from that, I just need to remove those pieces of tubing from the four hoses between the engine block and the carburetors before the whole kit is mounted in place. I'll also have to make a hole for the choke cable to pass through the firewall and attach the choke lever under the instrument panel. Then it's definitely time! 😄

https://www1.garaget.org/gallery/images/219/218366/218366-d716e324a23b7fa71e2f1ad607164ad6.jpg
https://www1.garaget.org/gallery/images/219/218366/218366-92610213739aca1d504ea0f15e2e0c02.jpg
https://www1.garaget.org/gallery/images/219/218366/218366-6f4ff17e8f37564aa4744e7e1b815ce4.jpg
https://www1.garaget.org/gallery/images/219/218366/218366-683d8b831ba01c774ec19d535b29d455.jpg
https://www1.garaget.org/gallery/images/219/218366/218366-d13399d9bf00297deb1958f4df87958d.jpg
https://www1.garaget.org/gallery/images/219/218366/218366-70e6394a05613c73eff55778831599a1.jpg

Senast redigerat av martinhejdesten (29 december 2023)

Senast i forumet
Diskussionsforum
Projekt
Evenemang