Vauxhall Victor Estate (FB) 1962 "Julia"

Att "bruxa" en vetaranbil, eller en rullande renovering/modifiering mot mer bruksvärde.
  • 17 Följare
  • 16 910 Visningar
  • Uppdaterades senast 16 maj 2019
rallyelwood
29 december 2018 · 34 Inlägg

WINTER SLEEP
The car has hang around outside for awhile this winter. I've been using it from time to time, but less and less as the temperature have dropped and the salt concentration increased.

However, the other day I cleared the garage for Julia and tucked her in for the winter. I hope to have some time during the rest of the winter to put new seals on the doors (more about that later), fix the leaking heater tap and put in front seat belts.

DOOR SEALS FOR A VOLVO?
So, door seals. East Kent Trim Supplies sells reproduction seals, but they've been out of stock for awhile. What to do, what to do... After a general search in cyber space I came across a company here in Sweden, CVI Automotive, that specializes in Volvo parts (!) and their Volvo Duett door seal looked to have smiliar profile as the Vauxhall Victor one. Without knowing the dimensions, I "put all the eggs in one basket" and ordered 16 meters, in hope it will also be usefulll on the rear door.

I've cut of a test piece and tried it on the driver's door. I think it will work great, although it's not the exact same profile. What do you think?


https://www1.garaget.org/gallery/images/27/26518/26518-36c171d976ef5021217ff47dc2ee5f40.jpg
https://www1.garaget.org/gallery/images/27/26518/26518-e363f97d5717ed59802dd6d3e09d7bc2.jpg
https://www1.garaget.org/gallery/images/27/26518/26518-1c3721ef53946204a9b4fb3969b80023.jpg
https://www1.garaget.org/gallery/images/27/26518/26518-77de5dab01c36cf01f555eca53ce359e.jpg
https://www1.garaget.org/gallery/images/27/26518/26518-fb53c67666d4f7d42c9b2672e8cfbb90.jpg

Saab 99 "GLT16" (1984)
rallyelwood
12 februari 2019 · 34 Inlägg

WINTER UPGRADES START

At last the garage is organized again, after moving to a new apartment, so I can now concentrate on the car.

I won't say it out load, but I have a special trip in mind, and before that I want the doors to be re-sealed, the heater working and possible seat belts mounted.

The driver's door is now ready to accept the new Volvo Duett door seals. Recommendations on glue to use? I was thinking of regular contact adhesive.

See the pictures and their descriptions for more details.


https://www1.garaget.org/gallery/images/27/26518/26518-643c7c2a4e71b284907f753de423cf05.jpg
Self-made flat-pack shelf

https://www1.garaget.org/gallery/images/27/26518/26518-b63638649e16da7ac52428e3dff35a9e.jpg
Organized again!

https://www1.garaget.org/gallery/images/27/26518/26518-462ac81fac71540a2e35acfabcda9877.jpg
The factory split in the seal is hold down by a sheet metal clip, but is pop rivet factory spec?

https://www1.garaget.org/gallery/images/27/26518/26518-f147cd6f19ca2d0a4d48df148d6056ba.jpg
The seal is kind of different around the door lock

https://www1.garaget.org/gallery/images/27/26518/26518-2497fe59601b03dedea856c310848cab.jpg
The “door lock” part of the seal saved for future reference

https://www1.garaget.org/gallery/images/27/26518/26518-f5f9913d4826019f07284590e29fa7da.jpg
Driver's door after seal tear off, and cleaning

https://www1.garaget.org/gallery/images/27/26518/26518-624b4faf729d942591372d4fb68ba58c.jpg
Passenger's door before seal tear off

https://www1.garaget.org/gallery/images/27/26518/26518-f0c3cd572367a5dcf82d5bf2748e2c62.jpg
Yuck!

https://www1.garaget.org/gallery/images/27/26518/26518-868abfb94f48bc40fc6578b38fbbed9a.jpg
Passenger's door after seal tear off

https://www1.garaget.org/gallery/images/27/26518/26518-d9f64ba4d82083cbabb823993f1aa3c3.jpg
A lot of glue and seal residue to clean off

https://www1.garaget.org/gallery/images/27/26518/26518-a1efb2d007a2f5340fe79dfdd695e233.jpg
To get rid of the glue and seal residue I started with carefully mechanical scraping. Then the residue was treated with “gasket solver” (don't leave it to long, it will get to the paint too, ask me how I know…). As the last step the whole circumference of the door was cleaned with “brake cleaner”.

Saab 99 "GLT16" (1984)
chris_gson
13 februari 2019 · 283 Inlägg

Hej Hopp !
This one is the suitable for weatherstrip ''glue''.
3M
from Dalhems....
you can order 1 extra for me... I need to my doors as well....
https://dalhems.com/sv/p/1c694ac59f6041 … ster-svart
krister...

Chevrolet corvette "Coupe" (1968)
chris_gson
14 februari 2019 · 283 Inlägg

hej igen...
kollade i garaget o det visade sig att jag redan hade beställt hem en sån. du kan prova den innan du själv köper.... ligger på en hylla ovanför min ''soffa''...... i garaget... k..

Chevrolet corvette "Coupe" (1968)
rallyelwood
12 mars 2019 · 34 Inlägg

DOOR SEALS, OR GLUELESS GLUE

When both the front doors were free from the old seals and all glue residue was cleaned off, I started to measure out the new seals. Then I worked on a solution to space out the seal around the door lock striker. In the end the spacer consisted of two pieces of rubber mat, on top of each other, cut to fit between the lock and the outer edge of the door and extending 5-7 cm both upwards and downwards from the lock striker. On top of which the generic (Volvo) door seal then would be glued.

I brought some contact adhesive from home and set about to glue the new seal to the driver's door, spreading the glue with a brush around the door circumference and on the mating surface of the seal. At first the seal seemed to stick to the door, but as soon as I continued to the next part, the seal started to loosen from the first part. Bad glue, bad method or too cold? I don't know.

My solution was to liberally, with several pluses, apply the glue to the door and brush it out, then sticking the seal to the door, without any glue on it, and using masking tape to hold the seal in place while the glue cured.

The end result wasn't too impressive... When closing the door the seal came loose from several spots and it did not reach all the way to the body around the lock.

Now I've moved on to a more important job pending for an soon upcoming road trip I want to do. I'll get back to the door seals at a later date. Then I'm thinking of instead using part of the old seal for a spacer at the lock mechanism and using a glue made for the purpose (thanks to my garage neighbor for the tip on the later).

https://www1.garaget.org/gallery/images/27/26518/26518-10105b656d01f95f31939194357d977d.jpg
Cleaned seal surface.

https://www1.garaget.org/gallery/images/27/26518/26518-87aef5be4a76f261f93898fccf26f7a2.jpg
Removing the old seal.

https://www1.garaget.org/gallery/images/27/26518/26518-f43c14495444ee58e806f6a3db419f85.jpg
Crusty pieces of old seal destined for the bin.

https://www1.garaget.org/gallery/images/27/26518/26518-6e274100575ec55beff8731ef06a1080.jpg
Making a seal spacer. (Part of the old seal, around the lock, to the right.)

https://www1.garaget.org/gallery/images/27/26518/26518-17b6ed3d3783d241e78523a86d5f3d04.jpg
Seal spacer in place.

https://www1.garaget.org/gallery/images/27/26518/26518-46cca0856b6205db79718dc52858973a.jpg
Measuring seal length.

https://www1.garaget.org/gallery/images/27/26518/26518-195bf94de306bff2fef98104dd745c7a.jpg
Holding the seal in place while the glue is curing.

https://www1.garaget.org/gallery/images/27/26518/26518-5da278f3a7459546673d61ca038394c0.jpg
Seal in place, including factory clip for the seal split.

https://www1.garaget.org/gallery/images/27/26518/26518-07ccea59a4492f676c30b77166b9928f.jpg

https://www1.garaget.org/gallery/images/27/26518/26518-98d82e6fb73b66c782aa615b71cde771.jpg

https://www1.garaget.org/gallery/images/27/26518/26518-716105de72069e518a98e7aa35099450.jpg

Saab 99 "GLT16" (1984)
rallyelwood
1 april 2019 · 34 Inlägg

THE HEAT IS ON, OR SOON ANYWAY

In preparation for the planned spring adventure I've moved on to fixing the heater. Last summer I found out that the heater valve was leaking and I simply solved it by looping the heater fittings at the engine.

The heater box was removed in a jiffy, or not... Even in an old car its cramped working under the dash. The glove box was removed, the heater controls also, and the fan motor was disconnected. I tried to remove the fan and motor first for easier removal of the heater box, but there wasn't enough room down to the transmission tunnel to get the fan out. So, the heater box eventually came out as a complete assembly.

I removed the heater valve and soon discovered that the leak came from between the copper valve housing and the control mechanism base plate. Next problem – the heater valve assembly isn't really serviceable since both the valve housing and mechanism housing have tabs that fit in to slots in the base plate and they are then bent, or pressed down, to firmly attach each housing to the plate.

“No problem”, I thought, “I just pry those tabs back straight”. Between the valve housing and the base plate I found that there was a rubber membrane sealing of the water side against the base plate, and that was cracked. I proceeded to make a new membrane from a flat rubber mat, and then thoroughly cleaning the valve housing and base plate. Then I clamped the base plate in the vice and bent the tabs of the valve housing back with a hammer and a driver. Tightness testing next…, it failed miserably. I hadn't got nowhere near enough clamping force between the base plate, the sealing membrane and the valve housing.

At work I could borrow a press and I made up two dies to press the valve housing on to the base plate. I almost got it tight, but then I decided to fix the still leaky part by hand and ruined it.

It was a fun experiment, but essentially the heater valve is scrap now. However I will keep it for future reference and if I decide to try fixing it at a later date.

Fortunately the heater core was completely tight, with no external leakages. All the parts of the heater box got a good clean, and new sealing strips were applied where required. The build-in switch that turns the fan on at full speed when demister position is chosen was not working, again not really serviceable, it was riveted together and to the heater box. Nothing a drill and later some sheet metal screws could fix. The switch was thoroughly cleaned and the terminals were freed from oxidation, so now it works beautiful again. Also the baffles in the heater box was probably misaligned before, but they move with ease now, and have a satisfying “thunk” at the end positions.

So, coolant needs to go through the heater core to get any warmth in the cabin. With the original heater valve removed routing of the hoses will of course be different. The only way I could route them is not ideal from a chafing and kinking perspective, but they will flow coolant and uses the original holes in the bulkhead. On the “bracket” on the side of the valve cover (originally intended for the heater hoses?) I mounted a household water ball valve and run the hoses by that.

The heater fittings at the engine (in the thermostat housing and coolant pump housing, respectively) had seen better days and the coolant pump one even had a rust hole at the hose bulge. When removing them I broke the later, level with pump housing. There's where I'm at at the moment. I have found new fittings and they have even already landed in my mail box. Now I just need to get the broken-of part of the fitting, that still is in the coolant pump housing, out.

But wait there's more: While I was under the dash and fiddling around I thought that now is a good opportunity to rout the USB charging port properly so it wasn't dangling freely in the glove compartment. I enlarged one of the blocked-of holes in the dash panel to fit the USB socket, then I tested the windshield washer and it worked, it was just the ground cable and the floor switch that was bad. Another blocked-of hole in the dash was enlarged to accept a new momentary switch for the washer.

Both the USB charging port and the washer motor are now driven through respective new fused relays controlled by the ignition, and in the case of the washer motor also controlled in conjunction with the momentary switch in the dash.

https://www1.garaget.org/gallery/images/27/26518/26518-e17ac1f8f53ebb1670a9c0da01fb1a2a.jpg
Before removal of the heater box

https://www1.garaget.org/gallery/images/27/26518/26518-a85eef6f38b3f55f39d0013b71684bc0.jpg
The heater valve assembly

https://www1.garaget.org/gallery/images/27/26518/26518-52c6a6d0650006ec1e54dea6f265aee8.jpg
Tightness testing the heater core

https://www1.garaget.org/gallery/images/27/26518/26518-0e450c21840cd75f776a178d70a92982.jpg
Disassembling the heater valve. Valve housing to the left and control mechanism with housing to the right.

https://www1.garaget.org/gallery/images/27/26518/26518-0de60b2997a1fd6743524b3a3f71e0ca.jpg
Cracked heater valve sealing membrane

https://www1.garaget.org/gallery/images/27/26518/26518-8334c4aa1818f078f65138b4e1718562.jpg
All parts of the heater valve. Base plate top right and the valve it-self middle right.

https://www1.garaget.org/gallery/images/27/26518/26518-5f18da3388a635173b3f64cb64492650.jpg
New, self-made sealing membrane in place

https://www1.garaget.org/gallery/images/27/26518/26518-6abb2272e25dc5780517513a330c6a29.jpg
Dies to press the heater valve housing to the base plate

https://www1.garaget.org/gallery/images/27/26518/26518-d502cdfa339ef0f583db60879469a04d.jpg
Dies to press the heater valve housing to the base plate, in the vice for trial-fit

https://www1.garaget.org/gallery/images/27/26518/26518-b5fd78048e88d48e0304d924c99638f9.jpg
The result after pressing in the press

https://www1.garaget.org/gallery/images/27/26518/26518-e16b6aba16b4d1edbbe845ff3c4e803c.jpg

https://www1.garaget.org/gallery/images/27/26518/26518-ba7a3a11d7c0374ed78bed94ebdcf8d6.jpg
Heater box disassembled. In the process of replacing crusty old sealing strips.

https://www1.garaget.org/gallery/images/27/26518/26518-f9f3c105fc92d092861bd7f19b1ff0c1.jpg

https://www1.garaget.org/gallery/images/27/26518/26518-17cff5cbc42b35a99a1ea586c386370d.jpg

https://www1.garaget.org/gallery/images/27/26518/26518-cf7e7b99a2d62b79d419bd0c4a2e65bd.jpg
Dismist fan switch working again.

https://www1.garaget.org/gallery/images/27/26518/26518-7327eabf9f8a5250d51711839c24288b.jpg
These old style hose clamps are cool. I'll hang on to them and possibly renovate them in the future.

https://www1.garaget.org/gallery/images/27/26518/26518-6591d31dd8d9a360099b46402143af1f.jpg
Heater box ready for re-mounting. (Yes, it's upside-down here...)

https://www1.garaget.org/gallery/images/27/26518/26518-b0998fd2a71d10af1a2577c18dc4b75c.jpg
Heater fitting, engine side. The not-so-broken one.

https://www1.garaget.org/gallery/images/27/26518/26518-e90e1ffcd856ec716ff538699c8df5f1.jpg
Rewired windsheild washer.

https://www1.garaget.org/gallery/images/27/26518/26518-696542d0764c3dc34f45905d4df6db35.jpg
The new heater valve and hoses.

https://www1.garaget.org/gallery/images/27/26518/26518-818ea3386197a26faf7954ce202846e7.jpg
12V supply and ignition controll signal taken from the starter motor solenoid.

https://www1.garaget.org/gallery/images/27/26518/26518-9d202337c21c5620ee5a089be695929b.jpg
USB charging port and windshield washer relays, and some colourfull spaghetti.

https://www1.garaget.org/gallery/images/27/26518/26518-18c1fbf66f7e51e917e99439cd9bd40d.jpg
The new additions to the dash panel. Especially the USB charging port looks quite out of place, but function always goes before style in my cars.


https://www1.garaget.org/gallery/images/27/26518/26518-d860db2720f393c2cba00637116f78d6.jpg
Heater box re-fitted and hoses run to the engine compartment.

https://www1.garaget.org/gallery/images/27/26518/26518-459284037e1ab9f4ac4a8647ab673340.jpg
A look at the backside of the dash panel.

https://www1.garaget.org/gallery/images/27/26518/26518-002a6423a67f7f93ca62d7a1cf730b66.jpg
Oh, yes. I also fitted a new windshield washer nozzle.

https://www1.garaget.org/gallery/images/27/26518/26518-9f56df9c818feda3446ea931c9cc2d3d.jpg

https://www1.garaget.org/gallery/images/27/26518/26518-dc6409ba2211606f8b21e98edd57838f.jpg
Here's how USB charging ports and windshield washer are wired. I made this up to remember how I connected it all. Thanks to https://www.electrical-symbols.com/ for most of the symbols.

Saab 99 "GLT16" (1984)
rallyelwood
1 april 2019 · 34 Inlägg

A HOT TEST DRIVE, or HOW TO LOOSE THE HEAT

The “one” thing left to do on the heating system was to get the broken heater union out of the coolant pump. The fan and pulley came of the pump relatively easy. The screws and nut holding the pump to the engine block as well. Then it took some persuasion with a piece of timber and a hammer to get the pump out of the block.

I think the theme of a previous owner was “the more liquid sealant the better” (as seen before, even on the exhaust...). Sure enough, although the coolant pump actually had a gasket, there had been a overly liberal amount of the liquid stuff applied (even blocking a small coolant passage into the block). The pump was cleaned and I set about to get the piece of union stuck in the housing out.

With a jig saw blade I saw the union left-overs in four pieces. Actually I resorted to use the complete jig saw at the end, and finally I could pry the pieces out. However the threads in the housing was now a bit affected by the sawing and I was afraid that thread sealant wouldn't be enough to take up the “imperfections” and seal. So it was a pleasant surprise when the tightness test revealed no leaks. Then it was time to make a new gasket, and I traced the holes over from the old one and made a gasket with simpler outer shape. A more appropriate amount of silicon sealant was then applied on both side of the new gasket for some extra sealing performance.

At last I could connect the new heater hoses to the new aluminium fittings (bought at Burton Power). The cooling system was filled up (thanks for the super tip from the Skid Factory), followed by five test laps around the garage building – all good and heat coming from the vents in the heater box!

So the next day was all free for driving. I drove about 160 km in total and refused to take the highway, where possible. I tried to drive as much as possible of the old main road (“R1” or “Riksettan”) from Södertälje all the way to and through Stockholm. When I've had passed the Liljeholmen bridge I got the feeling I was back in the 1950-1960's driving through Stockholm, for a brief moment.

The heater works fine, it was hot in the cabin, so hot that I had to stop and turn down the ball valve two thirds. I also discovered that by altering the fan speed, the position of the scuttle valve and/or the position of the heater box fresh air valve I could significantly regulated the heat. How the distribution through the cabin is I don't know, but as the driver I'm satisfied.

Some service, check-ups and to reassemble the glove box remains before the car (she?) is ready for the spring adventure.


https://www1.garaget.org/gallery/images/27/26518/26518-997c3e6623b95244ee534f2eefbd822a.jpg
The coolant pump is out.

https://www1.garaget.org/gallery/images/27/26518/26518-ea87af5fa7986d9745993898f525723e.jpg
A lot of silicon sealant used by a previous owner. Can you see the blocked coolant passage?

https://www1.garaget.org/gallery/images/27/26518/26518-1937e1bd1c3074801eb79438cefe94f1.jpg
Gaff tape works great to plug the pump for a tightness test.

https://www1.garaget.org/gallery/images/27/26518/26518-45c9341aab75124704325b98f65e68ff.jpg
From left to right; new aluminium heater fitting, left-overs from broken-off fitting and the less broken original fitting.

https://www1.garaget.org/gallery/images/27/26518/26518-6fc4b9fcc8fcf0c31e163c3aa618127f.jpg
Coolant pump, new home-made gasket, previous home-made (?) gasket.

https://www1.garaget.org/gallery/images/27/26518/26518-d0b6a37698578320529acad10e7c44c0.jpg
One of the mounting ears in the coolant pump housing was cracked and eventually broke off. A home-made sleeve ensures that the nut will hold the ear evenly to the engine block.

https://www1.garaget.org/gallery/images/27/26518/26518-9308d0deb1b3cb32626bfb36a4244342.jpg
Re-assemblin'.

https://www1.garaget.org/gallery/images/27/26518/26518-6891f015c213d728e13e14abb4e5d480.jpg
Heater hoses completely connected.

Saab 99 "GLT16" (1984)
chris_gson
2 april 2019 · 283 Inlägg

Great work & Result ! good luck driving !

Chevrolet corvette "Coupe" (1968)
Xebers76
2 april 2019 · 2 264 Inlägg

Du är riktigt klurig du! Blir fint! smile

rallyelwood
1 maj 2019 · 34 Inlägg

PREPARING FOR THE EASTER RUN, OR HOW TO KILL THE SIDE LIGHT BY MENDING THE HEAD LIGHT

During the past autumn I thought of doing a one year anniversary trip with the Vauxhall. As December got closer I realized that the trip had to be postponed; the heater was not fixed yet and the doors were still leaking air worse than a sieve.

The target was set on fixing those things and making the trip whenever they were done. When March came I was making good progress and the goal was set on taking Julia down to Jönköping and visiting the Easter traditional Bilsport Performance and Custom Motor Show. A total of three days where allocated for the adventure.

I planned to do nothing on the Easter Friday than packing the car with tools, spare parts and supplies. The heater was working great and the front doors had new seals, but still leaking like a sieve (see previous post). I’ve noticed same days before that the right head light wasn’t working so I had ordered spare head light bulbs. However, neither of the new bulbs would light up; nor main, nor dipped.

The voltage at the bulb terminals were correct and the earth terminal had contact all the way to the battery. “Strange”, I thought, but decided that it was probably best to re-wire the head light. And there the calm and lazy Friday went up in smoke…

Armed with cable terminals, butt connectors, heat shrink tubes and tools the Friday afternoon came and went quickly. When it all was done, and the head light was working properly the right-side light and flasher had stopped working, and one of the screws holding the lens was rusted solid to the base… “Arghhh!” … Eventually I gave up with the penetrating fluid and just drilled the screw out. The bulb socket was very rusty, and I had to work feverishly with sand paper and a drill mounted wire brush to get at least some contact between the socket and bulb.

I was also set to mount seat belts in the front seat before the trip. This also happened during that calm and lazy Friday, in parallel to the side light mending. The two, from factory, prepared seat belt mounting points in respective b-pillar worked great. But, the ditto in the floor for the buckles were way to far back for the buckles supplied in the kit I bought, that supposedly would fit a 1962-64 Vauxhall Victor (FB).

Fortunately, I had foreseen that something like this could occur and had preventively bought some generic threaded seat belt anchorage plates. Two holes were drilled in the transmission tunnel just behind the front seat, these anchorage plates were placed beneath the floor and I made up a mounting bracket for the buckles out of 30 mm flat mild steel bar. By this stage it was well past midnight and I packed up and went home for some sleep.

Look for an upcoming post for the road trip story.


https://www1.garaget.org/gallery/images/27/26518/26518-6d6bc68256611ff78952802290444f09.jpg
Auxillary gasket to the oil filling lid.

https://www1.garaget.org/gallery/images/27/26518/26518-b5ea1a8d9e29fab35192f2dd902f1777.jpg
Totally worn out throttle linkage.

https://www1.garaget.org/gallery/images/27/26518/26518-819e5d50169a79441ffe7dd81706f953.jpg
Some welding, drilling and grinding later the throttle linkage was in better shape.

https://www1.garaget.org/gallery/images/27/26518/26518-11e67287b65ed08453509d39a213ebee.jpg
Mended, assembled and oiled throttle linkage.

https://www1.garaget.org/gallery/images/27/26518/26518-cacb00db033c8f1f68571ef4ebb7e22b.jpg
New bulbs. Standard 414 on the left, halogen with 414 fitting on the right. I havn't tried the later yet.

https://www1.garaget.org/gallery/images/27/26518/26518-fa8087e93d758b796199f1efe7ec5b86.jpg
Mended head lamp bulb socket.

https://www1.garaget.org/gallery/images/27/26518/26518-fa44ffcf73a1a209e24391ab981e7e1d.jpg
New right head lamp wireing with heat shrink tubing, neatly bundeled with the existing cable harness.

https://www1.garaget.org/gallery/images/27/26518/26518-6d366d1e8b81b0cf9a77feed4f722c81.jpg
The last few cm of wires to the bulb socket are original, just cleaned up. The rest of the wireing in to the engine bay is new.

https://www1.garaget.org/gallery/images/27/26518/26518-fba9d4b4a36f646531006e96a7f870d6.jpg
Behind the b-pillar upholstery ready-made seat belt anchorages were found.

https://www1.garaget.org/gallery/images/27/26518/26518-317e0b34d05a3581214849c8bd3788e2.jpg
https://www1.garaget.org/gallery/images/27/26518/26518-7c3000f0f48cb41250d192efe694728e.jpg
New seat belt anchorage points were added to the transmission tunnel.

https://www1.garaget.org/gallery/images/27/26518/26518-297d511b0be1e5a11df57b24f7c51f38.jpg
Home-made bracket for the seat belt buckles.

https://www1.garaget.org/gallery/images/27/26518/26518-f44dc0a3b80635e2d478ba73e4a96e34.jpg
Carpet back on the floor and seat belt buckles mounted.

https://www1.garaget.org/gallery/images/27/26518/26518-ec60edd20b42f6251f94808d38d6f62c.jpg
Seat belt buckles.

https://www1.garaget.org/gallery/images/27/26518/26518-0337cb32e3ae36d2fee5b606a7e52b0c.jpg
Seat belt reel.

https://www1.garaget.org/gallery/images/27/26518/26518-d9b96cb86fb9b7818d50ed5e2c54cd78.jpg
Upper seat belt anchorage point.

Saab 99 "GLT16" (1984)
rallyelwood
1 maj 2019 · 34 Inlägg

chris_gson skrev:
Great work & Result ! good luck driving !

Tackar!  cool

Saab 99 "GLT16" (1984)
rallyelwood
1 maj 2019 · 34 Inlägg

Xebers76 skrev:
Du är riktigt klurig du! Blir fint! smile

Alltid kul att "klureriet" man visar uppskattas.  smile

Saab 99 "GLT16" (1984)
rallyelwood
9 maj 2019 · 34 Inlägg

THE EASTER RUN
or
ONE YEAR PLUS, ANNIVERSARY TRIP

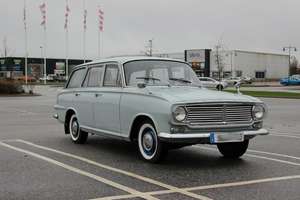
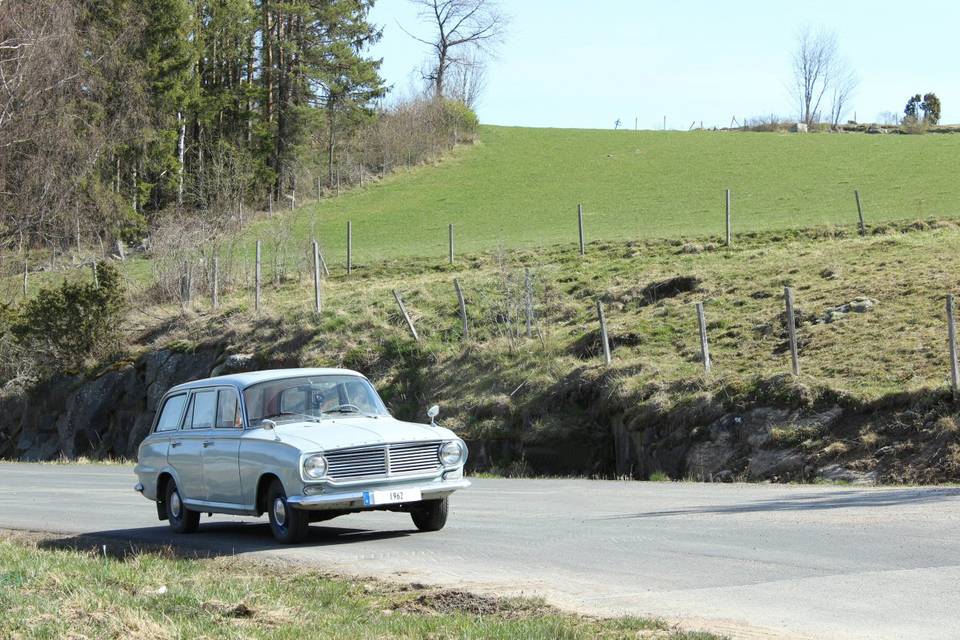
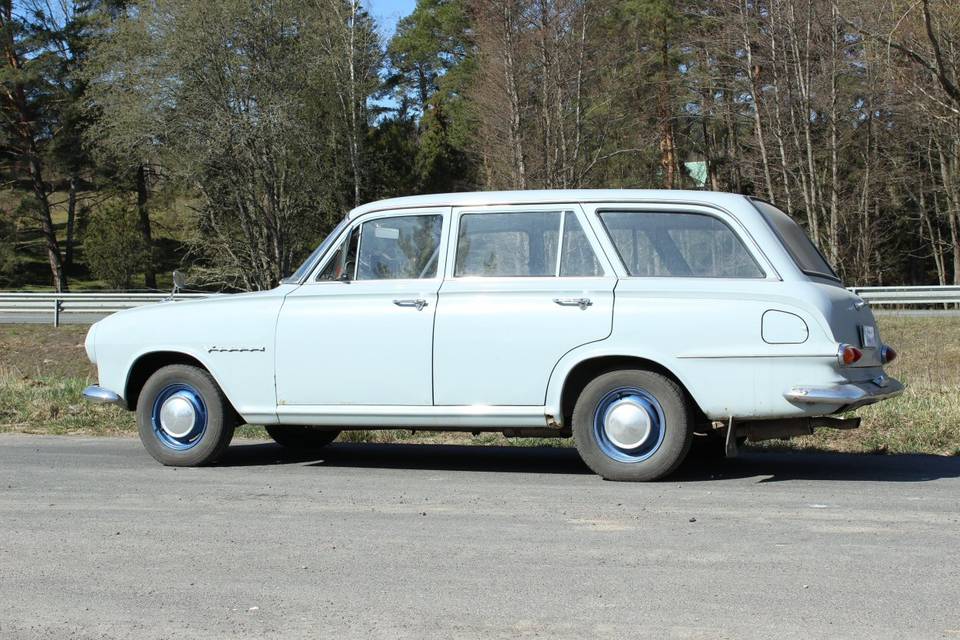
Early afternoon on the Easter Saturday me and the car rolled out from the parking lot at home. I drove towards Jönköping on the old route 1, in Swedish called “Riksettan” or simply R1. With the help from a 1947 map, in combination with modern and online maps, I had traced the remainders of the old road on to-days road and put it into the navigation app on my phone.

The R1 was the predecessor to to-days E4, and for the most parts the routing is still intact, “slaloming” around the modern highway. When it comes to the towns and cities, thou, that is when it gets very tricky to find the old routing. The old road usually did go through right in the middle of the town centre. Today, the road planners do everything they can to minimise traffic through the towns, and also a lot have usually happened with the town “landscape” during the last 60-70 years. Nevertheless, I tried to stay as close to my interpretation of the original routing as possible, even if I couldn't drive on the exact same streets as the original.

Between Södertälje and Vagnhärad the road surface is good, but the stretch south of Vagnhärad and the whole way to Nyköping is full of cracks, bulges and ruts, due to lack of maintenance, I think. Sometimes I was all-over the road trying to avoid the worst damages…

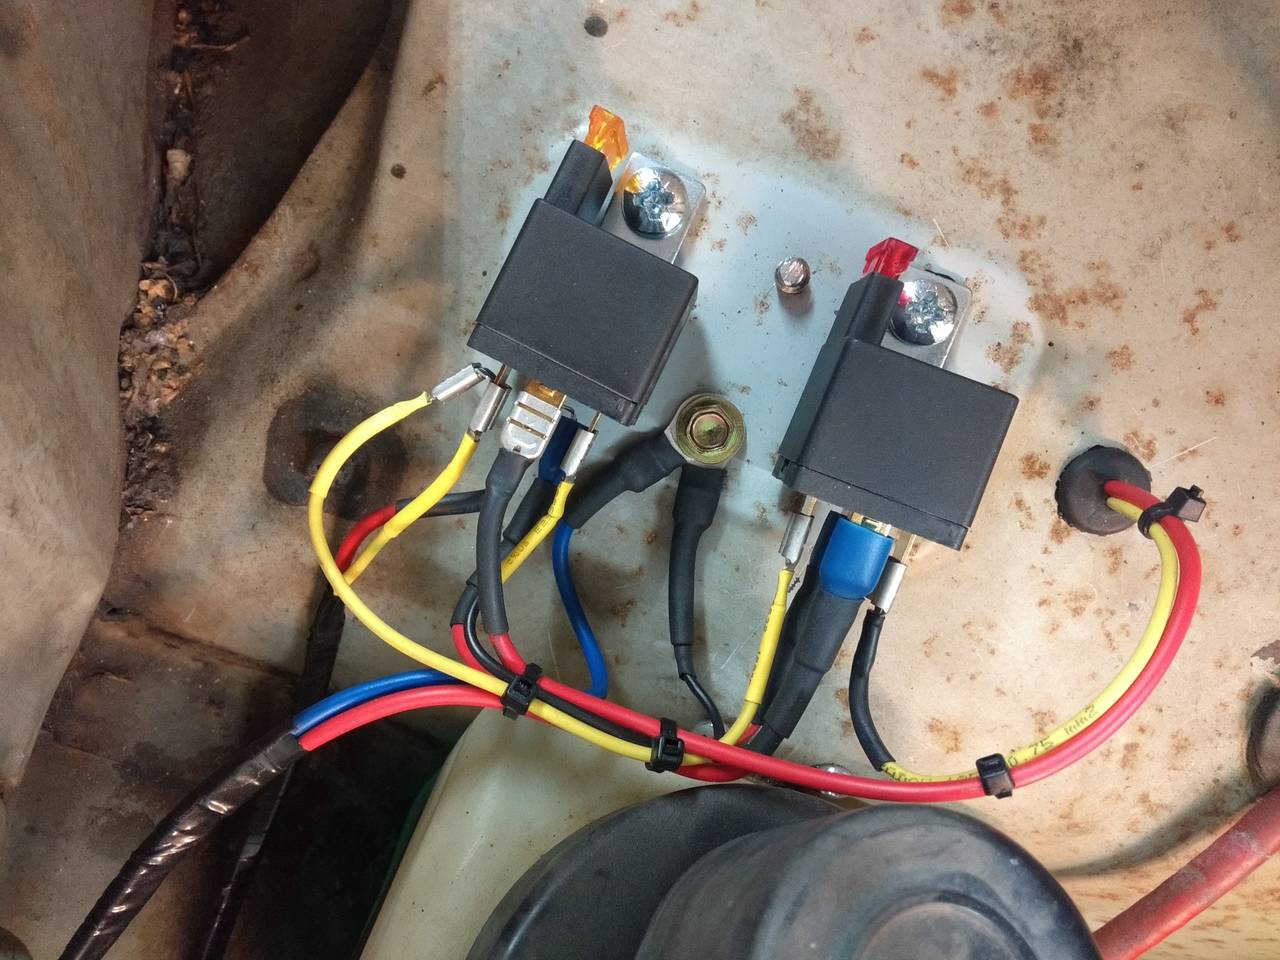
In Jönåker the old road passes a place called “Kalle i Backen” and according to the legend you should honk your horn when passing, so I did. Although, there is some discontinuity in the steering wheel horn switch, so the signal came a bit late.

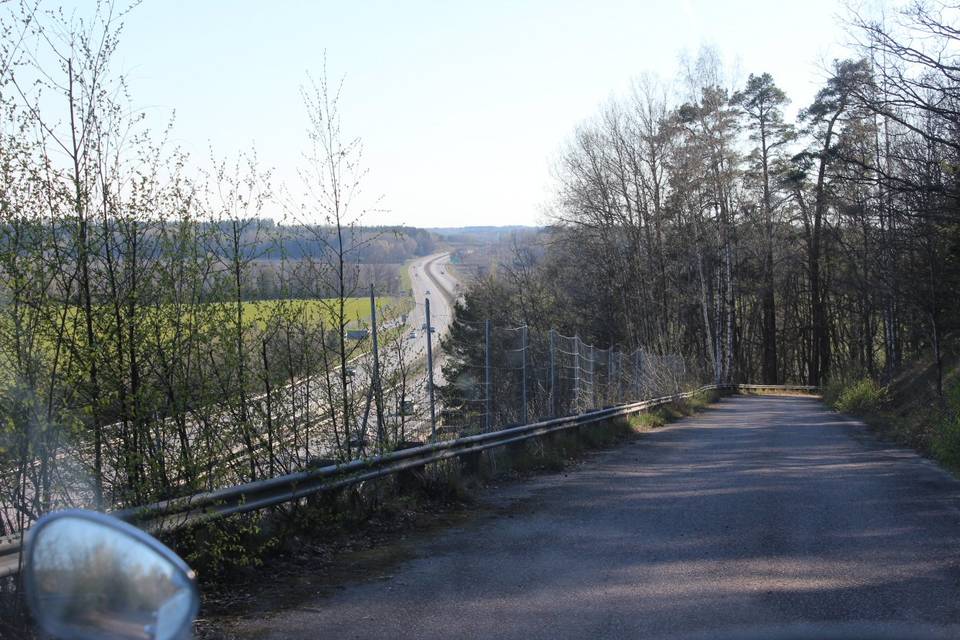
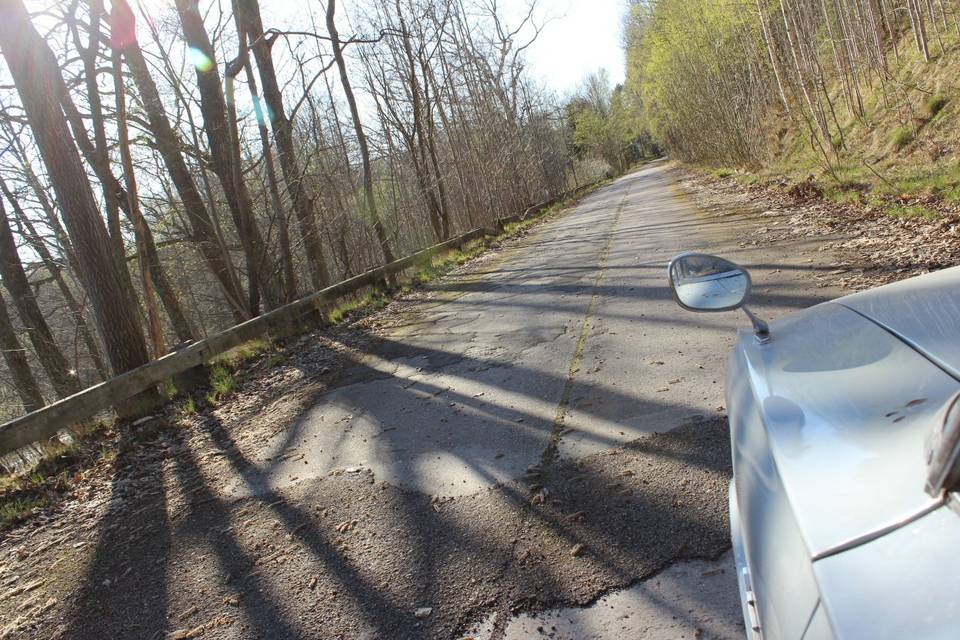
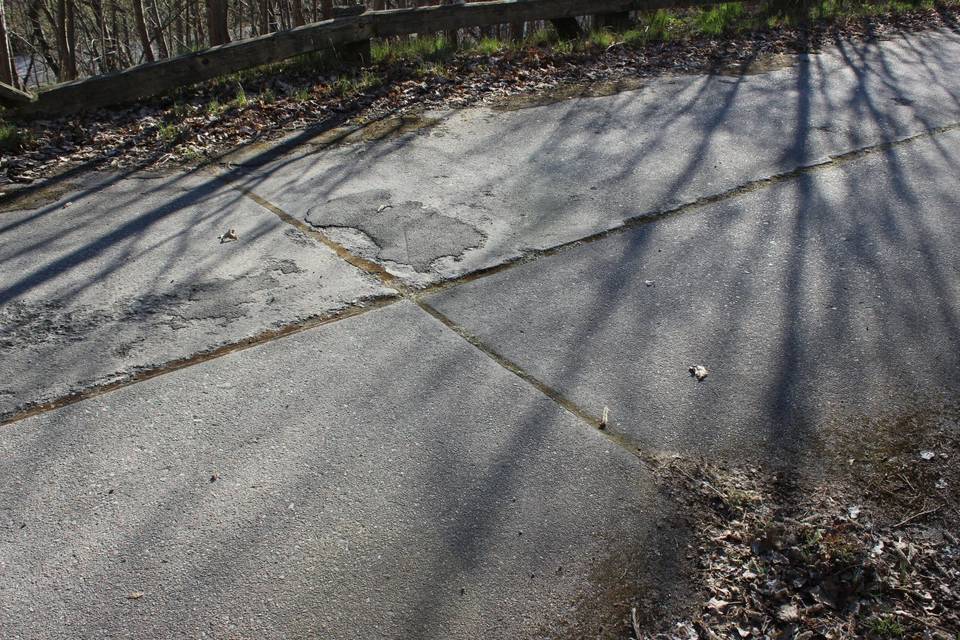
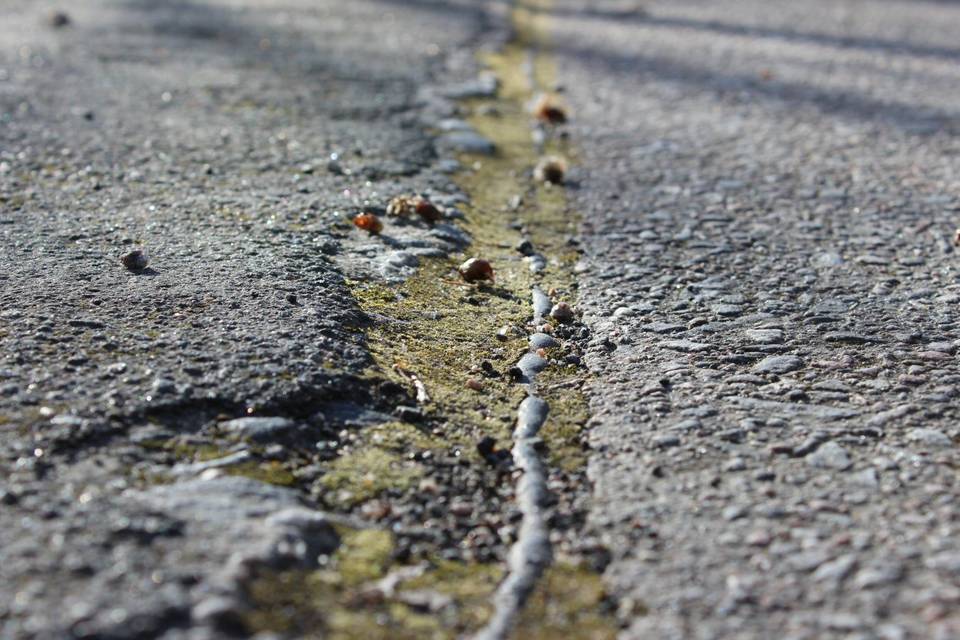
Next stop was Hotel Stenkullen, or actually I stopped to look at the road leading up there, since the first part of it probably was a part of the R1 before the highway was built. I remember reading about it in the Swedish magazine Nostalgia many years back. They were also tracing the old road, but in its entirety and from south (Helsingborg) to north (Stockholm); and they found this remainder more or less by chance. It is easily identified as have been part of a major road by because the road surface consists of concrete blocks and the joints between the blocks are very visible.

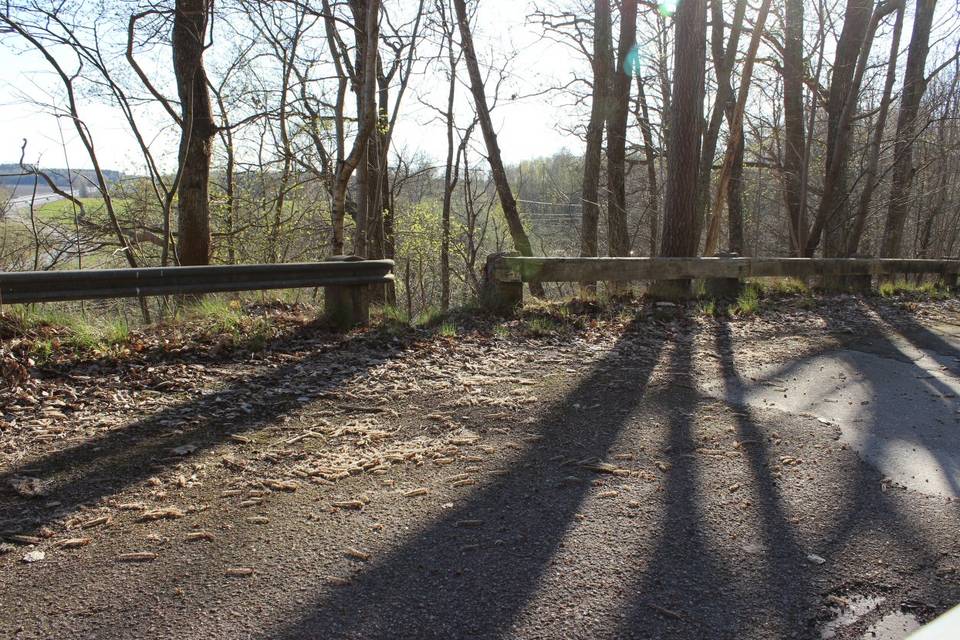
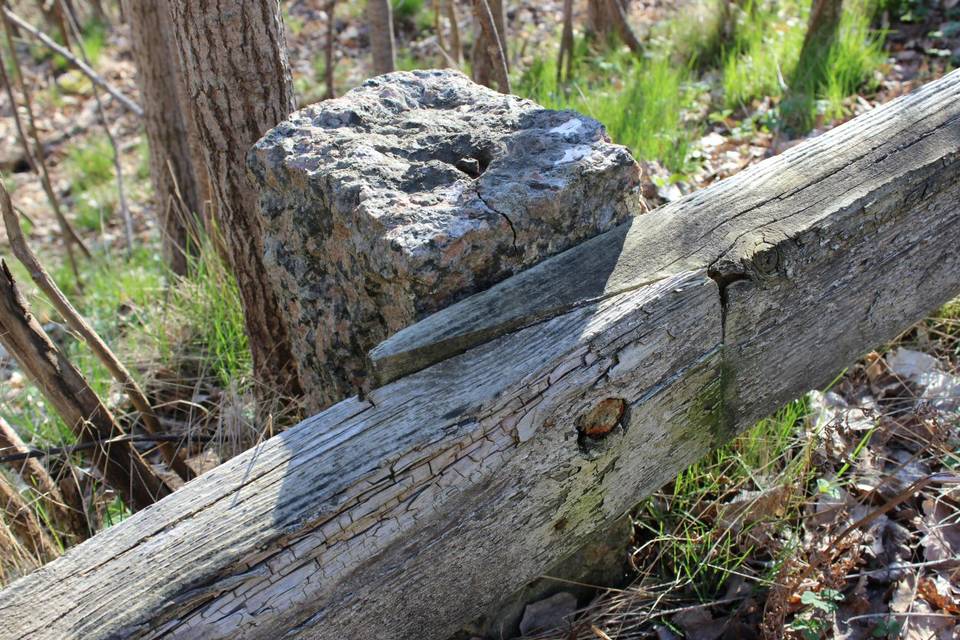
As the road turns towards the hotel the surface change from concrete to asphalt and the guard rail change from the old wooden type with stone pillars, to a modern steel one. If you look closely straight ahead into the woods instead, you can see the trees and plants growing in a distinct pattern resembling that of the concrete block joints.

The journey then continued to, and through, Norrköping, Linköping, Mantorp and Mjölby. Before I left Norrköping I took a wrong turn and ended up in a housing neighbourhood, but to my surprise I also found what I believe was a stretch of the old road, the concrete block joints were felt in the car and clearly visible through the top asphalt layer.

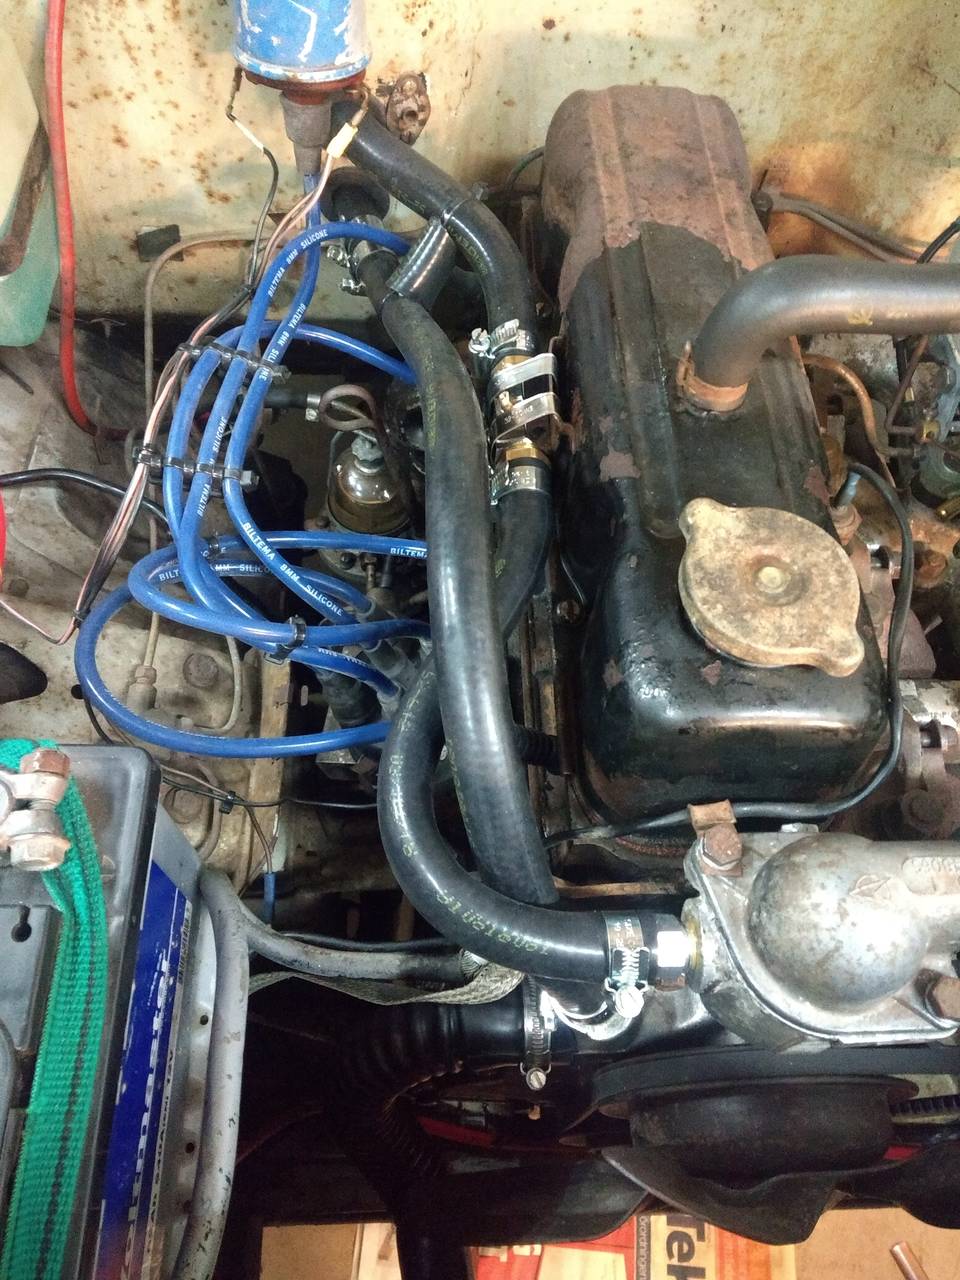
In Mjölby I realised that I was a bit pressed for time if I was going to make it to my hotel before they closed. So, I got the opportunity to test the Vauxhall in highway speed. Let’s just say that that was not fun after a while so I decreased the speed to a more comfortable level and continued along the highway, being passed even by some lorries (which were not keeping their speed limit).

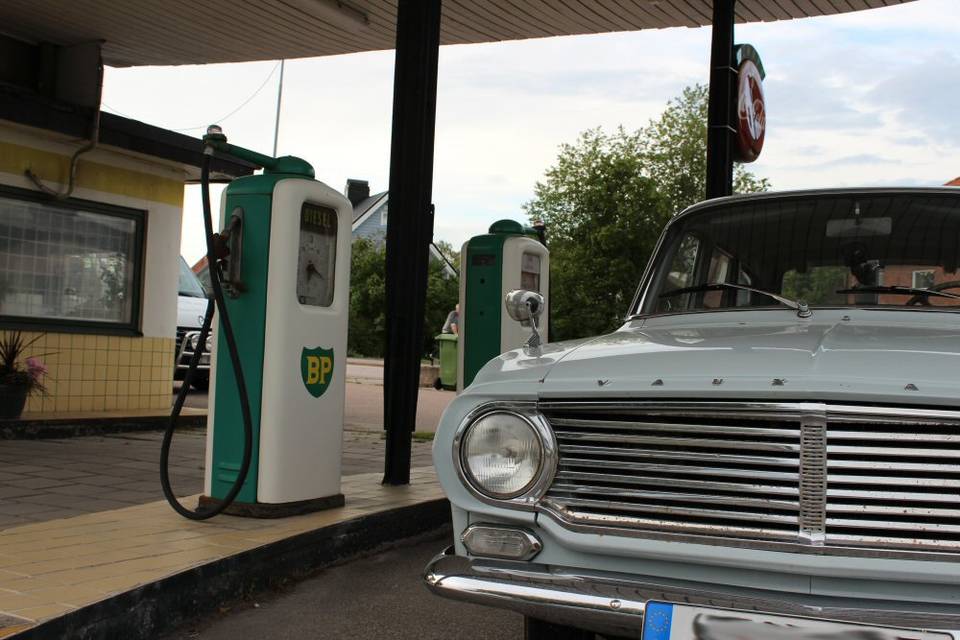
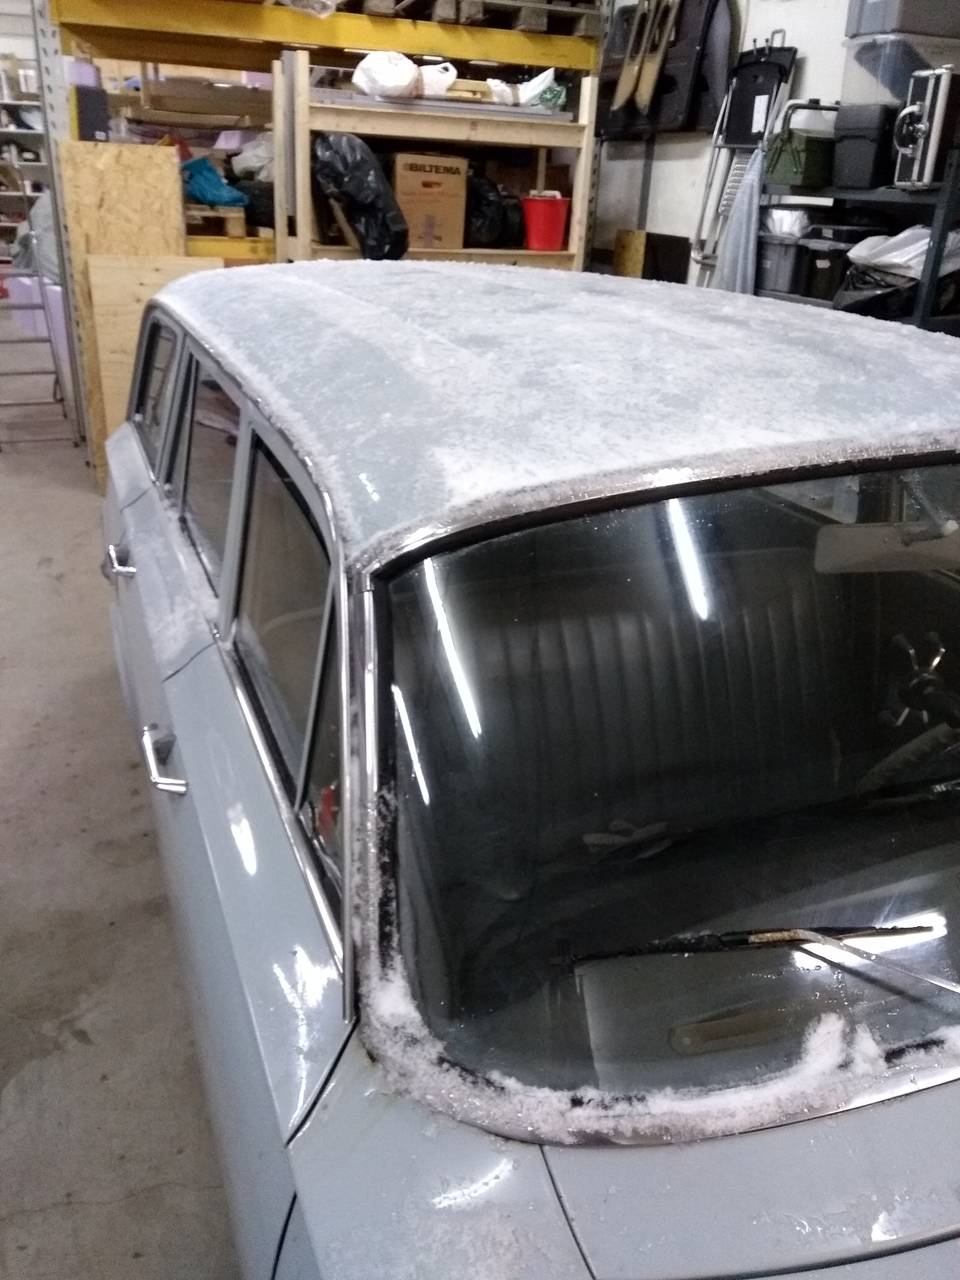
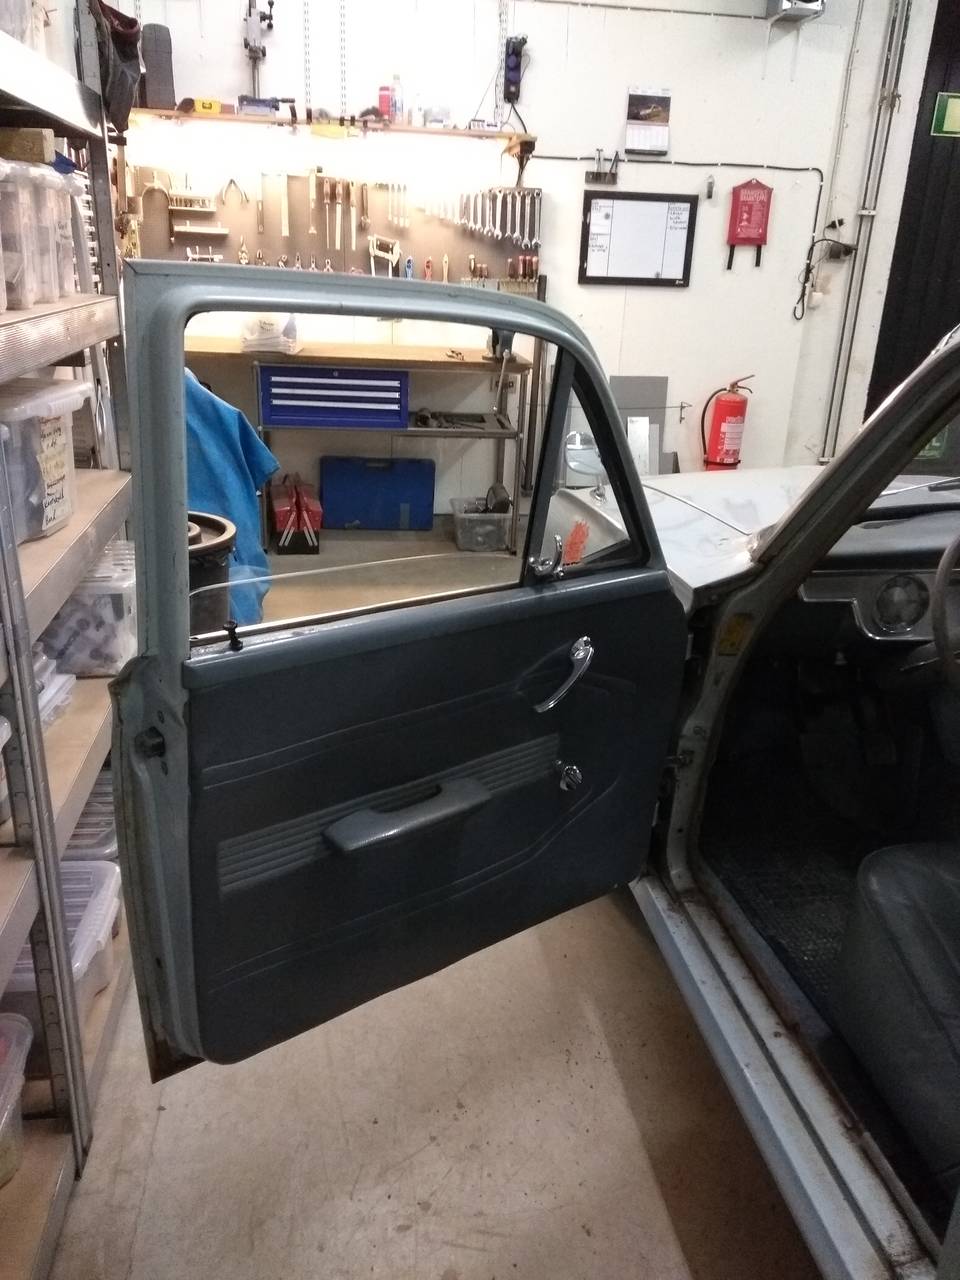
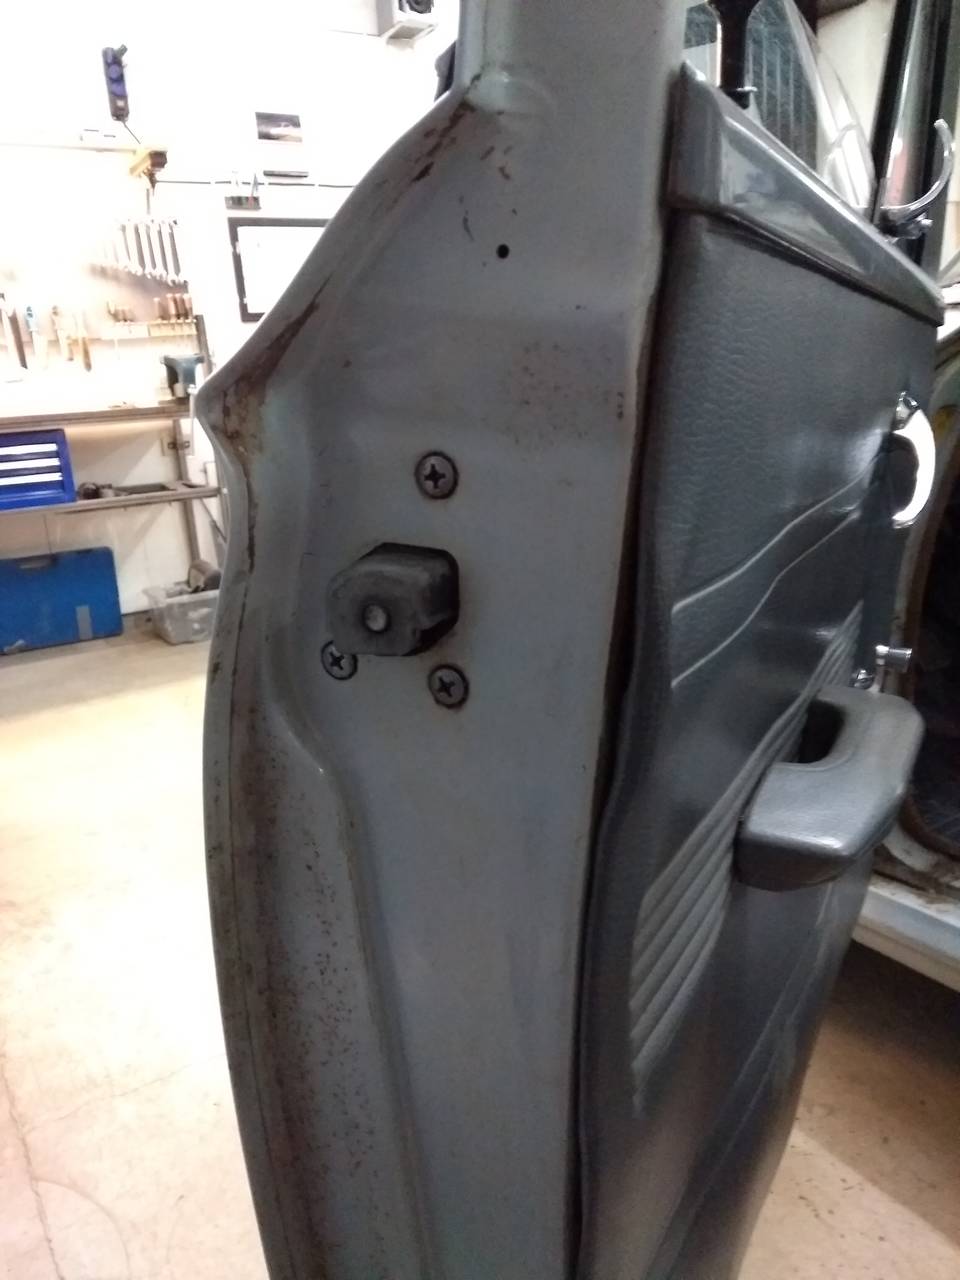
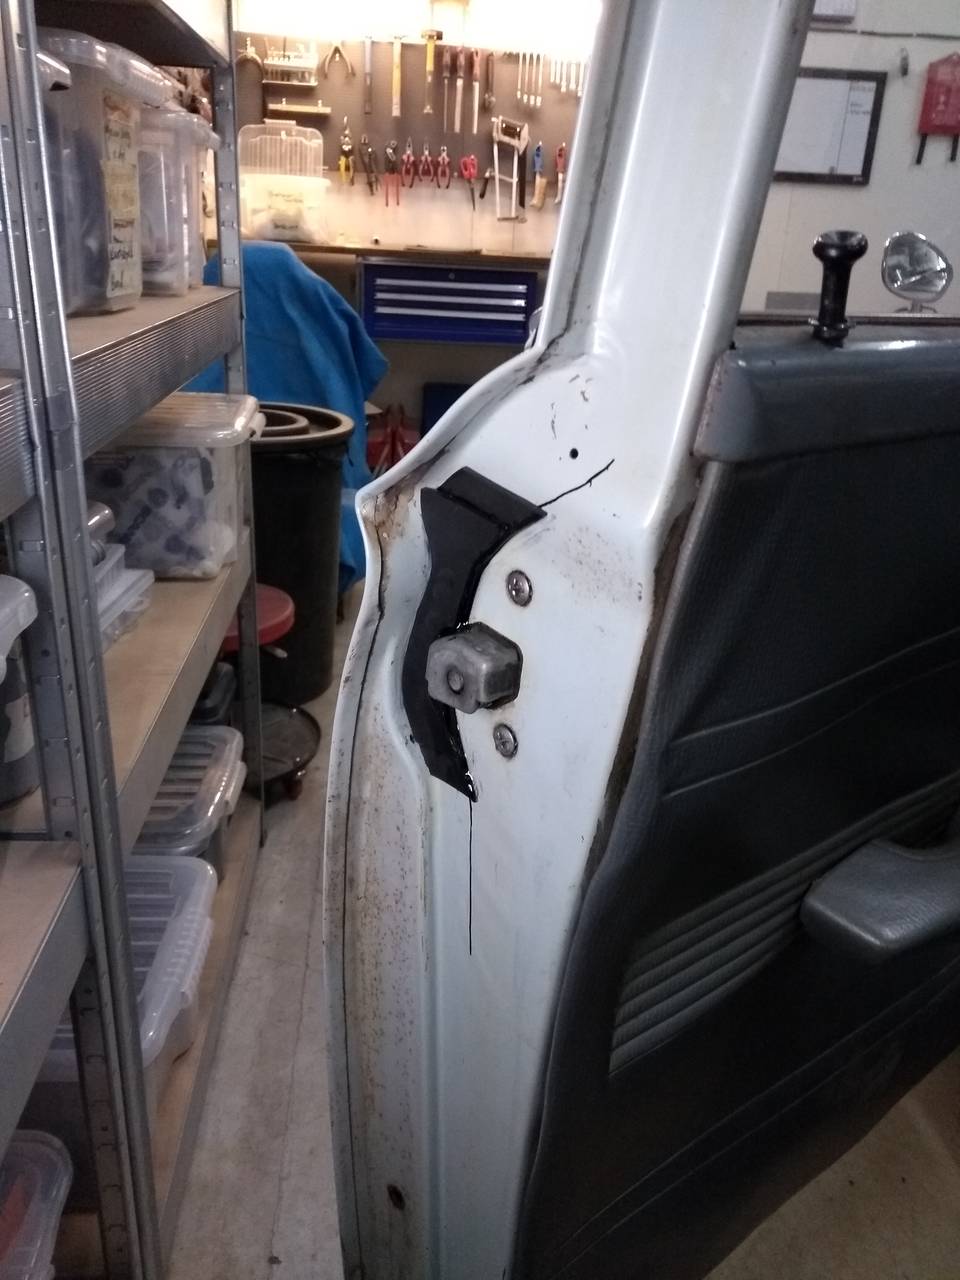
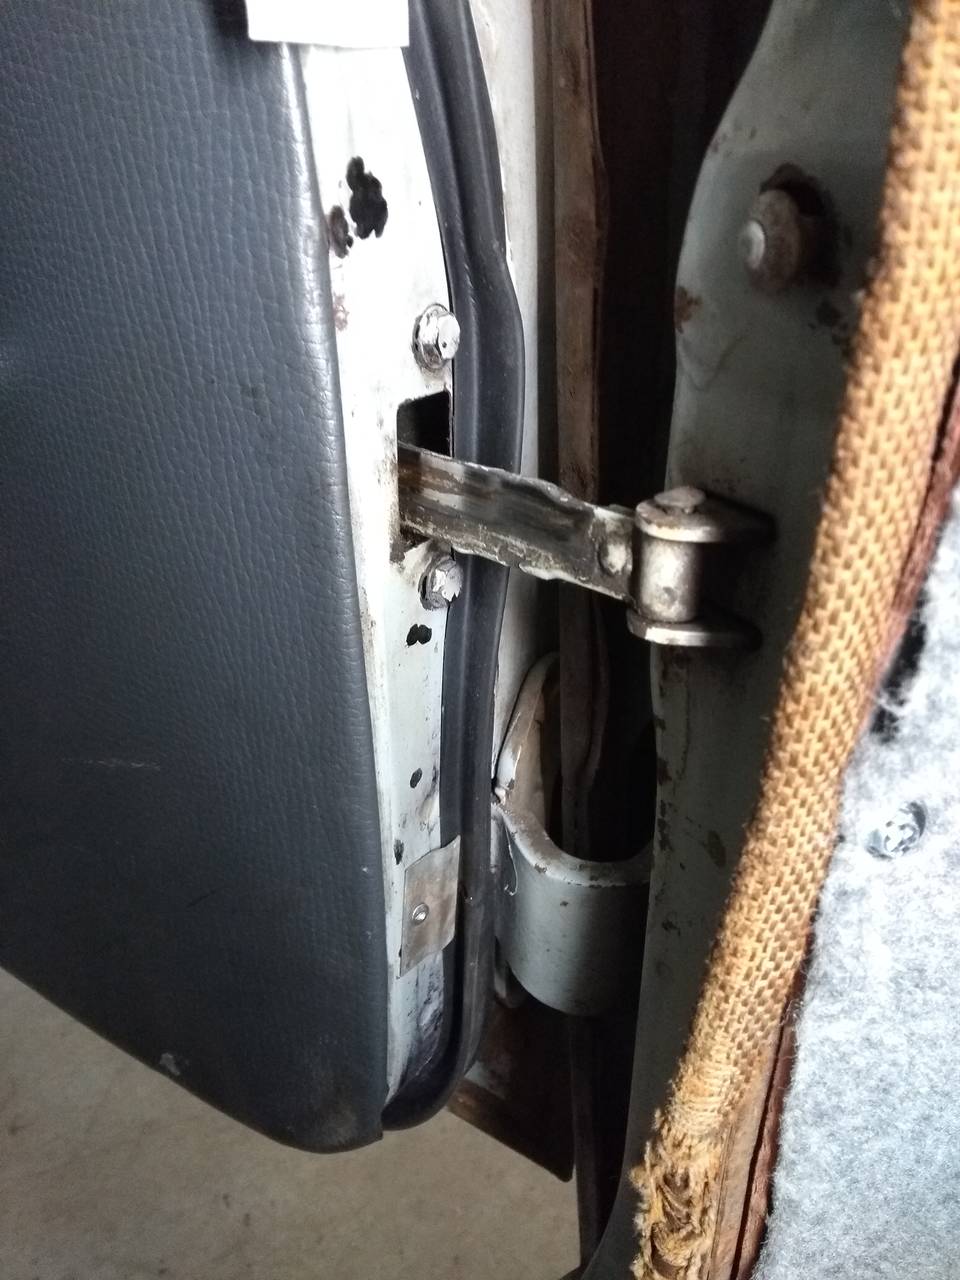
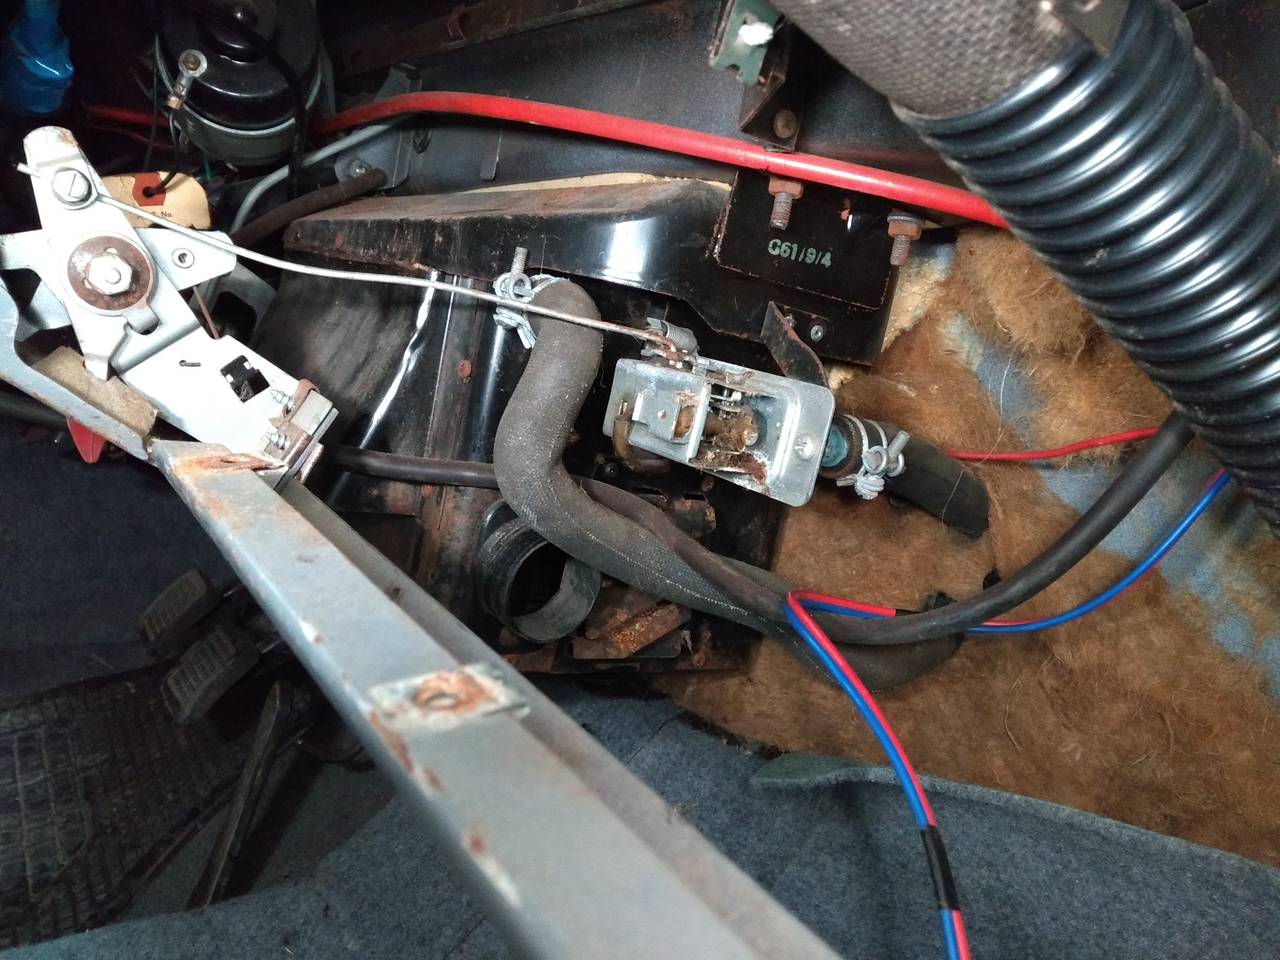
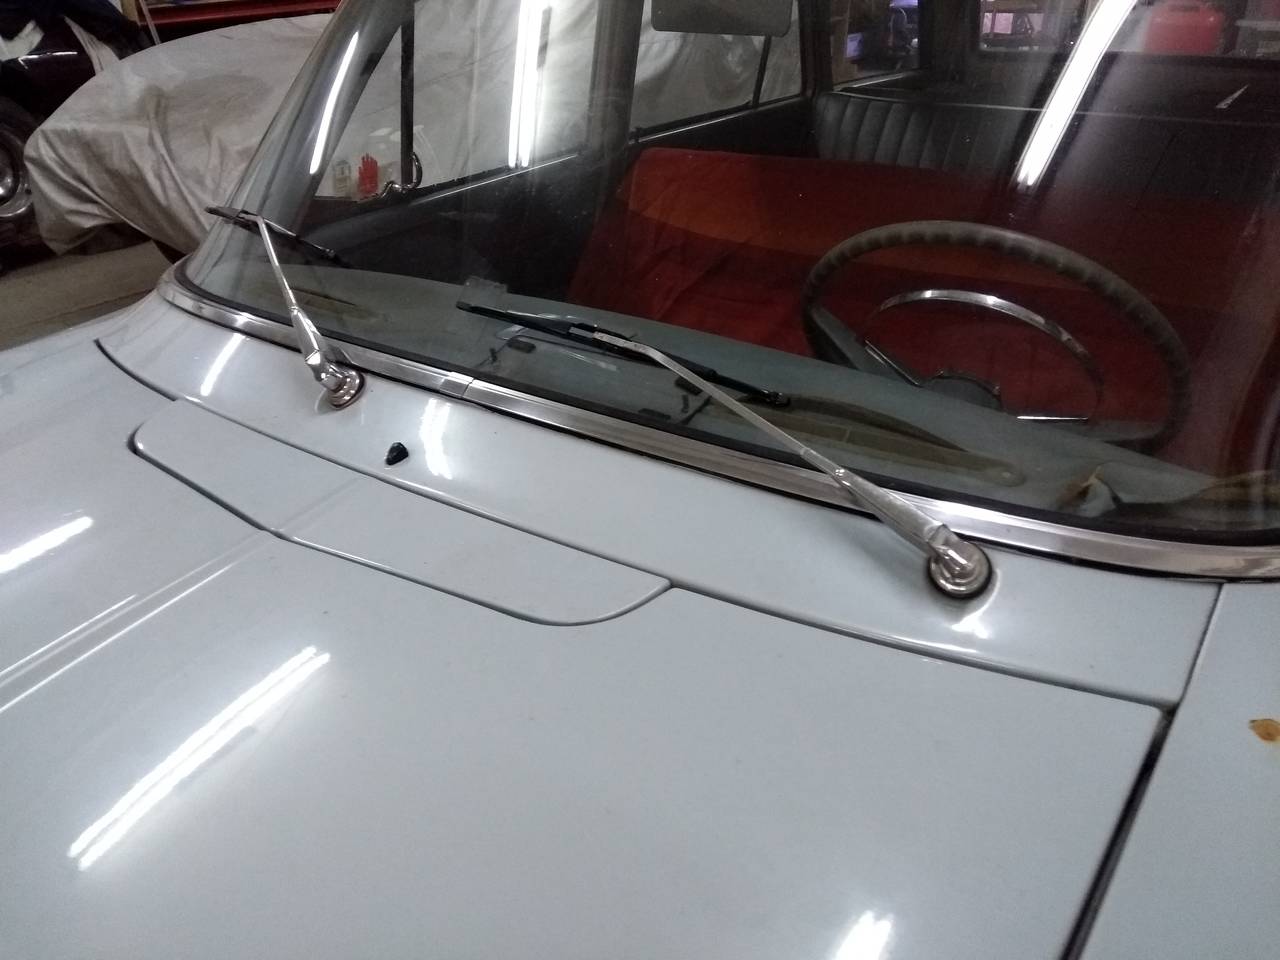
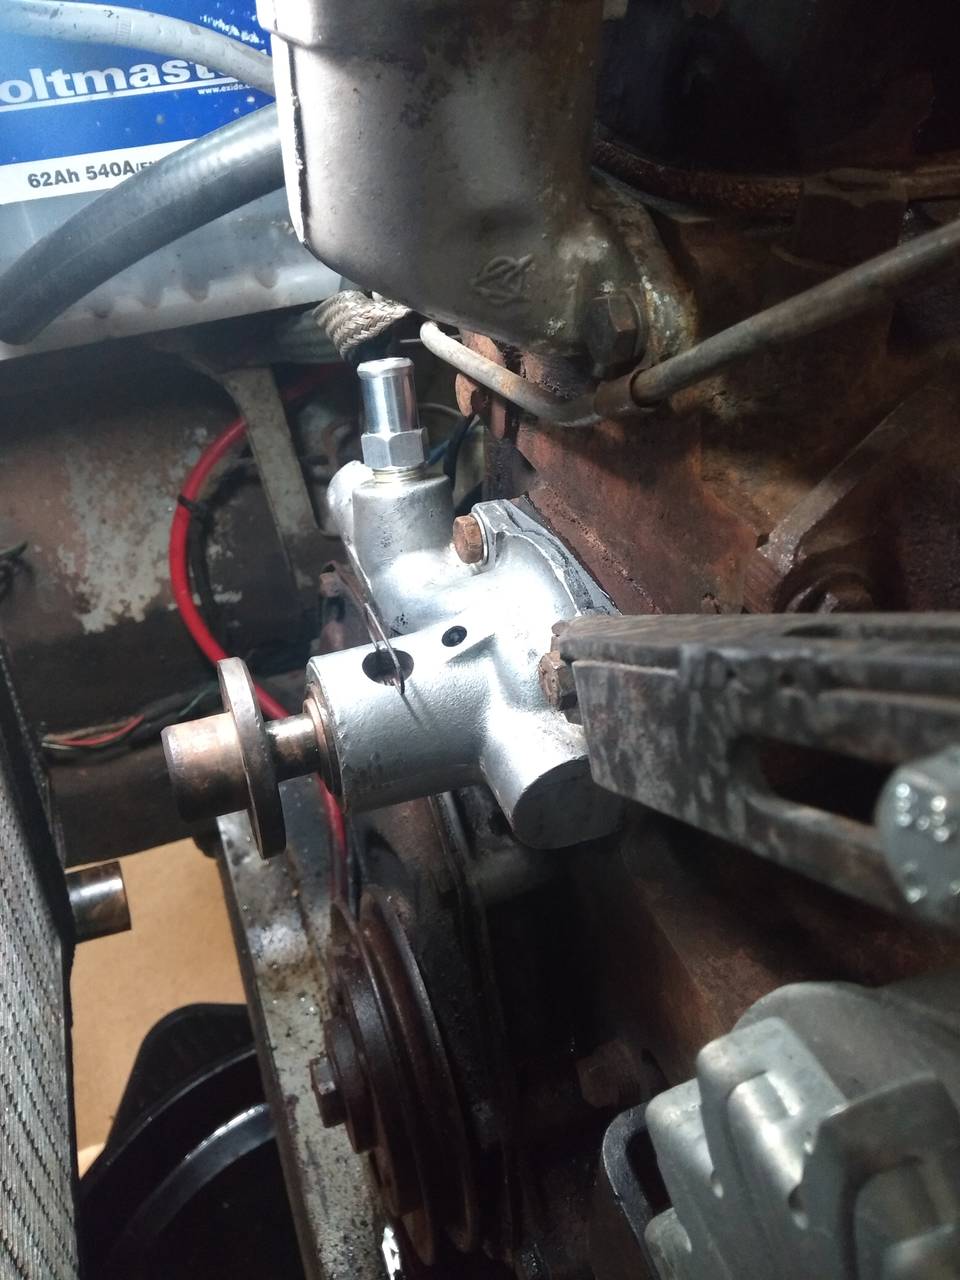
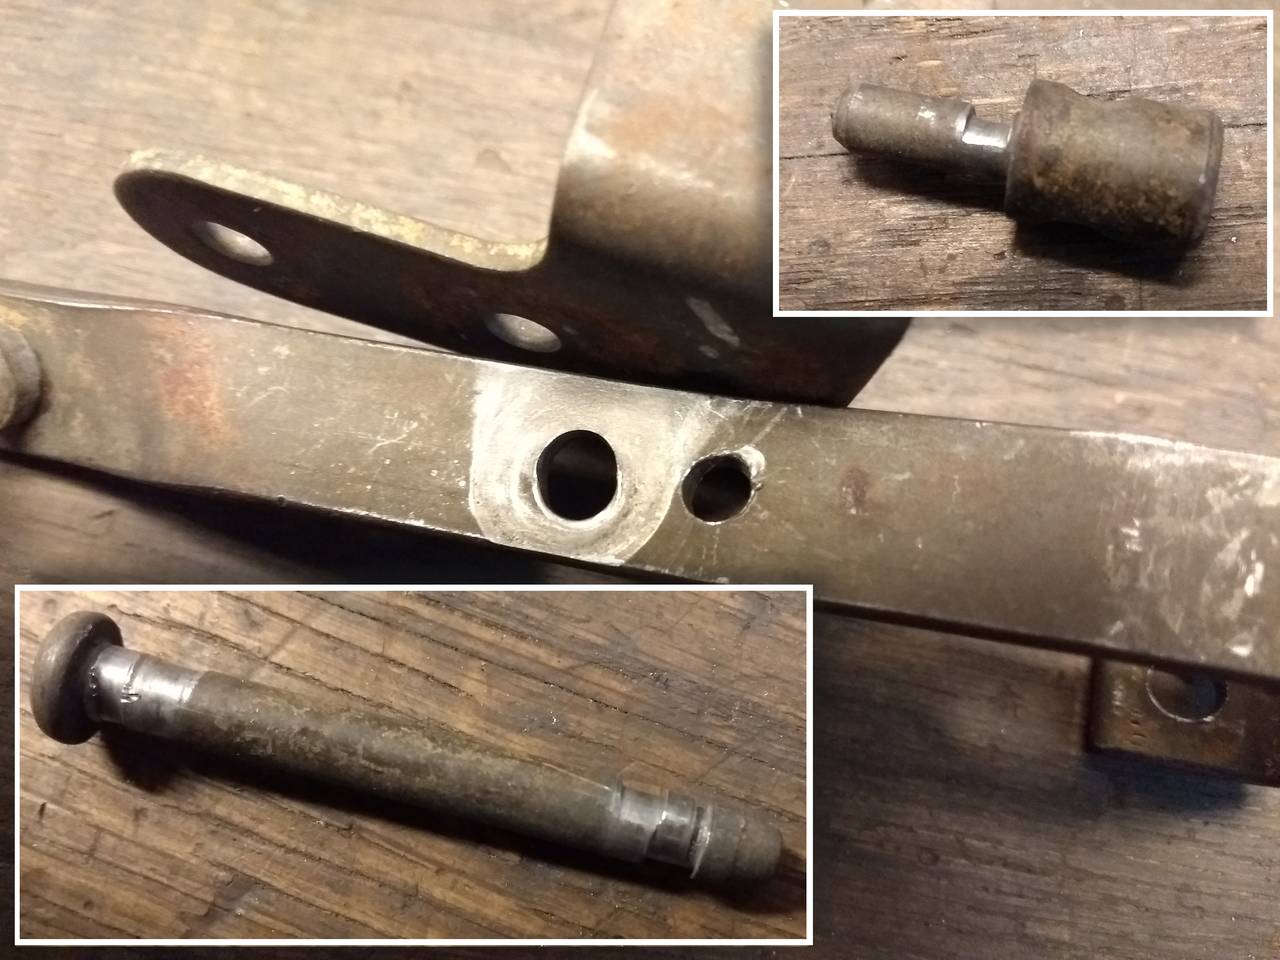
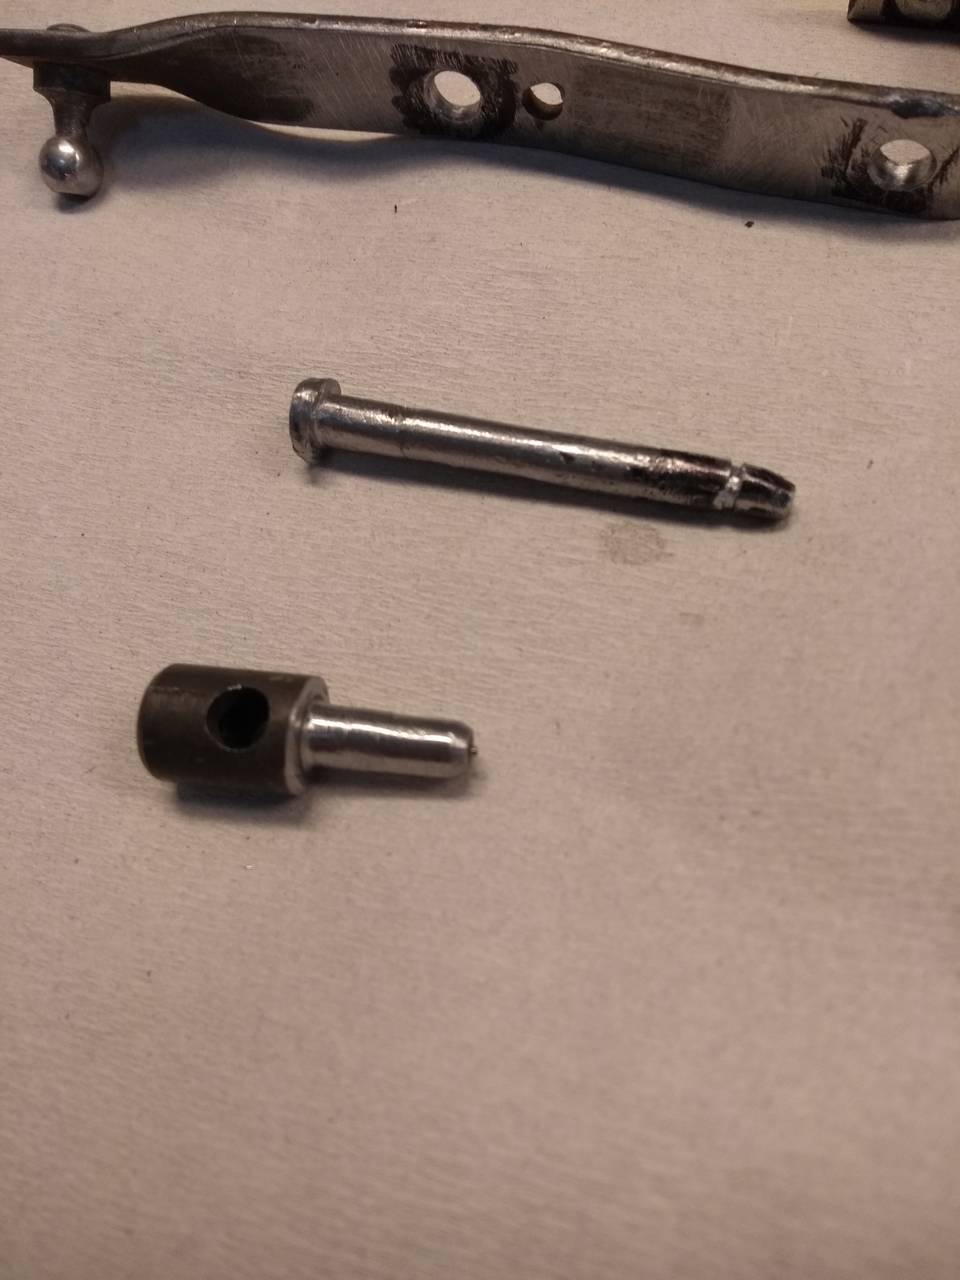
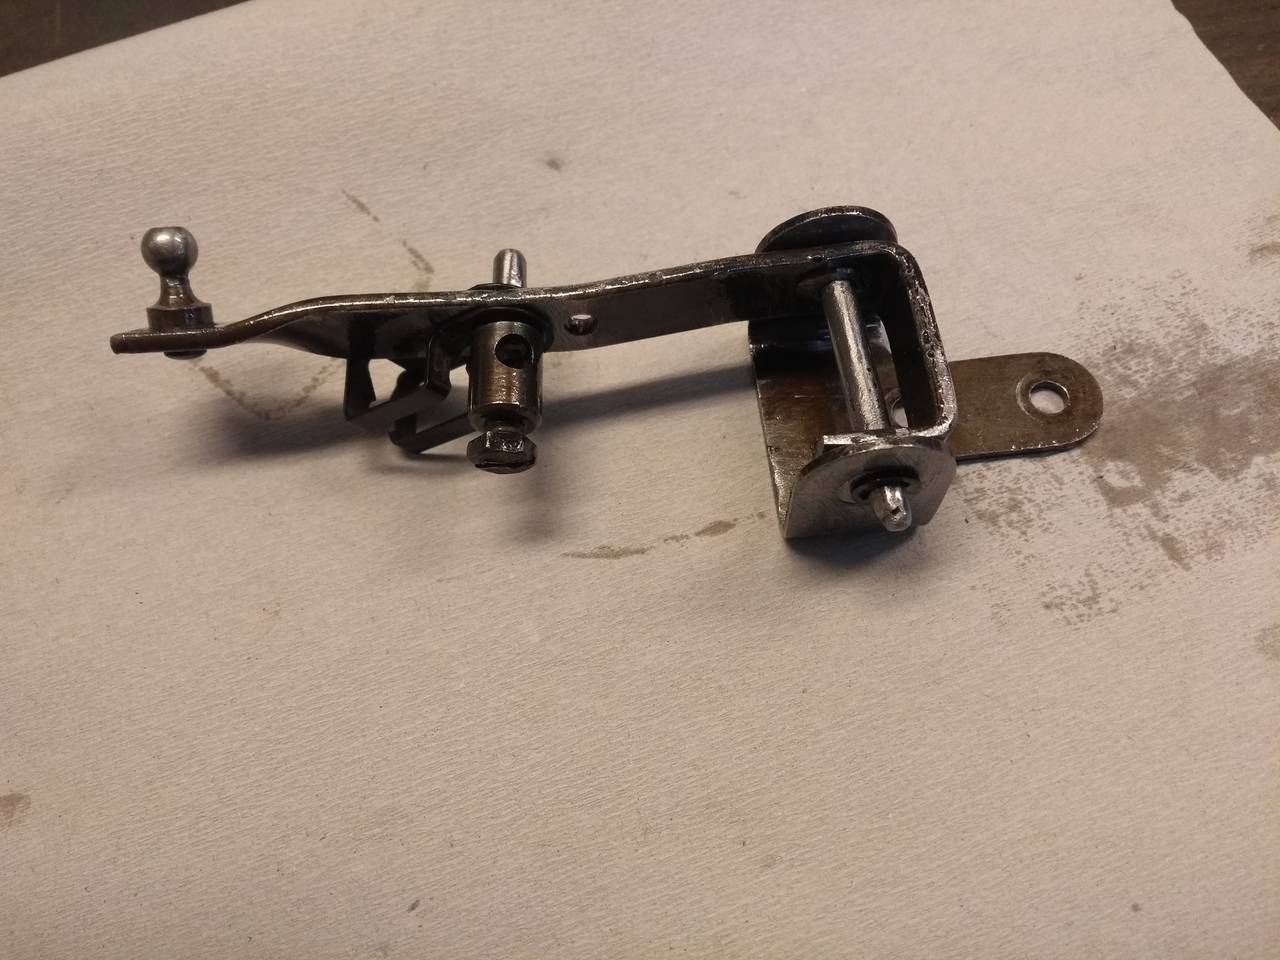
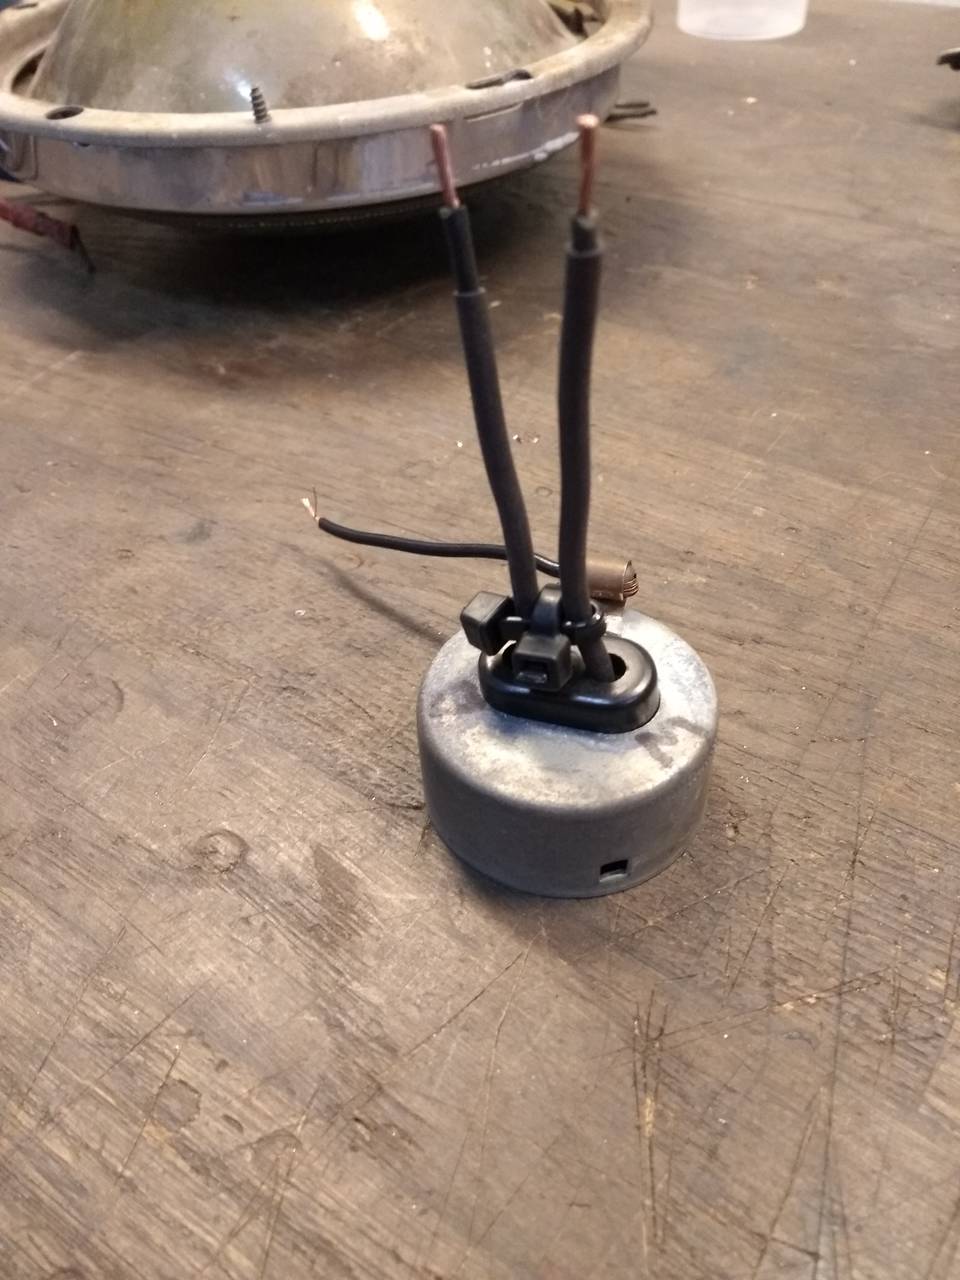
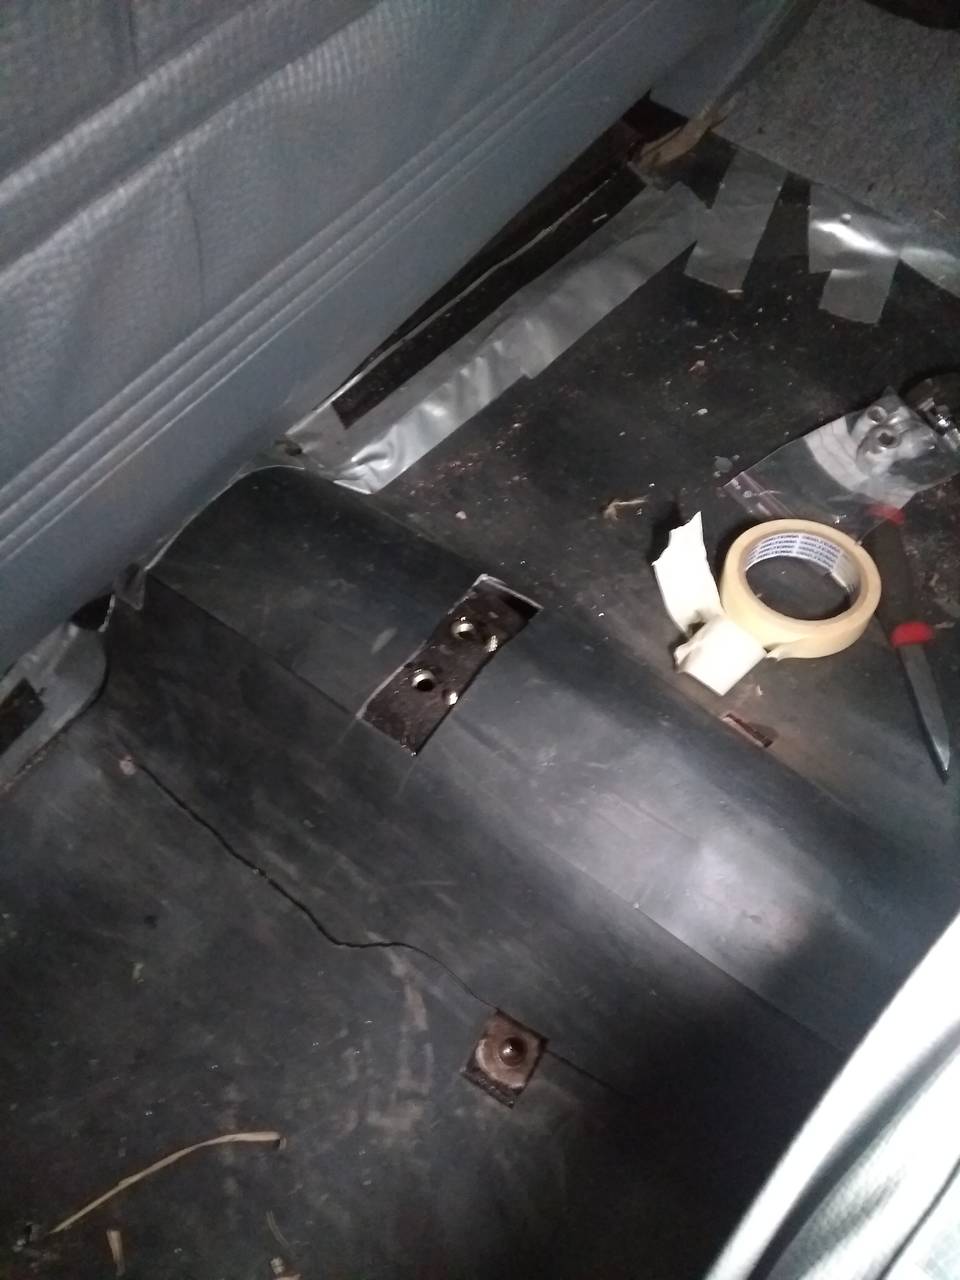
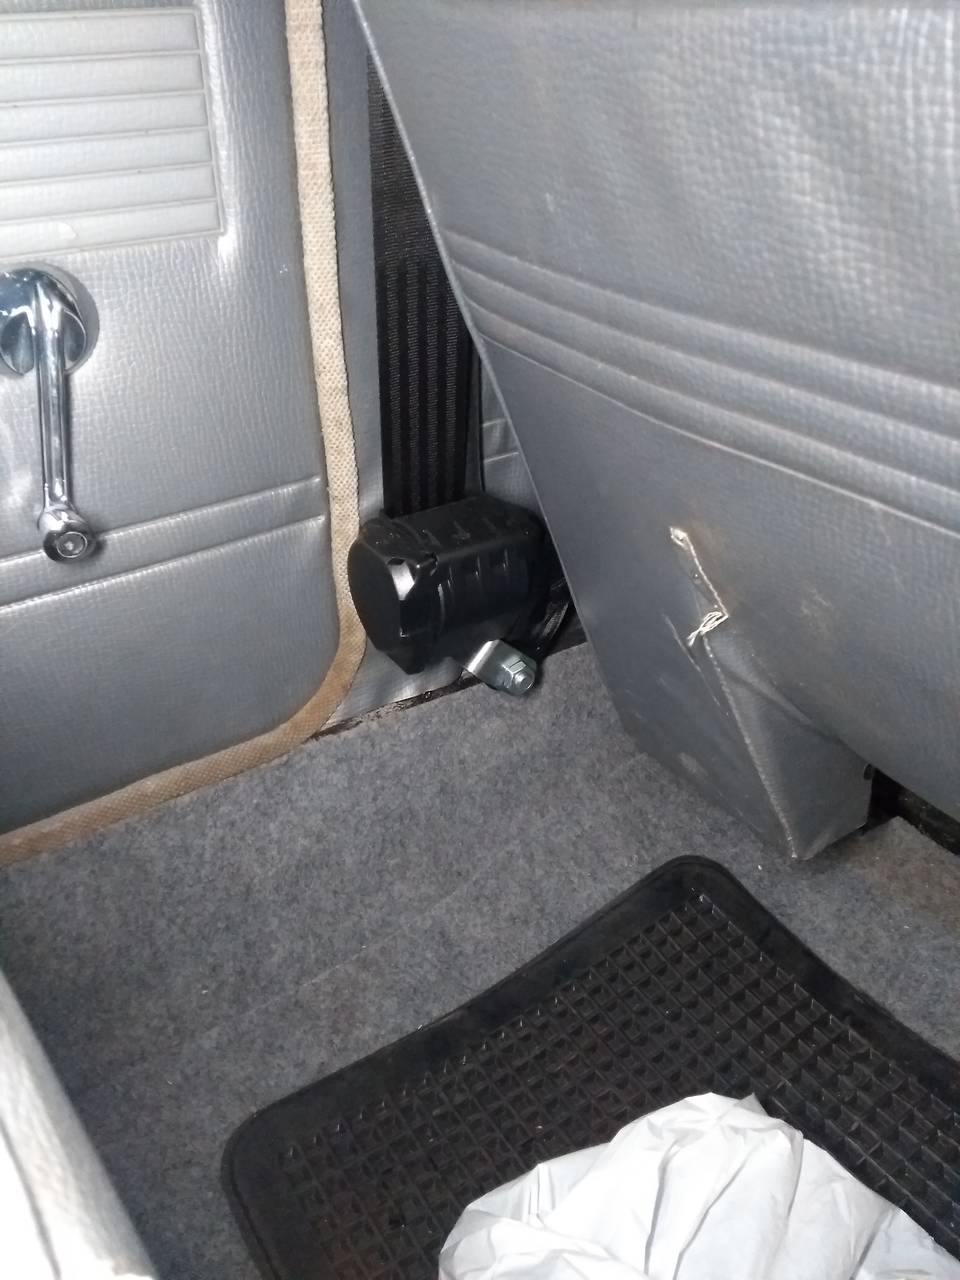
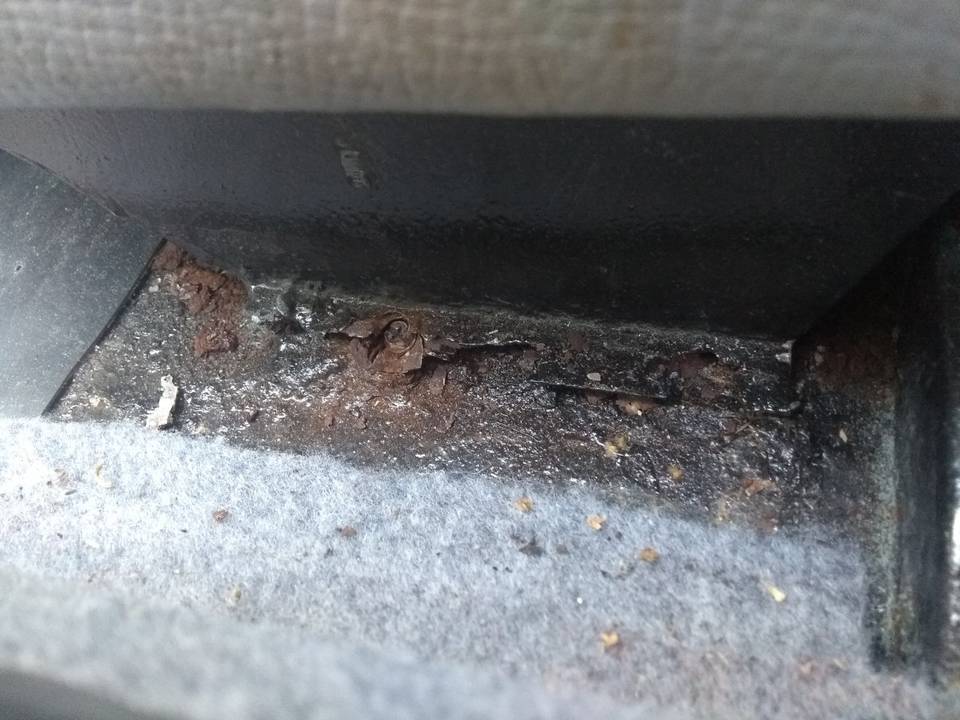
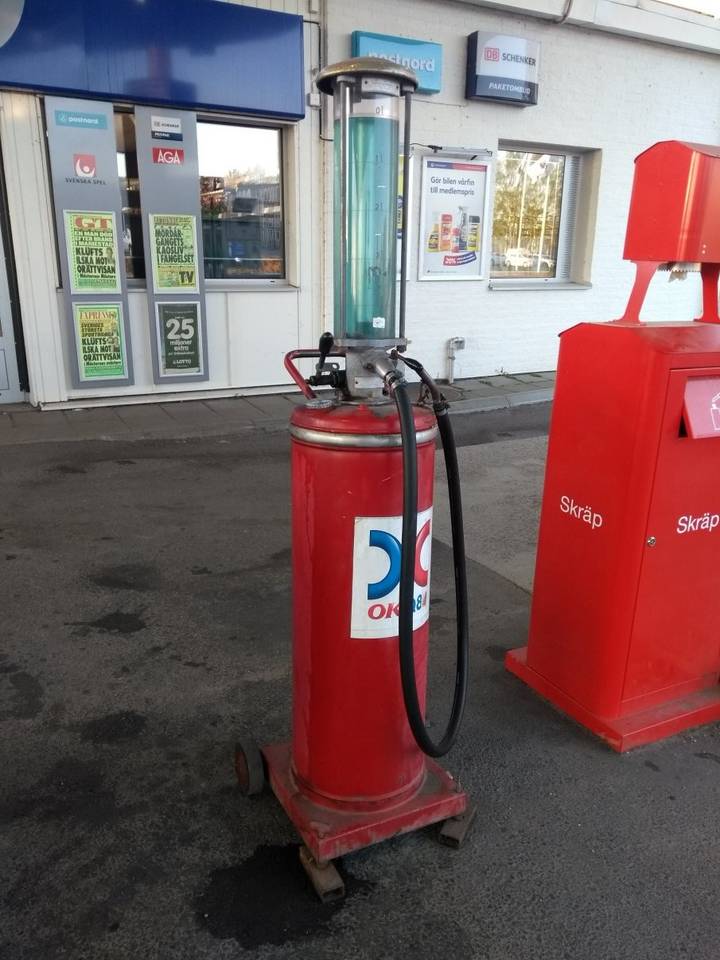
I arrived at the hotel, just north of Gränna, with some minutes to spare. After checking in I decided I needed some snacks and drove to the nearest petrol station. When turning back to the hotel I adjusted my position in the seat and something went “CRACK”. Then the seat was very loose and it felt like the back rest had snapped.

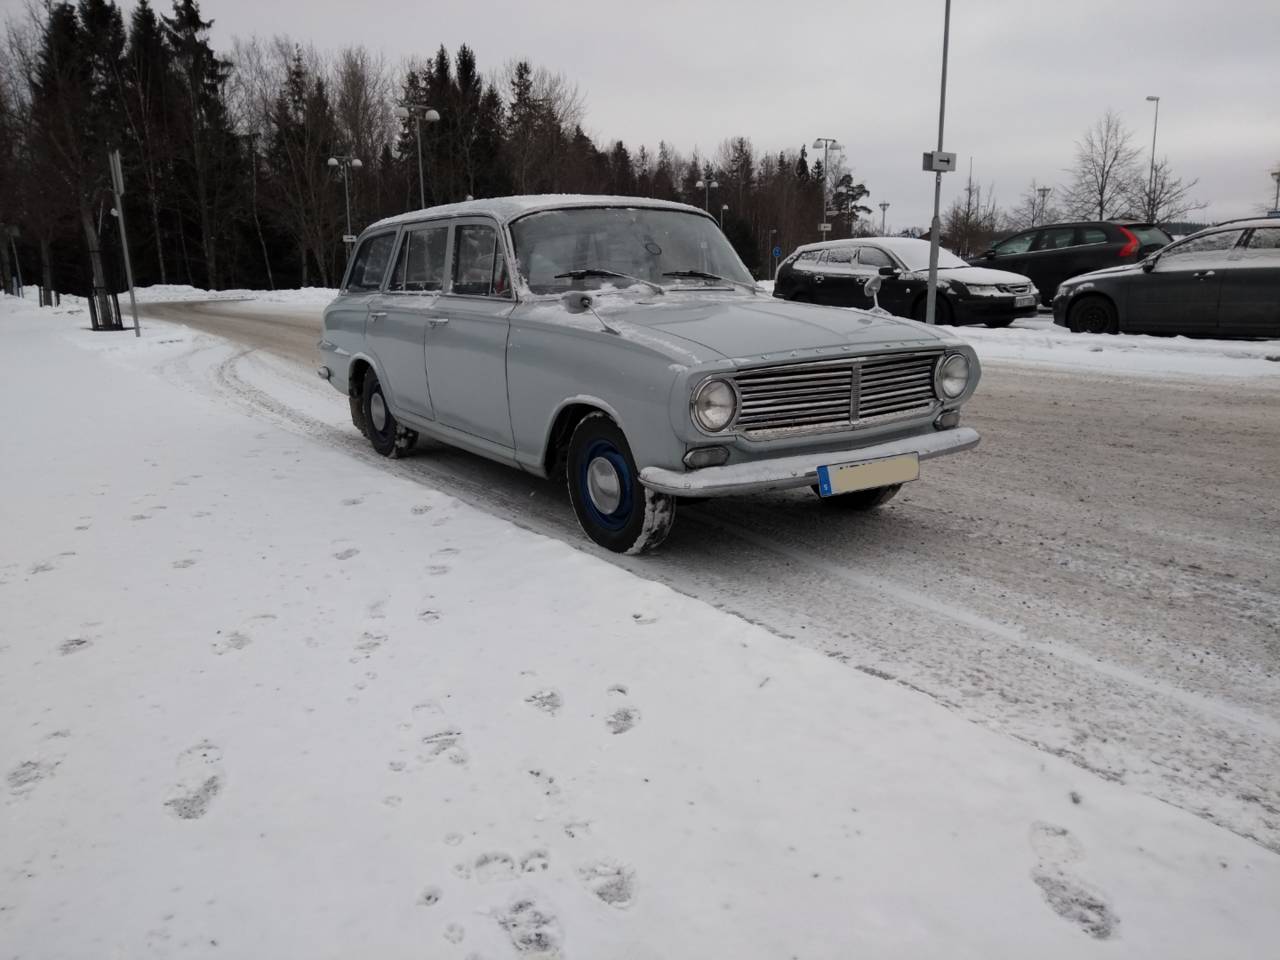
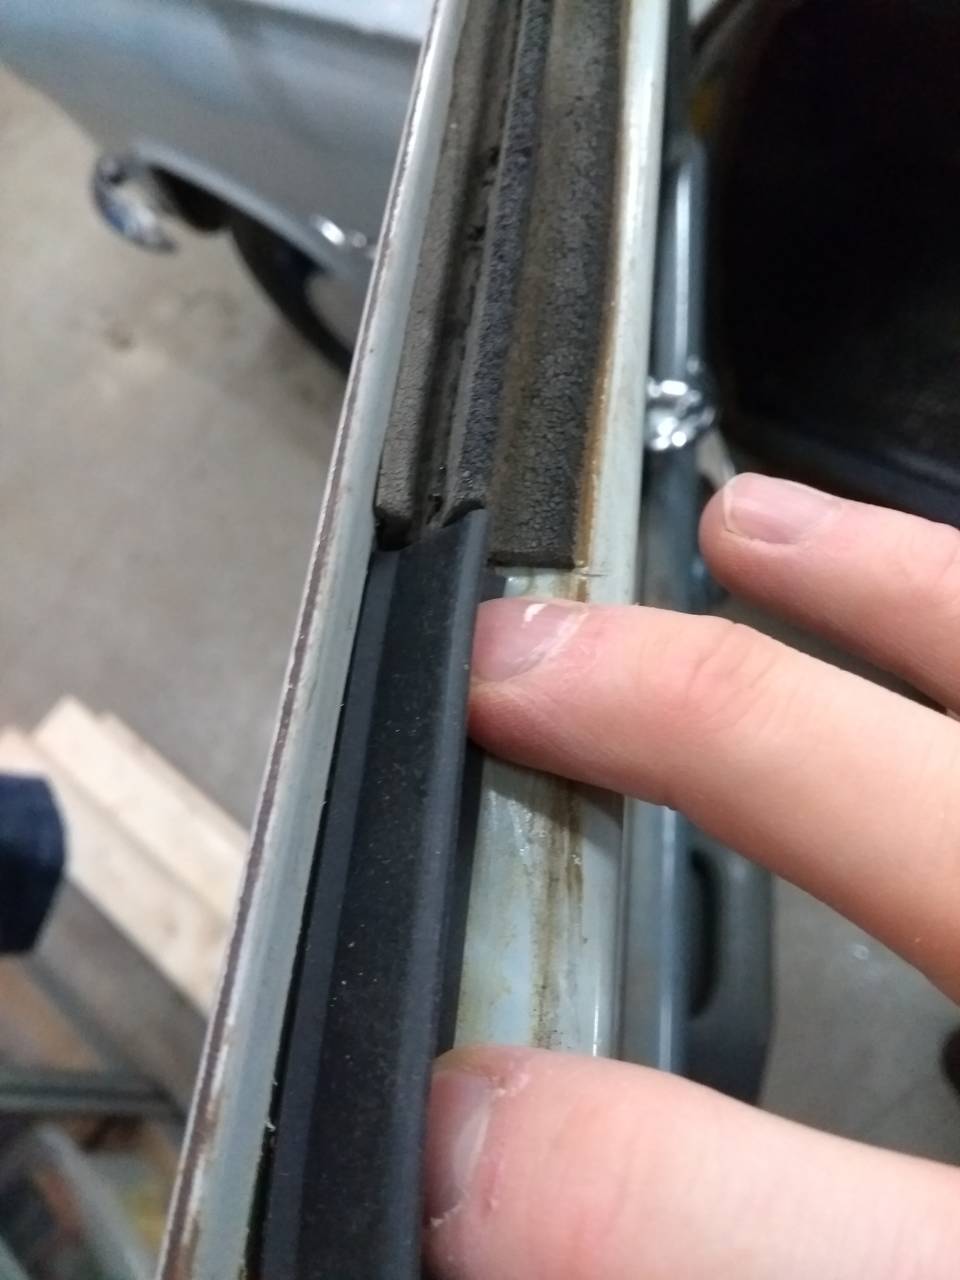
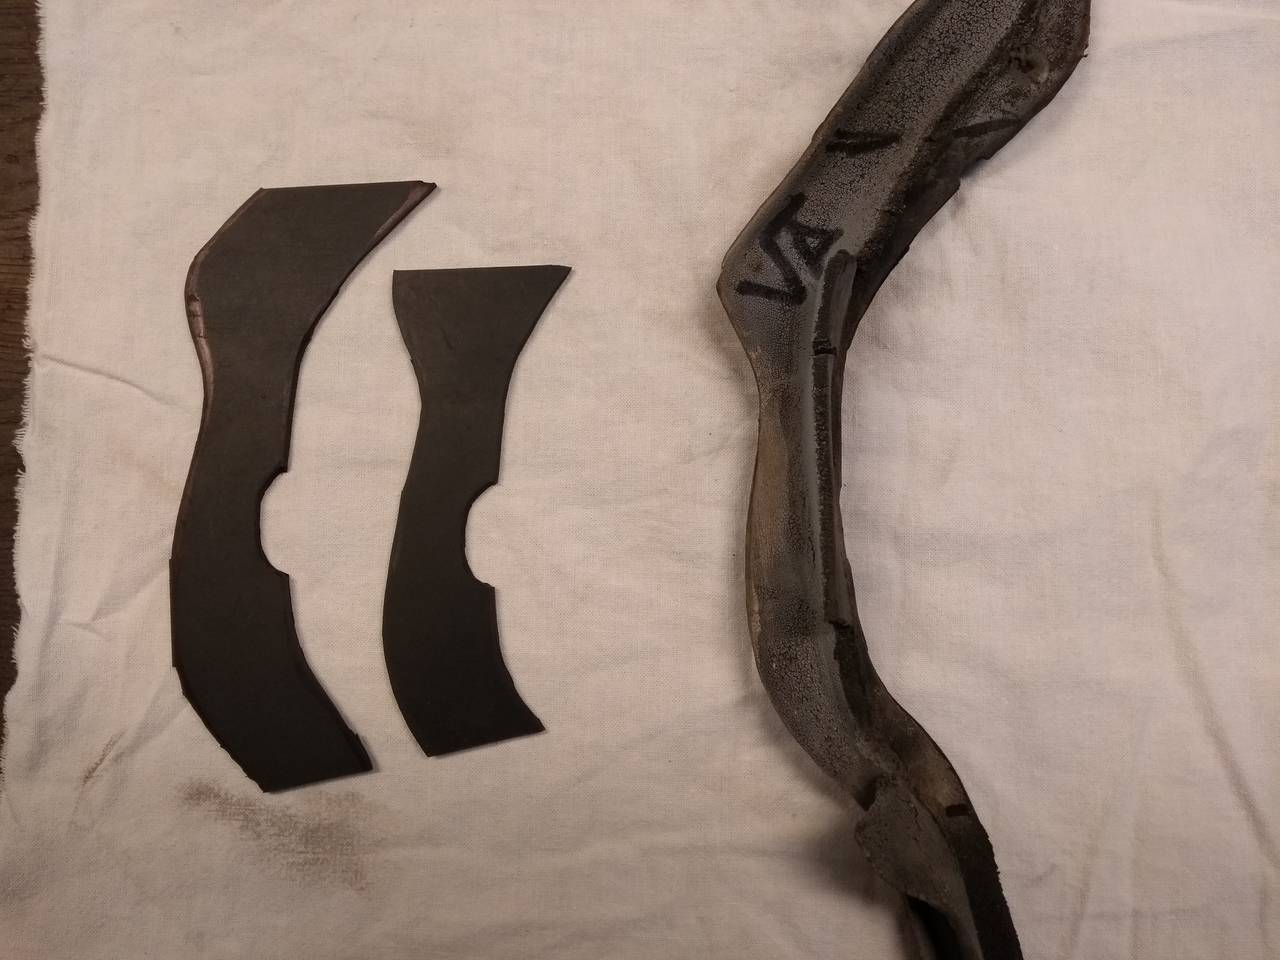
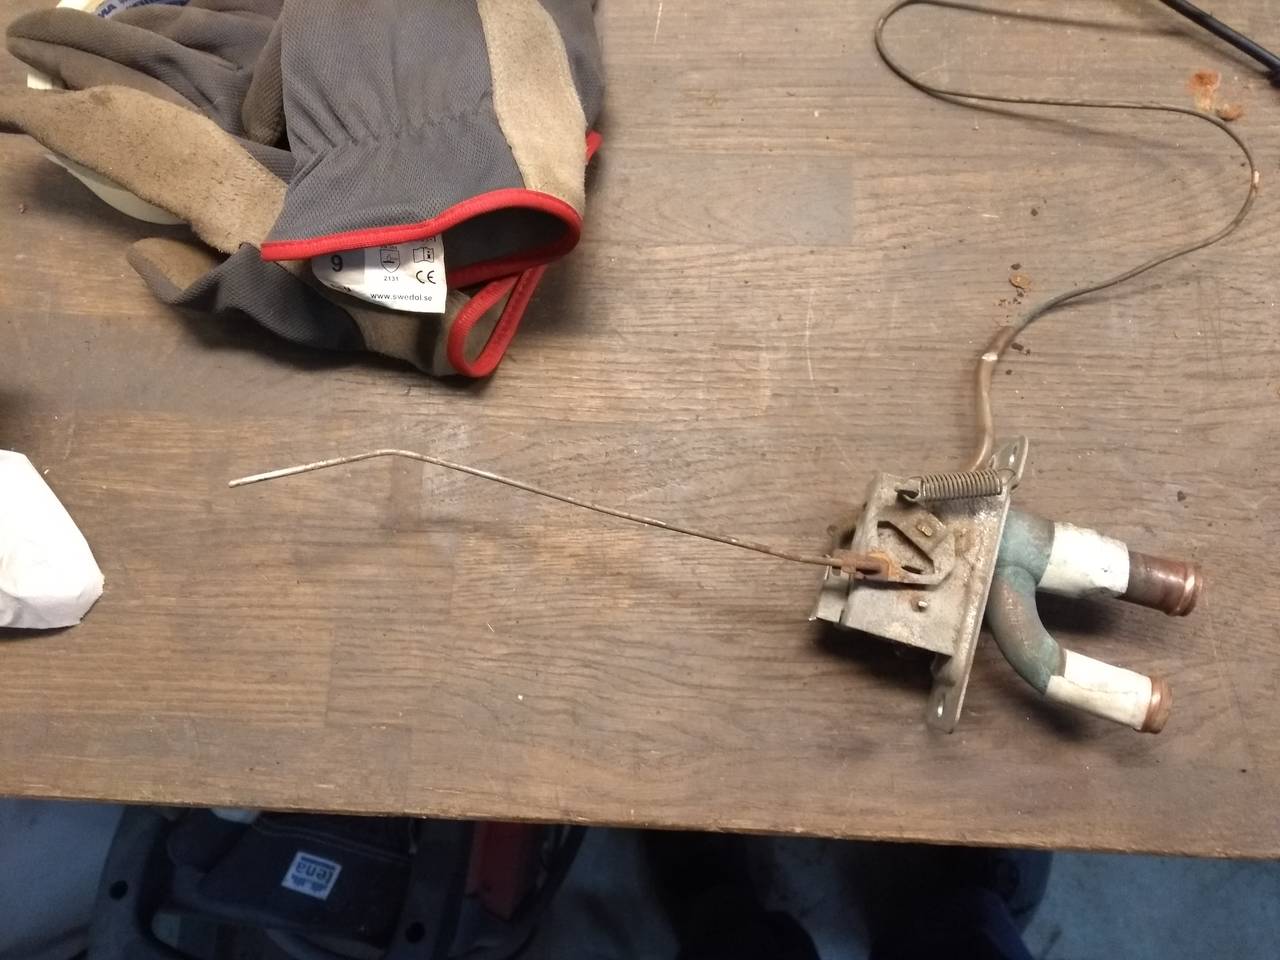
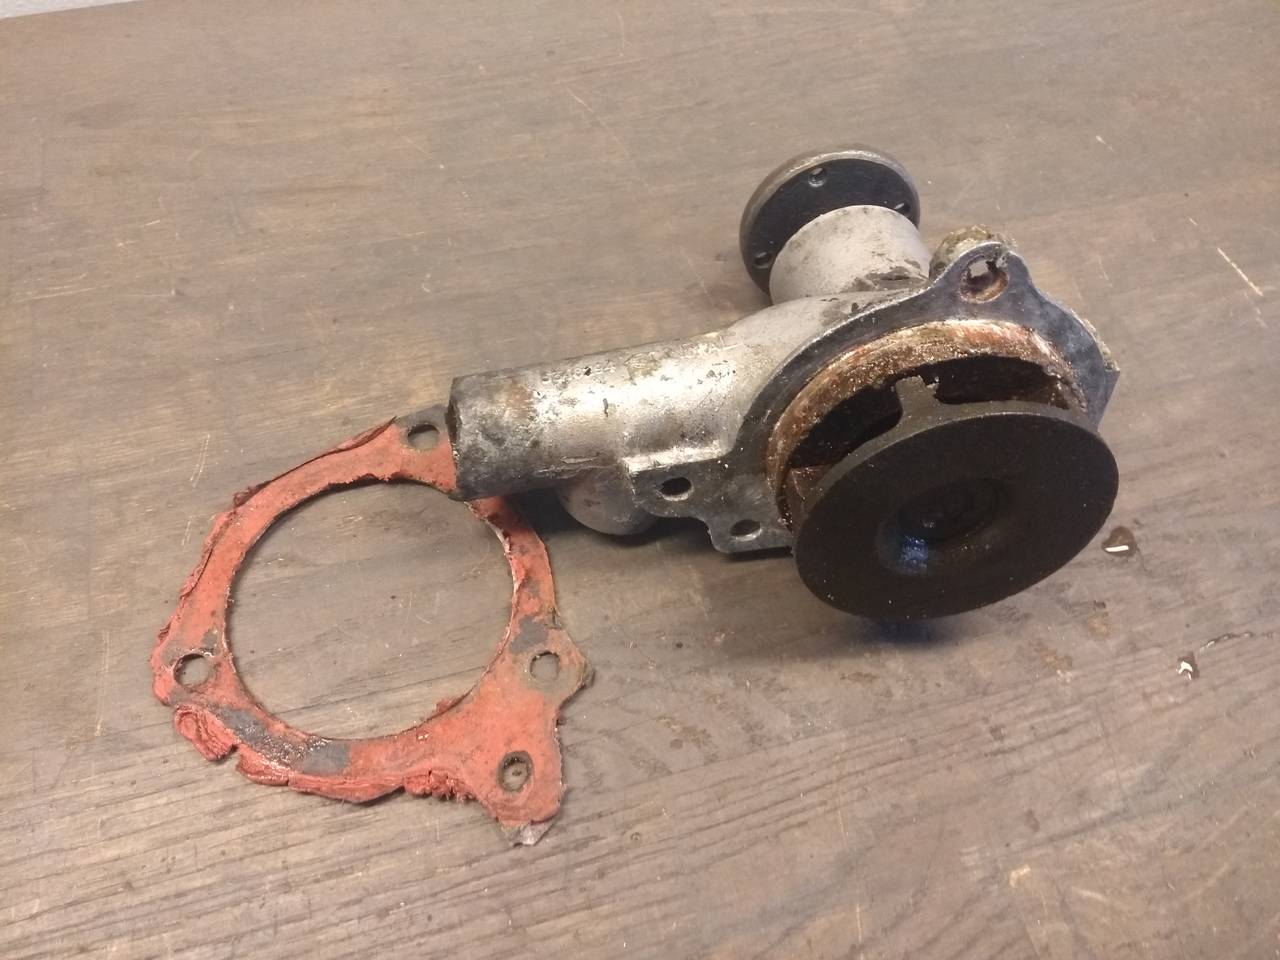
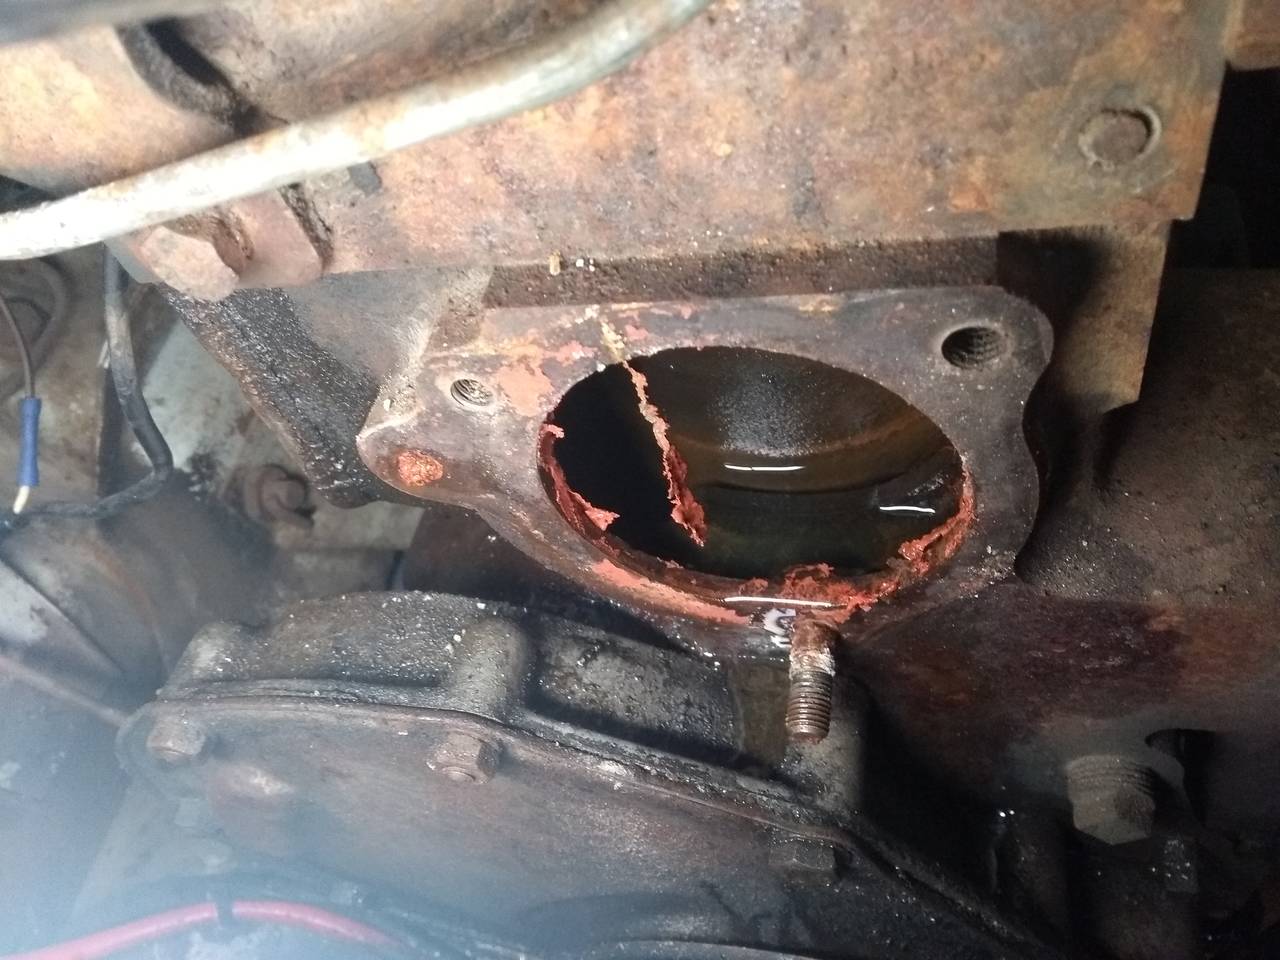
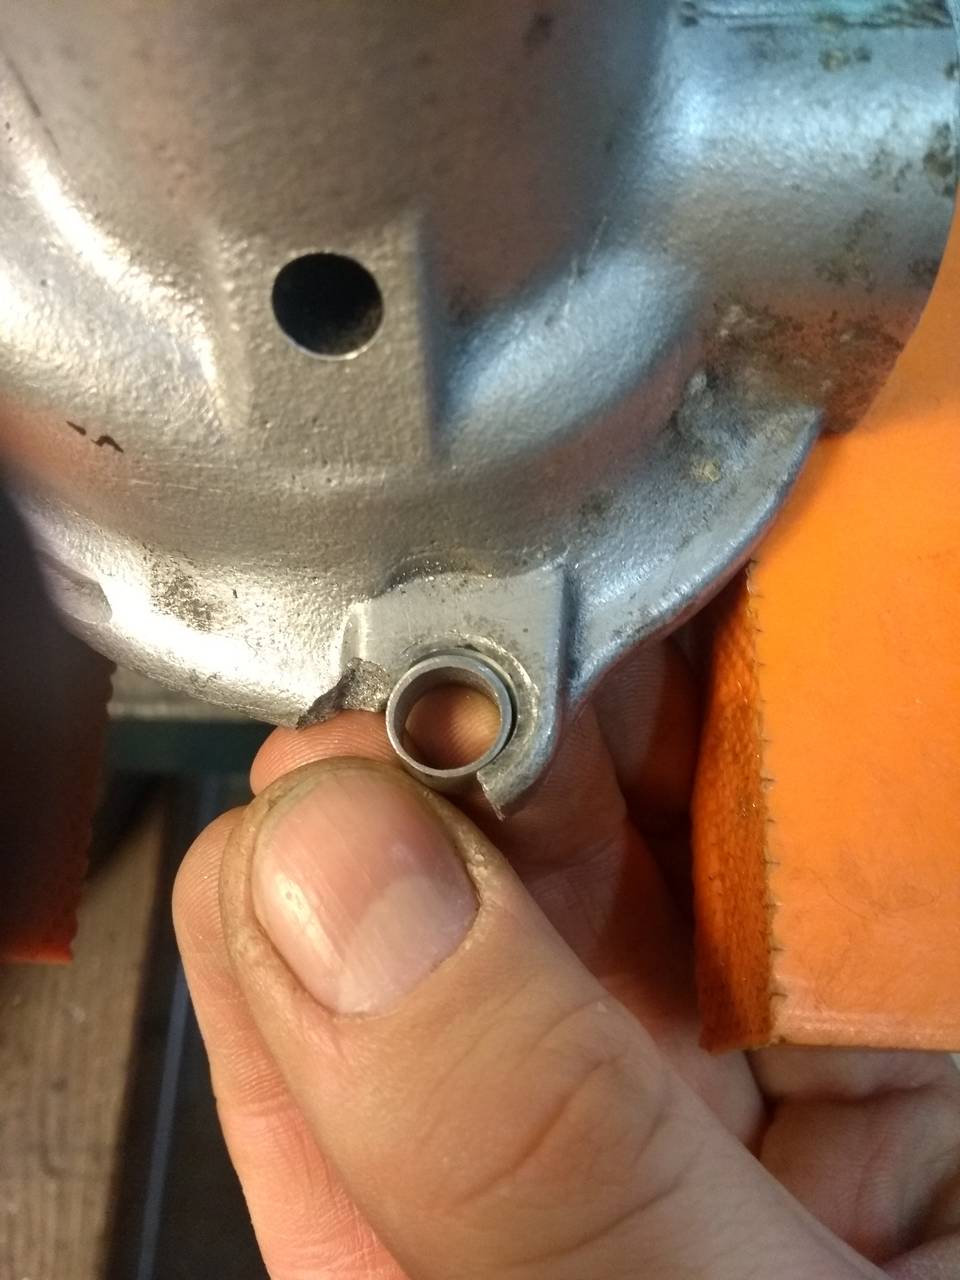
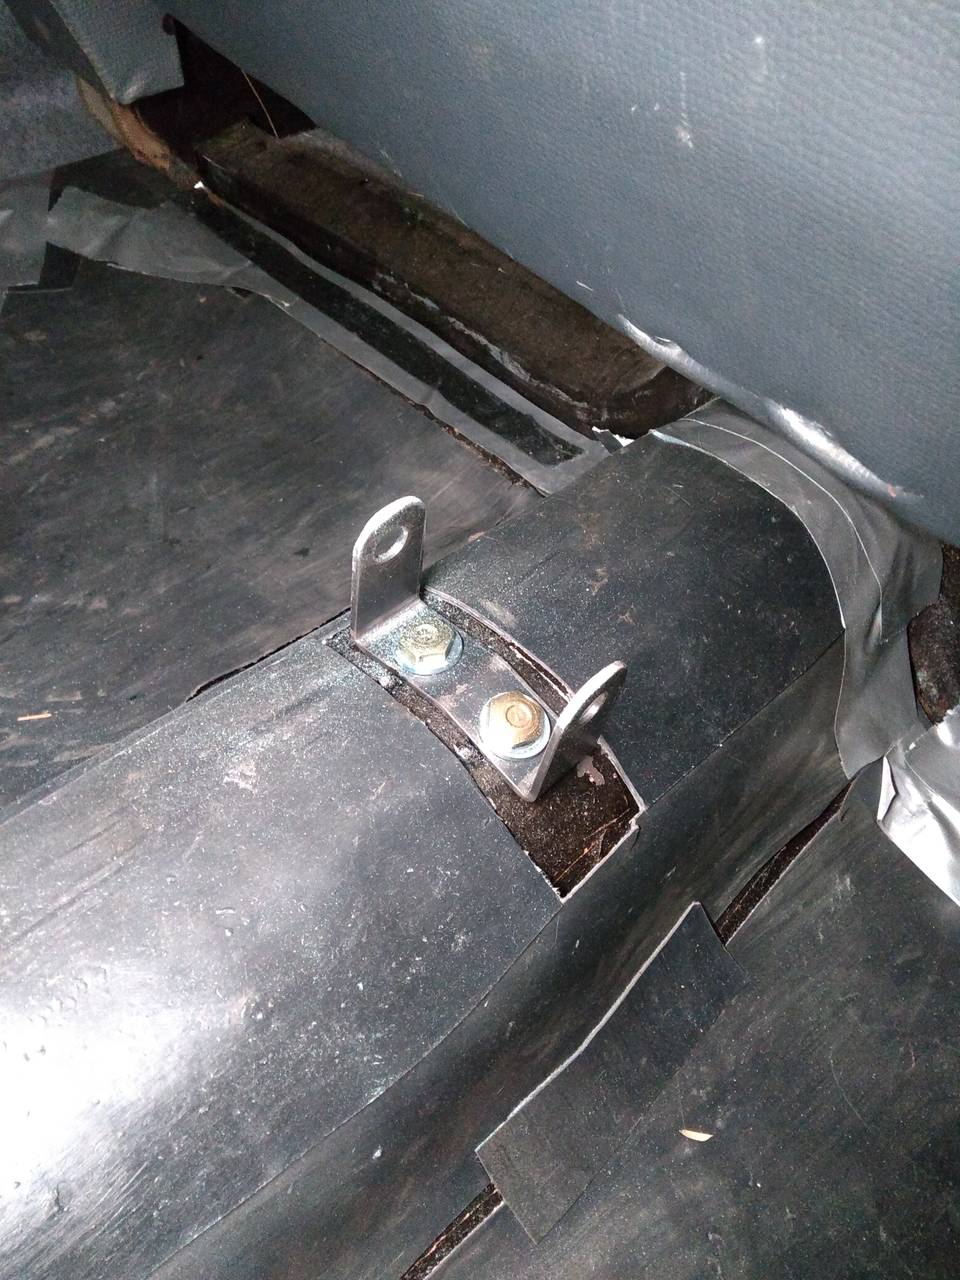
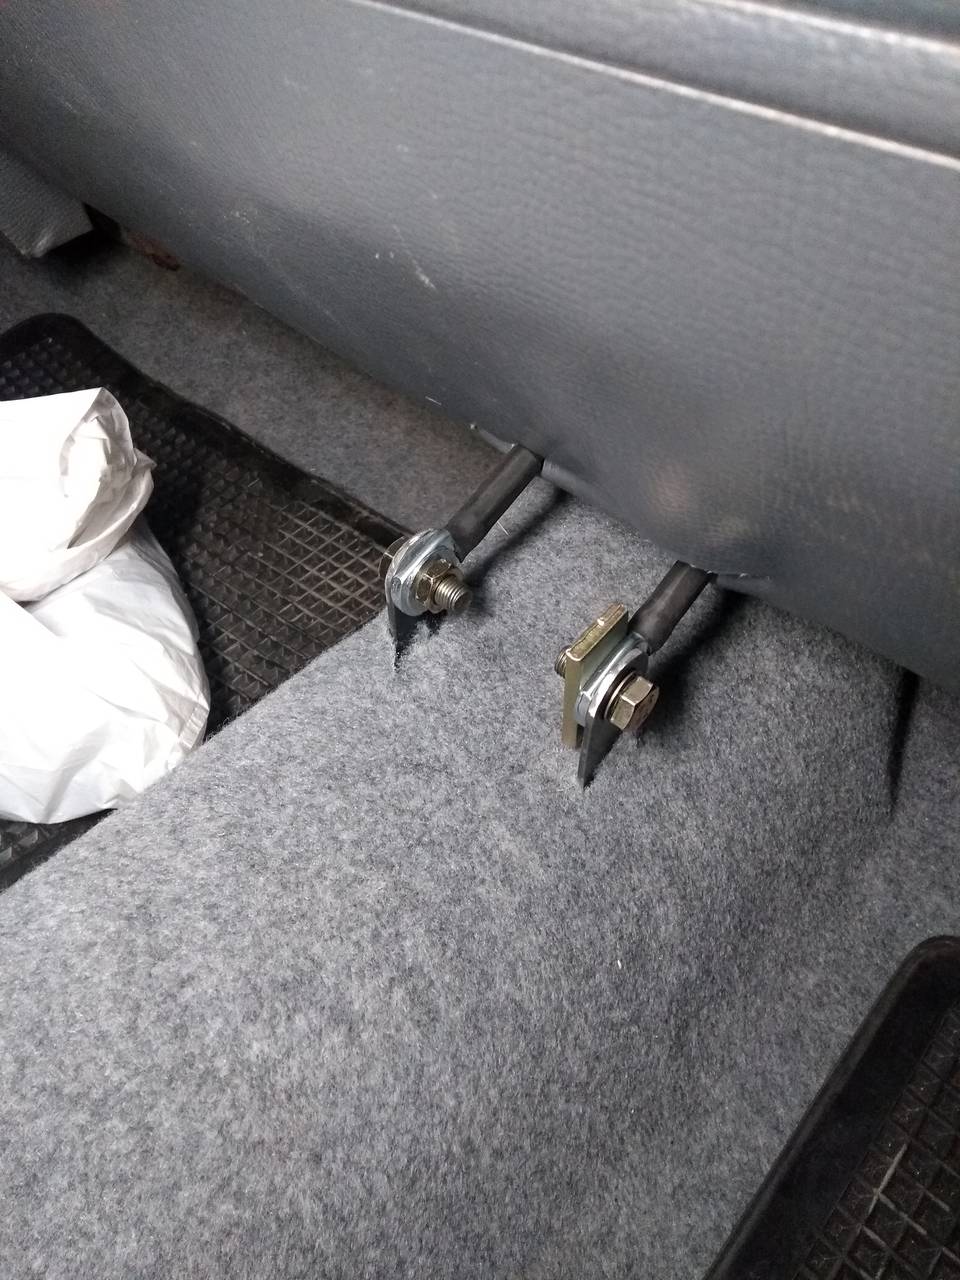
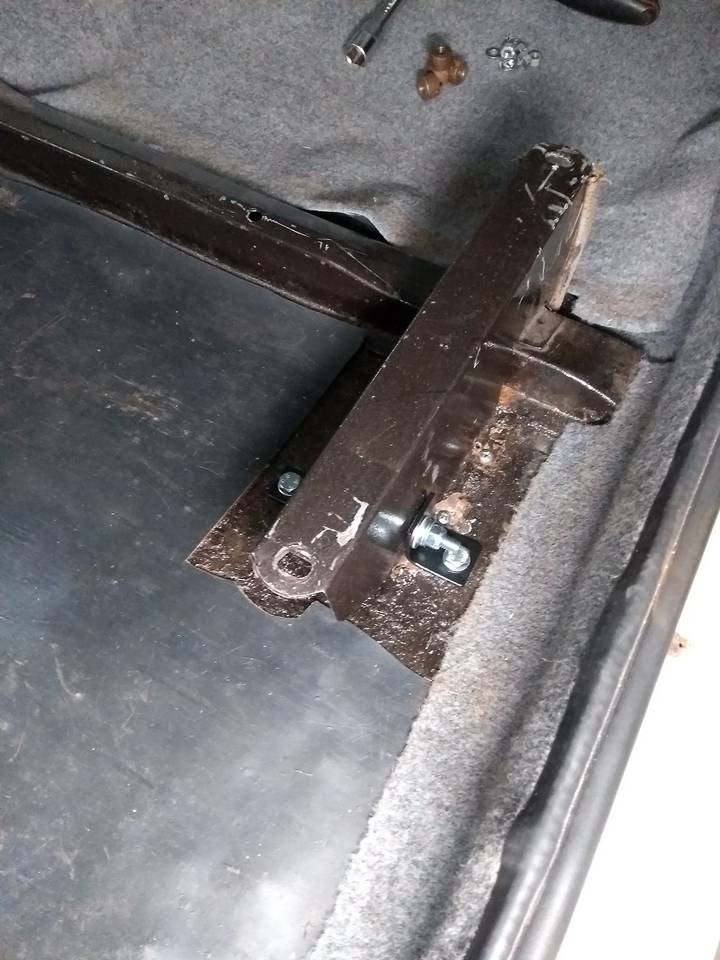
The next day I drove, with a loose seat, back to the same petrol station to examine the damage and figure out how I could fix it. What I discovered was that the mounting support for the seat, that should be welded to the floor, wasn’t on the driver’s side, and hadn’t been for some time. Someone before me had fixed it with one, or two, self-drilling sheet metal screw! These screws had torn from the flanges of the mounting support and was also loose in the floor.

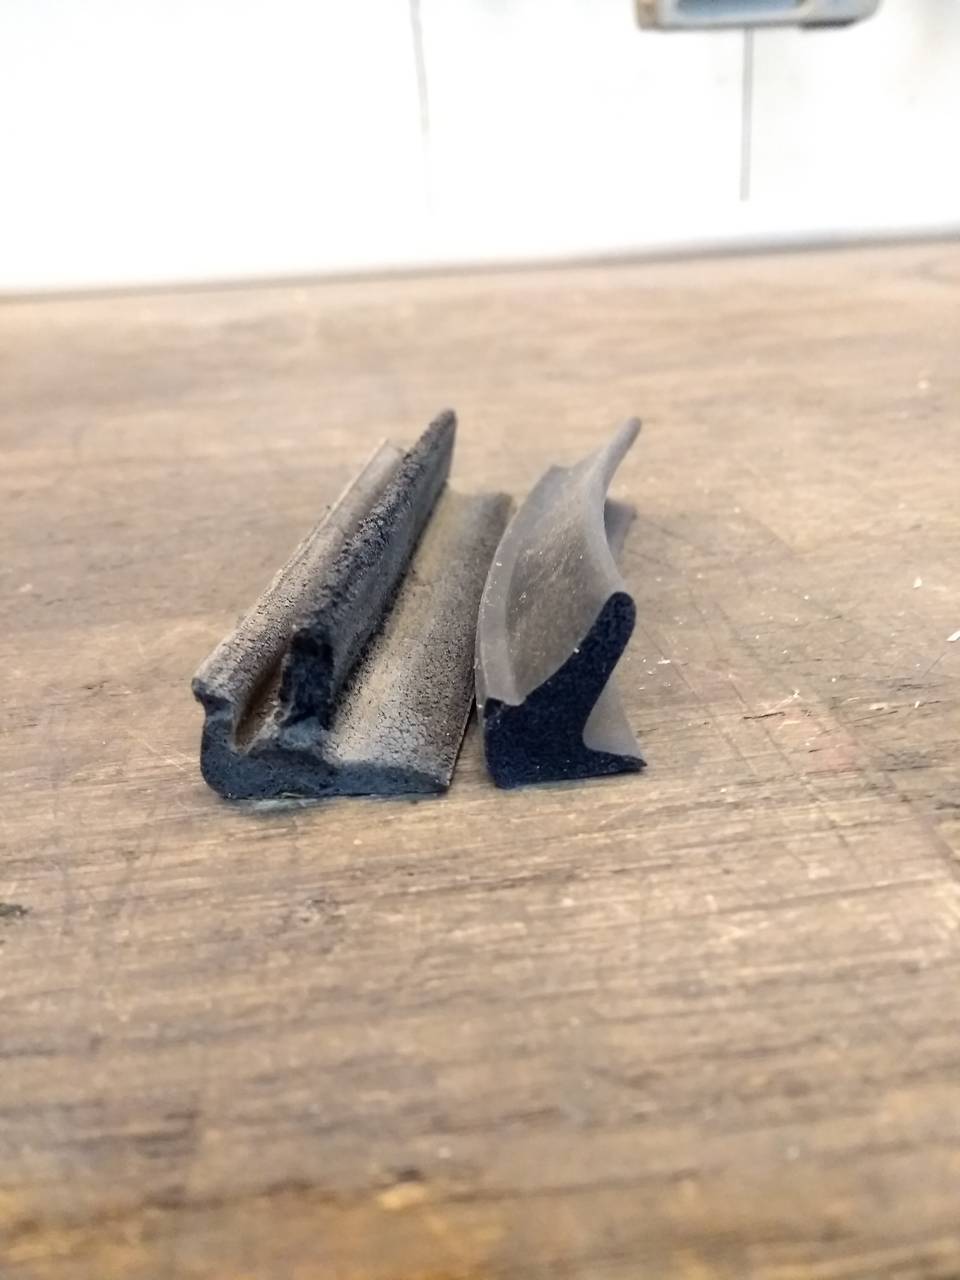
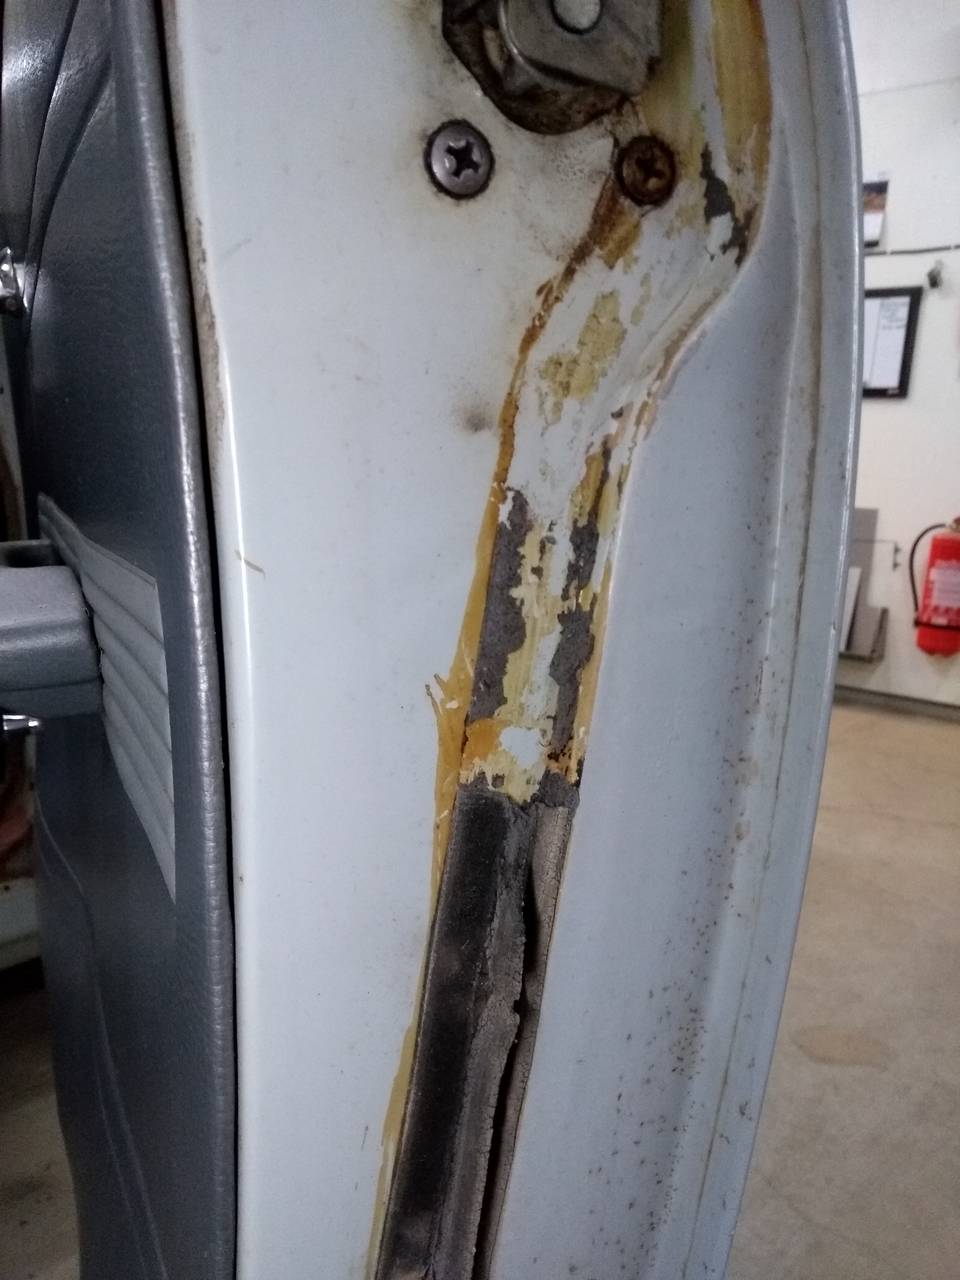
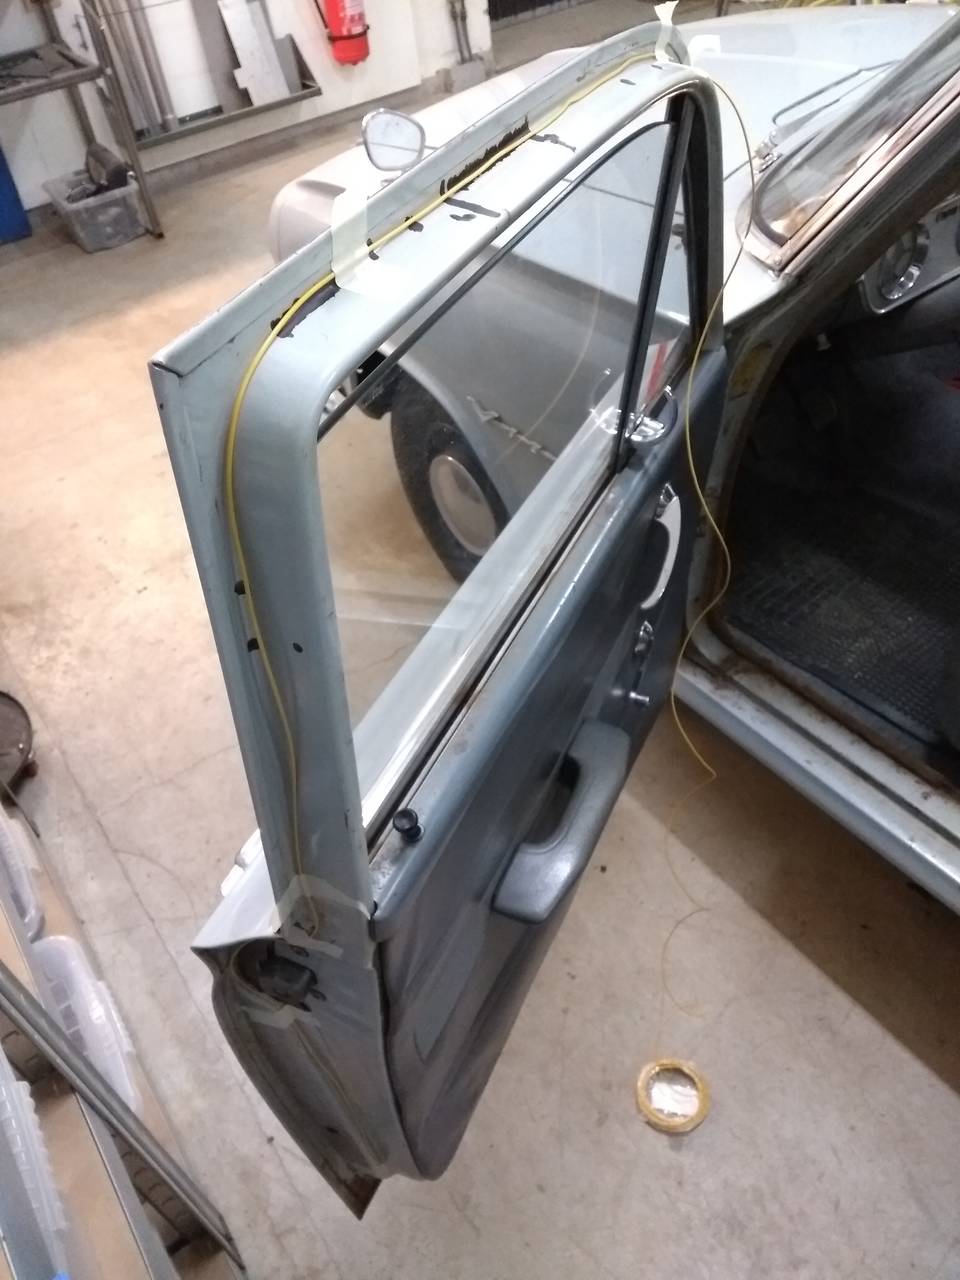
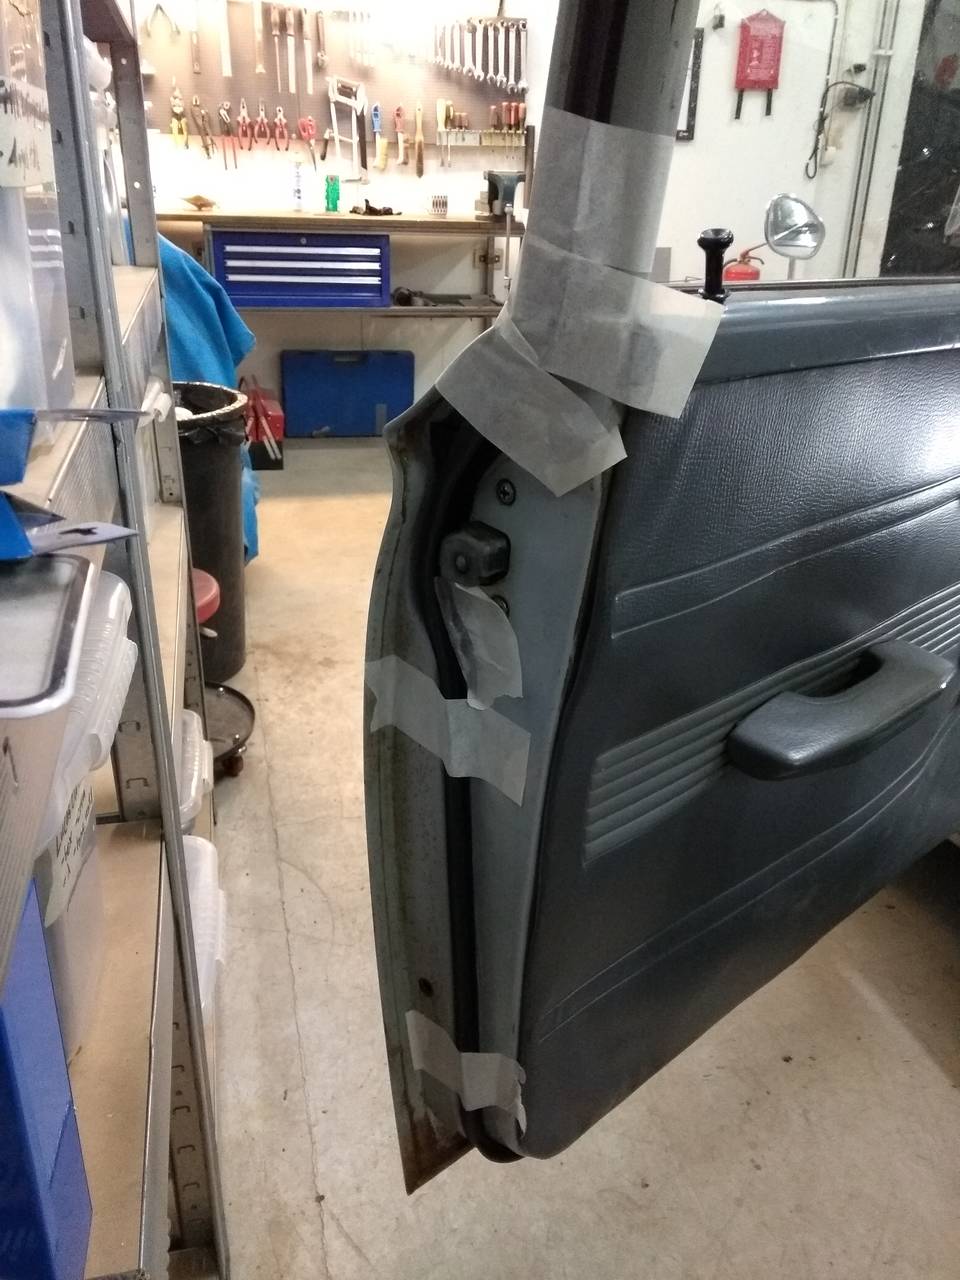
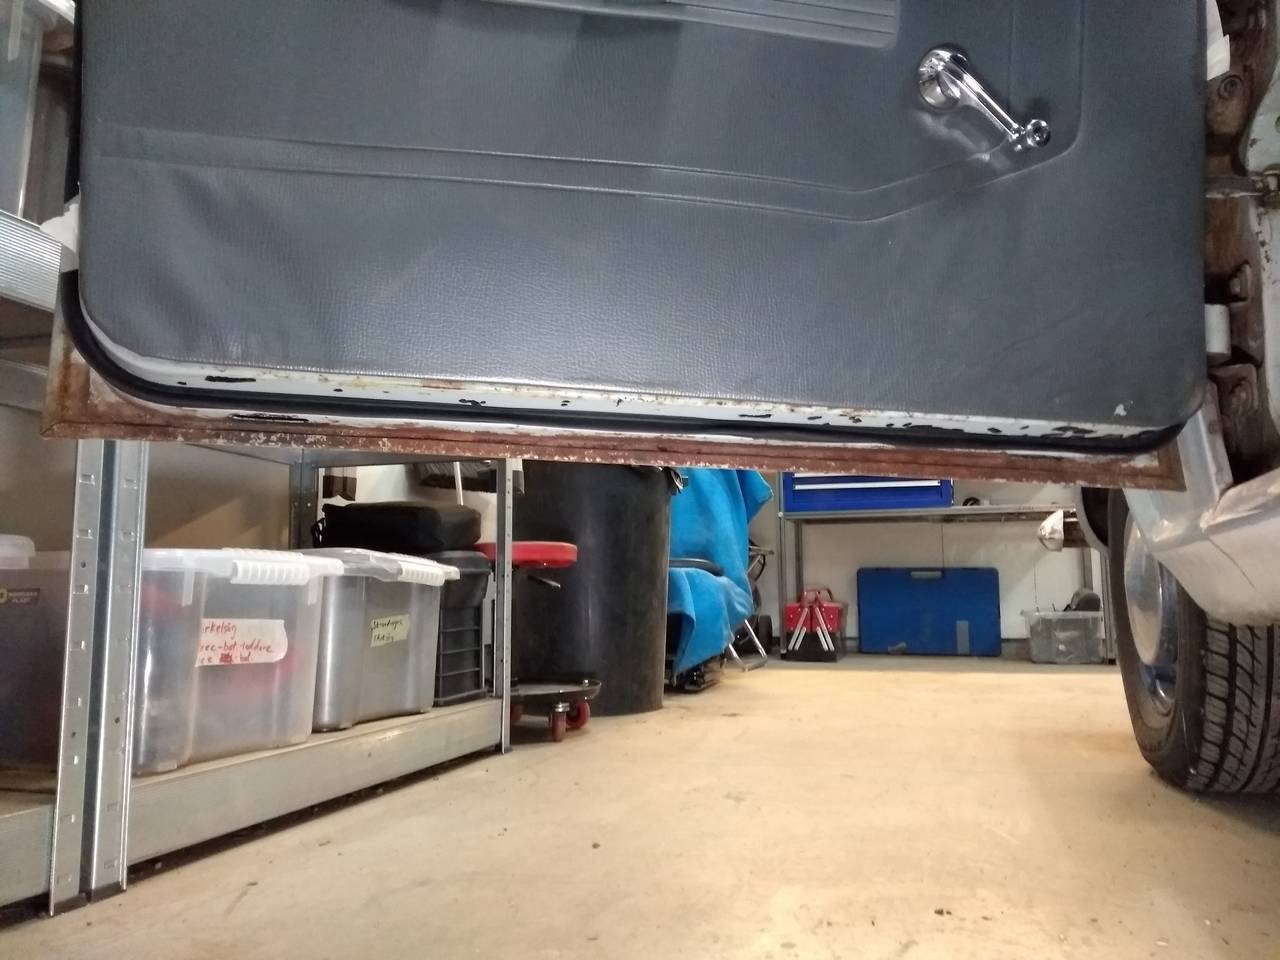
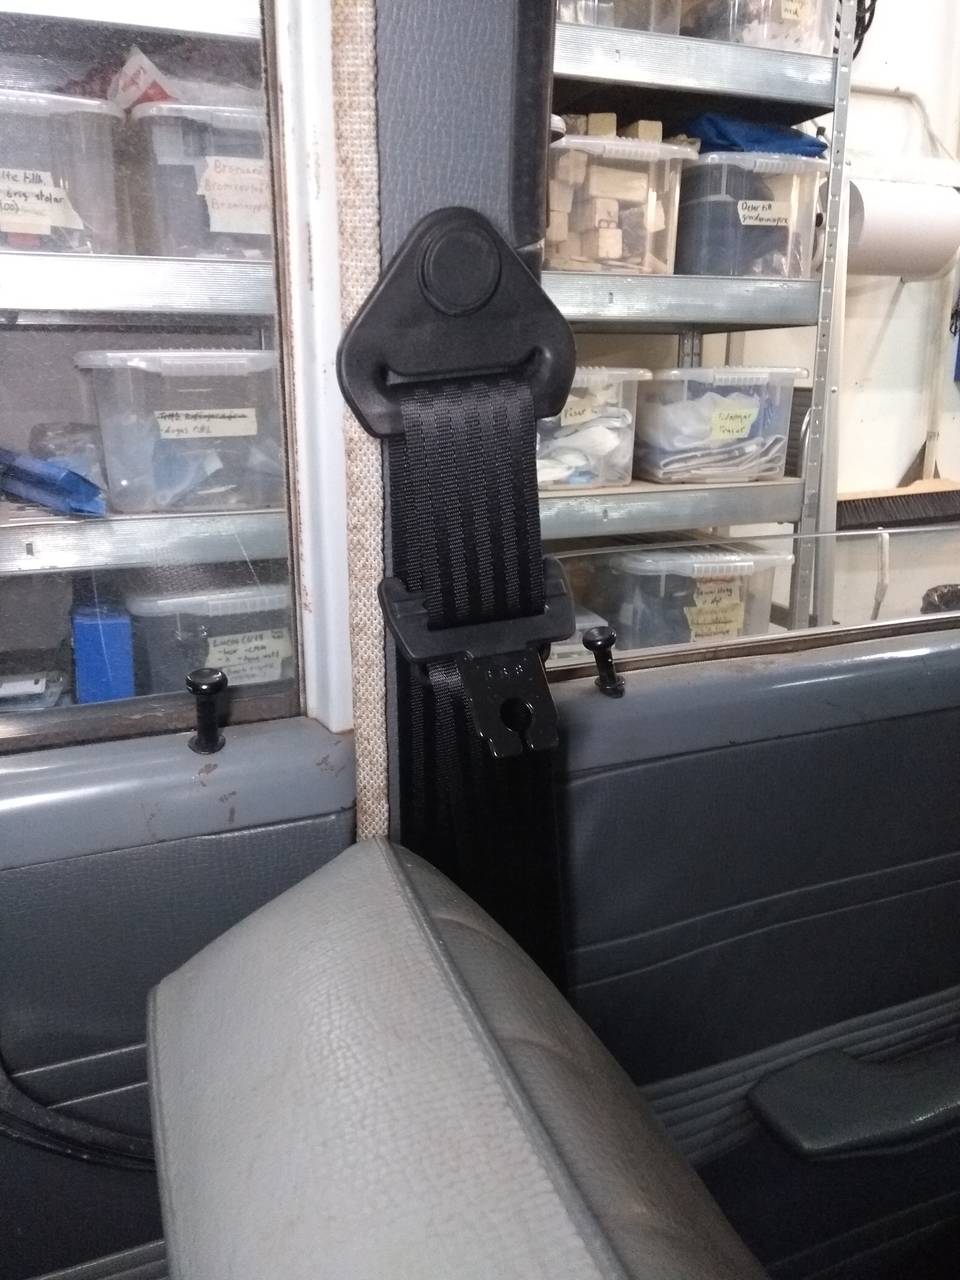
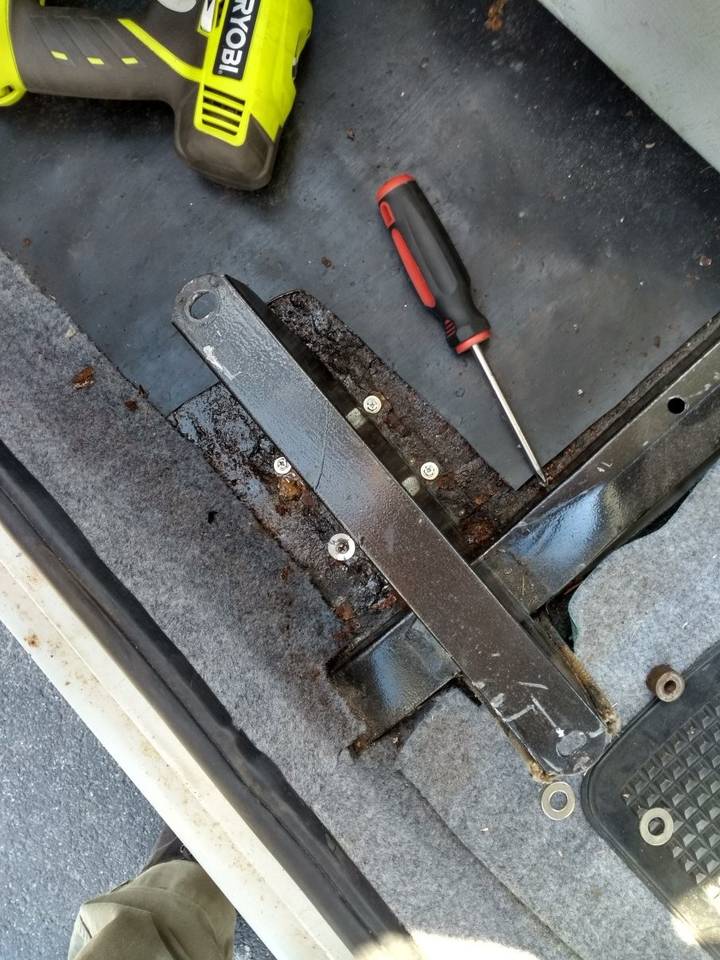
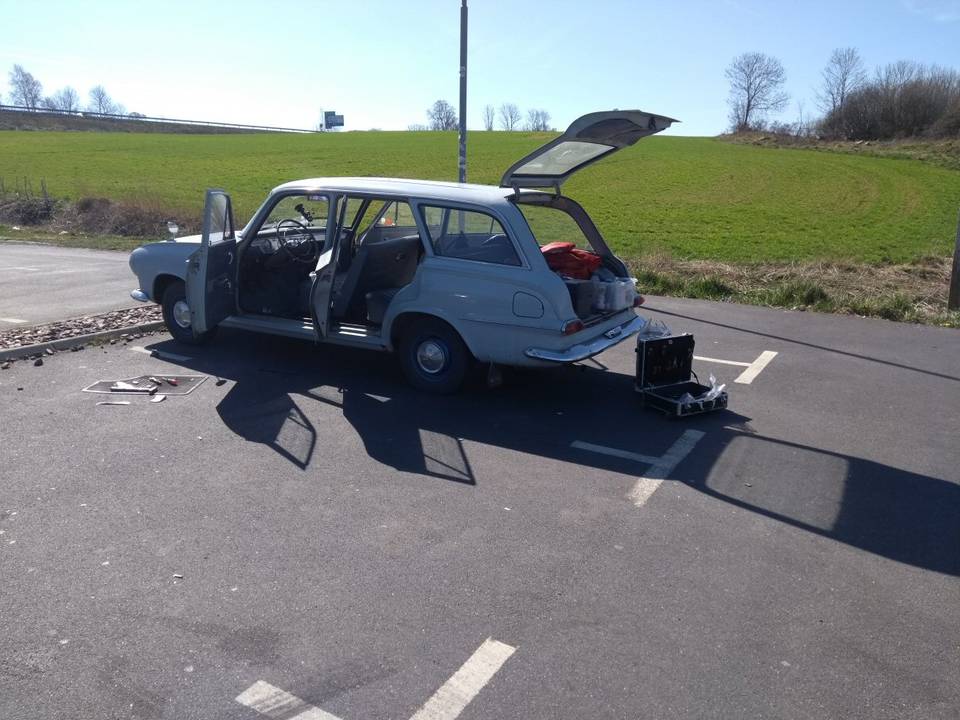
Fortunately I had a cord-less drill with me and some screws, nuts and washers. However, I had no drill bits, and the petrol station was not well equipped either. But, the re-carpeting job was partly done with self-drilling screws, so I robbed  four of them and found four larger washers. Then I removed the bench and used the cordless drill to drill and screw the mounting support back to the floor. Four screws with large washers and adequate spread is better than two randomly placed ones without washers, right?

An hour and and half late I could then head towards Jönköping and the annual Easter car show “Bilsport Performance and Custom Motor Show”. With the camera ready I entered the first of four halls.  Many hours later my feats were sore and the show was closing for the day. Over-all the show was not that interesting compared to previous years I've been there .

(If you're interested you can see my photos from the show here: https://photos.hoftware.com/#collection/241194 )

The next morning I was on a mission to find a fellow Super Seven-builder in Vara to get help with machining some parts. So, once again I headed to Jönköping to get around the south end of lake Vättern.

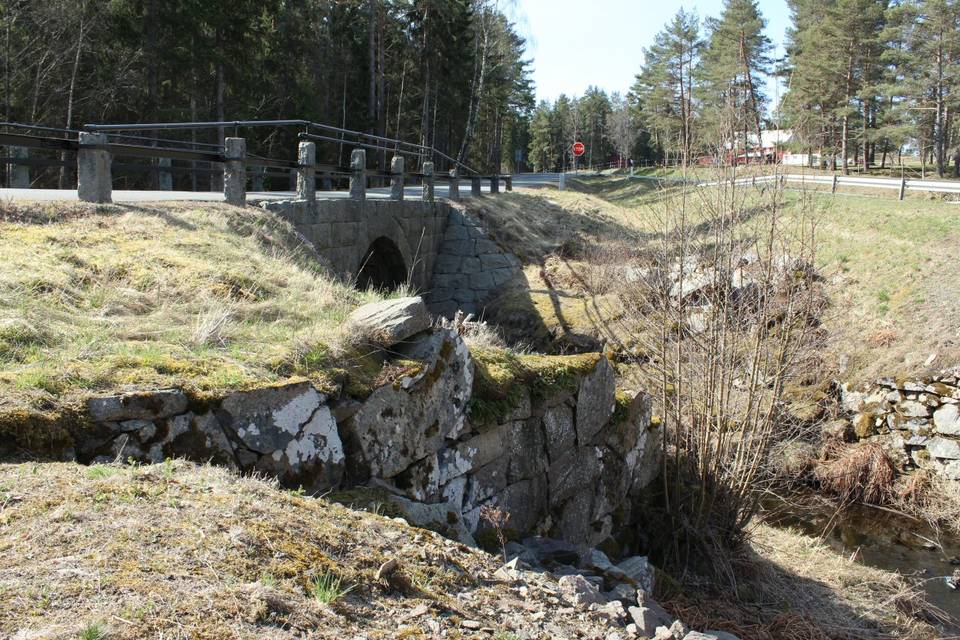
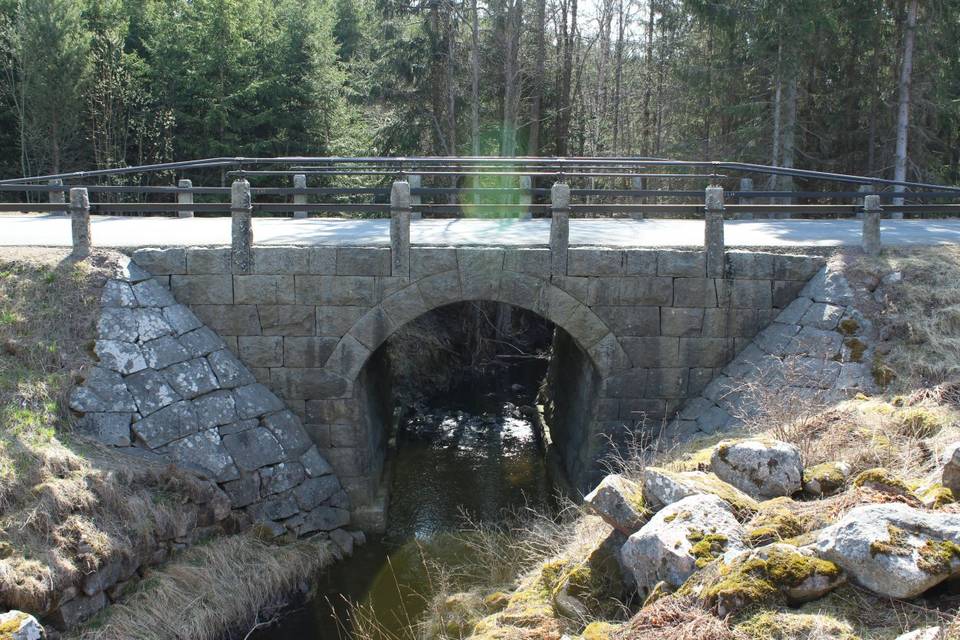
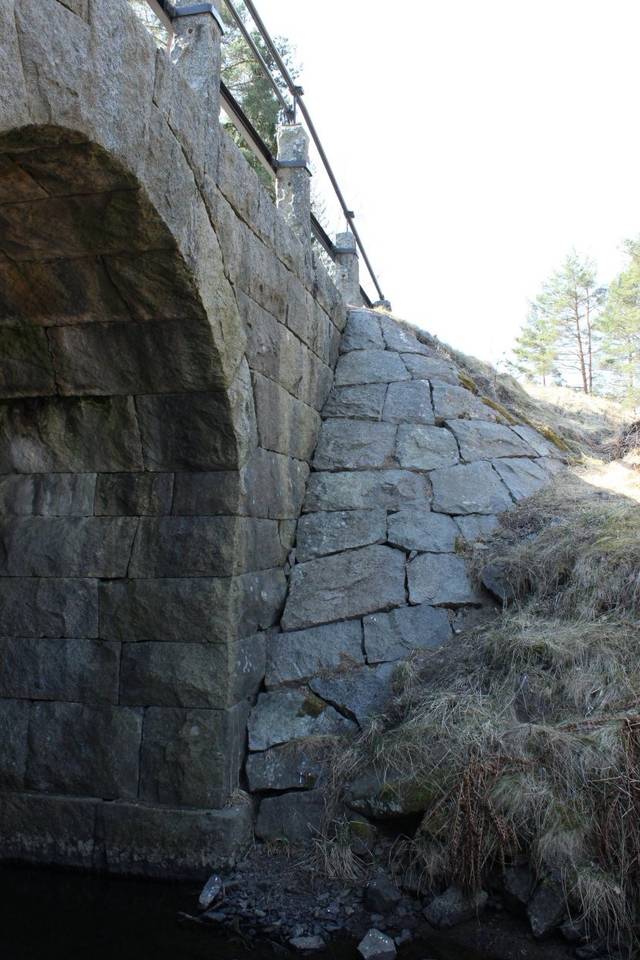
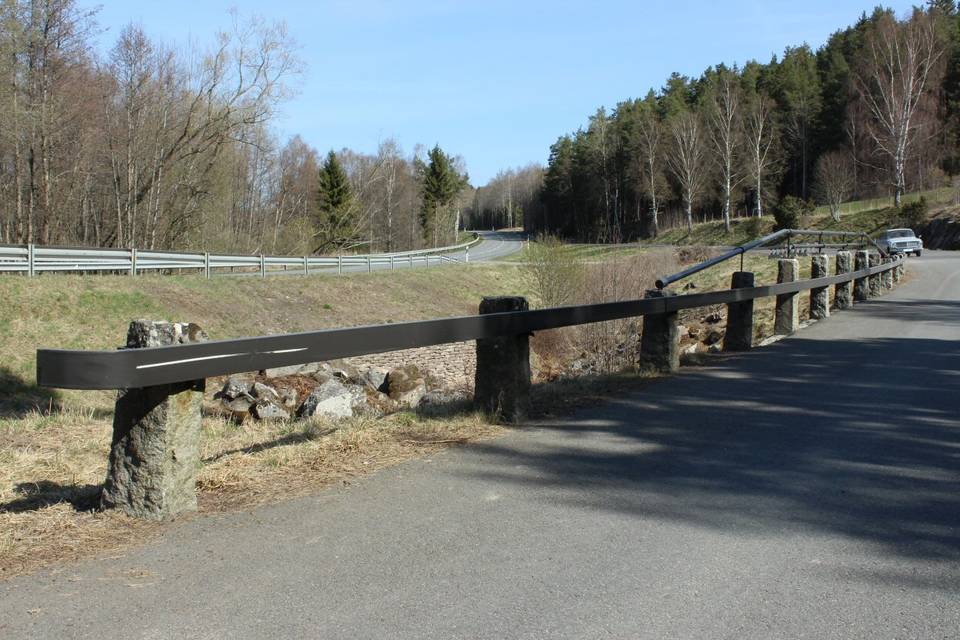
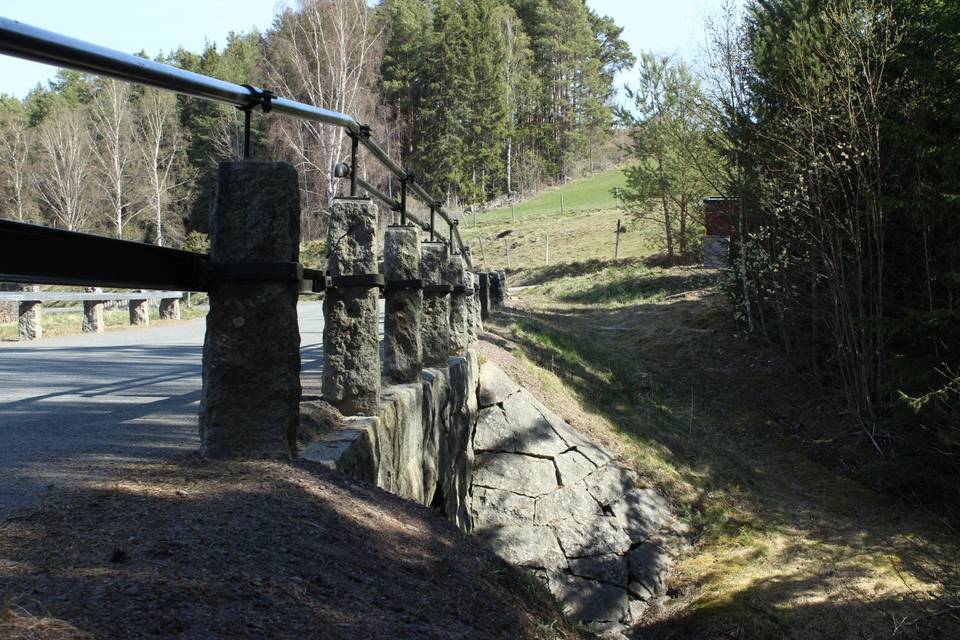
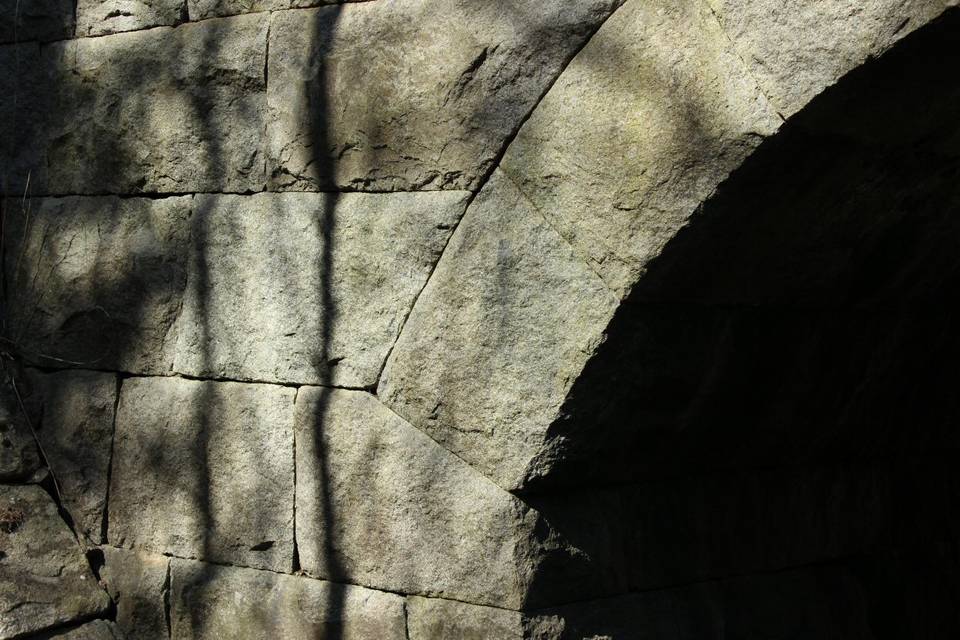
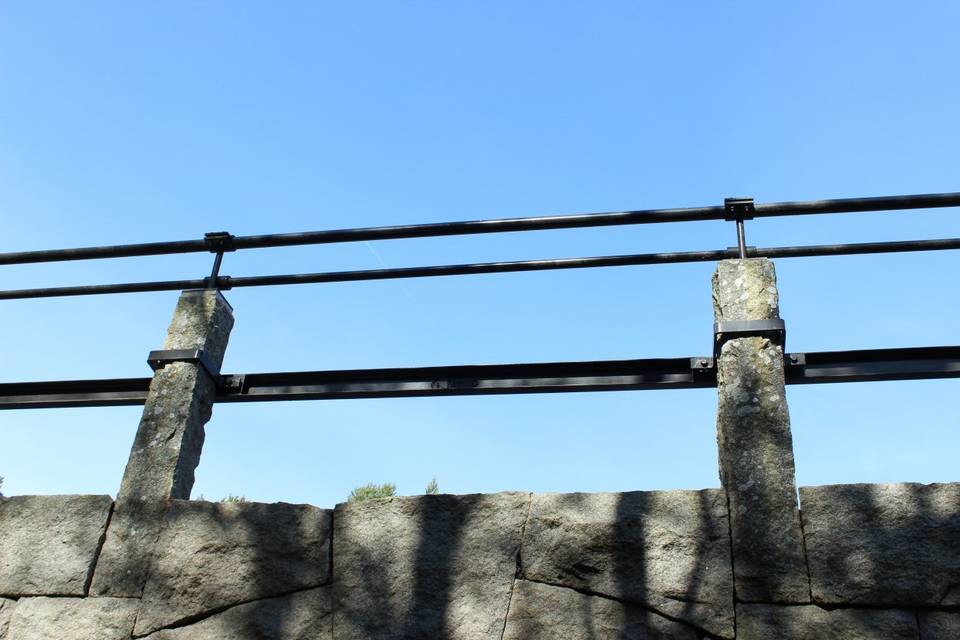
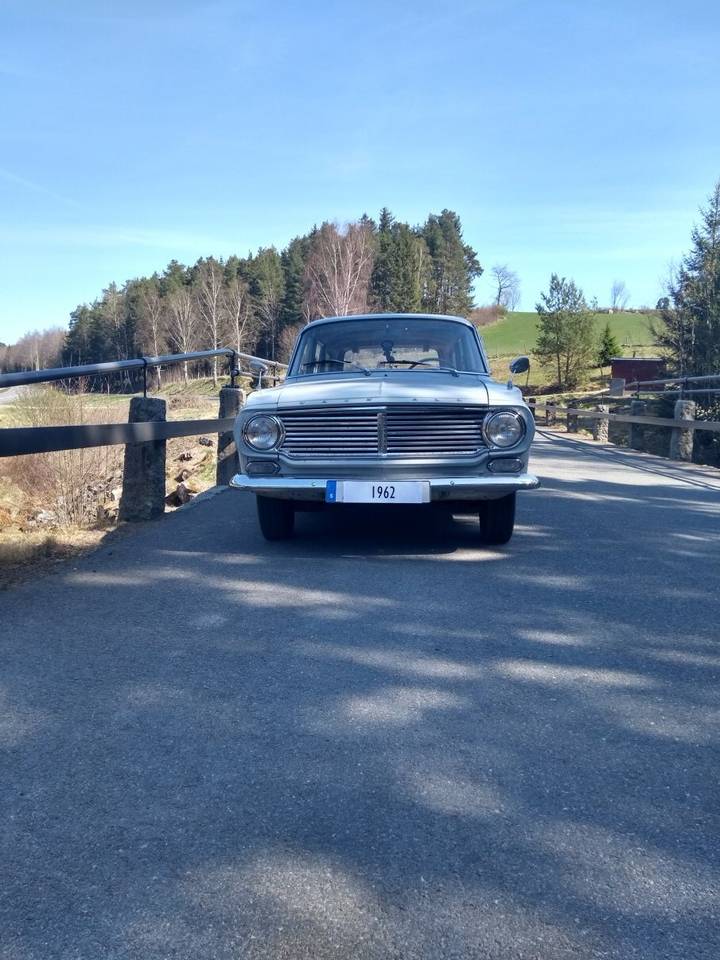
On the way I found a very cool old bridge, and it was in very good shape too. You could see that, including the old bridge and the current bridge, it had been a third one there too, probably even older. I was very glad to see that someone is maintaining the old bridge; the stone-work was in excellent condition and as far as I could tell the railing was newly made in old style.

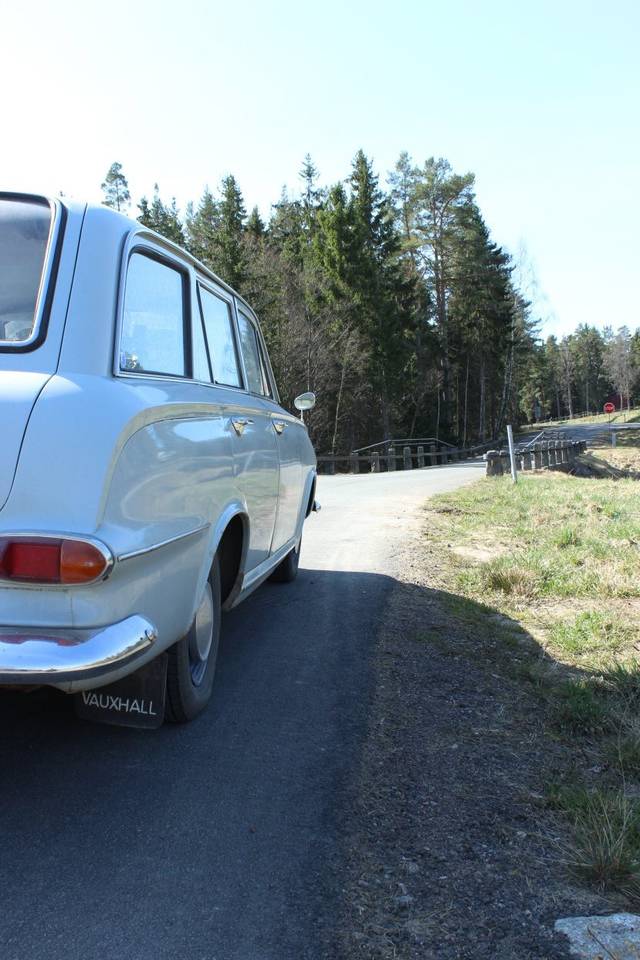
From Vara I set out to drive the old road north, this time the R6 (“Rikssexan”) that today is E20. I soon found out that this is harder than tracking the R1, because most of the routing of today's E20 is on top of the old R6. There is just small pieces through villages that remain, and you have to drive a lot back and forth between the old and new road. The later the night got the more I got tired of that so eventually I gave up and drove the E20 all the way to Mariefred. From there the R6 is intact to Södertälje.

It was a good trip and nothing major happened with the car. I need, however, to go hunting old roads without any other goal, to be able to stop more and discover. At last I wonder what next year's anniversary trip will go to?

https://www1.garaget.org/gallery/images/27/26518/26518-9f87f78f99af95d151a9c86f9c9a51fe.jpg
https://www1.garaget.org/gallery/images/27/26518/26518-7d387fa63510909f3fec63ea2d35e54e.jpg
https://www1.garaget.org/gallery/images/27/26518/26518-06318e5d8c192f114a6ceb1132eb729a.jpg
https://www1.garaget.org/gallery/images/27/26518/26518-7c7c05a6a3a6ac7132b836c47f3b0bea.jpg
https://www1.garaget.org/gallery/images/27/26518/26518-18ea9a741de045a1354ef84cb4cc3f05.jpg
https://www1.garaget.org/gallery/images/27/26518/26518-ec7d86e46c08db77b86dbfbb697d8cf2.jpg
https://www1.garaget.org/gallery/images/27/26518/26518-9b72dd512d17e34e50b32fd9fd50b523.jpg
https://www1.garaget.org/gallery/images/27/26518/26518-86568db9c74be32e16c347c2e939c0e9.jpg
https://www1.garaget.org/gallery/images/27/26518/26518-5578f78130f2f8609158e3dc7f80188d.jpg
https://www1.garaget.org/gallery/images/27/26518/26518-cb1f45139c0542d426720af598d3d52b.jpg
https://www1.garaget.org/gallery/images/27/26518/26518-ace0cccd8fc63acc789b0254623d17f9.jpg
https://www1.garaget.org/gallery/images/27/26518/26518-394f62c27eb0802f196873992f05ed28.jpg
https://www1.garaget.org/gallery/images/27/26518/26518-f5b93945bcd6b797178efde837533fc8.jpg
https://www1.garaget.org/gallery/images/27/26518/26518-7b5ae91bd56ce5b88b307cabfb701c57.jpg
https://www1.garaget.org/gallery/images/27/26518/26518-2e1adfb11eaf9df34c0caf271ab11cf7.jpg
https://www1.garaget.org/gallery/images/27/26518/26518-675c4b223adc4423590522ffcee6826e.jpg
https://www1.garaget.org/gallery/images/27/26518/26518-c9a8790cb0d05e886fd968959a25226b.jpg
https://www1.garaget.org/gallery/images/27/26518/26518-1c483c3101d5e9384361c5fbbb66014f.jpg
https://www1.garaget.org/gallery/images/27/26518/26518-413d933a66d745840b25b60b59cf3578.jpg
https://www1.garaget.org/gallery/images/27/26518/26518-1612d3d11a9ae71bf7385922e79ef763.jpg
https://www1.garaget.org/gallery/images/27/26518/26518-9e758af50c452f5bf077c0148375b2ba.jpg
https://www1.garaget.org/gallery/images/27/26518/26518-f4708d4743faef32b167d39664347f0b.jpg
https://www1.garaget.org/gallery/images/27/26518/26518-d67186eab849ed7a389a6d2dbcf3abce.jpg
https://www1.garaget.org/gallery/images/27/26518/26518-9d028ea172f931d4c29260b7d80f001d.jpg
https://www1.garaget.org/gallery/images/27/26518/26518-477f14fc36bf12f0e0e92b2303530896.jpg

Saab 99 "GLT16" (1984)
Xebers76
9 maj 2019 · 2 264 Inlägg

Sådanna resor är underbara smile

rallyelwood
9 maj 2019 · 34 Inlägg

Liten bit av gammal väg utanför Nyköping:

https://www.facebook.com/17405400337034 … 248756881/

Senast redigerat av rallyelwood (16 maj 2019)

Saab 99 "GLT16" (1984)
rallyelwood
9 maj 2019 · 34 Inlägg

Xebers76 skrev:
Sådanna resor är underbara smile

Japp! smile

Saab 99 "GLT16" (1984)
rallyelwood
16 maj 2019 · 34 Inlägg

The front seat mounting base is now secured to the floor. For the long term plan I'll be stripping the entire floor of surface rust and the paint covering the rust, and then weld the seat mounting base to the floor, as it should be.

https://www1.garaget.org/gallery/images/27/26518/26518-2018b39d743e4dcdf64140f58321b731.jpg
https://www1.garaget.org/gallery/images/27/26518/26518-ae103b1921888156e5a47d2c7bd31593.jpg
https://www1.garaget.org/gallery/images/27/26518/26518-17841dc299ca2a67364f51000326cf0d.jpg

Saab 99 "GLT16" (1984)
Senast i forumet
Diskussionsforum
Projekt
Evenemang