Austin Mini till Suzuki Swift GTi-konvertering

Getting ready to install a Swift GTi engine in my 1975 Austin Mini 1000 cc. Going from 35 bhp to 105 bhp, or more. It is also going to get just a bit of a style makeover.
  • 114 Följare
  • 307 858 Visningar
  • Uppdaterades senast 27 januari
martinhejdesten
6 april 2021 · 484 Inlägg

"–Those carbs are killing me!". Och jag menar inte kolhydrater, utan MC-förgasarna. In kommer bensin, tid och onödigt mycket nerlagd tid och ut kommer bara frustration. Gaaah!

Jag ville ju bestämt montera choke-vajer till det befintliga reglaget på förgsarkitet. Vajern hade inget ändslut så jag var tvungen att skaffa ett sådant. Personalen på cykelverkstaden på XXL Sport var bussiga nog att bjussa på en sådan och ett par ändhylsor till vajerhöljet. Tackar. Men lyckan var kort då ändhylsan jag fick inte passade i choke-reglaget på förgasarkitet. Hmm. Borrade upp ett större hål och halvsabbade reglagefästet en aning men räddade det med en rundfil. Men sedan var reglaget riktigt segmanövrerat vilket det inte var innan. Det visade sig att ändslutets undersida kasade längs med förgasarhuset. Hmm. Kapade av ett par millimeter och testade igen. Något bättre, men inte helt hundra än. Tvingades till att slipa ner en kant på förgasarhuset också innan choke-reglaget återigen gled fram och tillbaka utan motstånd.

Och så skruvade jag på flottörlocken och tänkte att nu var det väl ändå dags att montera kitet på motorn? Insåg att det inte skulle hända då jag såg att flottörerna inte låg i linje, iallafall i öppet läge. Flottören i förgasare nummer två hade inte samma rörlighet. Hade nålen fastnat i sätet? Nej, jag hade ju rispat bort diverse grader från svarvningen. Jämförde de olika förgasarna noga och såg ingen skillnad. Bytte säte, nål och flottör med en utav de andra fungerande förgasarna. Nädå, exakt samma problematik även denna gång, dvs begränsad rörlighet. Gaaah! Trodde för en sekund att det var fel på flottörhusets konstruktion eller att låspinnen till flottören inte gjorde sitt jobb...

...så jag bjöd över Andreas på en öl och den slank ner illa kvickt. Mellan klunkarna så konstaterade han att sätet i förgasare nummer två inte hade svarvats exakt lika mycket som de övriga och det troligtvis gav upphov till dilemmat. Men, vände vi kitet upp och ner i det läge den ska sitta på motorn så hänger faktiskt inte flottör nummer två ner lika mycket, men det är egentligen att det sluter tätt när flottörhuset är fyllt som är det viktiga och den funktionen fungerar. Så med Andreas råd så smackar jag dit förgasarkitet asap och med hopp om att ha bilen startklar till helgen.

• • • TRANSLATION • • •

"Those carbs are killing me!" And I don't mean carbohydrates, but motorcycle carburetors. In goes gasoline, time, and unnecessarily much invested time, and out comes only frustration. Gaaah!

I was determined to install a choke cable to the existing lever on the carburetor assembly. The cable had no end stop, so I had to get one. The staff at the bicycle workshop at XXL Sport were kind enough to give me one and a couple of end sleeves for the cable housing. Thank you. But the joy was short-lived when the end sleeve I received didn't fit into the choke lever on the carburetor assembly. Hmm. Drilled a larger hole and messed up the lever bracket a bit but saved it with a round file. But then the lever was really hard to maneuver, which it wasn't before. It turned out that the underside of the end stop slid along the carburetor housing. Hmm. Cut off a couple of millimeters and tried again. Somewhat better, but not entirely perfect yet. Was forced to grind down an edge on the carburetor housing as well before the choke lever once again slid back and forth without resistance.

And then I screwed on the float bowl covers and thought it was finally time to mount the kit on the engine? Realized it wouldn't happen when I saw that the floats were not in line, at least in the open position. The float in carburetor number two did not have the same mobility. Had the needle stuck in the seat? No, I had scratched away various degrees from the turning. Compared the different carburetors carefully and saw no difference. Changed the seat, needle, and float with one of the other working carburetors. No, exactly the same problem again, i.e., limited mobility. Gaaah! For a moment, I thought there was something wrong with the construction of the float bowl or that the float pin wasn't doing its job...

...so I invited Andreas over for a beer, and it went down quickly. Between sips, he noted that the seat in carburetor number two had not been turned exactly the same as the others, and that probably gave rise to the dilemma. But, if we turned the assembly upside down in the position it should be on the engine, float number two actually doesn't hang down as much, but what's essential is that it seals tightly when the float bowl is filled, and that function works. So, with Andreas's advice, I'll slap on the carburetor assembly asap, hoping to have the car ready to start by the weekend.

https://www1.garaget.org/gallery/images/219/218366/218366-6a82e0ae50b4fdfc99286865b153f605.jpg
https://www1.garaget.org/gallery/images/219/218366/218366-ac0f1510d1a261df00dbba29de859880.jpg
https://www1.garaget.org/gallery/images/219/218366/218366-993b4a1db23e7bac95282a67f57a9141.jpg
https://www1.garaget.org/gallery/images/219/218366/218366-46322037c74c03c443b531efb80e84f7.jpg
https://www1.garaget.org/gallery/images/219/218366/218366-ee80c6550f733db33b1ead224d3f1c50.jpg
https://www1.garaget.org/gallery/images/219/218366/218366-7fdbbc0d88a3ceda8a84542ef32b8de7.jpg
https://www1.garaget.org/gallery/images/219/218366/218366-cefddbd8c19da0872bbced32bbdaba2f.jpg

Senast redigerat av martinhejdesten (29 december 2023)

Cuefa Ain't no place like home...
7 april 2021 · 4 628 Inlägg

Allt detta småpyssel....
They'd better goddamn work!
Ser fram emot videon med provstarten big_smile

Autopilot: På.
Projekt: Skogsmulle on a budget
Mercury Grand Marquis LS "Murklan" (2000)
Cupra Born "Gruvbilen" (2022)
stingray-ragge
9 april 2021 · 1 506 Inlägg

Massa strul, men trägen vinner 😉
Lycka till med provstarten 😀

martinhejdesten
10 april 2021 · 484 Inlägg

Home Sweet Home. Såja, nu satt mc-förgasarkitet återigen på plats. Ägnade fredagskvällen/natten åt detta och det blev en hel del bök innan allt satt på plats. Återkommer till det.

Men tidigare under dagen måttade jag en befintlig insugstratt. Andreas menade att de två yttre trattarna borde vara lika långa som de två trattarna i mitten av förgasarkitet. Sagt och gjort. Kom och tänka på en bekant som trixar med 3D-printning och så vips så hade jag ritat klart, skickat till BVconsulting.se, fick ett gott snack och skratt medan Didrik gjorde en 3D-ritning av mitt tvärsnitt i realtid via Google Meet. Han 3D-printar tratten i helgen och skickar den i början på nästa vecka. Blir den bra så gör han en till förstås.

Jo, förgasarkitet. Innan jag kunde montera det på sin plats så var jag tvungen att göra en grej först, eller två... kanske tre. Allt måste göras i turordning.

1. Slangarna mellan förgasarkitet och motorn hade ju preppats med stålrör inuti för att göra det styvare, men även för att undvika virvlar som möjligtvis skulle kunna uppstå i skarvarna mellan gods och slangarna. Men stålröret var hyfsat långt och det fanns risk att förgasarkitet skulle röra på sig så att stålröret skulle gnaga på aluminiumflänsen. Och sådana flisor vill man inte ha in i motorn. Så dessa stålrör plockade jag bort. Satt som f-n, förstås. Men lirkade och sprutade in typ 5-56 vilket gjorde det hela mycket smidigare.

2. Satte slangarna på sin plats och fick dessvärre ta bort vakuum-fördelaren för att komma åt och spänna slangklämmorna. Såg att slangarna inte linjerade riktigt. Lirkade lite på två utav dem och skruvade åt allt igen.

3. Sen var jag ju tvungen att montera choke-reglaget. Och i samma veva tänkte jag även montera värmereglaget. Ett sådant är förvisso redan monterat och installerat, men choke-reglaget borde rimligtvis sitta på höger sida om ratten, dvs nära nyckeln förstås. Så detta värmereglage flyttade jag till vänster om ratten istället. Nytt choke-reglage i retrostruk med vajer drogs i befintligt hål i torpedväggen, medan jag fick borra ett nytt hål en bit bort för att föra in värmereglagets vajer. Bilderna visar förvisso reglagen på fel sida om rattstångsfästet... men det är korrigerat nu.

4. I kupén är det svårt att komma åt under instrumentpanelen, särskilt när man sitter på knä utanför bilen och hänger in över burröret vid dörren. Men det är inget jämfört med hur trångt det är på andra sidan torpedväggen, där börjar det bli rätt snårigt med kablar, slangar och vajrar av olika slag, men speciellt när man tidigare har monterat termostaten så att skruvskallar och fästanordning sitter upp och ner. Lite frustrerad över det trånga utrymmet i motorrummet må jag säga. Men inget är omöjligt, det tar bara längre tid.

5. Sen var det dags att fästa choke-vajern i det nykomponerade ändfästet/rälsen. Och det gick snabbt. Skönt. Satte bara dit det provosoriskt nu och justerar längd vid senare tillfälle. Vill få igång motorn först.

6. Gasvajern gick också smidigt att montera.

Under resten av natten laddar jag batteriet. Och sen får jag se ifall jag får tillfälle för uppstartsförsök nummer tre under dagen.

Cuefa och stingray-ragge... håll tummarna. Och alla ni andra! Nu har jag gett så mycket kärlek och omvårdnad för dessa förgasare. Jag pussade till och med varje enskild förgasare i hopp om att de ska göra susen och att motorn startar denna gång!

På återseende!

• • • TRANSLATION • • •

Reply to post: All this tinkering.... They'd better goddamn work! Looking forward to the video of the test start 😃

Reply to post: A lot of hassle, but perseverance pays off 😉 Good luck with the test start 😀

Home Sweet Home. There you go, the motorcycle carburetor assembly is back in place. Spent Friday evening/night on this, and there was quite a bit of hassle before everything was in place. I'll come back to that.

But earlier in the day, I measured an existing intake funnel. Andreas suggested that the two outer funnels should be as long as the two funnels in the middle of the carburetor assembly. Said and done. Remembered an acquaintance who tinkers with 3D printing, and suddenly I had drawn, sent it to BVconsulting.se, had a good chat and a laugh while Didrik created a 3D drawing of my cross-section in real-time via Google Meet. He'll 3D print the funnel over the weekend and send it early next week. If it turns out well, he'll make another one, of course.

Yes, the carburetor assembly. Before I could mount it in place, I had to do one thing first, or two... maybe three. Everything must be done in order.

1) The hoses between the carburetor assembly and the engine had been prepped with steel tubing inside to make it stiffer, but also to avoid swirls that might possibly occur at the joints between material and hoses. But the steel tubing was fairly long, and there was a risk that the carburetor assembly would move, so the steel tube would rub against the aluminum flange. And you don't want those chips in the engine. So I removed these steel tubes. It was stuck, of course. But I worked and sprayed in type 5-56, which made it much smoother.
2) Put the hoses in place and unfortunately had to remove the vacuum distributor to reach and tighten the hose clamps. Saw that the hoses didn't line up perfectly. Worked a bit on two of them and tightened everything again.
3) Then I had to mount the choke lever. And at the same time, I thought I'd also install the heat lever. One is already mounted and installed, but the choke lever should reasonably be on the right side of the steering wheel, i.e., close to the key, of course. So I moved this heat lever to the left of the steering wheel instead. The new choke lever in retro style with a cable was pulled into an existing hole in the bulkhead, while I had to drill a new hole a bit away to insert the cable of the heat lever. The pictures do show the levers on the wrong side of the steering column bracket... but it's corrected now.
4) In the cabin, it's difficult to access under the instrument panel, especially when kneeling outside the car and hanging over the roll bar at the door. But it's nothing compared to how cramped it is on the other side of the bulkhead, where it starts to get quite tangled with cables, hoses, and wires of various kinds, but especially when you've previously mounted the thermostat so that screw heads and fastening devices are upside down. A bit frustrated about the tight space in the engine compartment, I must say. But nothing is impossible; it just takes longer.
5) Then it was time to attach the choke cable to the newly composed bracket/rail. And it went quickly. Nice. Just put it there provisionally for now and will adjust the length at a later time. Want to get the engine started first.
6) The throttle cable was also easy to install.

For the rest of the night, I'm charging the battery. And then I'll see if I have the opportunity for the third startup attempt during the day.

Cuefa and stingray-ragge... keep your fingers crossed. And all of you others! Now I've given so much love and care to these carburetors. I even kissed each individual carburetor hoping they'll do the trick and that the engine starts this time!

Until next time!

https://www1.garaget.org/gallery/images/219/218366/218366-46dfdb466a0ffae521fcf7c5ec31cbf1.jpg
https://www1.garaget.org/gallery/images/219/218366/218366-f88c6eeac067e04dfa465c4615868a57.jpg
https://www1.garaget.org/gallery/images/219/218366/218366-b11626d4f5bb9b00ffcecf55c6448d04.jpg
https://www1.garaget.org/gallery/images/219/218366/218366-40138855d5bd1f753bf6f2d2733c5fb4.jpg
https://www1.garaget.org/gallery/images/219/218366/218366-2cd7d4a7bc2352397af4926f1be42c30.jpg
https://www1.garaget.org/gallery/images/219/218366/218366-b62a7be402b694ad4c662ce9995e11fc.jpg
https://www1.garaget.org/gallery/images/219/218366/218366-4595f10c803482c4ca0f2aa061145dca.jpg
https://www1.garaget.org/gallery/images/219/218366/218366-488b1ac2f0f98784e8c2f6bd402290ca.jpg
https://www1.garaget.org/gallery/images/219/218366/218366-b89fcbc2d0c922287f1f0a4d833df9f7.jpg
https://www1.garaget.org/gallery/images/219/218366/218366-76ace463e158c873fb6a2f430a35545f.jpg
https://www1.garaget.org/gallery/images/219/218366/218366-d90845158c85d23a1e240feb3b07b751.jpg
https://www1.garaget.org/gallery/images/219/218366/218366-2efd560cd8be8878e5df8aa05badb90e.jpg
https://www1.garaget.org/gallery/images/219/218366/218366-703d05dd78646bd66532f9dfae1b84f2.jpg
https://www1.garaget.org/gallery/images/219/218366/218366-986df3e721d7ad5c446a5e36ac7c23f6.jpg
https://www1.garaget.org/gallery/images/219/218366/218366-141807dbc6c473aac0bfbdc517f378ee.jpg
https://www1.garaget.org/gallery/images/219/218366/218366-8f6d354e23d1772c136f9dd83a6d8a86.jpg
https://www1.garaget.org/gallery/images/219/218366/218366-d54559cc68ec0e6b63a353033e7a371c.jpg
https://www1.garaget.org/gallery/images/219/218366/218366-50b673adfd01c3b16dcd4d4ecae341f7.jpg
https://www1.garaget.org/gallery/images/219/218366/218366-8f8c76d90d4c5b11ea81cbdf6a5f412e.jpg

Senast redigerat av martinhejdesten (29 december 2023)

eastmotorsport -sommar ska de va....
10 april 2021 · 4 524 Inlägg

Fullt ladd på batteriet, bra bensin (skulle helst unna bilen akrylatbensin nu) och sen ska du se att det smäller igång.

Tack till alla som följer och tittar i våra projekttrådar .
martinhejdesten
10 april 2021 · 484 Inlägg

Blev en hyfsat tidig morgon trots att jag mekade till 03.15 i natt. Idag vill jag ha klart fästena för de båda reglagen som ska sitta på varsin sida om rattstången. Snabb frukost och med vetskapen om att det var Home Alone under större delen av dagen så gav jag mig i kast med uppdraget.

De befintliga fästena hade en 45° vinkel och var något långa vilket skulle ha gjort att "knopparna" skulle sitta för långt ner och inte vara helt synkade sett till symmetrin vid rattstången. Jag hade ju redan hunnit fästa ändarna på respektive ställe i natt och det hade jag ingen lust att göra om. Men fästena får man inte av såvida hela vajer inte är borttagen. Hmm. En liten blunder. Men jag klurade ut att om jag skär ett spår i öglan så kan jag ta bort fästet från vajern trots allt. Kapade, borrade, slipade, primade och lackade dem mattsvarta som allt annat.

Andreas ringde och sa att han var trött på helgsysslorna i trädgården och undrade ifall han kunde komma förbi och starta upp kojan. Ehh, självklart! Men jag hade ju inte satt dit bränsleslangen, men var tvungen att skruva av förgasarkitet på nytt för att lättare komma åt anslutningsnippeln.

Andreas tyckte också att bränsleslangen mellan förgasarna och bränsletrycksregulatorn var i kortaste laget. Turligt nog hade jag en längre bit 6 mm slang liggande hemma. Den gamla lades åt sidan och... men vänta nu, nippeln från bränsletrycksregulatorn är 6 mm medan anslutningen till förgasarna är 8 mm. Hur fick vi ens på den ursprungliga slangen? Så det blev genast till att spana efter 1/8" NPT 8 mm i mässing, vilket inte många helgöppna butiker har. Typ inga. Nähä, konstaterade att jag hade 4 st 1/8" NPT 6 mm-nipplar hemma som vi använde till en rigg för att mäta bränsletrycket. Men dessa är just nu inte till någon som helst nytta. Så med detta missöde dog dagens planering. Och morgondagens. Jag lär inte hitta någon butik som har amerikanskgängade nipplar under helgen. Hmm.

Men på annan ort så händer det grejor minsann – 3D-printning i full fart. Nåja, undan går det inte, utan närmare sju timmar för en tratt. Men, galet häftigt att se den tillverkas – från ingenting till en tjusig tratt. Jag tackar Didrik på BV Consulting (www.bvconsulting.se) för snabb respons.

Och eftersom det inte blev uppstartsförsök idag så testade jag nya Cooper S-hastighetsmätaren. Satte borrmaskinen på 2000 rpm och stack in en spik i mynningen och körde full fart motsols. 100 km/h. Och så testade jag Swiftens för att se hur mycket den visade. 74 km/h närmare bestämt. Det diffar en aning med andra ord. Hmm. Nu ska jag bara klura ut hur jag ska få detta att lira ihop. Någon som har något tips på hur man gör? Eller så får jag plocka mätarmekanismen från Swiften och sätta den bakom Cooper-urtavlan på något fiffigt sätt...

• • • TRANSLATION • • •

Reply to post: Fully charged battery, good gasoline (preferably avoiding acrylic gasoline for the car now), and then you'll see it roar to life.

It became a fairly early morning even though I was tinkering until 03:15 last night. Today, I want to finish the mounts for the two levers that will sit on either side of the steering column. Quick breakfast and with the knowledge that I was Home Alone for most of the day, I tackled the mission.

The existing mounts had a 45° angle and were somewhat long, which would have made the "knobs" sit too low and not be entirely synchronized in terms of symmetry on the steering column. I had already attached the ends in their respective places last night, and I didn't feel like redoing that. But you can't get the mounts off unless the entire cable is removed. Hmm. A small blunder. But I figured out that if I cut a groove in the loop, I can remove the mount from the cable after all. Cut, drilled, sanded, primed, and painted them matte black like everything else.

Andreas called and said he was tired of weekend chores in the garden and wondered if he could come by and start up the coop. Uh, of course! But I hadn't put on the fuel hose yet, but had to unscrew the carburetor assembly again to more easily access the connection nipple.

Andreas also thought the fuel hose between the carburetors and the fuel pressure regulator was a bit short. Luckily, I had a longer piece of 6 mm hose at home. The old one was set aside, but wait a minute, the nipple from the fuel pressure regulator is 6 mm, while the connection to the carburetors is 8 mm. How did we even get the original hose on? So immediately started looking for 1/8" NPT 8 mm in brass, which not many open-on-the-weekend stores have. Practically none. Nope, realized that I had 4 pieces of 1/8" NPT 6 mm nipples at home that we used for a rig to measure fuel pressure. But these are currently not useful for anything. So with this mishap, today's planning died. And tomorrow's. I won't find any store with American-threaded nipples over the weekend. Hmm.

But in another place, things are happening – 3D printing in full swing. Well, it can't be rushed, taking nearly seven hours for one funnel. But, insanely cool to see it being made – from nothing to a fancy funnel. I thank Didrik at BV Consulting (www.bvconsulting.se) for the quick response.

And since there was no startup attempt today, I tested the new Cooper S speedometer. Set the drill at 2000 rpm, inserted a nail into the nozzle, and ran it full speed counterclockwise. 100 km/h. And then I tested the Swift's to see how much it showed. 74 km/h to be precise. There's a bit of a difference, in other words. Hmm. Now I just have to figure out how to make this work together. Does anyone have any tips on how to do it? Or I may have to take the gauge mechanism from the Swift and place it behind the Cooper dial in some clever way...

https://www1.garaget.org/gallery/images/219/218366/218366-a26f373aa9fb6cc083ebac8c1132dee8.jpg
https://www1.garaget.org/gallery/images/219/218366/218366-67b00ccd5d0b715f25dc85741a967d8b.jpg
https://www1.garaget.org/gallery/images/219/218366/218366-6832ea3b54630c4b4526bf8a3056efe7.jpg
https://www1.garaget.org/gallery/images/219/218366/218366-3285933c6170054c71da6b31eccde23d.jpg
https://www1.garaget.org/gallery/images/219/218366/218366-fe265dd7ddb8e76094ce6d8bbd1e729f.jpg
https://www1.garaget.org/gallery/images/219/218366/218366-223e793eb6c6cbfae29d3b5a8740e9fa.jpg
https://www1.garaget.org/gallery/images/219/218366/218366-8dd0fbc6e7b100667d0f0f1f3643a4cd.jpg
https://www1.garaget.org/gallery/images/219/218366/218366-c6777baabbfca7ba894eec686128f96b.jpg
https://www1.garaget.org/gallery/images/219/218366/218366-ea7b92f119eba7940746a9348c110ada.jpg
https://www1.garaget.org/gallery/images/219/218366/218366-8983e858cc14754e9d19528433a2c186.jpg
https://www1.garaget.org/gallery/images/219/218366/218366-ff9c0fb03dbf0d6c834d7049140c6013.jpg
https://www1.garaget.org/gallery/images/219/218366/218366-c7f2069961bd3d425d8e4f4fc66e1a65.jpg

Senast redigerat av martinhejdesten (29 december 2023)

stingray-ragge
11 april 2021 · 1 506 Inlägg

Tråkigt med att det ska falla på en nippel men så är det alltid av någon anledning man har en hel låda med olika nipplar och gängningar men aldrig pen man behöver 🤪
Finns typ växellådor för att omvandla från miles till km typ som denna https://www.tamotor.se/produkt/vaxelhus … kilometer/ 
kanske finns någon liknande produk som är variabel eller ställbar någonstans att hitta 🤔
Antar att hastighetsvajern kommer ifrån växellådan, ibland är där små kugghjul som driver vajern och ibland även i plast som du kanska kan ändra?

martinhejdesten
11 april 2021 · 484 Inlägg

"–Ojojoj" som i att det händer grejer med 3D-printingen, men även att andra saker tar längre tid än väntat.

Ojojoj #1 – Jag planerade ju att montera fästena för både chokevajerreglaget och värmereglaget. Tänkte sätta dem på varsin sida om rattstångsfästet och måttade ut, markerade, borrade, kapade skruvar och smackade dit den ena efter mycket möda då det återigen var svåråtkomligt och märkliga vinklar där jag inte kunde se och fick använda spegel. Snyggt, men jag ville vrida den en aning innan den satt rakt. Men det blev för mycket vridmotstånd eftersom vajerns (ståltråd egentligen) ände var fastskruvad. Och då var jag tvungen att lossa den där låsmekanismen på andra sidan torpedväggen, ni vet den som satt upp och ner och var svåråtkomlig. Nåja, bara gör det, liksom. Färdigt.

Gick vidare med att markera vart chokevajerreglaget skulle sitta på högersidan. Tog fram fästet men fick inte på det på vajern. Vad nu då? Insåg att jag skruvat dit fel fäste på vänstersidan. Demontera och montera rätt. Bökigt ännu en gång? Jajemän. Men nu hade jag i varje fall rätt fäste på högersidan. Borrade, kapade skruv och monterade. Ajajaj, ögonmåttet var inte det minsta rätt inställt. Det satt för långt till höger, typ 15 mm. Hyfsad diff, haha. Skelögd. Markerade på nytt, borrade och skruvade ihop sittandes i världens mest osköna ställning med ett burrör i magen och hjässan mot tvärbalken. Kändes som ett pass på Twister-mattan. Men så satt de båda där. Ooooh, nice. Tog några timmar, men är mycket nöjd.

Ojojoj #2 – Det händer grejor hos BV Consulting. Didrik har slutfört 3D-printningen och kapat bort "supportmaterialet" och nu ser man slutresultatet. Och det hela läggs på posten imorrn och då ska det minsann testas direkt. Kan hända att vi får justera något eller byta plastsort så att det funkar tillsammans med bensin. Gott jobbat!

Och så har jag beställt 1/8" NPT-nipplar (8 mm) till bränsleslangen och bränsletrycksregulatorn så att de båda ändarna passar 8 mm-slangen. Sen är det nog minsann klart för ett tredje uppstartsförsök, troligtvis senare i veckan. Håll tummarna igen.

• • • TRANSLATION • • •

Reply to post: Too bad it comes down to a nipple, but that's always the case, for some reason you have a whole box of different nipples and threads, but never the one you need 🤪 There are gearboxes available to convert from miles to kilometers, like this one https://www.tamotor.se/produkt/vaxelhus … kilometer/ maybe there's a similar product that is variable or adjustable somewhere to find 🤔 I assume the speedometer cable comes from the gearbox, sometimes there are small gears that drive the cable and sometimes even in plastic that you might be able to modify?

"–Oh yay" as in things are happening with 3D printing, but also that other things take longer than expected.

Oh yay #1 – I planned to mount the brackets for both the choke cable lever and the heater cable lever. Thought to place them on either side of the steering column mount and measured out, marked, drilled, cut screws, and slapped on one after a lot of effort since it was once again hard to reach and strange angles where I couldn't see and had to use a mirror. Nicely done, but I wanted to twist it a bit before it was straight. But there was too much torsional resistance since the end of the cable (steel wire actually) was screwed in. And then I had to release that locking mechanism on the other side of the firewall, you know, the one that was upside down and hard to reach. Well, just do it, you know. Done.

Continued to mark where the choke cable lever should be on the right side. Took out the bracket but couldn't get it on the cable. What now? Realized I had screwed on the wrong bracket on the left side. Disassemble and assemble correctly. A hassle once again? Yes indeed. But now, at least, I had the correct bracket on the right side. Drilled, cut screws, and assembled. Ouch, eye measure was not set right at all. It was too far to the right, about 15 mm. A decent difference, haha. Cross-eyed. Marked again, drilled, and screwed together sitting in the world's most uncomfortable position with a roll bar in the stomach and the top of the head against the crossbeam. Felt like a round of the Twister mat. But then they both sat there. Ooooh, nice. Took a few hours but very satisfied.

Oh yay #2 – Things are happening at BV Consulting. Didrik has completed the 3D printing and cut away the "support material," and now you can see the end result. And it will be in the mail tomorrow, and then it will certainly be tested right away. We may need to adjust something or change the type of plastic so that it works with gasoline. Well done!

And so, I have ordered 1/8" NPT nipples (8 mm) for the fuel hose and the fuel pressure regulator so that both ends fit the 8 mm hose. Then it's probably ready for a third startup attempt, most likely later this week. Cross your fingers again."

https://www1.garaget.org/gallery/images/219/218366/218366-b841937b21bae55db68893d3c029be9f.jpg
https://www1.garaget.org/gallery/images/219/218366/218366-a77304bcb3470f9869929db91b201e1c.jpg
https://www1.garaget.org/gallery/images/219/218366/218366-ec6440c35c896576e94af2f799d40fb6.jpg
https://www1.garaget.org/gallery/images/219/218366/218366-443c4a8b79693f1fdca5ed6ce47d950a.jpg
https://www1.garaget.org/gallery/images/219/218366/218366-5b2eeb0e30e258c51ec49805e98ffe50.jpg
https://www1.garaget.org/gallery/images/219/218366/218366-bf9b86f18c426130864f1d7701a525a8.jpg
https://www1.garaget.org/gallery/images/219/218366/218366-7e9336132a25558e4a2cc0a17fa101ad.jpg
https://www1.garaget.org/gallery/images/219/218366/218366-42b66345a3a3372a9a5c3b5dfa41b45a.jpg
https://www1.garaget.org/gallery/images/219/218366/218366-838b0b320d260688604dfedd615a9248.jpg
https://www1.garaget.org/gallery/images/219/218366/218366-53a7c866720943c0c0bf5dc5d807ac11.jpg
https://www1.garaget.org/gallery/images/219/218366/218366-417755e4d6ddc96ae0d2d16191725866.jpg

Senast redigerat av martinhejdesten (29 december 2023)

Cuefa Ain't no place like home...
12 april 2021 · 4 628 Inlägg

Ett gott dagsverke minsann!

Får du en provbit av print-materialet så Du kan se att det inte löser upp sig direkt av bensinen eller chansar du på att det funkar rakt av?

Autopilot: På.
Projekt: Skogsmulle on a budget
Cupra Born "Gruvbilen" (2022)
Mercury Grand Marquis LS "Murklan" (2000)
martinhejdesten
14 april 2021 · 484 Inlägg

Idag kom dottern in på kontoret med en massa brev. Skit i dem, jag vill ha paket! Och visst fanns det sådana – ett blått vadderat kuvert och ett mindre kuvert. Innehåll; 3D-printad tratt respektive mässingsnipplar. Välkomna!

Jag måsta erkänna att det är en häftig känsla av att hålla en pryl i plast som inte fanns för en dag sedan, som nu finns IRL, tillverkad helt efter min måttsättning och 2D-ritning samt fint 3D-utförande utav BV Consulting. Överraskande fin kvalitet, men den behöver slipas litegrann. Men det krävs en liten justering som därmed kräver en ny printning. Precis som du nämnde Cuefa, jag testar med bensin på den tratt jag fått (som ändå är inaktuell pga justeringarna) innan jag ger klartecken till att printa fler trattar. På mitt Instagram-konto har jag lagt ut en film på tratten när den snurrar ett varv.

Och nyss svängde jag inom Andreas och lånade gängtätning och så ska den nya 8 mm-nippeln på bränsletrycksregulatorn, på med slangen och montera förgasarna. Sen är det dags att fire it up!

Stingray-ragge, njae, jag har skaffat en hastighetsmätare med rätt enhet, dvs km/h vilket även Swiften har, så det är ingen mph-konvertering som jag söker efter. Enligt spec från Minisport så har Cooper-mätaren en utväxling på 3.4:1. Vad det innebär exakt vet jag ännu inte, men antingen blir det till att se över kugghjul i växellådan som du nämnde eller hitta en sådan där variabel eller ställbar pryl som gör att mätaren visar rätt. Jag borde kunna få tag på info om Swiftens utväxkling och hitta en lösning som synkar dessa två. Tips, nåon?

Men detta kan vänta lite, nu är det fokus på att få igång motorn! Lär nog testa i helgen. Håll alla tummar!

• • • TRANSLATION • • •

Reply to post: Indeed, a good day's work! Do you get a sample of the print material so you can see that it doesn't dissolve directly in gasoline, or are you taking a chance that it works straight away?

Today, my daughter came into the office with a bunch of envelopes. Forget them, I want packages! And sure enough, there were some – a blue padded envelope and a smaller one. Contents; 3D-printed funnel and brass nipples. Welcome!

I must admit it's a cool feeling to hold an item in plastic that didn't exist a day ago, now existing IRL, manufactured entirely to my specifications and 2D drawing, and beautifully executed in 3D by BV Consulting. Surprisingly good quality, but it needs a bit of sanding. However, a small adjustment is required, which means a new print. Just as you mentioned, Cuefa, I'll test with gasoline on the funnel I received (which is still irrelevant due to the adjustments) before giving the go-ahead to print more funnels. On my Instagram account, I've posted a video of the funnel spinning one revolution.

And just now, I stopped by Andreas and borrowed thread sealant, and then the new 8 mm nipple goes on the fuel pressure regulator, attach the hose, and mount the carburetors. Then it's time to fire it up!

Stingray-ragge, well, I've got a speedometer with the right unit, i.e., km/h, which Swift also has, so I'm not looking for an mph conversion. According to the spec from Minisport, the Cooper meter has a ratio of 3.4:1. What that exactly means, I don't know yet, but either I'll have to check gears in the gearbox, as you mentioned, or find one of those variable or adjustable gadgets that make the meter show correctly. I should be able to get information about Swift's ratio and find a solution that syncs these two. Any tips?

But this can wait a bit; now the focus is on getting the engine started! Probably going to test this weekend. Keep all fingers crossed!

https://www1.garaget.org/gallery/images/219/218366/218366-4c36e1d6a90d9f2c8bbcd790aaf05a28.jpg
https://www1.garaget.org/gallery/images/219/218366/218366-ed183a239849a57e3d087b4b23f2c6b5.jpg
https://www1.garaget.org/gallery/images/219/218366/218366-d32ee8987d0487a2ccb6ac92debb957f.jpg
https://www1.garaget.org/gallery/images/219/218366/218366-453569448f6f4f61c60c1f2a88442d8f.jpg

Senast redigerat av martinhejdesten (29 december 2023)

eastmotorsport -sommar ska de va....
22 april 2021 · 4 524 Inlägg

Nu blir jag orolig. Länge sedan du uppdaterade nu. Har du tänt eld på bilen eller vad händer smile

Tack till alla som följer och tittar i våra projekttrådar .
martinhejdesten
23 april 2021 · 484 Inlägg

Ja, nej, ja, nej... paus. Njae, ja, oh no! Hmm, nu då? Kanske, ja, men vänta lite nu, nu så, ja, oh ja, nej. Detta var seneftermiddagen.

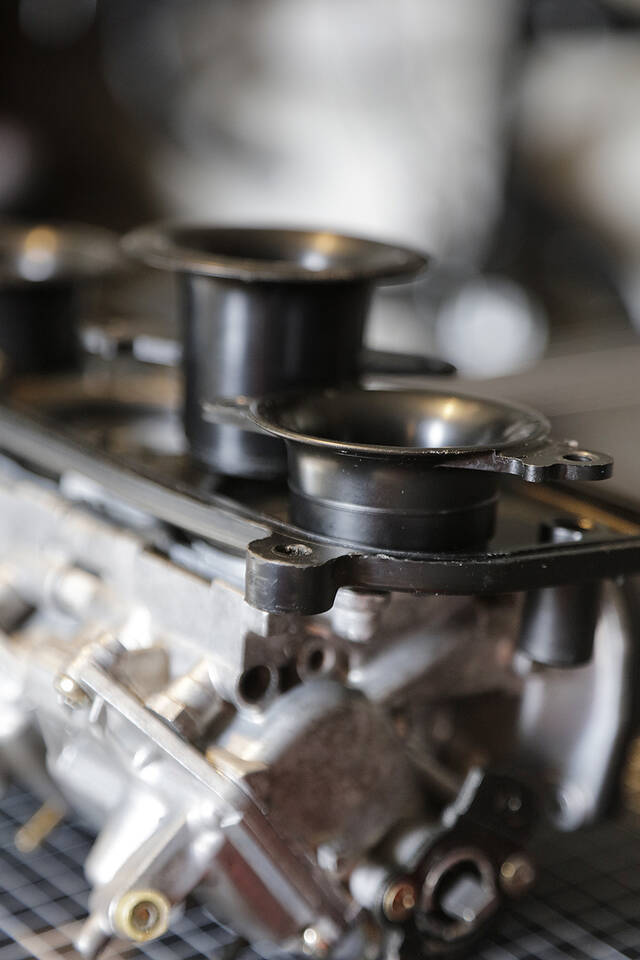
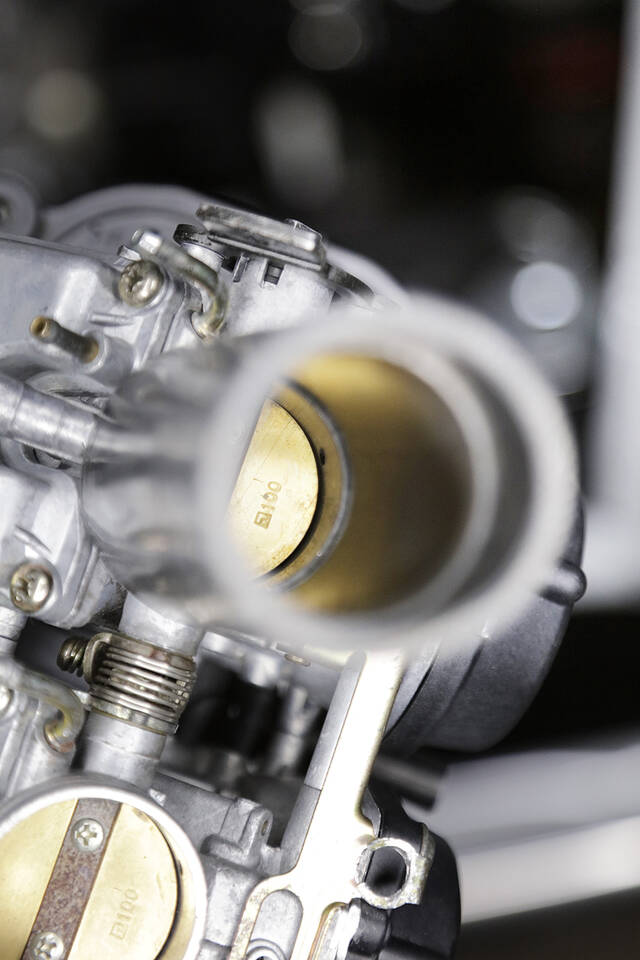
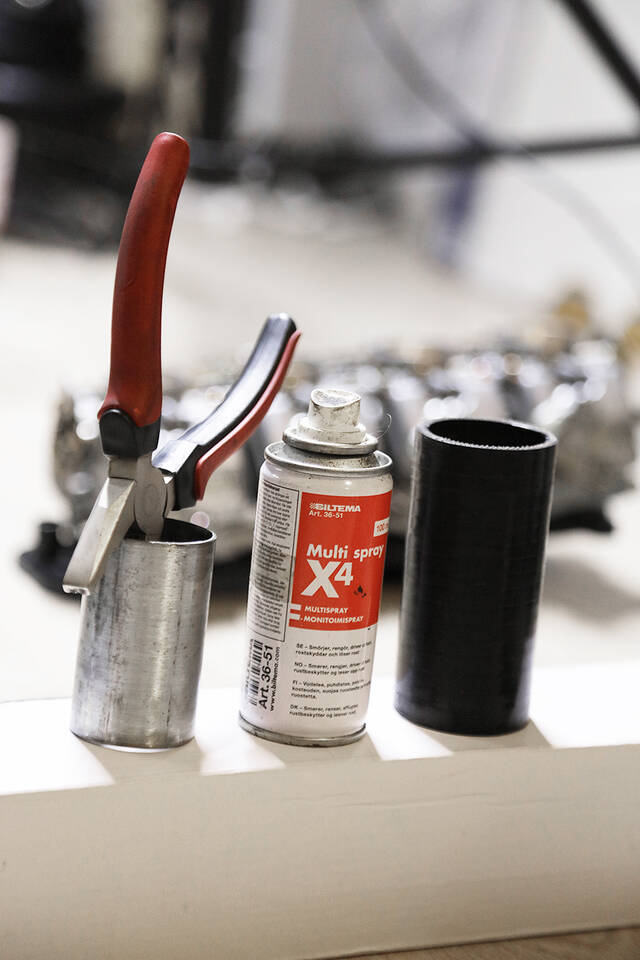
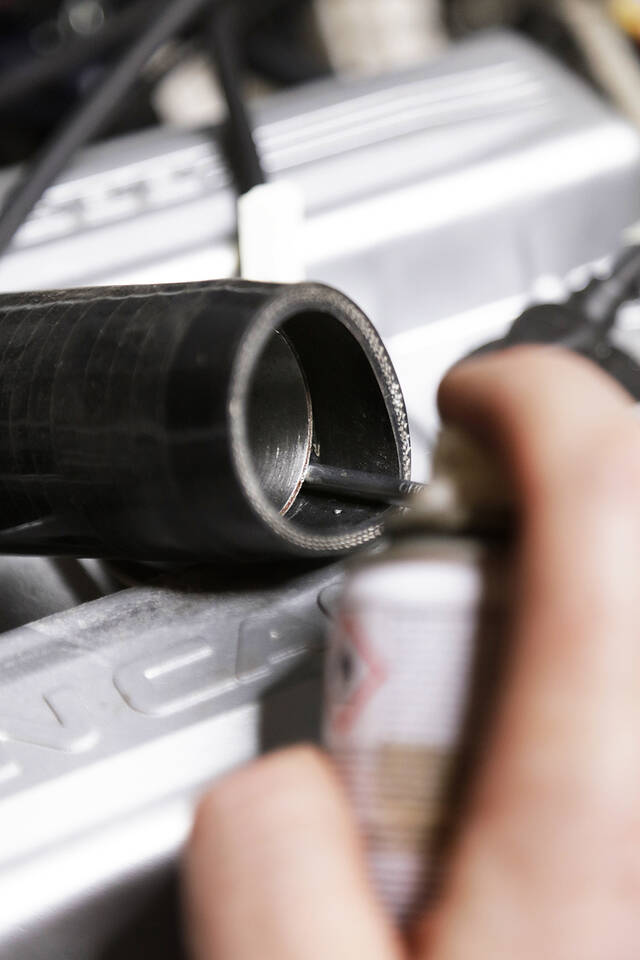
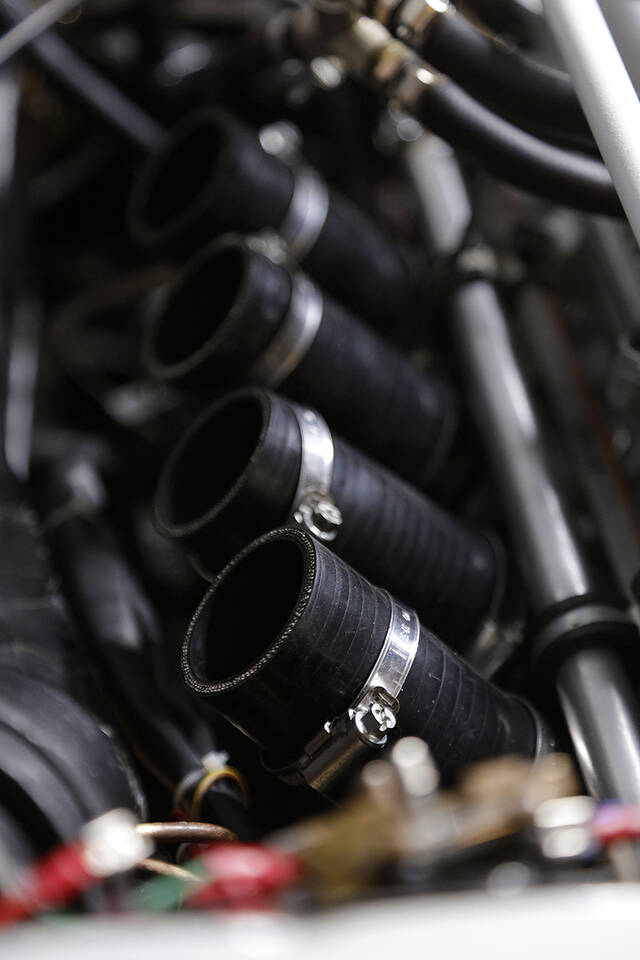
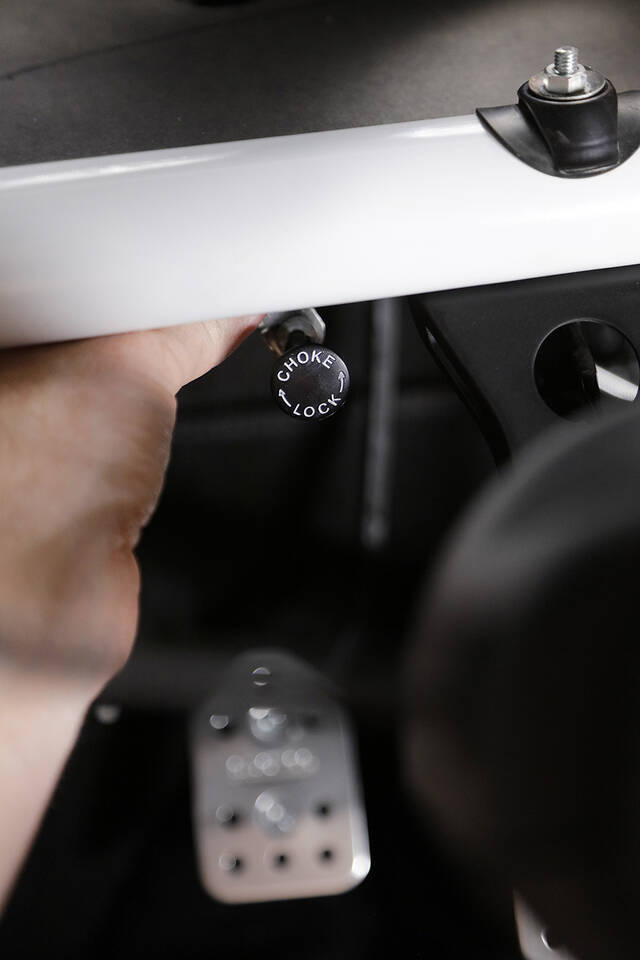
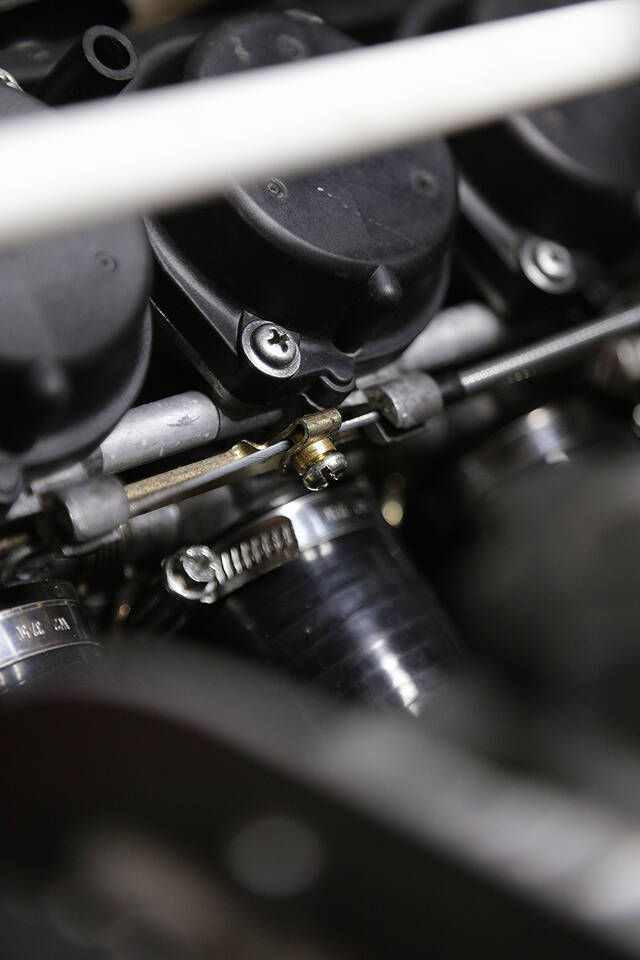
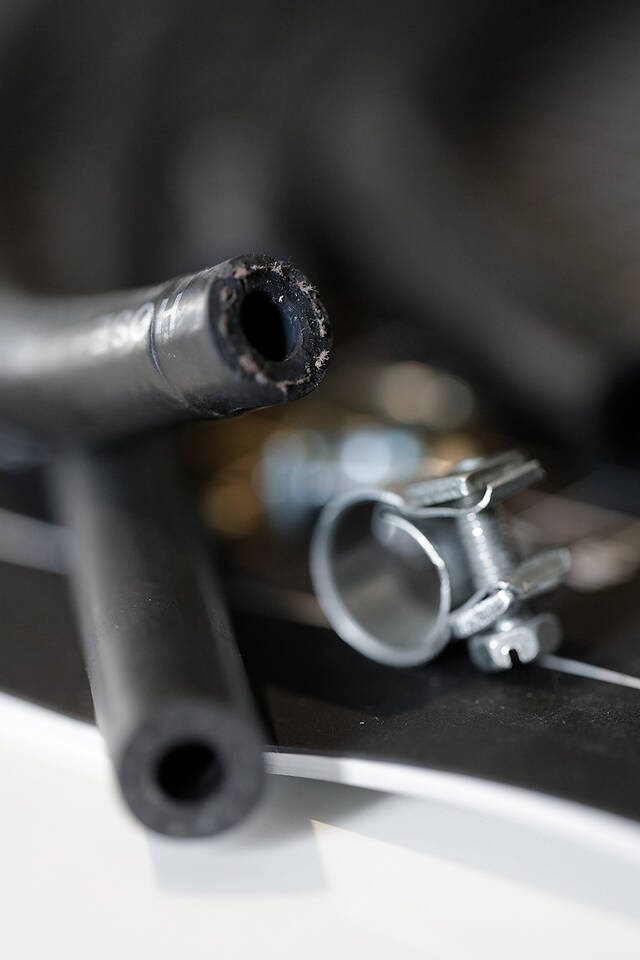
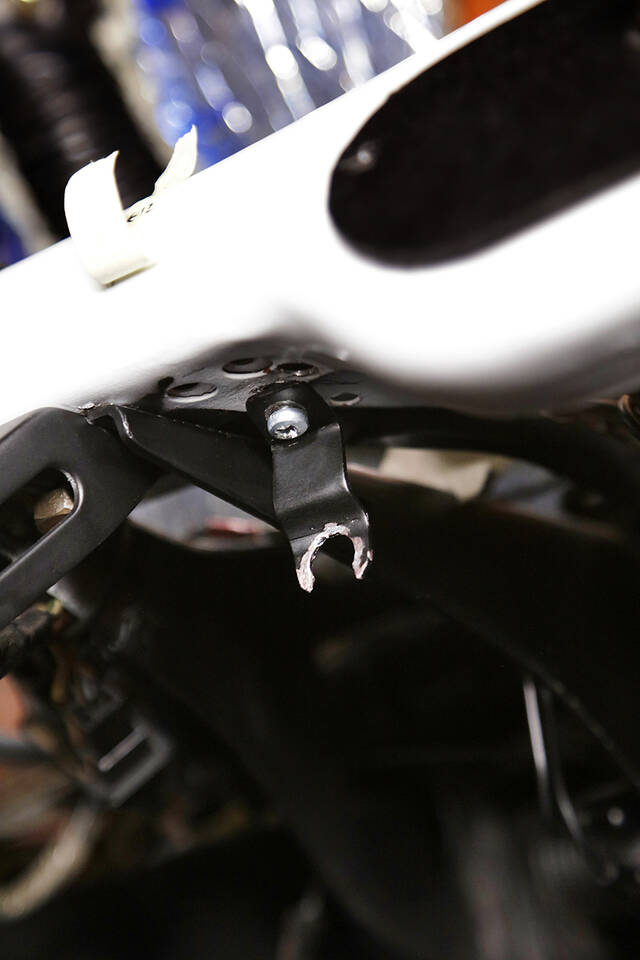
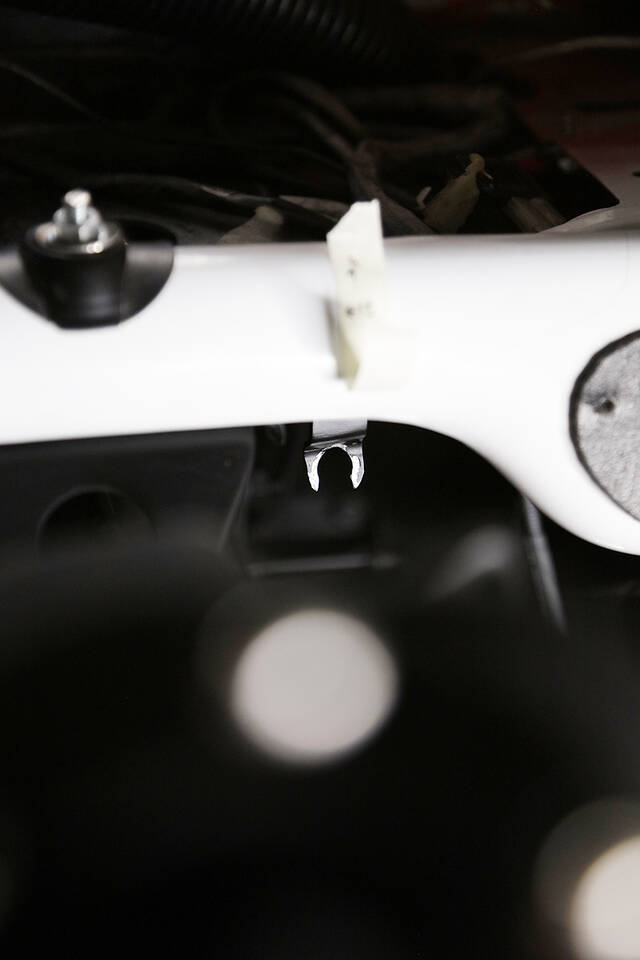
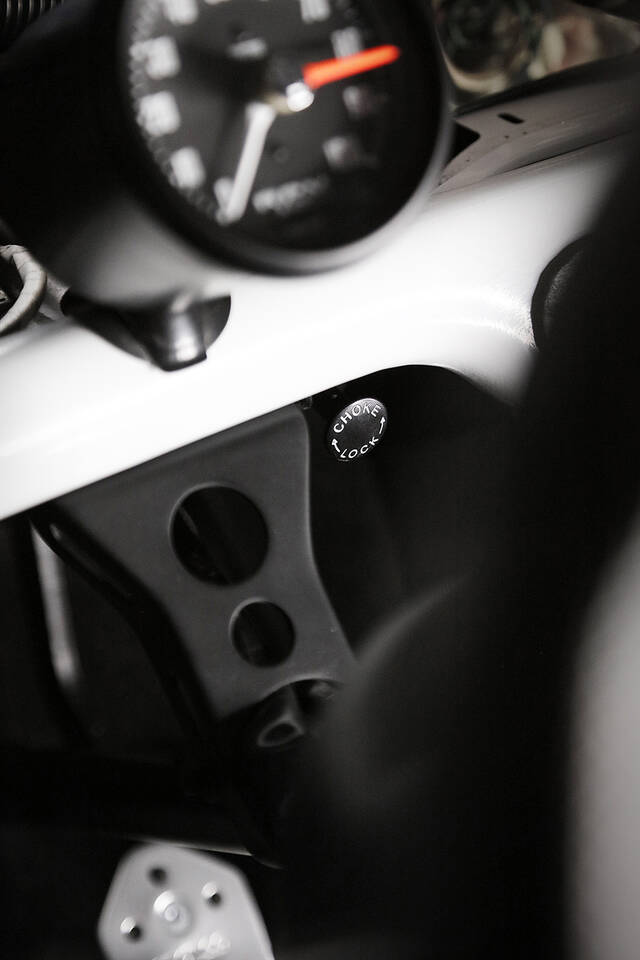
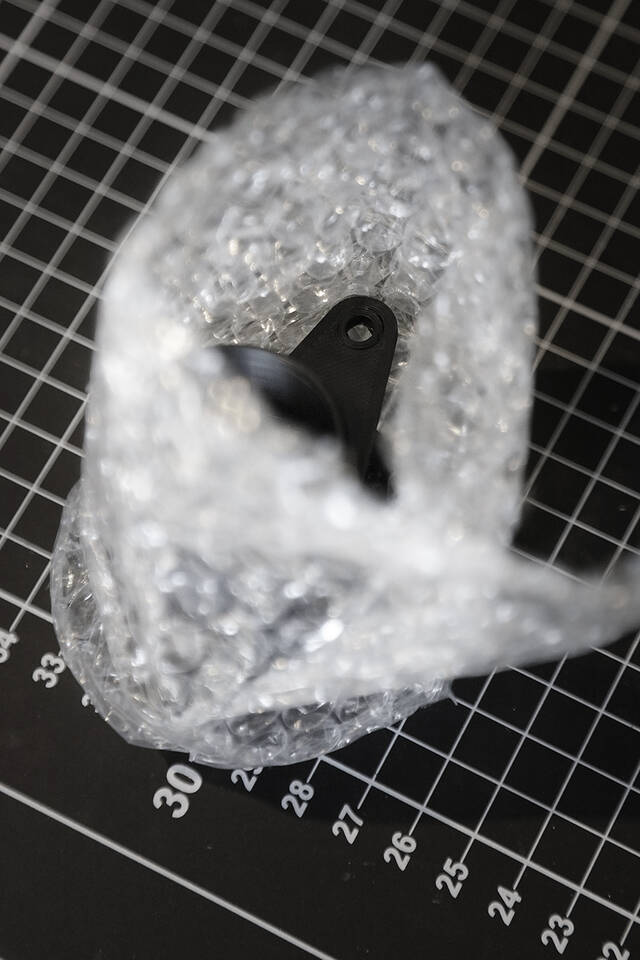
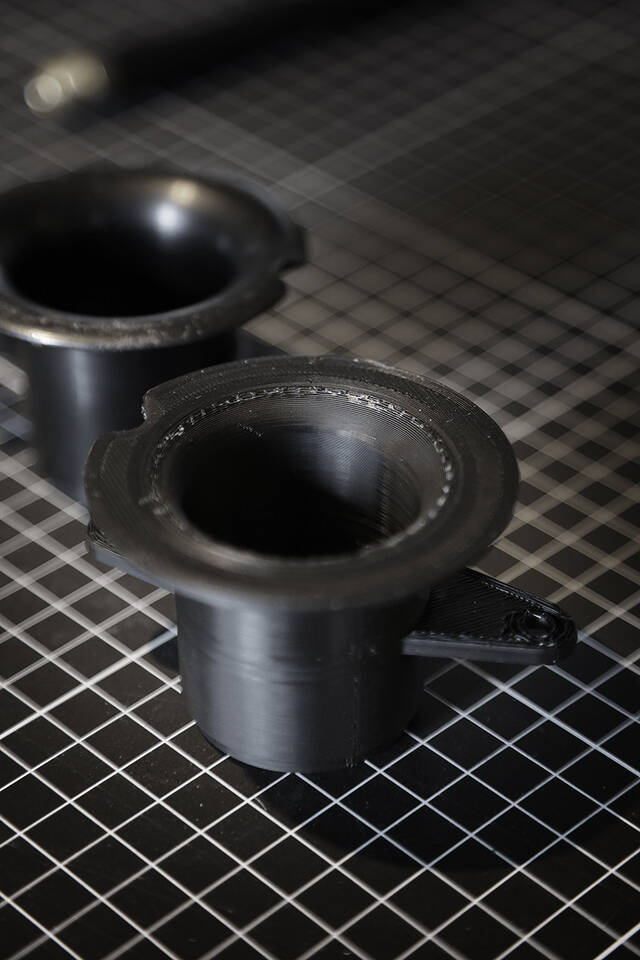
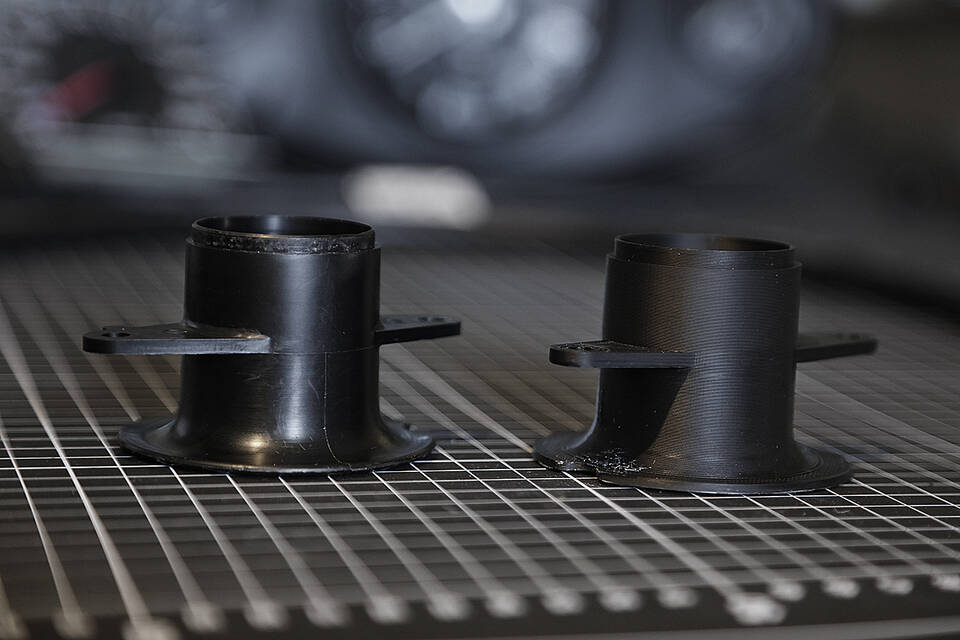
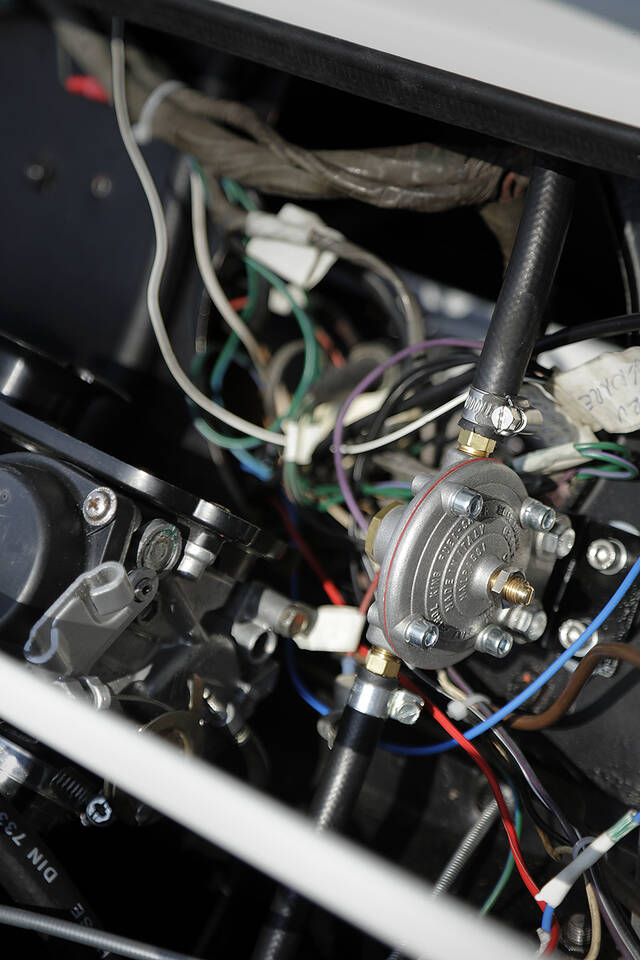
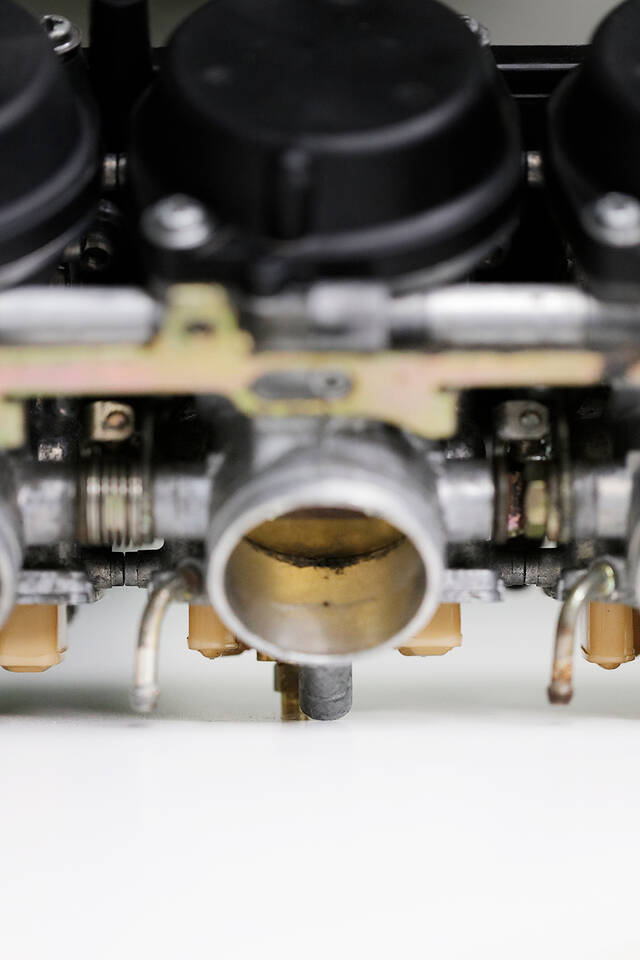
Började med att jag började skruva lite på förgasarkitet. Nu vill jag ha igång bilen! Hela kitet på plats, hmm, vänta lite. Choke-vajern var tvungen att skruvas fast innan man monterade förgasarna. Av med dem, skruva och så på med allt igen. Fick en notis om att eastmotorsport lämnat en kommentar på min sida. Jadu, tändstickor och bensin hör inte ihop. Men än så länge har jag inte eldat upp bilen. Drog åt slangklämmorna ordentligt, men nu satt inte slangarna på riktigt. Av med det. Justera. Klart.

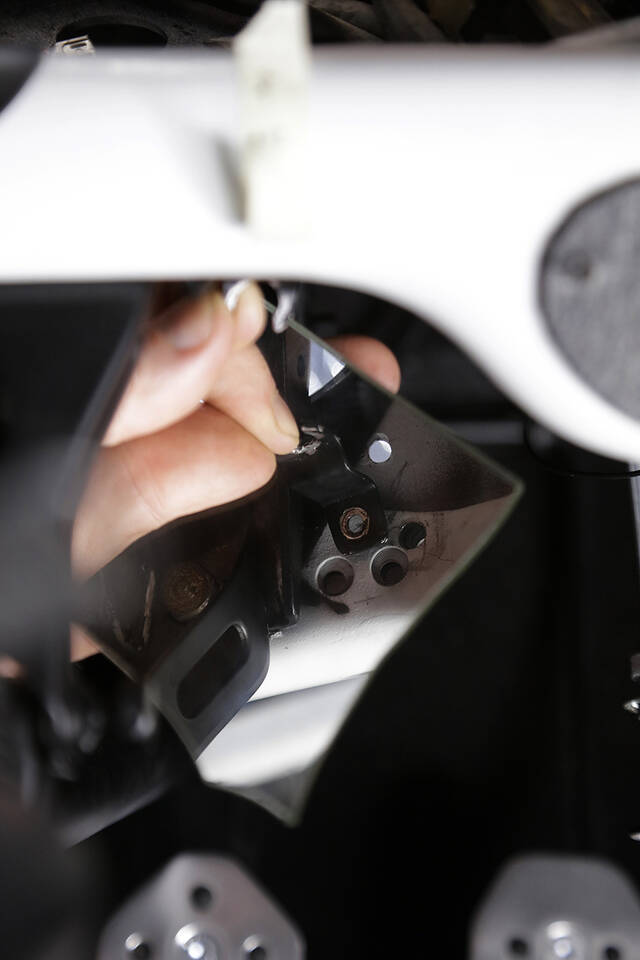
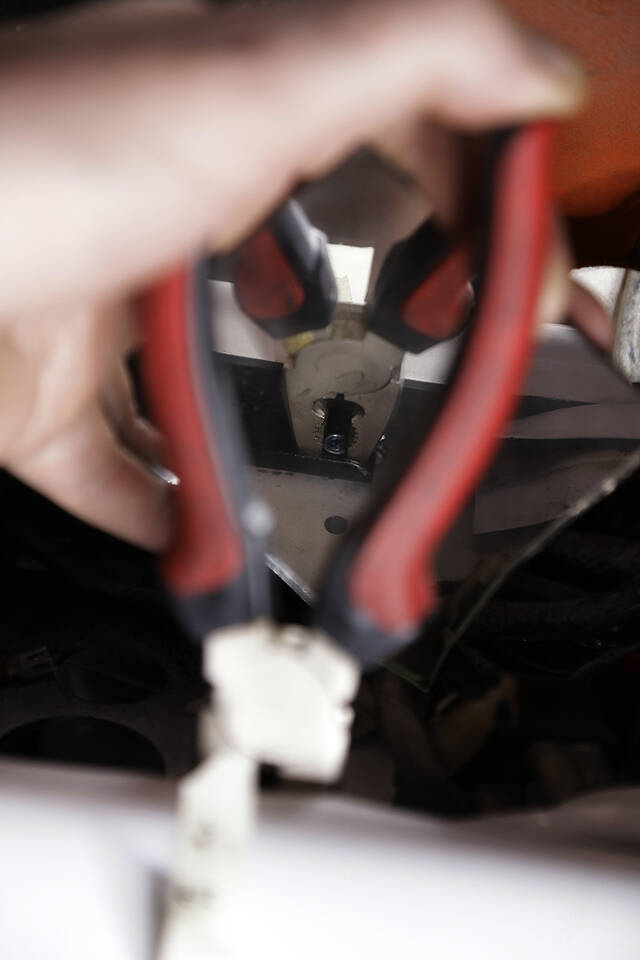
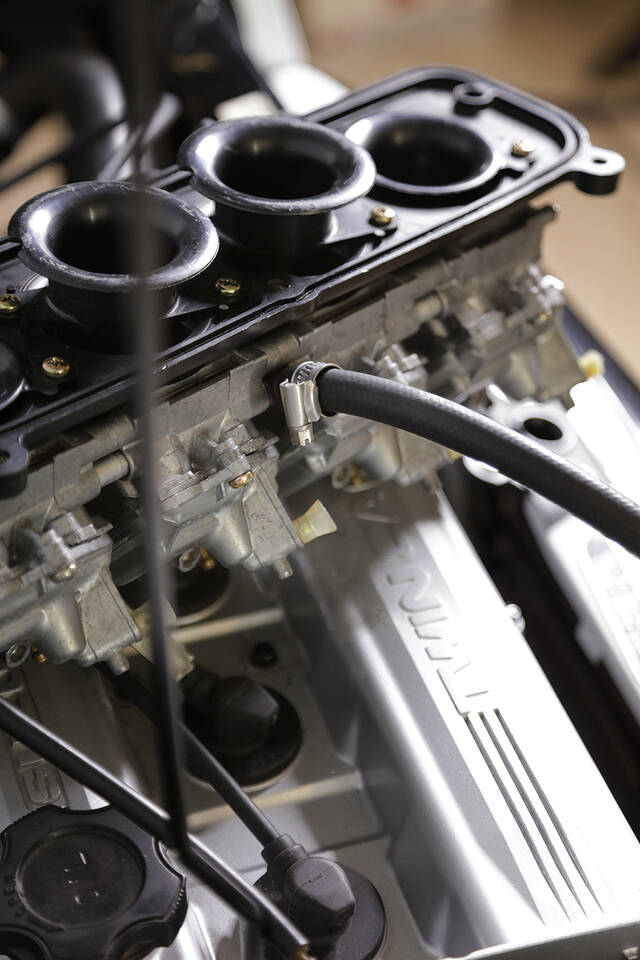
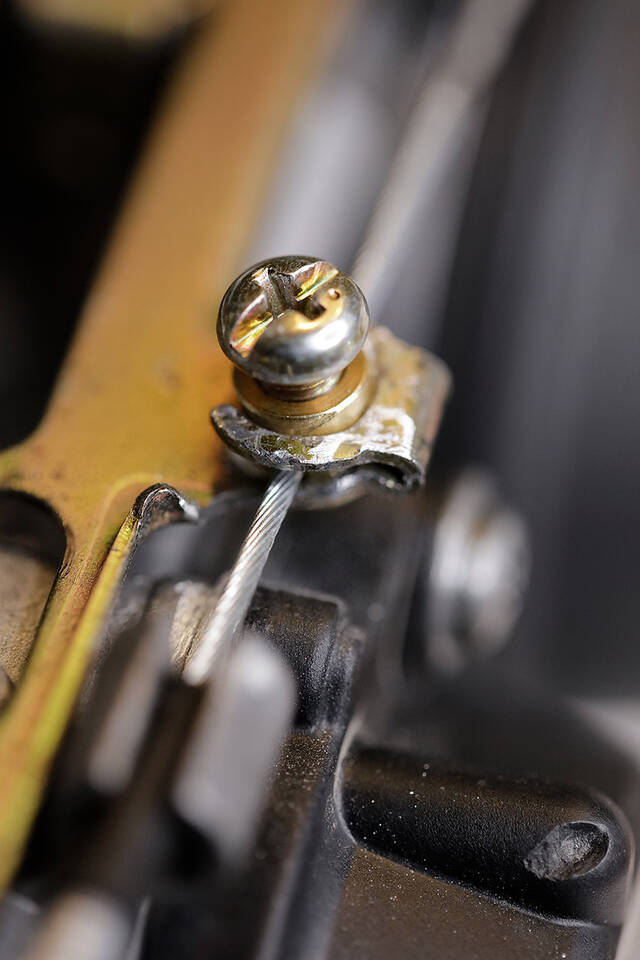
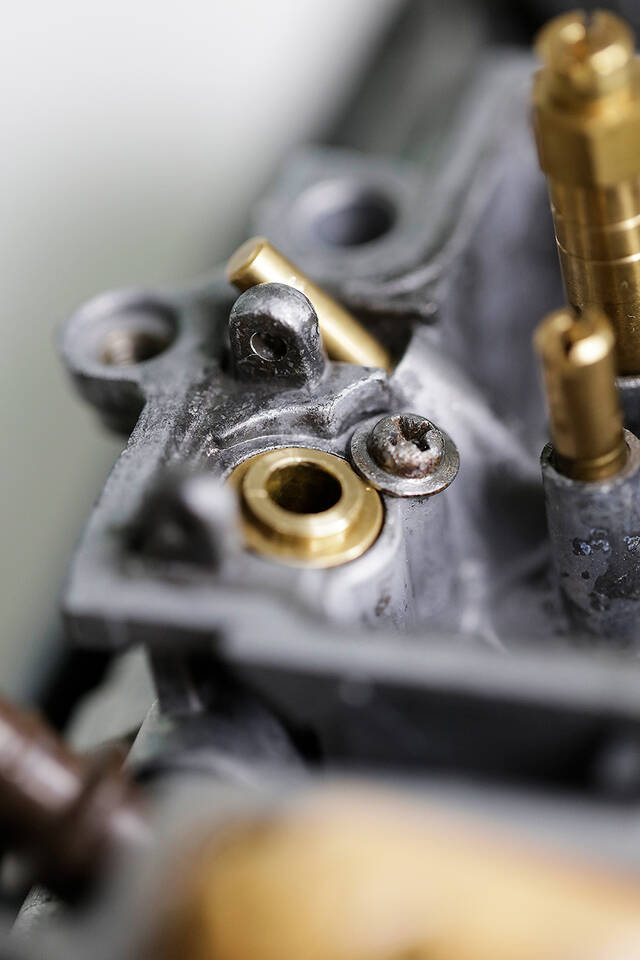
Rullade ut bilen ur garaget så att den fick en chans att acklimatisera sig för "livet utanför" en stund. Och så blev det thaimat innan the Grand Moment. Men nu så! Pinnade ut och kopplade på batteriladdare med starthjälp, choke, och så vred jag nyckeln. Ingenting hände. Aha, måste koppla rätt på batteriet ju... ingen fläta på minuspolen. Vred första steget på nyckeln, yes, bränslepumpen gick och fyllde flottörhusen. Men tycket det började lukta oroväckande mycket bensin i motorrummet. Läckage! Attans. Visade sig att förgasare #2 (den som strulat hela tiden) läckte. Det var tydligen en skruv som inte var åtdragen, och inte mindre än skruven där man tappar flottörhusen på soppa. Så det rann ju förstås rakt igenom och blötte ner en hel del. Tur att jag stod ute. Torkade upp och fick lossa hela förgasarkitet på nytt för att kunna skruva åt den där skruven. På med allt igen.

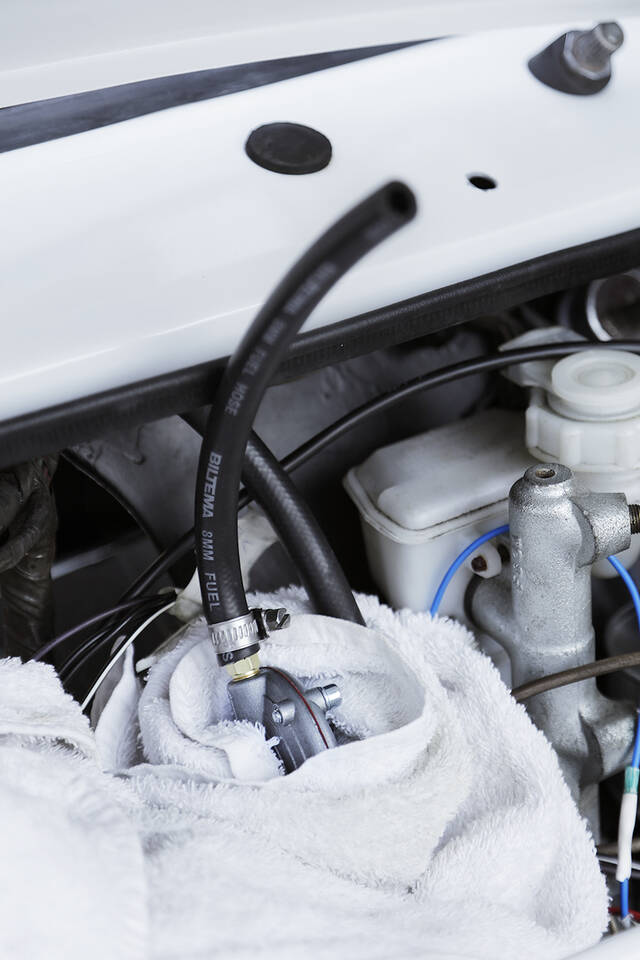
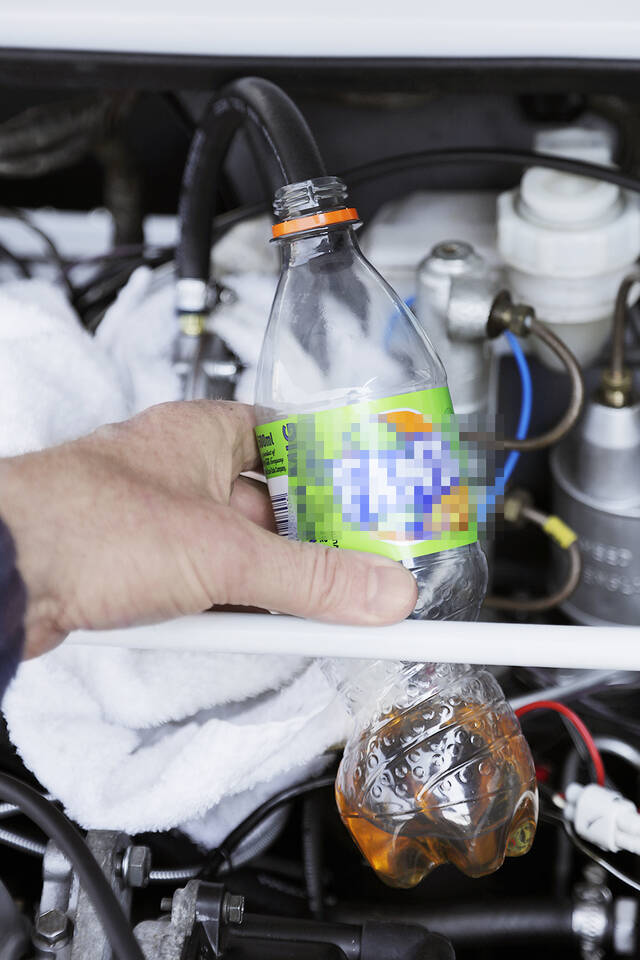
En nyfiken granne kom förbi och gav komplimanger gällande bygget och när han ändå var där så kunde han ju gott få hjälpa till, eller hur? Han blev startgas-ansvarig medan jag vred på nyckeln. Motorn hostar litegrann, tänder till, dör, hoppar igång igen, tänder mer, och mer, dör, tänder igen och brölade något så in i h-vete (har jag glömt montera ljuddämpare?), dog igen, tände till på nytt, brölade, snurrade runt en hel del faktiskt, halvdog och så stängde jag av. Den kör bara startgasen. Ingen startgas, no action. F*n. Den får inte soppa. Det. Kan. Ju.Inte. Vara. Förgasarna. Eller? De är ju genomgångna till atomnivå. Jag får helt enkelt koppla av bränsleslangen och se ifall det kommer soppa ur den när jag slår till tändningen och bränslepumpen går. Men eftersom flottörhusen fylldes och det läckte pga den icke åtdragna skruven så kommer det ju fram. Är det felinställt nu när jag plockat ner hela kitet i bitar? Tålamodet tryter.

Jaja, resten av famijen påminde mig att vi skulle iväg och spela padel. Om två minuter. In med allt garaget. Luktar bensin så det står härliga till där inne nu. På väg till padeln så frågad emin fru om den lilla bilen skulle låta så mycket. Ehh, nej. Hehe. Vad vet jag, det blir en senare fråga. Men får jag bara i soppa så ska jag nog se till att hela grannskapet hoppar till varje gång jag startar bilen.

Jag filmade förstås kvällens startförsök men jag hade tydligen avaktiverat ljudinspelningen. Rookie-misstag. Annars hade jag förstås lagt upp en video här. Kan man det förresten? Eller blir det till att lägga på Youtube och länka in här? Nåja, en film med uppstartsförsök där man inte hör något är ju meningslöst. Får prova igen imorrn. Både med mer startgas och med ljudinspelning.

På återseende/återhörande!

• • • TRANSLATION • • •

Reply to post: Now I'm getting worried. It's been a while since you updated. Have you set the car on fire or what's happening? 😄

Yes, no, yes, no... pause. Well, maybe, yes, oh no! Hmm, what now? Perhaps, yes, but wait a moment, now, yes, oh yes, no. This was the late afternoon.

Started by tinkering with the carburetor kit. Now I want to get the car started! The whole kit in place, hmm, wait a minute. The choke cable had to be screwed on before mounting the carburetors. Off with them, screw, and then put everything back on. Got a notification that East Motorsport left a comment on my page. Well, matches and gasoline don't go together. But so far, I haven't set the car on fire. Tightened the hose clamps properly, but now the hoses weren't sitting right. Off with it. Adjust. Done.

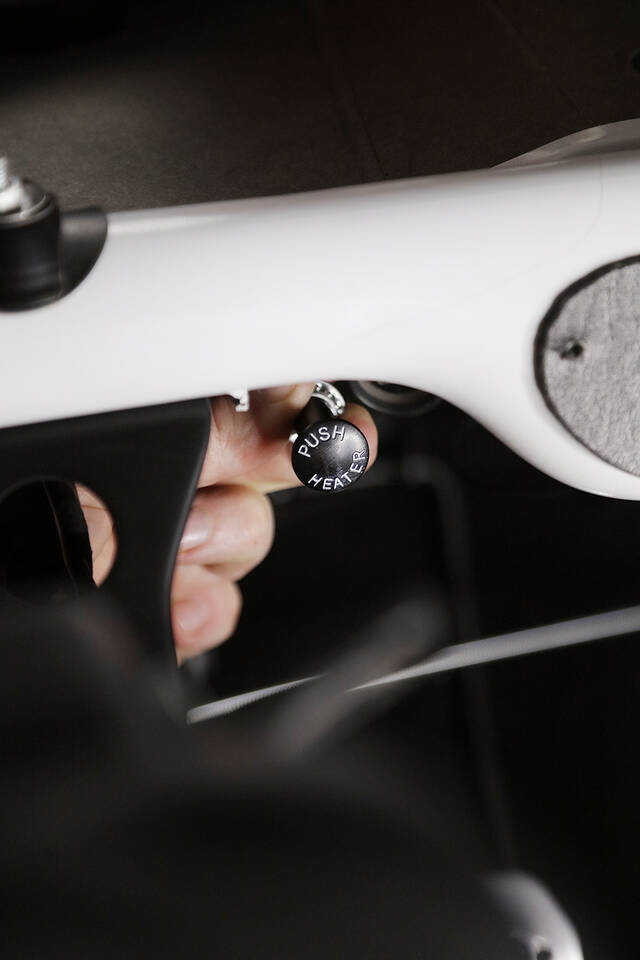
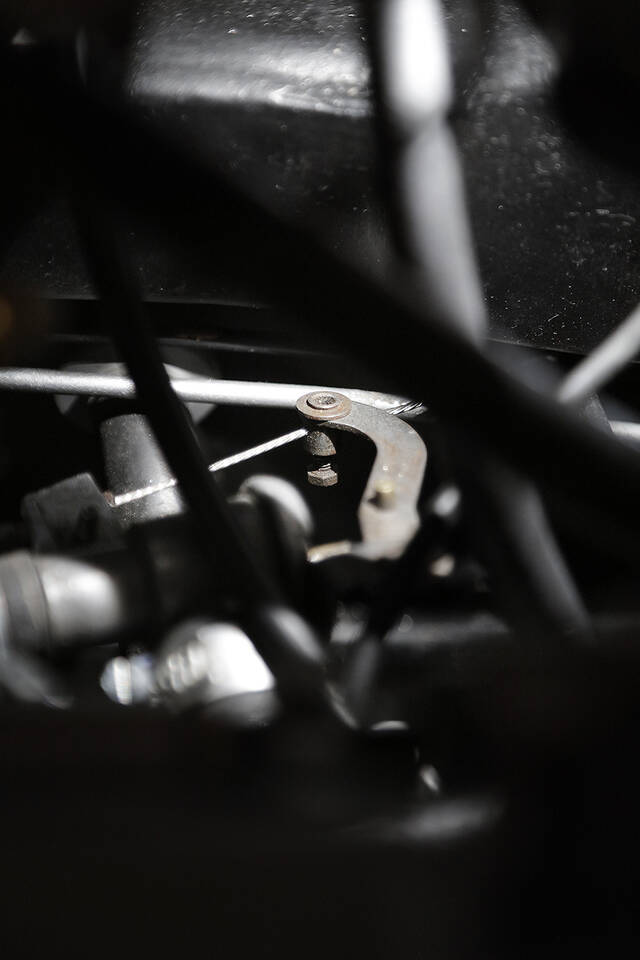
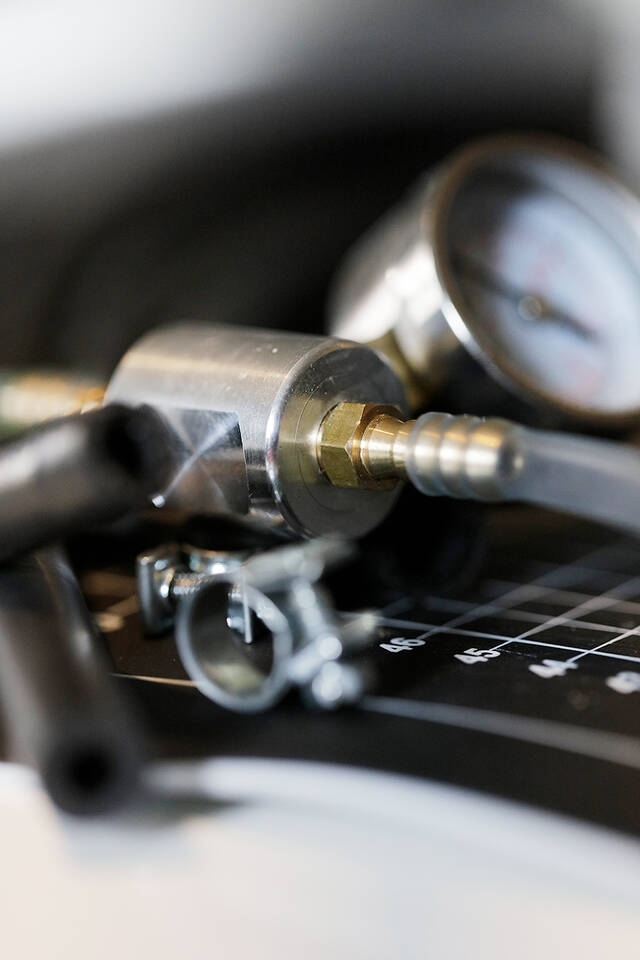
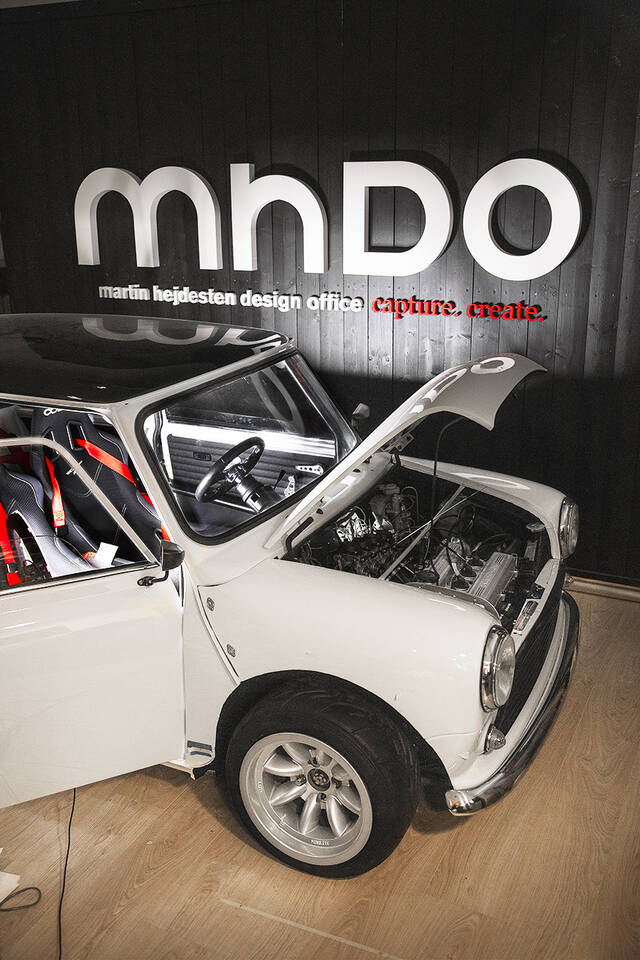
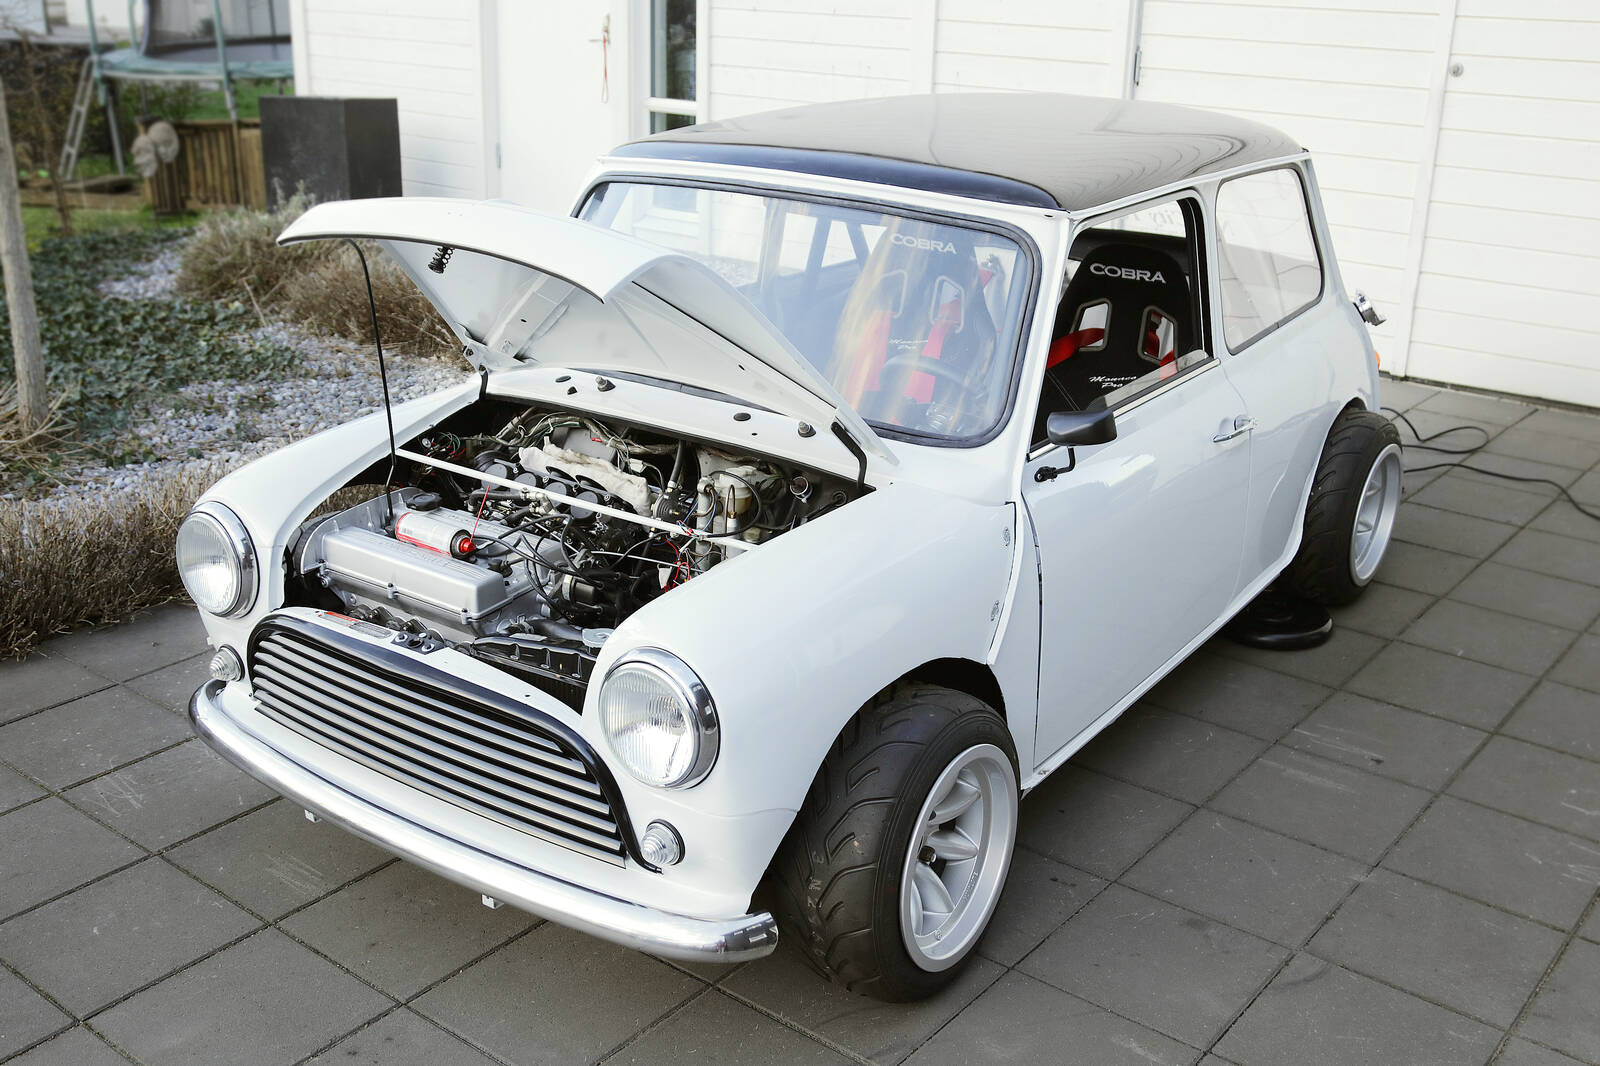
Rolled the car out of the garage so it could acclimatize for a while to the "outside life." And then, Thai food before the Grand Moment. But now! Went out and connected the battery charger with jump start, choke, and then I turned the key. Nothing happened. Aha, must connect the battery correctly... no braid on the negative pole. Turned the first step on the key, yes, the fuel pump went and filled the float chambers. But I thought it started to smell worryingly much like gasoline in the engine compartment. Leakage! Darn. Turned out that carburetor #2 (the one that had been causing trouble all along) was leaking. Apparently, a screw was not tightened, and it was no less than the screw where the float chambers leak. So, it naturally leaked right through and soaked a lot. Lucky I was outside. Wiped it up and had to loosen the whole carburetor kit again to be able to tighten that screw. Put everything back on.

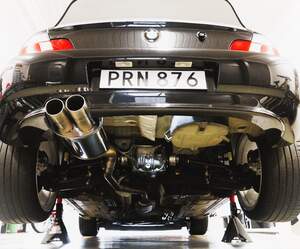
A curious neighbor came by and complimented the build, and since he was there, he might as well help, right? He became the starting gas supervisor while I turned the key. The engine coughed a bit, sparked, died, started again, sparked more, and more, died, started again and roared like hell (did I forget to install the muffler?), died again, sparked again, roared, spun around quite a bit, half-died, and then I turned it off. It only runs on starting gas. No starting gas, no action. Darn. It's not getting fuel. It. Can't. Be. The. Carburetors. Right? They've been disassembled to the atomic level. I simply have to disconnect the fuel hose and see if fuel comes out of it when I turn on the ignition and the fuel pump runs. But since the float chambers were filled, and it leaked because of the not tightened screw, it will come out. Is it misadjusted now that I've taken the whole kit apart? Patience is running out.

Well, the rest of the family reminded me that we were supposed to go play paddle. In two minutes. In with everything in the garage. Smells of gasoline so wonderfully in there now. On the way to paddle, my wife asked if the little car would sound so much. Uh, no. Hehe. What do I know, that's a question for later. But if I just get some fuel in it, I'll make sure the whole neighborhood jumps every time I start the car.

Of course, I filmed tonight's starting attempt, but I apparently disabled the audio recording. Rookie mistake. Otherwise, I would have posted a video here, of course. Can you do that, by the way? Or do I have to put it on YouTube and link it here? Well, a video with a startup attempt where you can't hear anything is pointless. Will try again tomorrow. Both with more starting gas and with audio recording.

Until next time!

https://www1.garaget.org/gallery/images/219/218366/218366-281f33f1c0a32856d7578631baf0d900.jpg
https://www1.garaget.org/gallery/images/219/218366/218366-668086001931bd7de306ac25251d45b6.jpg
https://www1.garaget.org/gallery/images/219/218366/218366-060ff72b3ab357b4960e6f2e97f11b11.jpg

Senast redigerat av martinhejdesten (29 december 2023)

Lucif3r
23 april 2021 · 2 208 Inlägg

Börjar misstänka att det vilar en förbannelse över den där bilen/motorn tongue Den vill verkligen inte igång big_smile
Men det var ju bra att den behagade hosta lite iaf! Är ju iaf ett halvt steg i rätt riktning smile

martinhejdesten
24 april 2021 · 484 Inlägg

Jadu Lucif3r, man börjar ju själv undra. Men, allt består ju av ihopplockade delar, renoverade in i minsta detalj, så det är ju en hel del som ska lira om det ska bli något wroom wroom.

Provar igen imorrn, med ljudinspelning på videon. Lär också leta upp en mc-verkstad som får se över och ställa in förgasarkitet. Kollar förstås först ifall det kommer soppa från bränsletrycksregulatorn.

• • • TRANSLATION • • •

Reply to post: Starting to suspect that there's a curse resting on that car/engine 😛 It really doesn't want to start. But it's good that it deigned to cough a bit at least! That's at least a half step in the right direction 😄

Well, Lucif3r, one does start to wonder. But, everything consists of pieced-together parts, renovated down to the smallest detail, so there's a lot that needs to work for it to make any vroom vroom.

Will try again tomorrow, with audio recording on the video. Also going to find a motorcycle workshop to have the carburetor kit inspected and adjusted. Of course, first checking if there's any fuel coming from the fuel pressure regulator.

Senast redigerat av martinhejdesten (29 december 2023)

KSI-Garage Platschef på Hedin Däckdepå i Bålsta
24 april 2021 · 1 370 Inlägg

Kolla så du har ström och att pumpen går även efter startläget. Jag hade det så på en bil. Slog man på tändningen så gick pumpen. I startläget så gick pumpen samtidigt som startmotorn. Men när jag släppte nyckeln från startläget så fick inte soppapumpen längre ström. Om jag inte minns helt fel så var det felkopplat runt tändlåset på den bilen.

Motorer utan turbo suger. Kolla in mina Projekt här.
Audi 80 GTE quattro GTE quattro -86
Audi 80 quattro -84 urq sedan
Bruksbilen BYD Atto 3 BYD Atto 3
Montecarlo
28 april 2021 · 444 Inlägg

Imponerande tålamod!!!! Men nu måste du snart få lite flyt så den inte bara är en snygg prydnad. smile

martinhejdesten
28 april 2021 · 484 Inlägg

Montecarlo, idag rullade jag ut ”prydnadssaken”. Glömde ju spela in ljudet senast jag spelade in tredje uppstartsförsöket. Provade därför ett fjärde försök idag men hade förstås inga höga förväntningar med tanke på att soppan inte kommer igenom förgasarna. Lär nog lämna bort förgasarna för att få dem standardinställda. Och därmed få dem att funka. Antar att jag inte skruvat dit justeringsskruvar på ett korrekt sätt. Inte lätt när allt varit isärplockat i minsta detalj.

vw_audi, jag testar detta asap! Tack för tipset! Tänk om det ”bara” är detta som är problemet. Testar även att dra av bränsleslangen från bränsletrycksregulatorn och stoppar den i en PET-flaska för att se flödet. Om det kommer något alls när jag drar runt startmotorn.

Men för alla nyfikna där ute kan jag berätta att motorn rör på sig, även om det bara är med hjälp av startgas, och den låter nåt så in i h-vete! Och senast blev det ju bara film utan ljud. Men idag... se filmen på Instagram via länken nedan.

https://www.instagram.com/p/COOQPyijhlB … faykt8lilg

På återseende!

• • • TRANSLATION • • •

Reply to post: Check that you have power and that the pump continues to run even after the starting position. I had that on a car. If you turned on the ignition, the pump ran. In the starting position, the pump ran simultaneously with the starter motor. But when I released the key from the starting position, the fuel pump no longer had power. If I remember correctly, it was miswired around the ignition switch on that car.

Reply to post: Impressive patience!!!! But now you must soon get some luck so it's not just a nice ornament 😄

Montecarlo, today I rolled out the "ornamental thing." Forgot to record the sound the last time I recorded the third start-up attempt. Therefore, tried a fourth attempt today, but of course, had no high expectations considering that the fuel isn't passing through the carburetors. Probably going to leave the carburetors to have them set to standard. And thus, get them to work. I assume I haven't screwed the adjustment screws on correctly. Not easy when everything has been taken apart down to the smallest detail.

vw_audi, I'll test this asap! Thanks for the tip! What if this is the "only" problem? Also testing to disconnect the fuel hose from the fuel pressure regulator and put it in a PET bottle to see the flow. If anything comes out when I turn the starter motor.

But for all the curious ones out there, I can tell you that the engine is moving, even if it's only with the help of starting gas, and it sounds like something from hell! And last time, it was just a video without sound. But today... see the video on Instagram via the link below.

https://www.instagram.com/p/COOQPyijhlB … faykt8lilg

Until next time!"

Senast redigerat av martinhejdesten (29 december 2023)

Lucif3r
28 april 2021 · 2 208 Inlägg

Lät inge vidare tongue Men hey! Den gick ju iaf! om än med tvångsmatning tongue

martinhejdesten
29 april 2021 · 484 Inlägg

Lucif3r skrev:
Lät inge vidare tongue Men hey! Den gick ju iaf! om än med tvångsmatning tongue

Hehe, jo, jag har ingen susning om hur den ska låta med tanke på detta fullkomliga ihopplock av motordelar. Men tveksam att den ska låta som en ivrig liten ettrig bil vid starten på Svenska Rallyt, haha! Ska ju ha den som en ”daily driver”. Men skönt att det rör på sig!

• • • TRANSLATION • • •

Reply to post: Sounded not too great 😛 But hey! It started at least! Even if with force-feeding 😛

Hehe, well, I have no idea how it's supposed to sound given this perfect assembly of engine parts. But doubtful that it should sound like an eager little rally car at the start of the Swedish Rally, haha! It's meant to be a 'daily driver.' But nice that it's moving!

Senast redigerat av martinhejdesten (29 december 2023)

martinhejdesten
30 april 2021 · 484 Inlägg

”-Vilket spån!”, sa jag till mig själv när jag skulle testa så att bränslepumpen fungerade i alla lägen på tändningen, utan att ha slangen i PET-flaskan. Jösses, vilken jubelidiot man är. Sprutade bensin i hela motorrummet. Inte alltför mycket dock.

Hur som helst, det kommer bensin i alla lägen så då är det inte bränslematningen som är problemet. Då är det... håll i hatten: förgasarna!

Plockade också ur tändstiften och de är både sotiga och snustorra, dvs dålig förbränning pga tvångsmatningen i form av startgas. Ingen bensin kommer dit. Andra bekräftelsen med andra ord.

Ringde Christer på Bra i gasen i Uddevala, som är Sveriges främsta expert på mc-förgasare. Alla mc-verkstäder jag och farsan har pratat med den senaste veckan rekommenderar just honom. Han hade tid att se över mitt förgasarkit. I höst. Det var galet mycket nu tydligen. Många mc-intresserade satsar på hemester med sin hoj i sommar. Och de behöver också service. Han gav mig ett par tips som jag ska följa upp snarast.

Jag doppade även min tratt i bensin för att se hur de reagerar i kontakt med bensin. Om det funkar så lär jag 3D-printa en något justerad variant av tratten.

Men högsta prioritet är att få förgasarna rätt inställda och därmed möjliggöra uppstart.

• • • TRANSLATION • • •

'-What a mess!,' I said to myself when I was testing that the fuel pump worked in all positions with the ignition on, without having the hose in the PET bottle. Goodness, what a fool I am. Sprayed gasoline all over the engine bay. Not too much, though.

Anyway, there's gasoline in all positions, so then it's not the fuel supply that is the problem. Then it is... hold on to your hats: the carburetors!

Also took out the spark plugs, and they are both sooty and bone dry, meaning poor combustion due to forced feeding in the form of starting gas. No gasoline gets there. Another confirmation in other words.

Called Christer at 'Bra i Gasen' in Uddevalla, who is Sweden's foremost expert on motorcycle carburetors. All motorcycle workshops my dad and I talked to in the last week recommend him. He had time to look at my carburetor kit. In the fall. It was apparently crazy busy now. Many motorcycle enthusiasts are opting for 'homecation' with their bikes this summer. And they also need service. He gave me a couple of tips that I will follow up on soon.

I also dipped my funnel in gasoline to see how they react to contact with gasoline. If it works, I'll likely 3D-print a slightly adjusted version of the funnel.

But the top priority is to get the carburetors properly adjusted and thus enable the startup.

https://www1.garaget.org/gallery/images/219/218366/218366-e389112c1570b26ef5ca32752dd006db.jpg
https://www1.garaget.org/gallery/images/219/218366/218366-06fb9bf538020798afe181d11e7ade7f.jpg
https://www1.garaget.org/gallery/images/219/218366/218366-c589778f2d10221394fc4ac9b07f29a9.jpg
https://www1.garaget.org/gallery/images/219/218366/218366-af7349a5a34cd9fec106021a3bf144d6.jpg
https://www1.garaget.org/gallery/images/219/218366/218366-b8c3c91c50595e6c3999c4a290cb7675.jpg

Senast redigerat av martinhejdesten (29 december 2023)

Senast i forumet
Diskussionsforum
Projekt
Evenemang