Austin Mini till Suzuki Swift GTi-konvertering

Getting ready to install a Swift GTi engine in my 1975 Austin Mini 1000 cc. Going from 35 bhp to 105 bhp, or more. It is also going to get just a bit of a style makeover.
  • 114 Följare
  • 308 608 Visningar
  • Uppdaterades senast 27 januari
martinhejdesten
19 april 2016 · 484 Inlägg

Första dagen på bilens resterande liv – transport till verkstaden för konvertering från Austin Mini 1000 cc (35 hk) till Suzuki Swift GTi (105 hk).

FÖLJ FÖR MER INNEHÅLL PÅ MINA ANDRA KANALER (TikTok, Instagram, Youtube etc), https://linktr.ee/austinminigti

• • • TRANSLATION • • •

First day of the car's remaining life – transport to the workshop for conversion from Austin Mini 1000 cc (35 bhp) to Suzuki Swift GTi 1300 cc DOHC (105 bhp), or more.

NOTE! This blog were originally written in Swedish but since there has been a great interest in my Mini I chose to translate it into English. Well, chatGPT did it. I asked chatGPT to translate the blog based on the role of a car mechanic, given all the technical terms, but I guess some wordings and slang in Swedish won't be the same in English. Hope you're okay with that.

The Mini's nickname in Sweden is "Hundkoja" aka "Doghouse", since it in fact could serve as one due to its size. I have tried to look for the occasions when I wrote this word and change it to "Mini". Also the shorter nickname "Koja" would be "cabin or treehouse". I guess chatGPT won't fully understand this, haha.

Unfortunately, I started this blog with taking black and white photos, well, at least image edit them like that because of the time consuming of color correction due to the mix of ambient light (white) and light bulb light (yellow). But, followers weren’t happy about it, therefore I switched to images in color but not until page 5. If I have time, and surely after my Mini is finished and running perfectly, I might search for the original images on my hard drives and replace the black and white images.

I also can not translate any reply to my posts, but I have included them in my following post for you to better understand the context.

Please, feel free to reach out if you have any issues with trying to understand due to poor translation and I'll try to fix it. I will post a FAQ on my LinkTree (link below) covering the most questions I get regarding my build. I've been answering the same question about the wheels and stance numerous times, haha!

Happy reading to you all!


FOLLOW FOR MORE CONTENT ON MY OTHER CHANNELS (TikTok, Instagram, Youtube etc), https://linktr.ee/austinminigti

I'm a photographer and graphic designer and will post video and images regularly when my Mini is finished. Hopefully in the summer of 2024. Please follow so you don't miss out!

https://www1.garaget.org/gallery/images/219/218366/218366-b9973978313fe713ea425d0b475aa290.jpg

Senast redigerat av martinhejdesten (1 januari )

martinhejdesten
18 maj 2018 · 484 Inlägg

Nå, hur går det med den lilla bilen? Tyvärr måste jag erkänna att det inte går alls. Inget har hänt på ett bra tag. Hjullagerna ska pressas på plats och sen ska framvagnen byggas ihop. Och det är just den där pressningen som jag inte fått till ännu.

Men, jag funderar på att ta hjälp av någon verkstad för att bygga ihop den. Och innan dess ska den flyttas från nuvarande garage till något nytt med bra mekmöjligheter.

När framvagnen är monterad kan jag göra lite fitment med coilovers, skära bort fronten och smacka dit inköpt flipfront i glasfiber. Ni vet, det är ont om utrymme i en sådan bil. Med dessutom avtagbar flipfront så gör det mekandet betydligt enklare och trevligare.

• • • TRANSLATION • • •

Well, how's the little car coming along? Unfortunately, I have to admit that it's not progressing at all. Nothing has happened for quite some time. The wheel bearings need to be pressed into place, and then the front suspension needs to be assembled. It's precisely that pressing part that I haven't managed to tackle yet.

However, I'm contemplating seeking assistance from a workshop to put it together. Before that, though, it needs to be moved from the current garage to a new one with better mechanical possibilities.

Once the front suspension is assembled, I can do some fitment with coilovers, cut away the front, and attach the purchased fiberglass flipfront. You know, space is tight in such a car. With a removable flipfront, the mechanical work becomes considerably easier and more enjoyable.

https://www1.garaget.org/gallery/images/219/218366/218366-781e736ec57e133b41ee693e8f8afc12.jpg
https://www1.garaget.org/gallery/images/219/218366/218366-25d08a7e86d5ff41af845339171e01bb.jpg
https://www1.garaget.org/gallery/images/219/218366/218366-f59fa5d559fce868635223e127f52d4c.jpg
https://www1.garaget.org/gallery/images/219/218366/218366-612f42c57639151d61d41447665d7510.jpg

Senast redigerat av martinhejdesten (27 december 2023)

martinhejdesten
25 maj 2018 · 484 Inlägg

Den lilla bilen i sin rätta bemärkelse – Mini.

https://www1.garaget.org/gallery/images/219/218366/218366-52c77aee0997c86b18e8b63374b209e6.jpg

Vi håller fredag med vetskapen att turbo och vevhusventil måste bytas på bruksbilen (BMW520D) för en jäkla massa pengar. Vore nice att sälja av den på momangen och lägga krutet på Minin. Jag har ju trots allt Tiguanen att köra med.

Men eftersom Minin är ituplockad och listan på vad som ska göras är ganska lång så kan det dröja.

Prio i runda slängar:
1. Pressa i hjullager.
2. Montera framvagn.
3. Rostlaga kaross.
4. Skära bort front.
5. Passa in flipfront i glasfiber och bygga gångjärn samt fixa infästningar (snabblås).
6. Montera racebur.
7. Montera sportstolar.
8. Montera coilovers och "sätta" stuket.
9. Få igång motorn.
10. Lackering.
11. Ihopmontering.

• • • TRANSLATION • • •

The little car in its true sense – the Mini.

We're approaching the weekend with the knowledge that the turbo and crankcase valve need to be replaced on the daily driver (BMW 520D) for a hefty sum. It would be nice to sell it off right away and invest the funds in the Mini. After all, I still have the Tiguan to drive.

However, since the Mini is disassembled, and the list of tasks is quite long, it might take some time.

Priority, roughly:
1. Press in the wheel bearings.
2. Assemble the front suspension.
3. Repair the body rust.
4. Cut away the front.
5. Fit the fiberglass flipfront and build hinges, as well as fix fastenings (quick-release).
6. Install the roll cage.
7. Install sports seats.
8. Install coilovers and set the stance.
9. Get the engine running.
10. Paint job.
11. Assembly.

Reply to post:11 points should be doable before midsummer. I'm following along!

I'm with you on this.

Senast redigerat av martinhejdesten (31 december 2023)

martinhejdesten
26 maj 2018 · 484 Inlägg

torsen skrev:
Intressant bygge som jag följer med största intresse.
Har själv ägt Austin 850 Mini Seven -59, Morris 850 Mini Minor -60, Morris Mini 1000 -6? samt Austin 1275 -6?.
Den sista en fabrikstrimmad grupp II bil, en av 5 i Sverige. "Tävlingsmålad" med gröna stripes över det vita taket samt vita ränder över British Racing Green huv och bakdel.
Det var tider det, när Picko och Bosse Elmhorn tävlade/utklassade alla på banorna.
Elmhorn-Troberg Racing Service vid Mariatorget lade beslag på större delen av min surt förvärvade lön.

Ursäkta o t, men därav hjärtat är fullt...………...

Picko, känns bekant, var han från Kristianstad? Definitivt kul bil att köra, man gasar gärna genom rondellerna smile det är min första bil och har ägt den sedan 1993 trorjag det är. Totalrenoverad då, men får en ny genomgång nu.

martinhejdesten
26 maj 2018 · 484 Inlägg

silverado350 skrev:
11 punkter borde ju hinnas innan midsommar smile

Följer!

Bra att du sätter press på mig! Hade ju planer att få liv i den i sensommaren, men hjullagerna är startskottet men har inte hunnits med ännu.

• • • TRANSLATION • • •

Great that you're keeping the pressure on me! I had plans to get it running in late summer, but the wheel bearings are the starting point and haven't been tackled yet.

Senast redigerat av martinhejdesten (27 december 2023)

martinhejdesten
29 juni 2018 · 484 Inlägg

Tummen loss... i alla fall för ett litet tag. Hjullagerna är nu ipressade. Gott! Och nu har fronten demonterats till förmån för flipfront i glasfiber. Dessvärre verkar inte passformen vara på humör. Det lutar åt att göra flipfront av metallfronten trots allt.

Lite kort vid denna session:
- Fronten demonterades
- Golvet i kupén stålborstades och ska rostskyddsmålas i nästa steg
- Buren provmonterades
- Kapade bort rost och fixade passbit i kartong, svetsning imorrn
- Bromsok fick primer på sig och lackerades röda

• • • TRANSLATION • • •

Let's get to work... at least for a while. The wheel bearings are now pressed in. Good! And now, the front has been disassembled in favor of the fiberglass flipfront. Unfortunately, the fit doesn't seem to be cooperating. It looks like I might have to turn the metal front into a flipfront after all.

A brief summary of this session:
- The front was disassembled.
- The floor in the cabin was wire-brushed and will be rust-proofed in the next step.
- The roll cage was test-fitted.
- Rusted areas were cut away, and a cardboard template for welding was prepared; welding tomorrow.
- Brake calipers were primed and painted red.

https://www1.garaget.org/gallery/images/219/218366/218366-98109a7ddaab19904754af18ee8bff61.jpg
https://www1.garaget.org/gallery/images/219/218366/218366-b0111bedaf0c576ebcfe9fd455b4d046.jpg
https://www1.garaget.org/gallery/images/219/218366/218366-2ddf5fc5c2edbae54693820fd5c0b7c1.jpg
https://www1.garaget.org/gallery/images/219/218366/218366-f0dc309729ca7562e7bac67338601a42.jpg
https://www1.garaget.org/gallery/images/219/218366/218366-5f05e3872d26be963dd71ed661e2037c.jpg
https://www1.garaget.org/gallery/images/219/218366/218366-947ff1b8a03424ffe381dcc0f6d37cb1.jpg
https://www1.garaget.org/gallery/images/219/218366/218366-90d0902710ecc28c7ac06a7dcf67abe6.jpg
https://www1.garaget.org/gallery/images/219/218366/218366-144233b0486fa83c47bfeec49dbee67a.jpg
https://www1.garaget.org/gallery/images/219/218366/218366-0fb5989ef626d0705d22b65bc7c7d257.jpg
https://www1.garaget.org/gallery/images/219/218366/218366-099a930f88856a3acb81d76553bd12a0.jpg
https://www1.garaget.org/gallery/images/219/218366/218366-4702bd238e40a05a69aee821a6ef55bc.jpg
https://www1.garaget.org/gallery/images/219/218366/218366-942719c662a2ae327957f3a2cd595ff2.jpg
https://www1.garaget.org/gallery/images/219/218366/218366-38161d55510d5df497c7b3b316e4ad66.jpg
https://www1.garaget.org/gallery/images/219/218366/218366-5ea1e61e9a387b8828fd421c40a9287c.jpg

https://www1.garaget.org/gallery/images/219/218366/218366-b57691e6db8e3cfc295d4583125bc1bb.jpg

Senast redigerat av martinhejdesten (27 december 2023)

martinhejdesten
1 juli 2018 · 484 Inlägg

Project Binky följer jag med spänning, men de puttar i en 4WD Toyota Celica turbomotor på 200hk. De bygger om väldigt mycket och tillverkar en del nytt. Jag å andra sidan lägger krutet på Swift-konvertering men sedan är det ganska same same sett till Mini. Jag nöjer mig med 105hk femväxlad Swift-framhjulsdrift. Än så länge.

Glädjande nog finns det en del andra videos på Youtube som hjälper till en del, däribland de som visar ordningen på hjullagerkomponenterna, hur man monterar skivbromsar samt bur (även om det blir fel ibland).

Hjullager, https://youtu.be/sTQYPJ7dICI
Montera skivbromsar av Classic Mini DIY (prenumerera på denna kanal, riktigt bra), https://youtu.be/oLnissL0pb8
Montera bur, https://youtu.be/2vz3WD9CG0U

Igår blev det mer rostlagning och svetsning, primerspray i motorrummet, färdigmontering av bromsoken samt provmontering av nya framvagnen i de gamla fästena. Innerskärmar och motorrummets nedre del fick sig en genomkörare av stålborsttrissa på borrmaskin.

I nästa steg blir det...
- karosserikittning
- rostskyddsmålning av innergolv
- Tectyl i nedre del av motorrummet
- vända bilen på sidan och vinyllacka innertaket
- lacka interiören

Kort därefter lär det bli hög tid att...
- montera framvagnen på nytt
- montera däck för att sedan
- passa in plåtfronten på nytt, dvs bygga flipfrontgångjärn och även göra det möjligt att haka av hela fronten
- snabbfästen ska också monteras på panelen intill dörrarna

• • • TRANSLATION • • •

Answer to post: Following. There's a certain resemblance to the Binky project I've been watching on YouTube.

I'm eagerly following Project Binky, where they're dropping a 4WD Toyota Celica turbo engine with 200hp. They're modifying a lot and manufacturing some new parts. On the other hand, I'm focusing on the Swift conversion but keeping it relatively similar to a classic Mini. I'm content with a 105hp five-speed Swift front-wheel drive, at least for now.

Fortunately, there are some helpful videos on YouTube, including ones showing the wheel bearing components, how to mount disc brakes, and the installation of a roll cage (even if they occasionally make mistakes).

Wheel bearings: https://youtu.be/sTQYPJ7dICI
Mounting disc brakes by Classic Mini DIY (subscribe to this channel, very good): https://youtu.be/oLnissL0pb8
Installing a roll cage: https://youtu.be/2vz3WD9CG0U

Yesterday involved more rust repair and welding, primer spray in the engine bay, complete assembly of the brake calipers, and a test fitting of the new front suspension in the old mounts. Inner fenders and the lower part of the engine bay were wire-brushed with a drill-mounted wire brush.

In the next steps...
- Body filler application.
- Rust-proof painting of the inner floor.
- Tectyl application in the lower part of the engine bay.
- Flip the car on its side and vinyl coat the inner roof.
- Paint the interior.
- Shortly after, it will probably be high time to...

Reassemble the front suspension.
- Install tires and then
- Fit the metal front again, building flipfront hinges and making it possible to detach the entire front.
- Quick-release fasteners should also be mounted on the panel next to the doors.

Senast redigerat av martinhejdesten (31 december 2023)

martinhejdesten
1 juli 2018 · 484 Inlägg

https://www1.garaget.org/gallery/images/219/218366/218366-d4a592fed2efafb0fef23c400594122c.jpg
https://www1.garaget.org/gallery/images/219/218366/218366-68d9c53add0c0f18fcc6ddc4777ef76a.jpg
https://www1.garaget.org/gallery/images/219/218366/218366-9be537b7c31b88c5915b9dce5357ec9d.jpg
https://www1.garaget.org/gallery/images/219/218366/218366-e84463d44a8c0f53e0fff6d60450ef73.jpg

martinhejdesten
10 juli 2018 · 484 Inlägg

I helgen blev det en liten tur för att se en liten bil – en i stort sett kopia på vad jag själv vill åstadkomma. Enda skillnaden är att Corncracker hade tak och skärmbreddare i kolfiber och med Allegro 1300-motor.

Men den var riktigt fint renoverad och såg helrätt ut med sänkningen och skärmbreddarna. Jag tänkte att det var lika bra att köra och kika, mäta och snacka.

Stort tack Corncracker för att du tog dig tid att visa din pärla!

Förresten, jag har nog glömt att berätta. Jag är 2 meter lång. Jodå, jag får plats. Skålade Cobra-racestolar och infästning en bra bit bak löser en del...

• • • TRANSLATION • • •

Over the weekend, I took a little trip to see a similar car – essentially a copy of what I want to achieve. The only difference is that Corncracker had a roof and carbon fiber flares with an Allegro 1300 engine.

But it was beautifully restored and looked just right with the lowering and flares. I thought it was best to drive, measure, and discuss.

Many thanks, Corncracker, for taking the time to show your gem!

By the way, I may have forgotten to mention. I'm 2 meters tall (6'7"). Oh yes, I fit. Cobra race seats and mounting set quite a bit back solve some issues...

https://www1.garaget.org/gallery/images/219/218366/218366-ce207735f99107e23182f0fd0e9572e2.jpg
https://www1.garaget.org/gallery/images/219/218366/218366-6ceeb5825465062a4c34f183c4e61ae8.jpg
https://www1.garaget.org/gallery/images/219/218366/218366-c225acfab4a7211de89f3c68e59dcbb6.jpg
https://www1.garaget.org/gallery/images/219/218366/218366-6bfd12f6b4ae08460b8a3daaebce10ea.jpg
https://www1.garaget.org/gallery/images/219/218366/218366-6fe9fad2f4f34e661585e8f26023b45a.jpg

Senast redigerat av martinhejdesten (27 december 2023)

martinhejdesten
30 september 2018 · 484 Inlägg

https://www1.garaget.org/gallery/images/219/218366/218366-be9b6d81f8ac40c73b708722869a88e9.jpg
https://www1.garaget.org/gallery/images/219/218366/218366-3959233a68497ba7f2f35cea74e90187.jpg

Nå, vad händer? Farsan har hjälpt till med rostskydd i hjulhusen fram och undersökt möjligheten med Dzus snabblås. Jag då? Jag beställde låsen smile

Och så blev det en tur förbi Jönköping för att eventuellt inhandla karosseridelar via en Blocket-annons men jag insåg att de delar jag själv hade nog ändå funkar. Min förhoppning var att detta köp skulle spara mig en del tid.

En insikt som dök upp idag var att kapa toppen på tornen för att på så sätt sänka bilen ytterligare en tum, utöver Spax coilovers. Corncracker hade gjort något liknande fast kapat i den tvärsgående balken inuti motorrummet. Får se hur jag gör. Ska dock smacka i motorn i framvagnen och provmontera för att se stancen. Får se hur man går vidare efter det.

Farsan hade provmonterat hjulen och det ser ju lovande ut.

Prio nu är sätta bilen på hjulen igen, justera stancen, lägga dit fronten och därefter se vart vi placerar Miglia-breddarna. Ser det inte rätt ut med skärmbreddarna sett till stancen så blir det ovan nämnda sänkning.

Efter det kapas hjulhusen bak och genomgång av bakvagnen samt byte till fjädrar bak samt coilovers. När bilen lagts på sidan passar vi på att spraya innertaket också. Sen målar vi nog interiören med. Sen lär vi nog omprioritera och kasta om i planeringen ändå.

Uppdaterar med fler bilder efter nästa session.

• • • TRANSLATION • • •

Reply to post: Damn, that's cool!

So, what's happening? Dad has helped with rust protection in the front wheel arches and explored the possibility of using Dzus quick-release fasteners. As for me? I ordered the locks with a smile.

And then, a trip to Jönköping to potentially buy body parts via a Blocket ad, but I realized that the parts I already had would probably work. My hope was that this purchase would save me some time.

A realization that came up today was to cut the tops of the towers to lower the car by another inch, in addition to Spax coilovers. Corncracker had done something similar but cut into the transverse beam inside the engine bay. I'll see how I do it. However, I'll slap the engine into the front suspension and test-fit to see the stance. We'll see how to proceed after that.

Dad had test-fitted the wheels, and it looks promising.

Priority now is to get the car on its wheels again, adjust the stance, fit the front, and then see where we place the Miglia flares. If it doesn't look right with the flares in terms of stance, the aforementioned lowering will be done.

After that, cut the rear wheel arches, go through the rear suspension, and switch to rear springs and coilovers. When the car is on its side, we'll also spray the inner roof. Then we'll probably paint the interior as well. Then we'll likely reprioritize and rearrange the planning.

Will update with more pictures after the next session.

Senast redigerat av martinhejdesten (31 december 2023)

martinhejdesten
8 oktober 2018 · 484 Inlägg

Nästa steg är planerat efter att ha kikat till projektet som tycks gått i ide. Men inom en månads tid ska jag ge mig på nästa fas. Farsan passar nog på att svetsa dit stag till A-panelen (triangelpanelen mellan framskärm och dörr) och Dzus-lås. I staget fäster vi en innerskärm i plast för att minimera risken för framtida rostbildning.

- I med motor i framvagnen
- Montera hjulen
- Montera framvagn i bilen
- Ner med allt på backen
- Sätta stancen
- På med plåtfronten (flipfront)
- Markera vart Miglia-skärmbreddarna ska sitta
- Kapa förvaringslådorna i baksätet för burens skull
- Måla interiören
- Måla innertaket

Tills dess... lite bilder.

• • • TRANSLATION • • •

Reply to post: This will be really fun to watch!

The next step is planned after looking at the project, which seems to have gone dormant. But within a month, I'll move on to the next phase. Dad will probably weld supports to the A-panel (triangle panel between the front fender and door) and Dzus locks. We'll attach a plastic inner fender to the support to minimize the risk of future rust.

- Install the engine in the front suspension.
- Mount the wheels.
- Install the front suspension in the car.
- Lower everything to the ground.
- Set the stance.
- Attach the metal front (flipfront).
- Mark where the Miglia flares should be.
- Cut the storage boxes in the back seat for the cage.
- Paint the interior.
- Paint the inner roof.

Until then... a few pictures.

https://www1.garaget.org/gallery/images/219/218366/218366-49c5c4848a431d1b224e60f9bce1971a.jpg
https://www1.garaget.org/gallery/images/219/218366/218366-f9492cf4b901f5a3d29ad79436582d9f.jpg
https://www1.garaget.org/gallery/images/219/218366/218366-c061904de6ed360bdcd1e4781f173b49.jpg
https://www1.garaget.org/gallery/images/219/218366/218366-ac9126253b380bbeb18c982462514971.jpg
https://www1.garaget.org/gallery/images/219/218366/218366-51ebc3754479a804f7e5c82587ef2336.jpg
https://www1.garaget.org/gallery/images/219/218366/218366-d9f56a11c05c3cdbcd84e87885abe626.jpg
https://www1.garaget.org/gallery/images/219/218366/218366-ba4da82b15e6cb5687cf86ed8e3f9db5.jpg

Senast redigerat av martinhejdesten (31 december 2023)

martinhejdesten
8 oktober 2018 · 484 Inlägg

torsen skrev:
Har med nöje följt dit fina jobb.
Ska du regga som ombyggt fordon?

Lär bli så, ja. Med Swift-motorn och bur så behövs det. Har kollat med andra på Garaget som gjort liknande ingrepp.

• • • TRANSLATION • • •

Reply to post: I've joyfully followed your excellent work.
Are you going to register it as a modified vehicle?

Most likely, yes. With the Swift engine and roll cage, it's necessary. I've checked with others on Garaget (forum) who have made similar modifications.

Senast redigerat av martinhejdesten (31 december 2023)

martinhejdesten
16 oktober 2018 · 484 Inlägg

Karosserikittning och "snabbmonterade" Miglia arches (skärmbreddare) för att se vart Dzus snabblås ska placeras och svetsas fast senare i veckan.

Tar dessutom ett snack med britterna imorrn vilken lösning som lämpar sig bäst för flipfront i plåt. Lär bli en liten beställning av lite smått och gott dessutom.

Tur att man är egenföretagare och själv kan bestämma över arbetstiderna. Ska inom kort försöka jobba några dagar i sträck på bilen för att komma en bra bit på vägen. Synd att den står 15 mil bort bara.

• • • TRANSLATION • • •

Body filler application and "quick-mounted" Miglia arches (flares) to see where Dzus fasteners should be placed and welded later this week.

Also, having a chat with the Brits tomorrow about the best solution for a metal flipfront. There'll probably be a small order of odds and ends as well.

Good thing I'm a business owner and can decide my working hours. Soon, I'll try to work a few consecutive days on the car to make good progress. Too bad it's 150 kilometers away.

https://www1.garaget.org/gallery/images/219/218366/218366-a48145e58ba7449cddf19d179df54a39.jpg
https://www1.garaget.org/gallery/images/219/218366/218366-f0dbfb94f9577e5bdbf688ac376a4837.jpg
https://www1.garaget.org/gallery/images/219/218366/218366-57ea45131e97bf4cf372139074c90765.jpg
https://www1.garaget.org/gallery/images/219/218366/218366-29c3f8afdb261dab7a507fedca138246.jpg
https://www1.garaget.org/gallery/images/219/218366/218366-3e748618a4093eb12c34abde3779da70.jpg

Senast redigerat av martinhejdesten (27 december 2023)

martinhejdesten
16 oktober 2018 · 484 Inlägg

I somras spanade jag in Corncrackers hundkoja. Tog lite bilder. Här är den sänkt 15-20 mm ytterligare i Photoshop för att få samma avstånd/mellanrum från skärmbreddare och ovansida däck.

Vem sa något om markfrigång? wink

• • • TRANSLATION • • •

This summer, I checked out Corncracker's Mini. Took some pictures. Here it is lowered another 15-20 mm in Photoshop to match the same clearance/space from flares and the top of the tire.

Who said anything about ground clearance? wink

https://www1.garaget.org/gallery/images/219/218366/218366-d07b4ccf6317415e8a0266b2f93b2afb.jpg
https://www1.garaget.org/gallery/images/219/218366/218366-e00a258702ecd134671687b4b01e8b32.jpg

Senast redigerat av martinhejdesten (31 december 2023)

martinhejdesten
24 oktober 2018 · 484 Inlägg

Nu j*vlar ska det byggas på min bil! Tog ledigt resten av veckan för att sätta lite fart på MiniSwift-bygget.

Idag kapade vi förvaringslådorna intill baksätet för att lättare montera buren. När det var gjort så var det raskt över till att montera framhjulen på framvagnen – och så i med motorn! Men, så klart satt det lite slangar, klämmor och fästen i vägen. Dessa togs raskt bort för att äntligen få allt på plats.

Vi smackade dit bakhjulen med, så nu står den på alla fyra igen. Lite väl mycket markfrigång, men det justerar vi senare i veckan. Just nu sitter det trumpetfjädring i bakvagnen men de byts till fjädrar under morgondagen. Då lär allt komma en bit ner på backen.

Flipfronten i plåt (den tidigare fast monterade originalfronten) sitter som en smäck och vi har funderat ut lite fiffiga lösningar gällande fästen och gångjärn.

Hål för burfästena har borrats, förstärkningsplattor till burens undersida är tillverkade. Buren provmonterad och ena racestolen provmonterad. Är man 2 meter lång så sitter den... inte som den brukar. Imorrn gör vi därför nya stolsfästen.

Och då kommer även fler bilder från den dagens dagsverke.

• • • TRANSLATION • • •

Yeah, it's time to build on my car! Took the rest of the week off to pick up the pace on the Mini Swift build.

Today, we cut the storage boxes next to the back seat to make it easier to install the roll cage. Once that was done, it was quickly on to mounting the front wheels on the front suspension – and then in with the engine! But, of course, there were some hoses, clamps, and brackets in the way. These were quickly removed to finally get everything in place.

We slapped on the rear wheels as well, so now it's standing on all fours again. A bit too much ground clearance, but we'll adjust that later in the week. Right now, there's rubber cone suspension in the rear, but they'll be swapped for springs tomorrow. Then everything should come down a bit closer to the ground.

The metal flipfront (the previously fixed original front) fits like a glove, and we've come up with some clever solutions regarding brackets and hinges.

Holes for the roll cage mounts have been drilled, reinforcement plates for the underside of the cage are fabricated. The cage is test-fitted, and one race seat is also test-fitted. When you're 2 meters tall (6'7"), it doesn't fit... as usual. So, tomorrow, we'll make new seat brackets.

And then there will be more pictures from the day's work.

https://www1.garaget.org/gallery/images/219/218366/218366-c999333dcd4ad4af2faf77526904ff5d.jpg
https://www1.garaget.org/gallery/images/219/218366/218366-9336fe52363941476203f30d463627a1.jpg
https://www1.garaget.org/gallery/images/219/218366/218366-5b91aa00e4d033f3b003b0a2418ecc4d.jpg
https://www1.garaget.org/gallery/images/219/218366/218366-2996d04fb42e718cc1ad0b5bad767bec.jpg
https://www1.garaget.org/gallery/images/219/218366/218366-19fc2f496c8d9b4ec537da6983fd3dec.jpg
https://www1.garaget.org/gallery/images/219/218366/218366-03684e758a19a40b85d0d127dafb8176.jpg
https://www1.garaget.org/gallery/images/219/218366/218366-7d8448b58e087a3a7d5de7ad1bdb5f9c.jpg
https://www1.garaget.org/gallery/images/219/218366/218366-9632dc82fc3f6ced9a125be720fca2e2.jpg
https://www1.garaget.org/gallery/images/219/218366/218366-4a310cd212e79dd07b326aeee0b44b94.jpg
https://www1.garaget.org/gallery/images/219/218366/218366-a03bb7de5633bae37d14cfecaf367c36.jpg
https://www1.garaget.org/gallery/images/219/218366/218366-d55765f3ea397bc35c8c516003c0f3ed.jpg
https://www1.garaget.org/gallery/images/219/218366/218366-cec147f008490c06e23e68c175ee7a54.jpg
https://www1.garaget.org/gallery/images/219/218366/218366-0c68df46efdfeee155e203af140c4938.jpg
https://www1.garaget.org/gallery/images/219/218366/218366-299c737ae070e76ac96797d659c4f812.jpg

Senast redigerat av martinhejdesten (27 december 2023)

martinhejdesten
25 oktober 2018 · 484 Inlägg

Dag 2 – seeeeeegt. Stolsfästena tog betydligt längre att montera än väntat. Fix och trix, kapa, böja, svetsa, slipa, borra, skruva, borra igen, skruva, borra igen... men så plötsligt satt båda stolarna på plats. Sittställningen justerades med brädor i första skedet och konstaterade att B-stolpen funkar bra som sidokrockskydd tillsammans med buren.

Baksätesplåten fick sig en omgång med sliptrissa och sandpapper då det ska lackas. Inget baksäte kommer att återmonteras. Då måste man ha tunna smalben om man vill sitta bak. Knappt 5 cm mellan fram- och baksätet.

Sen gick vi vidare med att fundera lite på flipfrontens upphängning i framkant, dvs med gångjärn. Men i allt funderande så kom jag på att... bilen står högt. Väldigt högt. Och då är det dumt att passa in fronten med fästen i framvagnen om vi nu bestämmer oss för att sänka bilen ca 40 mm. Det måste bara gå. Men... det innebär att samtliga motorfästen, styrstag samt hela torpedväggen måste byggas om helt. Plus tvärbalken i motorrummet tvingas kapas ca 25 mm. Jag menar, varför göra det enkelt för sig? Men en SUV vill jag inte ha. Hur mycket markfrigång bör man räkna med?

Nå, tvärsur blev man, så vi gick på bakvagnen. Lyfte ur framvagnen igen och lade bilen i framåtstupa sidoläge över natten. Lossade bakvagnen, bränsle- och bromsslangar, handbromsvajrar etc. Imorrn blir det till att lyfta ur bakvagnen, se över eventuell rost och byta trumpetfjädring till fjädrar. Underredet såg lite risigt ut så vi får se hur mycket uppfräschning av det man hinner imorrn.

Mest brydd över att bilen står högt. 40 mm högre än Corncrackers bil och då tänkte jag sänka den ytterligare 20 mm. Men då lär det skrapa rejält under motorn. Swift-motorn ligger lägre än Mini-motorn som Corncracker hade, mycket pga av utrymmesbristen och nyframtagna framvagnen. Så jag tvingas nog inse att efterlängtat stuk troligtvis inte kommer att hända. Men jag ska inte ge efter utan försöka komma så nära önskat resultat som möjligt. Det kommer bara ta 20h extra att få rätt på. Eller längre.

• • • TRANSLATION • • •

Day 2 – sloooow. Mounting the seat brackets took much longer than expected. Fixes and tricks, cutting, bending, welding, grinding, drilling, screwing, drilling again, screwing again... but suddenly both seats were in place. The seating position was adjusted with boards initially, and it was noted that the B-pillar works well as a side-impact protection together with the roll cage.

The rear seat panel got a round of sanding since it will be painted. No rear seat will be reinstalled. You'd need thin legs to sit in the back. Barely 5 cm between the front and rear seats.

Then we moved on to think about the mounting of the flipfront at the front edge, i.e., with hinges. But in all the pondering, I realized that... the car sits high. Very high. And it's silly to fit the front with brackets in the front suspension if we decide to lower the car by about 40 mm. It has to be possible, but... it means that all engine mounts, tie rods, and the entire firewall must be completely rebuilt. Plus, the crossbeam in the engine bay has to be cut about 25 mm. I mean, why make it easy for oneself? But I don't want an SUV. How much ground clearance should one consider?

Well, feeling a bit cross, we moved on to the rear suspension. Lifted out the front suspension again and laid the car on its side overnight. Removed the rear suspension, fuel and brake lines, handbrake cables, etc. Tomorrow, we'll lift out the rear suspension, inspect for any rust, and swap the coilover suspension for springs. The undercarriage looked a bit worn, so we'll see how much refreshing we can do tomorrow.

Most bothered by the fact that the car sits high. 40 mm higher than Corncracker's car, and I was planning to lower it another 20 mm than his Mini. But then it's likely to scrape heavily under the engine. The Swift engine sits lower than the Mini engine Corncracker had, mainly due to space constraints and the newly designed front suspension. So, I might have to realize that the eagerly awaited stance probably won't happen. But I won't give in without trying to get as close to the desired result as possible. It will just take an extra 20 hours or more to get it right. Or longer.

https://www1.garaget.org/gallery/images/219/218366/218366-4b034ffde9c49b84a42c80bdf518a12c.jpg
https://www1.garaget.org/gallery/images/219/218366/218366-a9bf22e887dd5cf1bcec506cfa38d197.jpg
https://www1.garaget.org/gallery/images/219/218366/218366-b6cfce11d42c4525ea74be7b1e1df9d2.jpg
https://www1.garaget.org/gallery/images/219/218366/218366-0d86cfd6cbf52ea5cad8a4988634ff5e.jpg
https://www1.garaget.org/gallery/images/219/218366/218366-3a7276c4b7cd614dfc7e869e4230d50b.jpg
https://www1.garaget.org/gallery/images/219/218366/218366-7d4470d36d649f8d1d57a26a4e82d6a8.jpg
https://www1.garaget.org/gallery/images/219/218366/218366-dc063f7981caeb4815b740bcfae0f64c.jpg
https://www1.garaget.org/gallery/images/219/218366/218366-d0c633a75dcb9aede030e07058cbc781.jpg
https://www1.garaget.org/gallery/images/219/218366/218366-66e920912825583e8d6e4046533feb63.jpg
https://www1.garaget.org/gallery/images/219/218366/218366-60aee1e41d579cf9375e18f144de38c4.jpg
https://www1.garaget.org/gallery/images/219/218366/218366-0658775201588b43eb263909959adee5.jpg
https://www1.garaget.org/gallery/images/219/218366/218366-9c15f2408a6a87d21ec70047a074b810.jpg

Senast redigerat av martinhejdesten (27 december 2023)

martinhejdesten
26 oktober 2018 · 484 Inlägg

Dag 3. Lite stiltje men ändå produktivt. Ehh?

Nåja, fortfarande lite sur över att bilen fortfarande blir för hög. Men fortsatte med att ta bort bakvagnen och gå över den grundligt med trissa på borrmaskin. Inte undra på att det såg lite smårostigt när bilen stått ute i många år utan tillsyn. Och det finns gott om små gojsiga utrymmen för skit att fastna. Nåja, väck med det.

Trumpetfjädringen togs ut och visst lär det bli ett lyft med fjädrar bak (estetiskt alltså och troligtvis komforten). Och lägre.

Nämen ser man på, en bult som sitter helt obegripligt svåråtkomligt som man undrar ifall tillverkaren inte haft alla hästar hemma när man ritade konstruktionen. Nåja, det tog lite extra tid (har inte tid för sånt nu) och rostskyddsmålning strykning 1 genomförd. Check på den.

Nya stötdämpare ska på. Trevligt. Och nya trummor. Breddar 20 mm dessutom. Trevligt. Kanske blir spacers ändå. Vem vet.

Vi funderade ett varv till på hur vi skulle kunna sänka bilen. Skruvade itu framvagnsupphängningen, igen (blivit duktig på det nu). Kom då på att vi satt fel fjädrar där. De rätta fjädrarna är något lägre. Gött. Funderade ytterligare ett varv och kom fram till att vi kapar lite på det övre framvagnsfästet (tornet) samt 12 mm på HiLos. Detta tillsammans ger 20 mm närmare backen.

Imorrn lackar jag innertaket svart. Rostskyddsmålar bakvagn ytterligare en gång, även svängarmarna. Ser över bromsoken etc. Ihopmontering. Sen tar vi en paus.

• • • TRANSLATION • • •

Answer to post: Glad you like it! The wheels are truly classic and give the car the right look. Keep going!

Day 3. A bit quiet but still productive. Ehh?

Well, still a bit annoyed that the car is still too high. Continued by removing the rear suspension and thoroughly going through it with a sanding wheel on a drill. Not surprising that it looked a bit rusty after the car had been left outdoors without attention for many years. And there are plenty of small dirty spaces where dirt can accumulate. Well, get rid of that.

The trumpet springs were removed, and there will indeed be a change with rear springs (aesthetic and probably also for comfort). And lower.

Well, look at that, a bolt that is incredibly difficult to access, and one wonders if the manufacturer had all their marbles when designing the construction. Well, it took a bit of extra time (don't have time for that now), and the first coat of rust protection paint is done. Check that off.

New shock absorbers are going on. Nice. And new drums. Widening by 20 mm as well. Nice. Maybe spacers after all. Who knows.

We reconsidered how to lower the car. Took apart the front suspension again (getting good at that now). Then realized we had the wrong springs there. The correct springs are slightly lower. Good. Reconsidered again and decided to cut a bit off the upper front suspension mount (the tower) and 12 mm off the HiLos. This together gives us 20 mm closer to the ground.

Tomorrow, I'll paint the interior roof black. Rust protect the rear suspension once again, including the swing arms. Check the brake calipers and so on. Assembly. Then we'll take a break.

https://www1.garaget.org/gallery/images/219/218366/218366-ce84237f02cc2e0f686874ff61fcc845.jpg
https://www1.garaget.org/gallery/images/219/218366/218366-4efaf4709c57493d7c9e1626264f7da8.jpg
https://www1.garaget.org/gallery/images/219/218366/218366-6fb5fb380be50dad4abf4832a08790b0.jpg
https://www1.garaget.org/gallery/images/219/218366/218366-9215af65fb61623920ae9783034eface.jpg
https://www1.garaget.org/gallery/images/219/218366/218366-08382c2149b8be27e8df0f36f703b5ad.jpg
https://www1.garaget.org/gallery/images/219/218366/218366-a725c70d5e7cc1709af9878a302cb1cd.jpg
https://www1.garaget.org/gallery/images/219/218366/218366-04156c1fd7f2c428d73782f42a386152.jpg
https://www1.garaget.org/gallery/images/219/218366/218366-2977aa8e9d3fc482a95ea6f295478718.jpg
https://www1.garaget.org/gallery/images/219/218366/218366-60700a7c7d06ec6766d63c4364748b8e.jpg
https://www1.garaget.org/gallery/images/219/218366/218366-e1563550e838f4e10835c7caf0405670.jpg
https://www1.garaget.org/gallery/images/219/218366/218366-30b5b923ae96278b3c96ce3e42230f29.jpg
https://www1.garaget.org/gallery/images/219/218366/218366-58d8d263600a3d5a2ce11c3cff5e70bb.jpg
https://www1.garaget.org/gallery/images/219/218366/218366-ee5866f97c8edae0db15f5db092b50c1.jpg
https://www1.garaget.org/gallery/images/219/218366/218366-c475e6ae8dedd66d43fc421493bbe664.jpg
https://www1.garaget.org/gallery/images/219/218366/218366-66a5e1084fc279e52b77d282c2e6ce9a.jpg
https://www1.garaget.org/gallery/images/219/218366/218366-6bd8a934111f19052877b7b233dd7ffe.jpg
https://www1.garaget.org/gallery/images/219/218366/218366-2d22180aaa9b00e55088b99186a5068a.jpg
https://www1.garaget.org/gallery/images/219/218366/218366-98ebe6392935be899c9728c92d1da6dd.jpg

Senast redigerat av martinhejdesten (27 december 2023)

martinhejdesten
27 oktober 2018 · 484 Inlägg

Dag 3,5 (halvdagsarbete idag och resten av helgen ledigt):

- Nu har vi en klar bild vad vi måste göra för att sänka bilen.
- Borstat rent underredet.
- Kittning av underredet.
- Lite rostlagning.
- Baksätet fick sig en omgång med primer. Efter torkning ska det lackas vitt.
- Innertaket fick också sig en omgång med vinylprimer. Efter torkning ska det lackas svart.
- Svingarmarna är redan färdigborstade men trumbromsarna är ituplockade och rengjorda. Bromsbeläggen såg bra ut. Rostskyddsmålas och ihopmonteras med nya alutrummorna med kylflänsar snarast.

När bromsar och svingarmar är klara så ska återmonteras i bakvagnen. Sen i med nya fjädrarna (rätt fjäder till rätt plats har vi lärt oss).

Nästa gång...
- Trösklar och underrede ska få ett lager med bodycoat.
- Sänkning enligt plan.
- Lackering av innertak.
- Lackering av interiör.
- En sändning från UK ska ha kommit med bl a droppformade Mk1-bakljusen samt konverteringsplåt (passar mina rektangulära Mk3-hål), ny baklucka mm.

Vi tar ett litet uppehåll nu. Gott att ha kommit en bra bit på vägen trots diverse road bumps. Ses inom en månad!

• • • TRANSLATION • • •

Day 3.5 (half-day work today, and the rest of the weekend off):

Now we have a clear picture of what we need to do to lower the car.
- Cleaned the undercarriage.
- Applied undercarriage filler.
- Some rust repairs.
- Primer applied to the rear seat. After drying, it will be painted white.
- The interior roof also received a coat of vinyl primer. After drying, it will be painted black.
- The swing arms are already brushed, but the drum brakes are disassembled and cleaned. The brake pads looked good. Rust protection paint will be applied, and they will be assembled with the new aluminum drums with cooling fins as soon as possible.

Once the brakes and swing arms are ready, they will be reinstalled in the rear suspension. Then, the new springs will be installed (we've learned to match the right spring to the right place).

Next time...
- Sills and undercarriage will receive a layer of body coat.
- Lowering as planned.
- Painting of the interior roof.
- Painting of the interior.
- A shipment from the UK should have arrived with items including drop-shaped Mk1 taillights and conversion plates (fitting my rectangular Mk3 holes), a new tailgate, and more.

We're taking a short break now. It's good to have come a long way despite various road bumps. See you within a month!

https://www1.garaget.org/gallery/images/219/218366/218366-9d2fb927b21dda4e45383eb831231d9c.jpg
https://www1.garaget.org/gallery/images/219/218366/218366-b4750135d49eda7b2124a53221b3e2ac.jpg
https://www1.garaget.org/gallery/images/219/218366/218366-ced1ed4a2b8d0a764081d46f37642e8a.jpg
https://www1.garaget.org/gallery/images/219/218366/218366-1c8dde2a9db4f493707aa5680b6bb90b.jpg
https://www1.garaget.org/gallery/images/219/218366/218366-8d19e312846aa86fddbdb8a9e6316681.jpg
https://www1.garaget.org/gallery/images/219/218366/218366-08c0fa9c9cf426598bc41571384e5920.jpg
https://www1.garaget.org/gallery/images/219/218366/218366-f24f816398784d44f6646531ac918788.jpg
https://www1.garaget.org/gallery/images/219/218366/218366-eccf50fdbb1e27db83e2fdee969201e5.jpg

Senast redigerat av martinhejdesten (27 december 2023)

martinhejdesten
11 november 2018 · 484 Inlägg

Nu var det plötsligt november. Lite stressad över att få bilen klar innan sommaren. Tänkte därför ta ledigt från jobbet i fem arbetsdagar och komma en bit på vägen med min MiniSwift.

Min far har hunnit följande i veckan som gått:
- Bakvagn målad
- Hi-Los ("trumpeter") svarvade för att sänka bilen ytterligare
- Tröskelhål Tectylbehandlade
- Småskarvar i underrede Tectylbehandlade
- Rostlagad del i underrede utjämnad med med plastic padding
- Hela underredet rostskyddsmålat och målat med Bodycoat
- Svingarmar rostskyddsmålade

En sändning från UK kommer inom kort och troligtvis innan jag går vidare. Däri finns konverteringsplåtar till äldre modellens bakljusen (lånad bild).

Tog en stund i Photoshop och klistrade in mina fälgar, tonade rutorna, svärtade grillen, breddade spårvidden (pga Swift-motorn), sänkte litegrann och stripade den. Något sådant blir nog slutresultatet.

Sen har jag hittat liknande fälgar, fast 8" eller 9" tum breda. Lite sugen på lite bredare baktill faktiskt. Tror dock att mina 7x13" borde räcka. Original är ju 4x10".

• • • TRANSLATION • • •

Now it's suddenly November. Feeling a bit stressed to get the car ready before summer. Therefore, I'm planning to take five working days off from my job and make some progress with my MiniSwift.

My father has accomplished the following in the past week:
- Rear suspension painted.
- Hi-Los ("trumpets") turned to further lower the car.
- Sill holes treated with Tectyl.
- Small joints in the undercarriage treated with Tectyl.
- Repaired rusted part in the undercarriage leveled with plastic padding.
- Entire undercarriage rust-protected and painted with Bodycoat.
- Swing arms rust-protected.

A shipment from the UK is expected shortly, probably before I proceed. It includes conversion plates for the older model taillights (borrowed image).

Spent some time in Photoshop and pasted my wheels, tinted the windows, blackened the grille, widened the track width (due to the Swift engine), lowered it a bit, and added some striping. Something like that might be the final result.

I've found similar wheels, but 8" or 9" inches wide. Kind of tempted to go a bit wider in the rear. However, I think my 7x13" should be enough. The original ones were 4x10".

https://www1.garaget.org/gallery/images/219/218366/218366-d9ed4b7acea8dc22a26d07c8cca65331.jpg
https://www1.garaget.org/gallery/images/219/218366/218366-7113d4c7c55ae1a777af9841b73b11a5.jpg
https://www1.garaget.org/gallery/images/219/218366/218366-fb3fcb794100950043eac6b400ca7d32.jpg
https://www1.garaget.org/gallery/images/219/218366/218366-dd6a3daf3d69bee4028b688f6bd57e7c.jpg
https://www1.garaget.org/gallery/images/219/218366/218366-c1e5149f0452a98ec2f1e26aa0e02c89.jpg
https://www1.garaget.org/gallery/images/219/218366/218366-4810d63097e52f239645c330ca88ce8a.jpg

https://www1.garaget.org/gallery/images/219/218366/218366-b07cd01cdd68dc0939a4254bc05f1104.jpg

Senast redigerat av martinhejdesten (27 december 2023)

martinhejdesten
21 november 2018 · 484 Inlägg

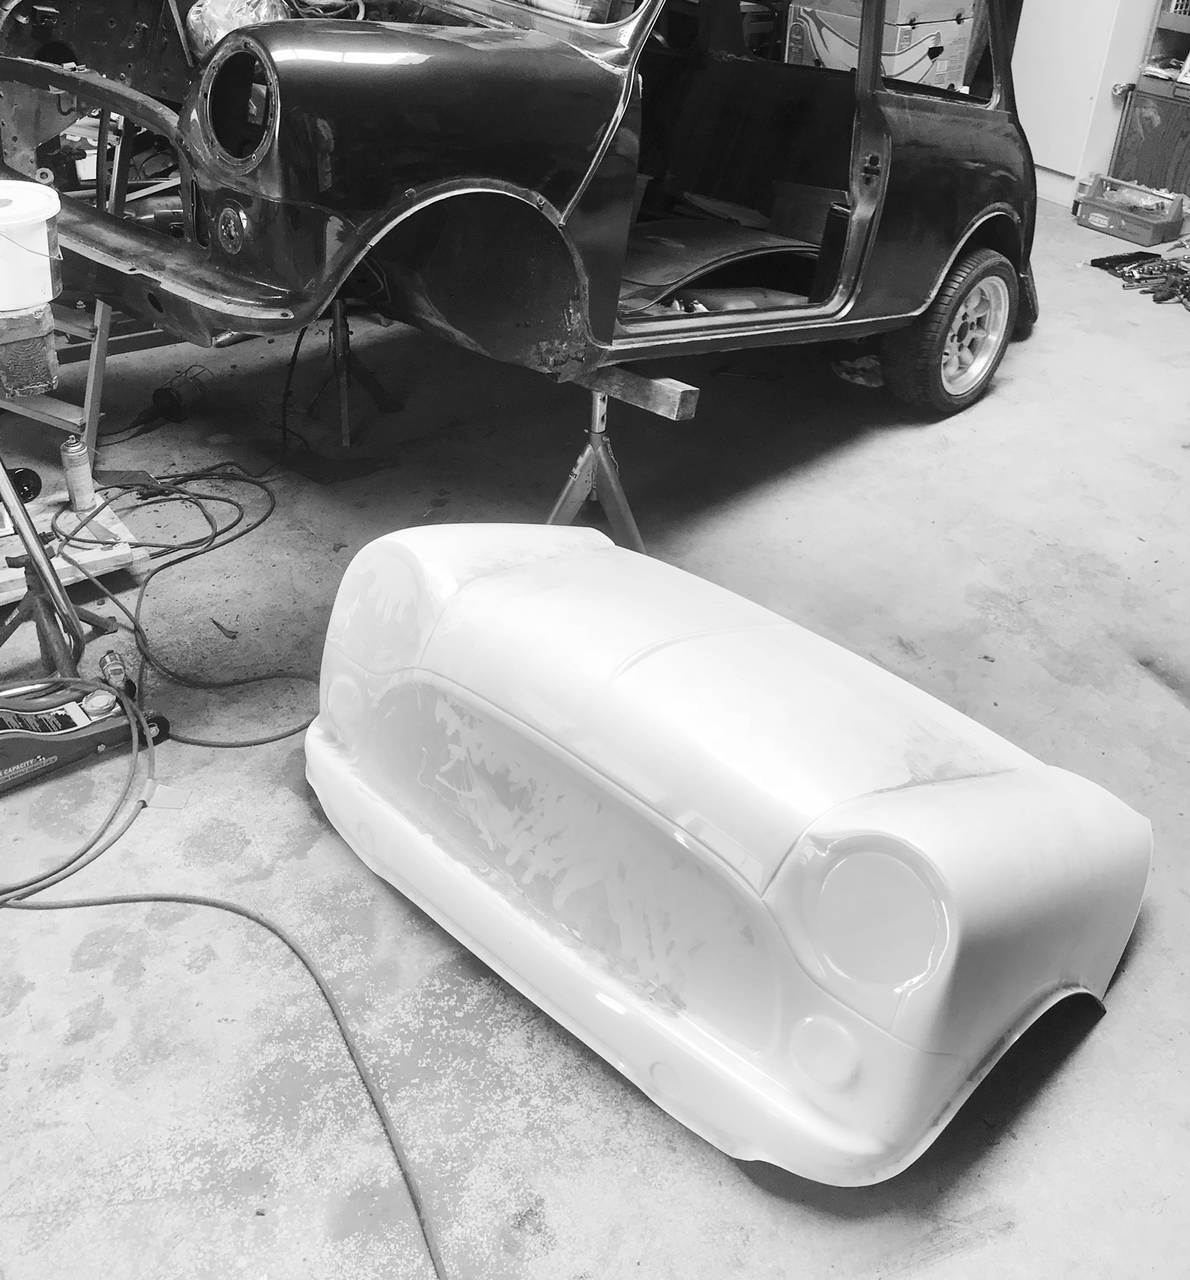
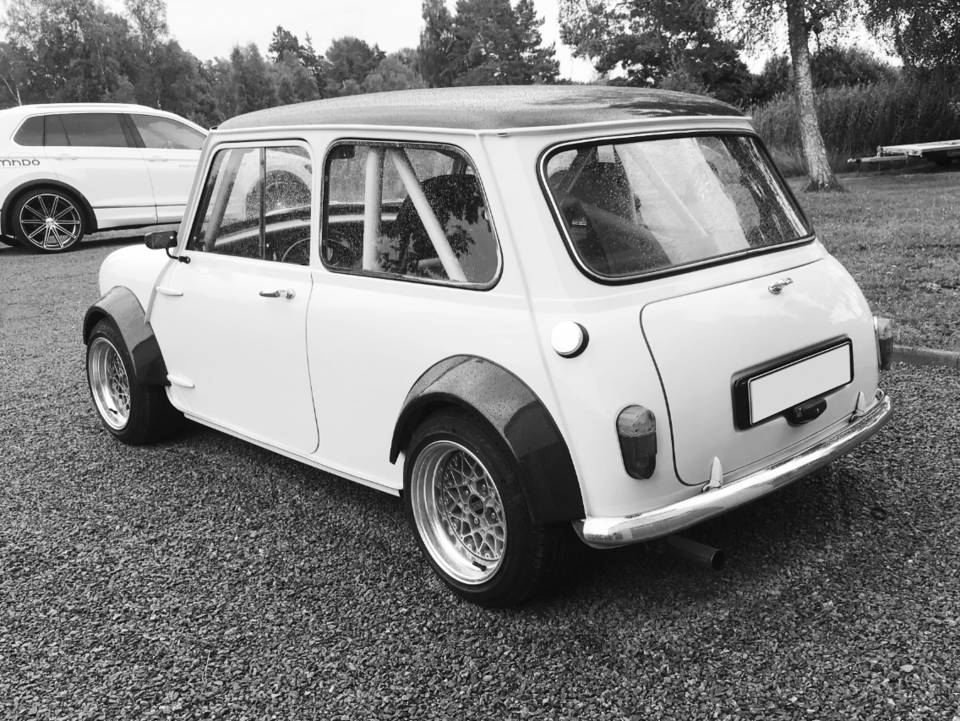
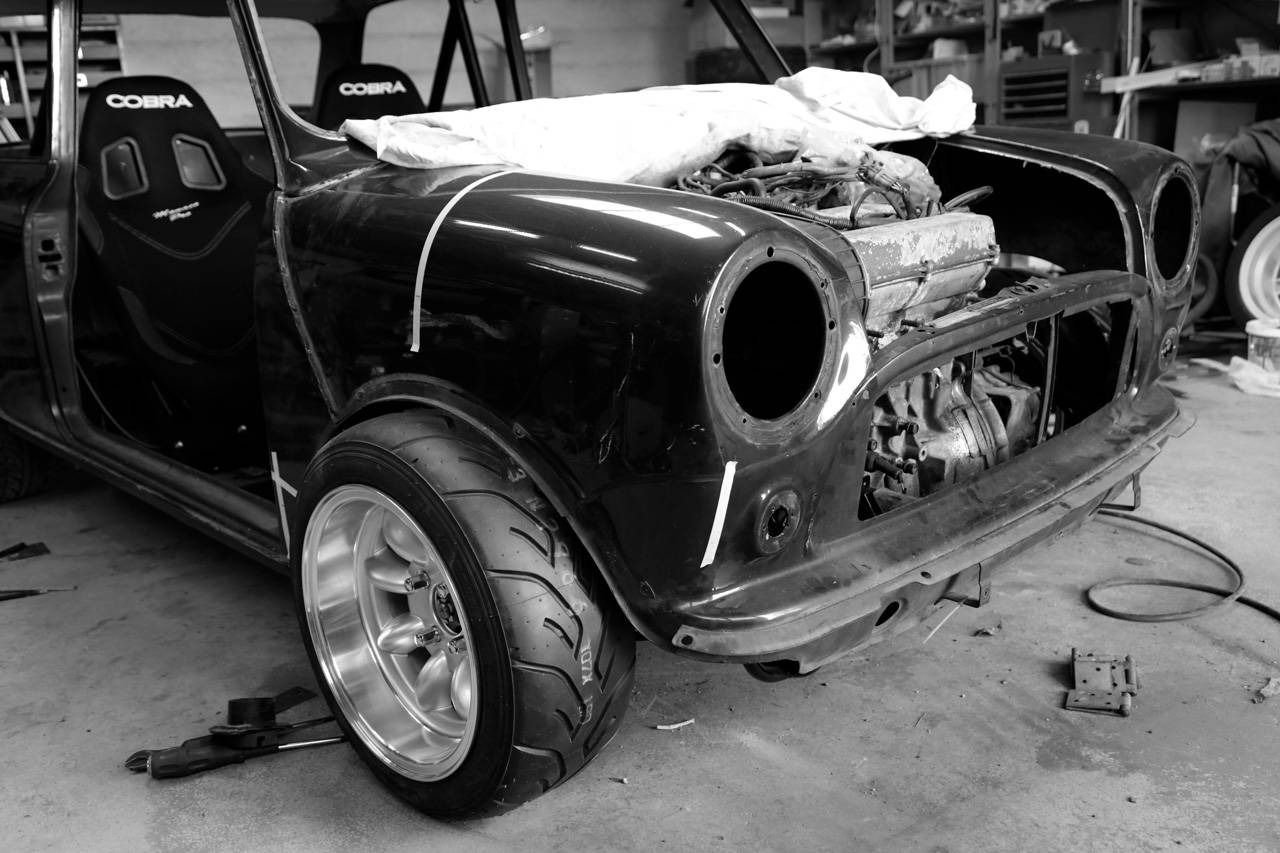
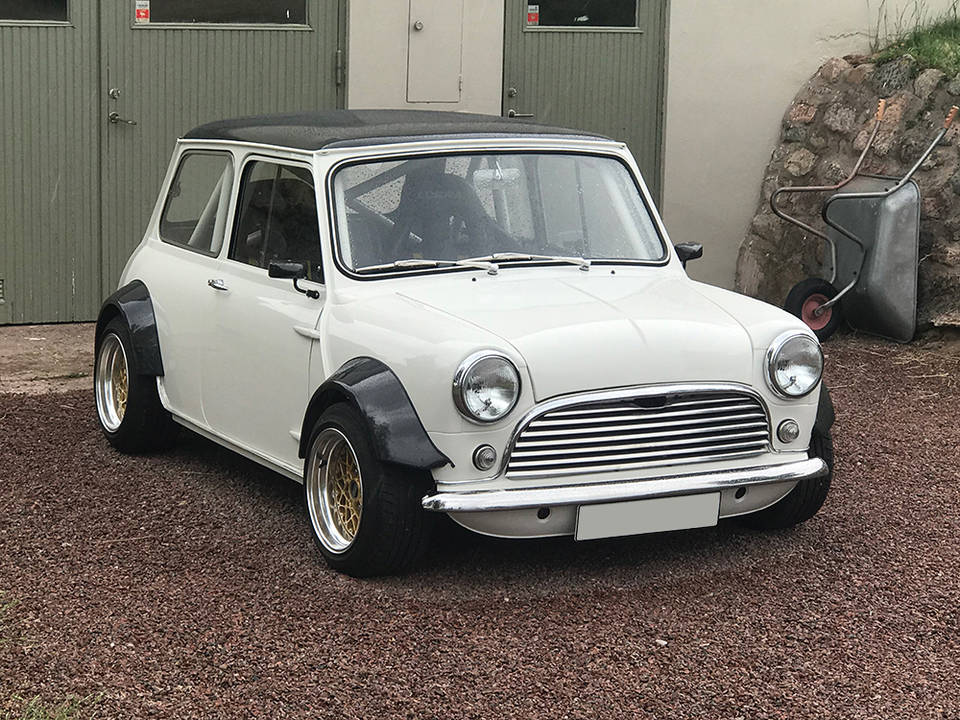
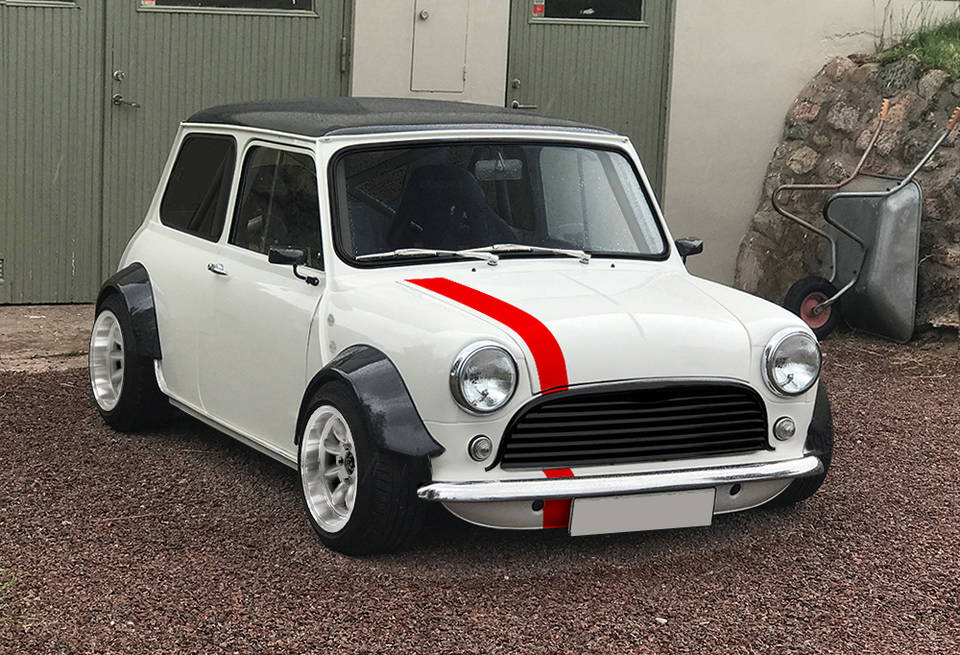
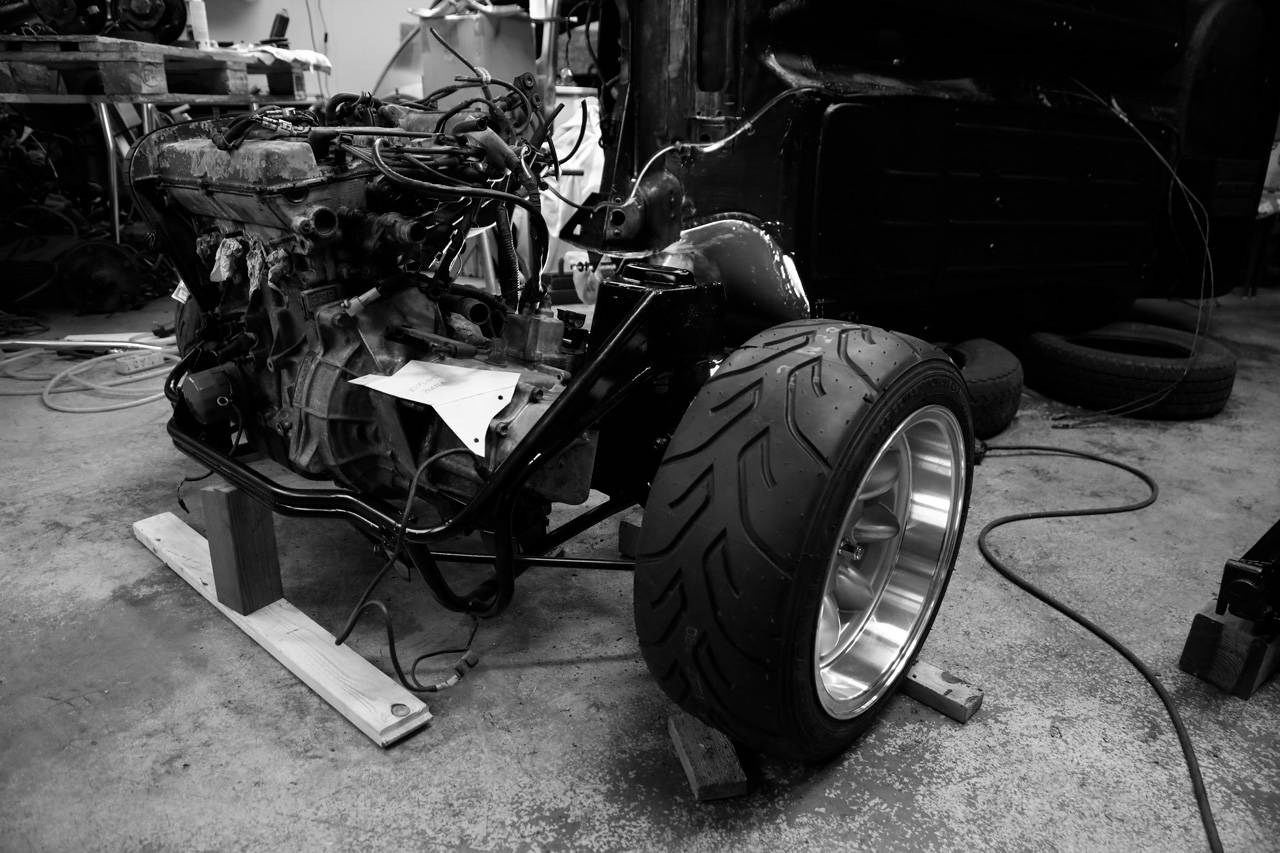
Idag, en knapp månad senare, fortsätter vi bygget MiniSwift GTi!

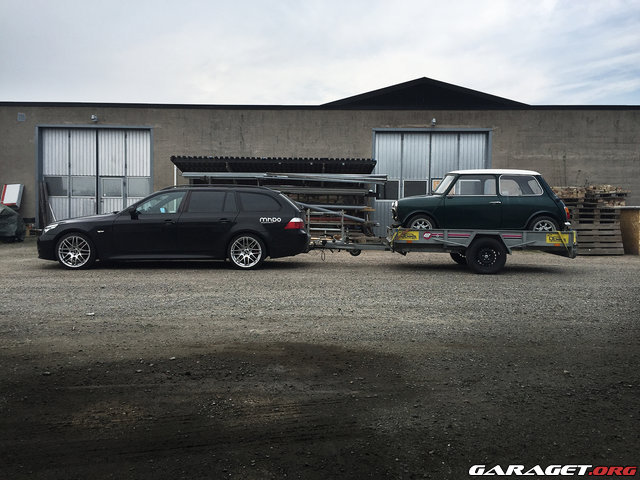
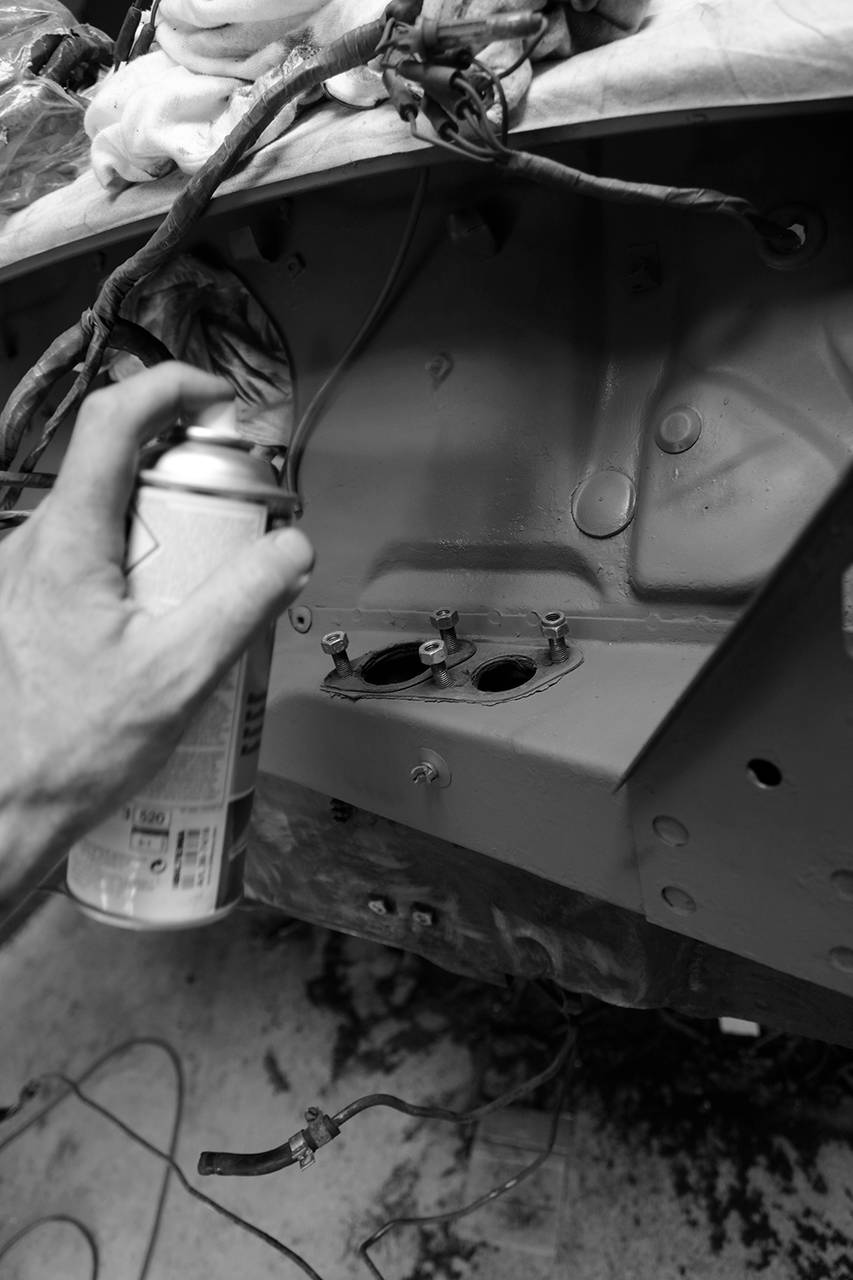
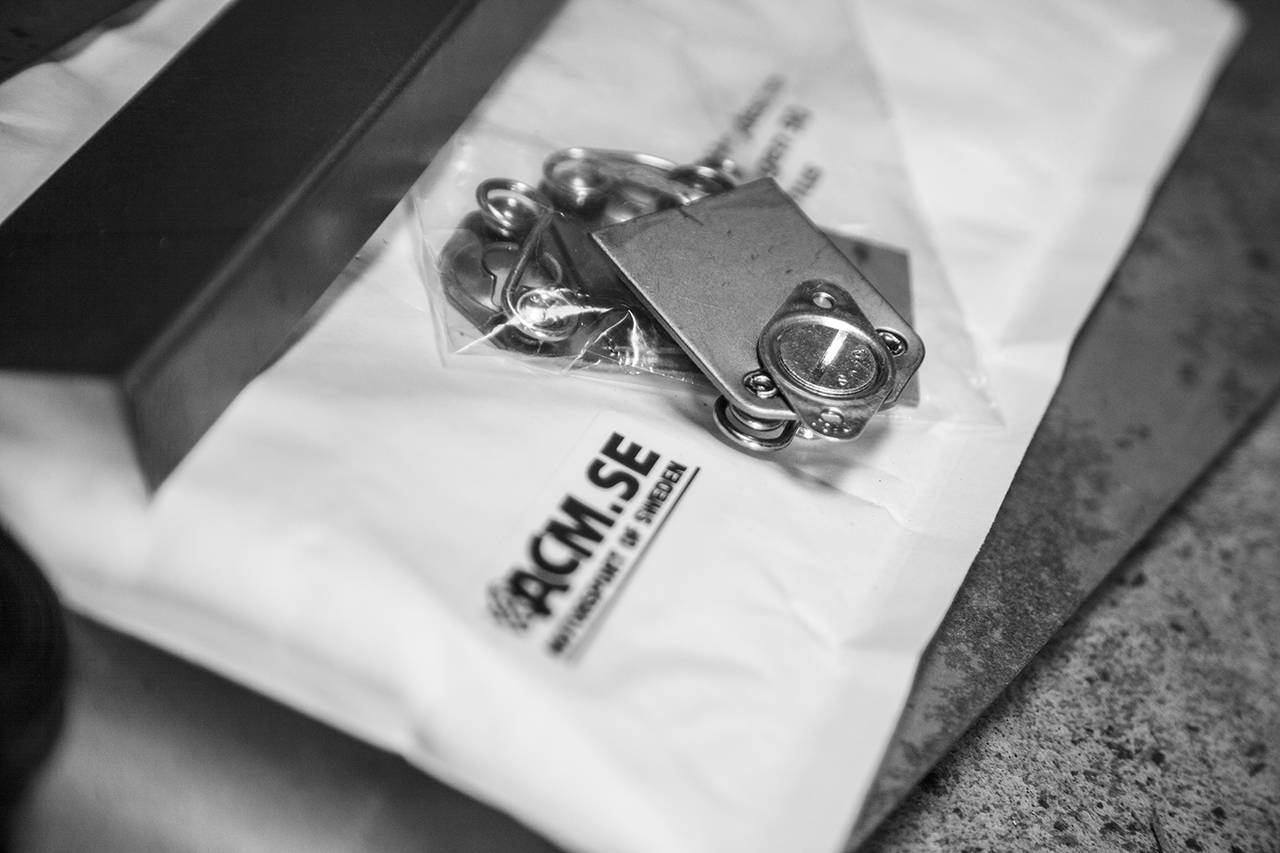
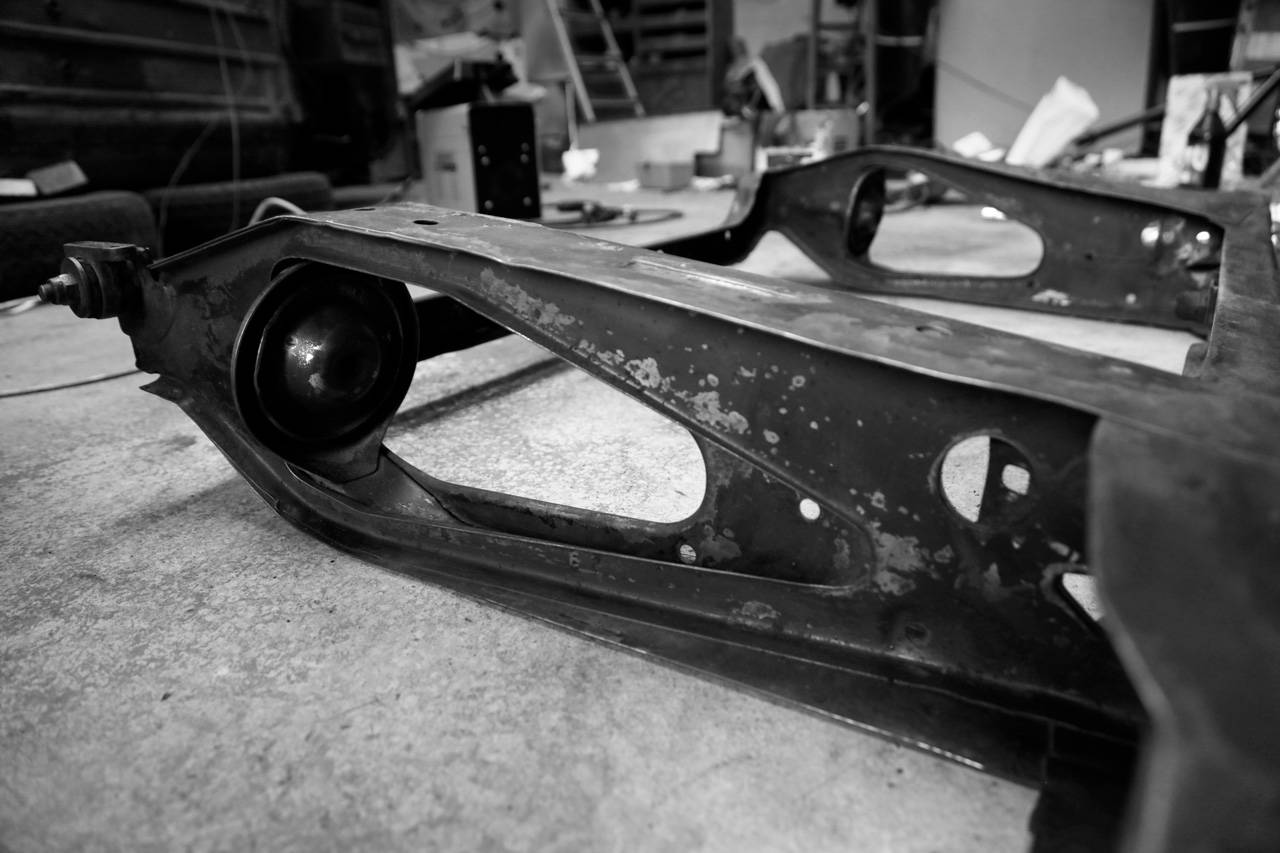
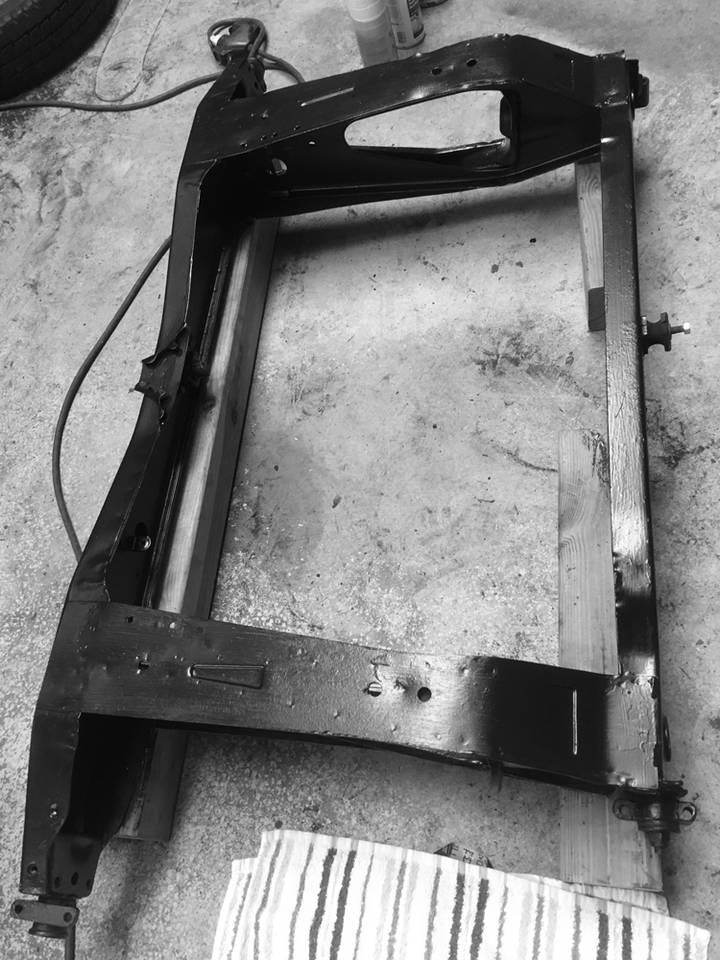
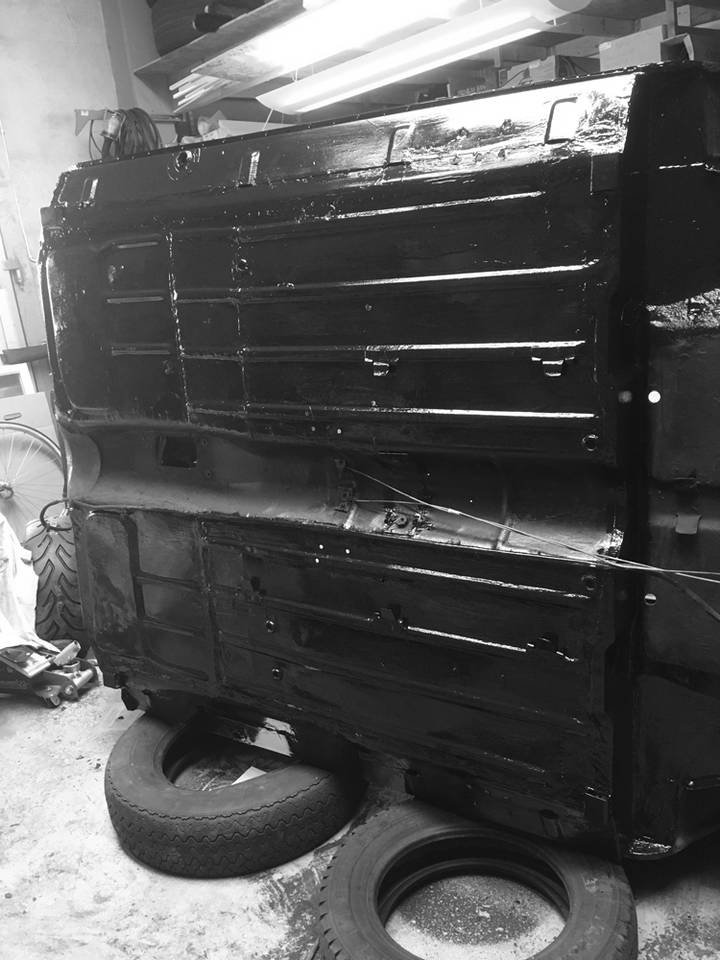
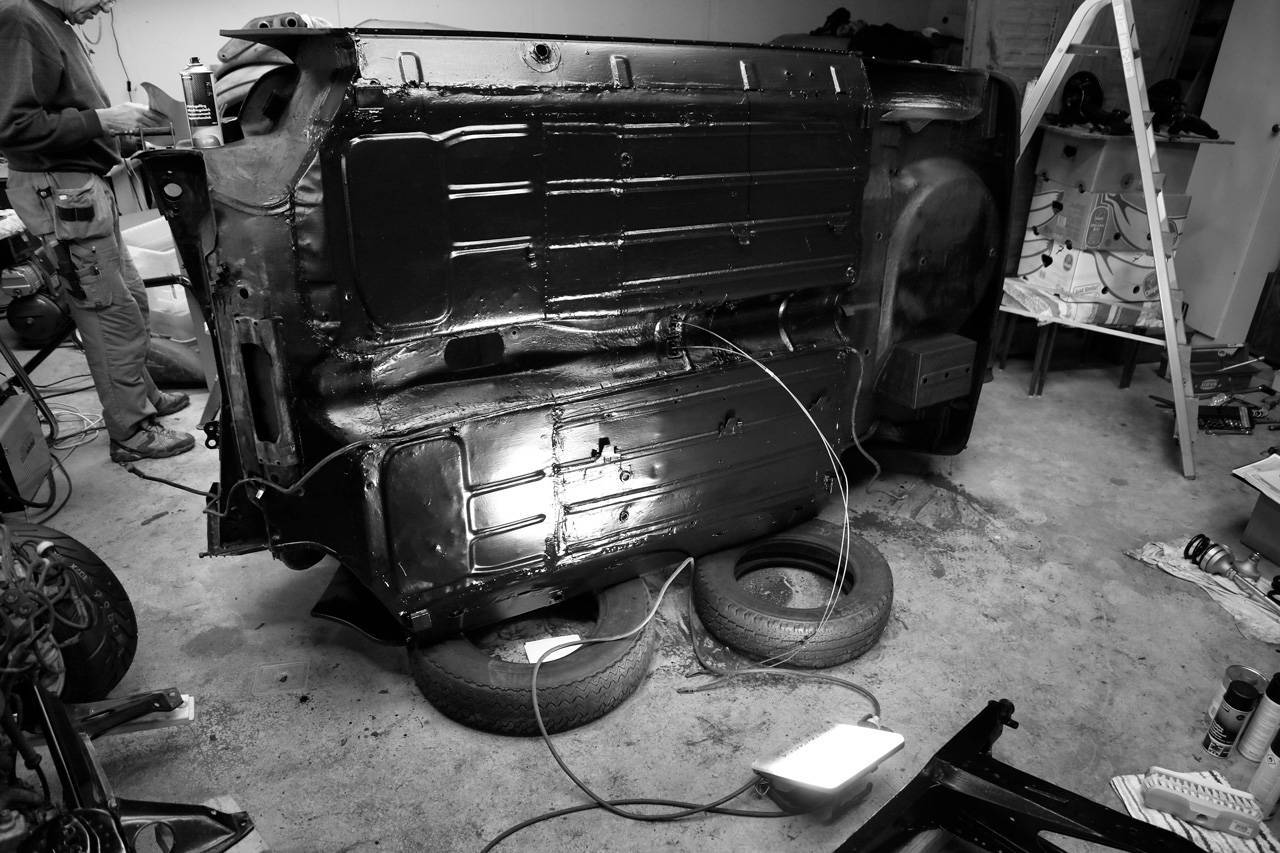
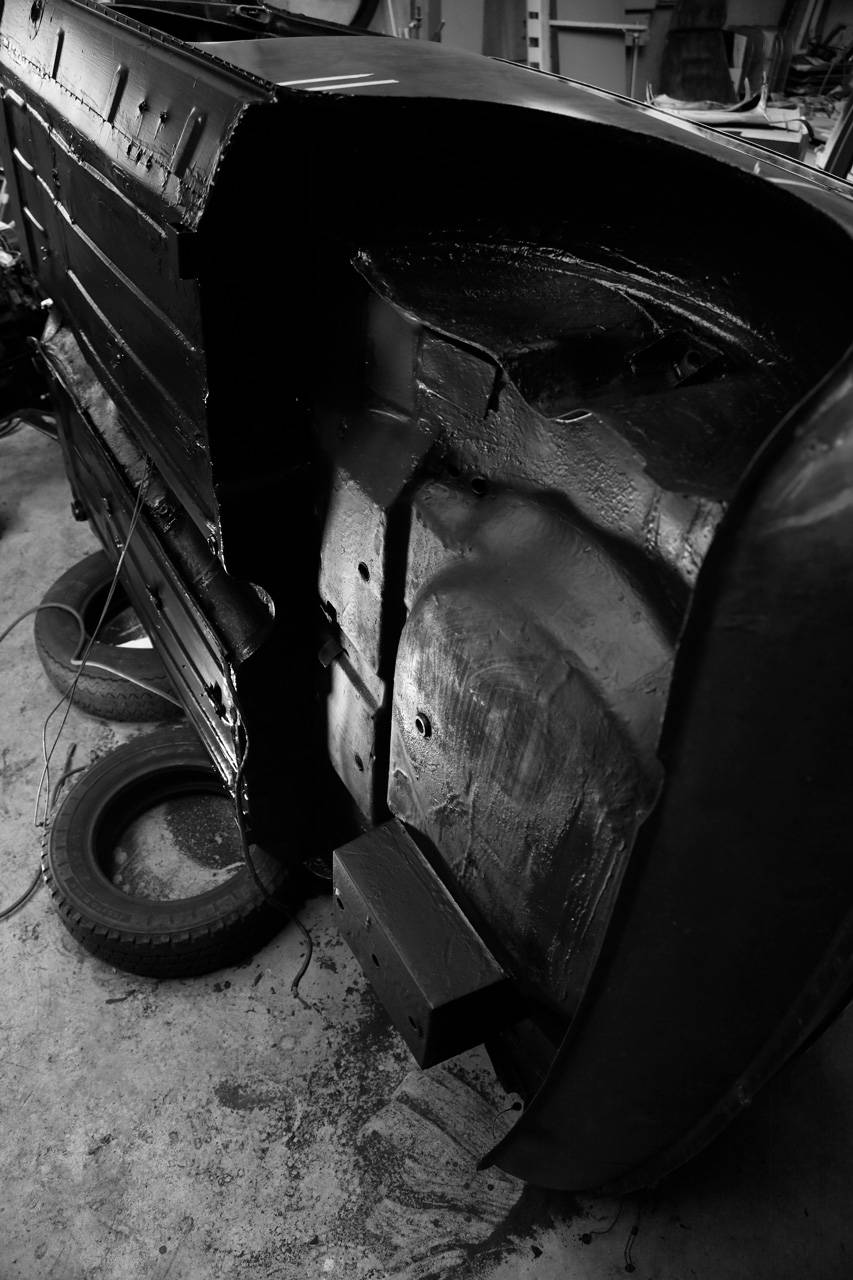
Sändningen från UK har anlänt, farsan har legat i lite med att rostskyddsmåla underredet samt svingarmar etc.

Vad pysslade vi med idag?
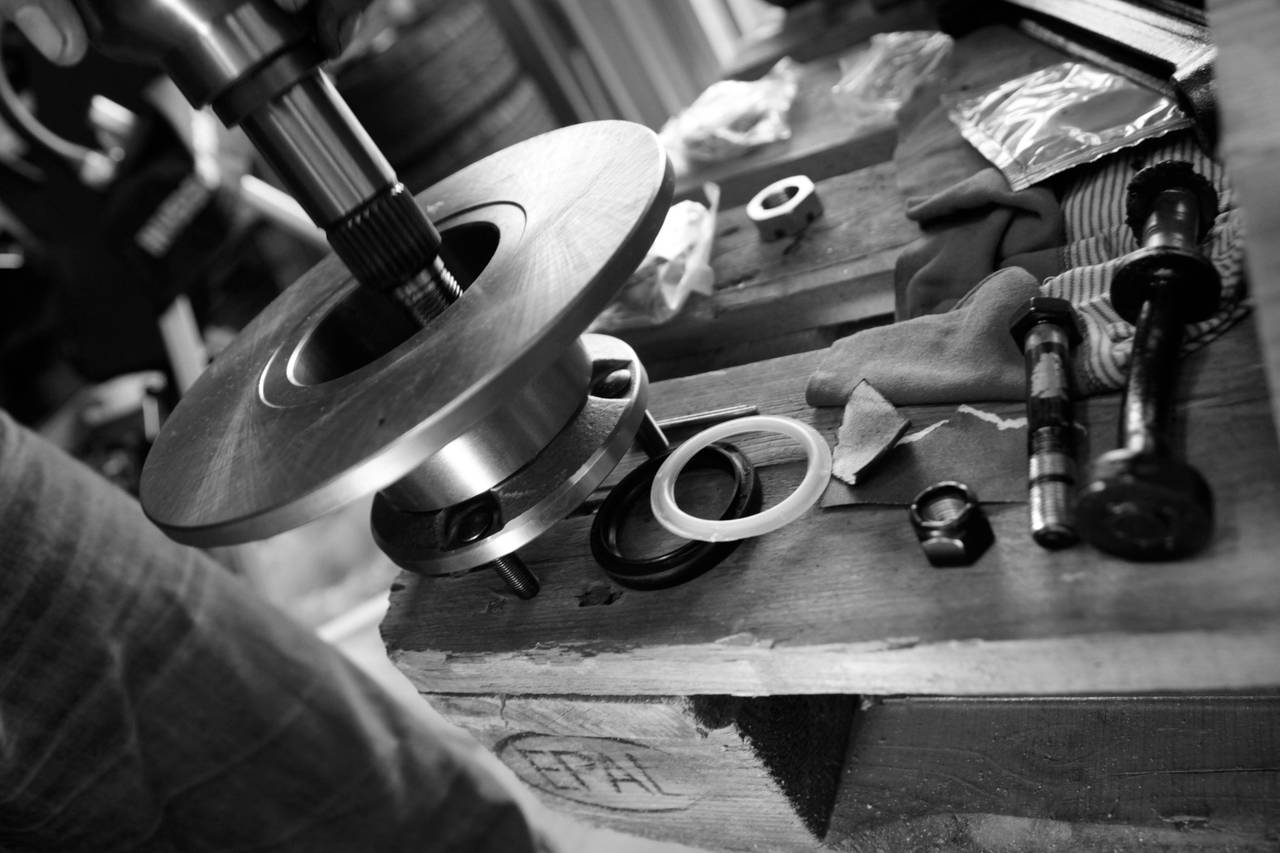
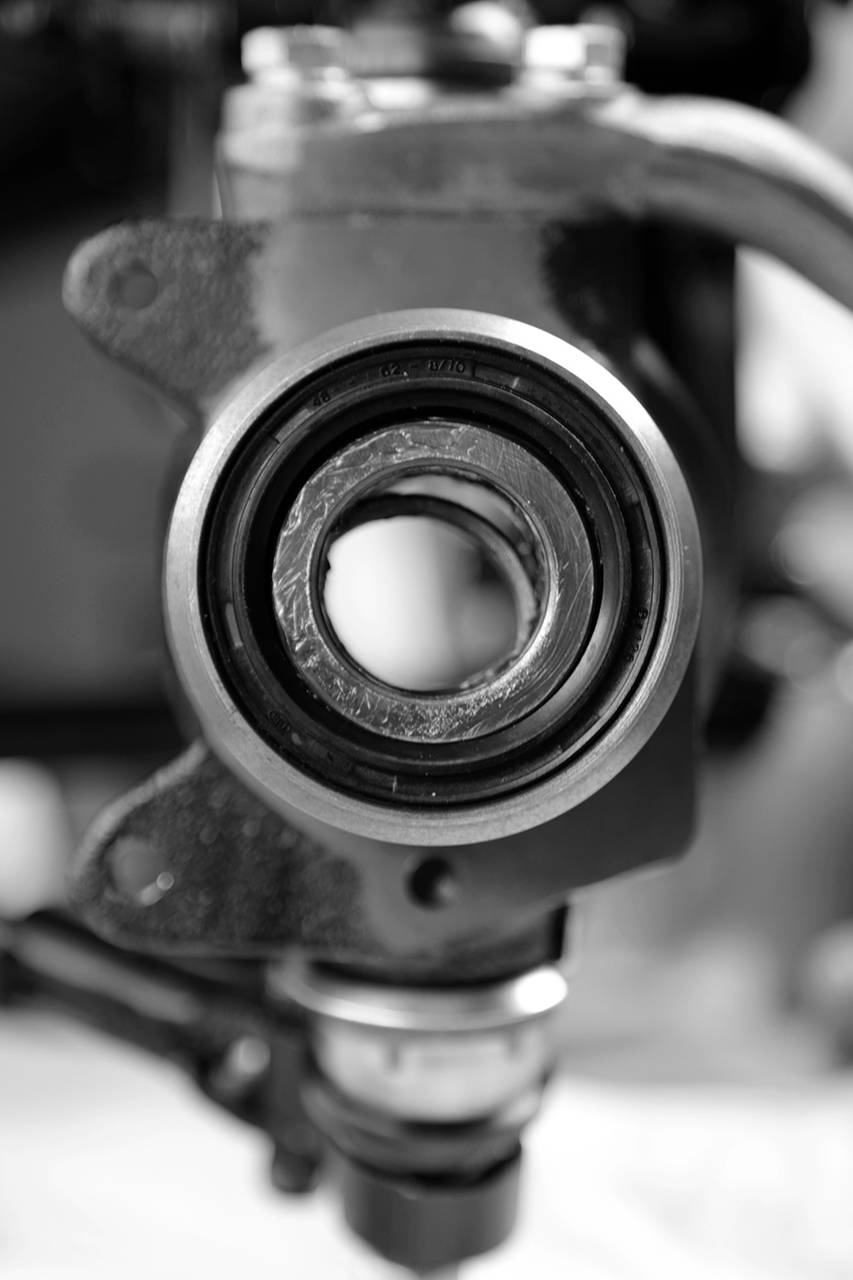
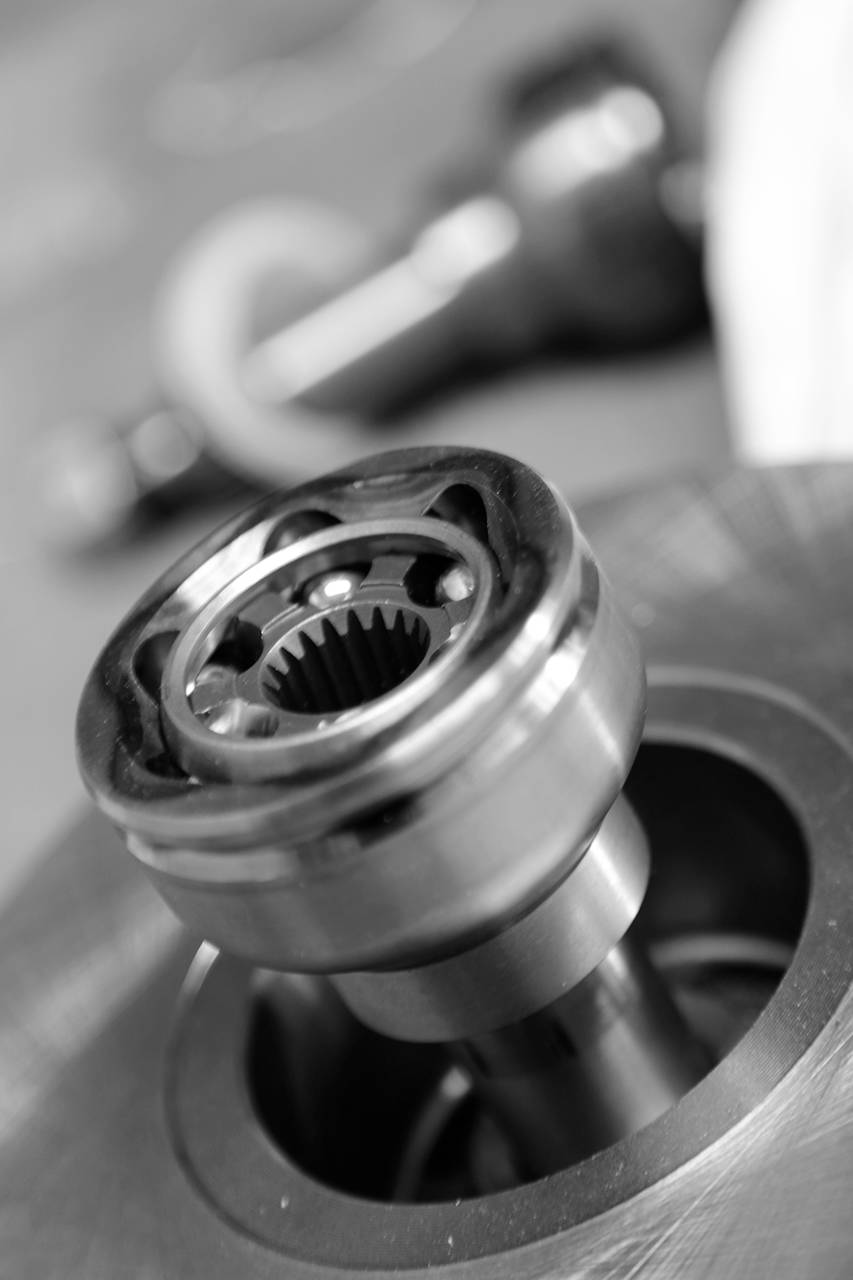
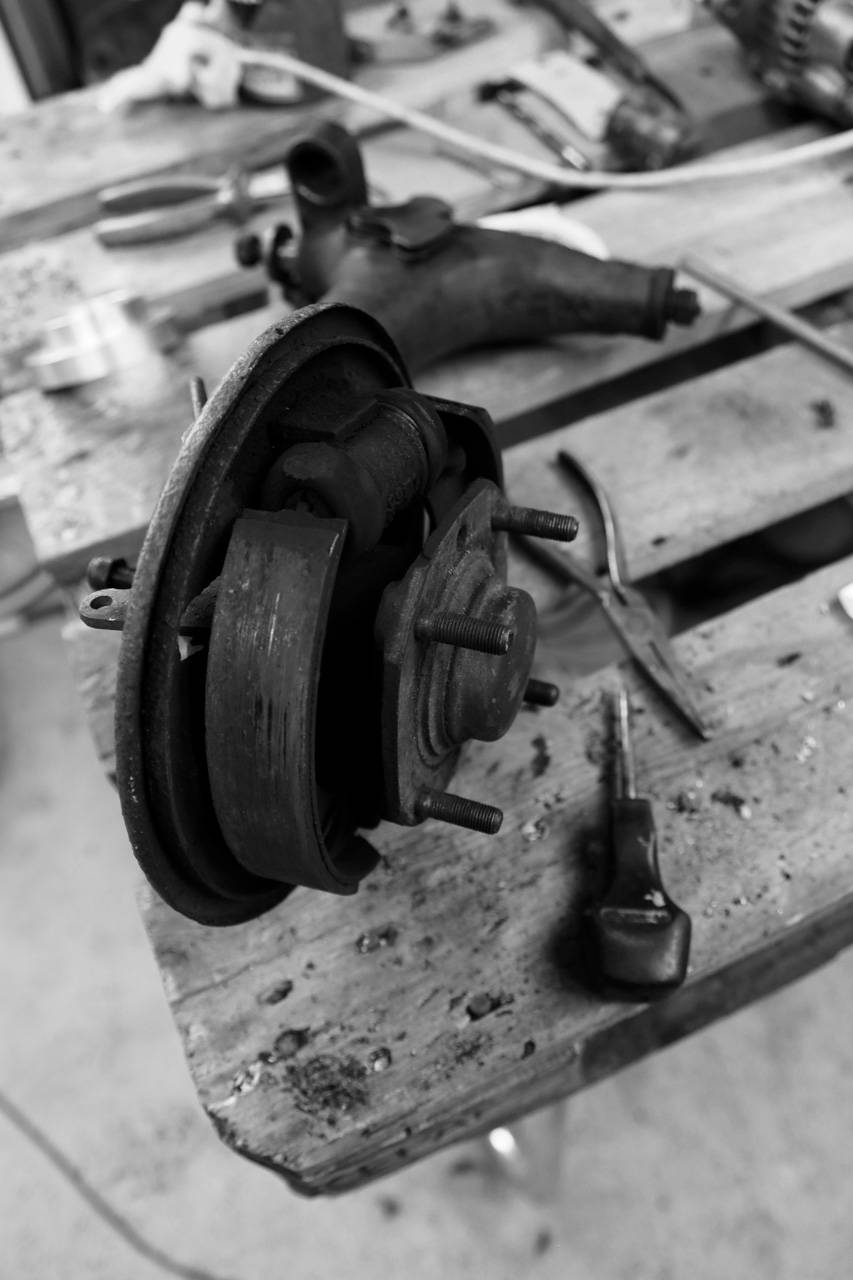
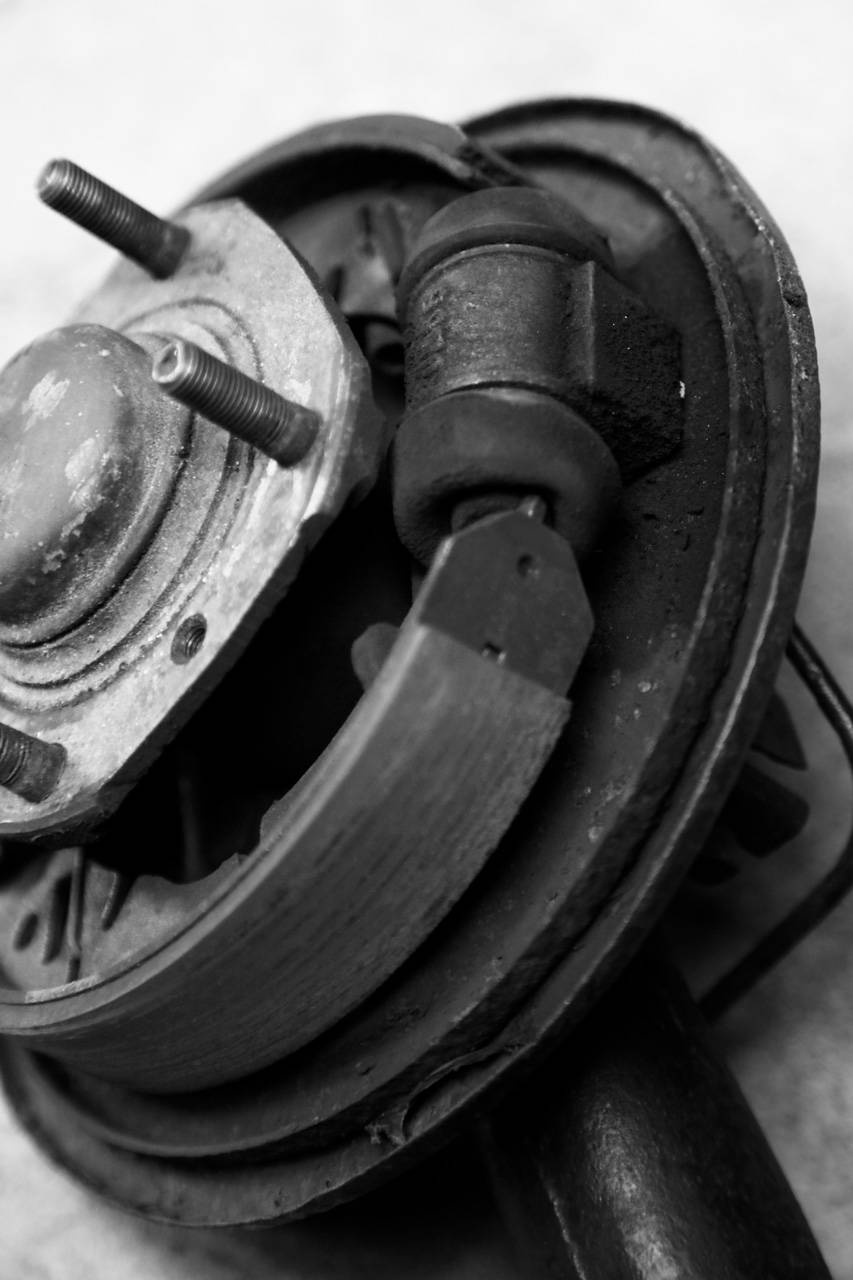
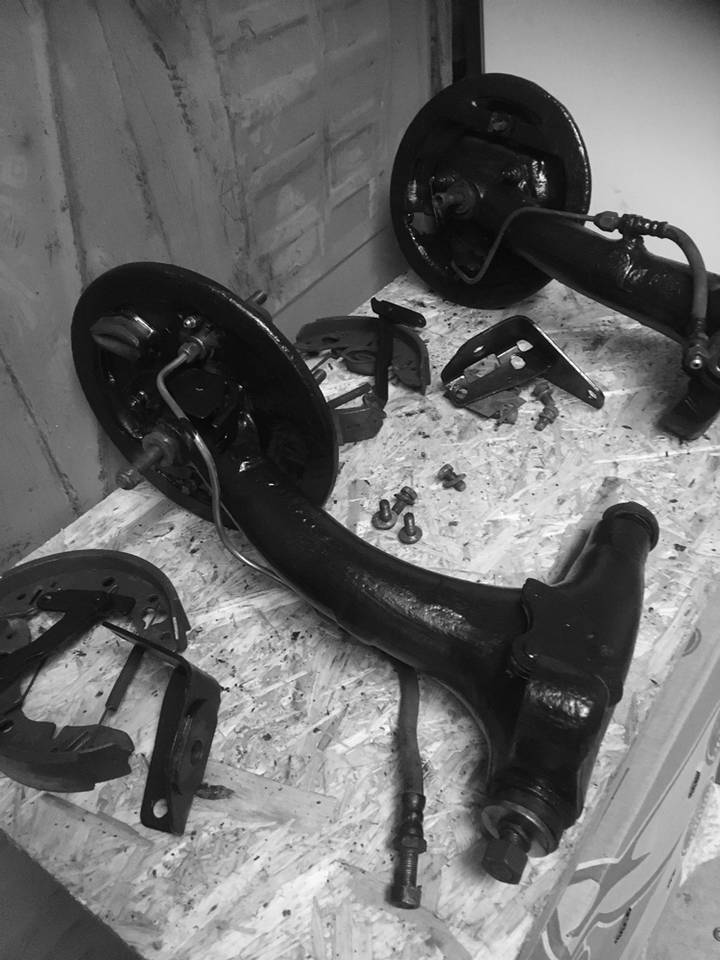
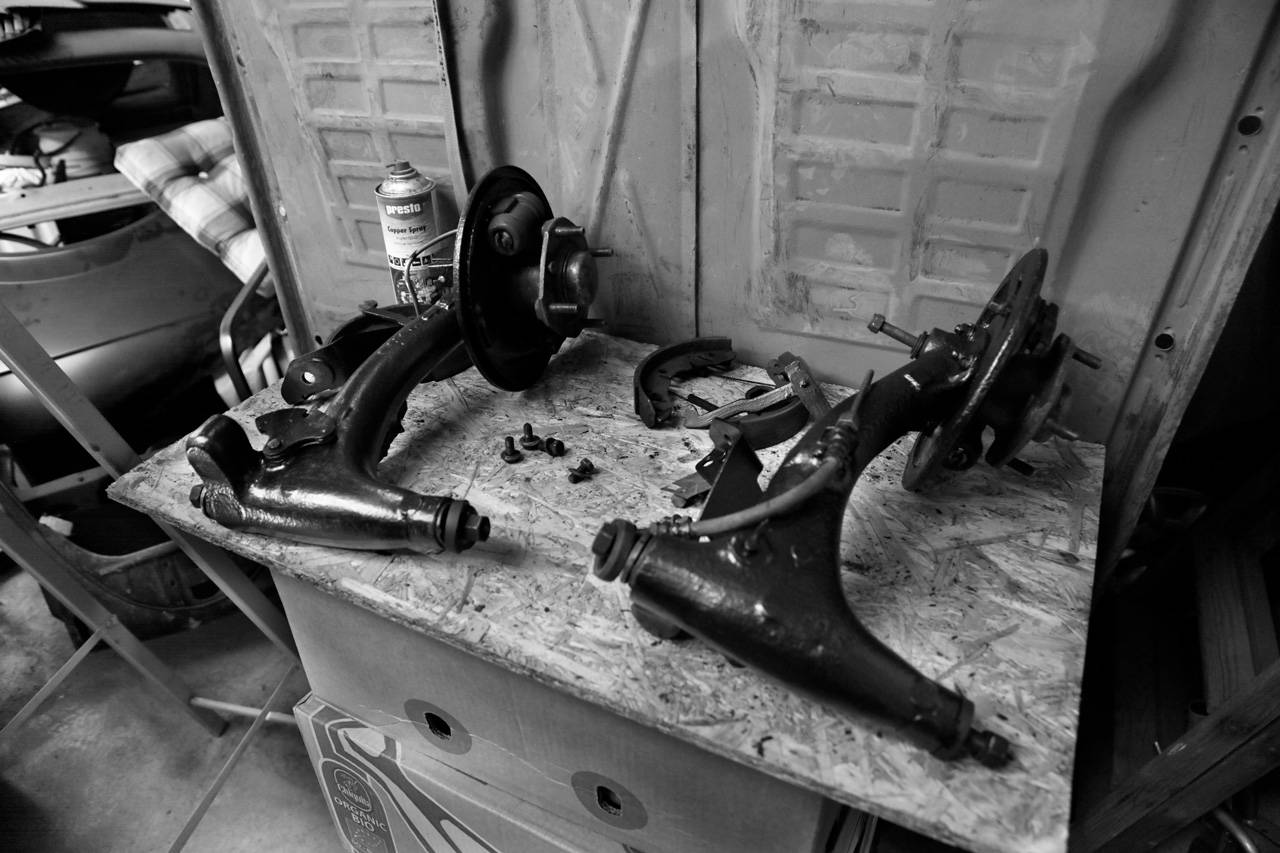
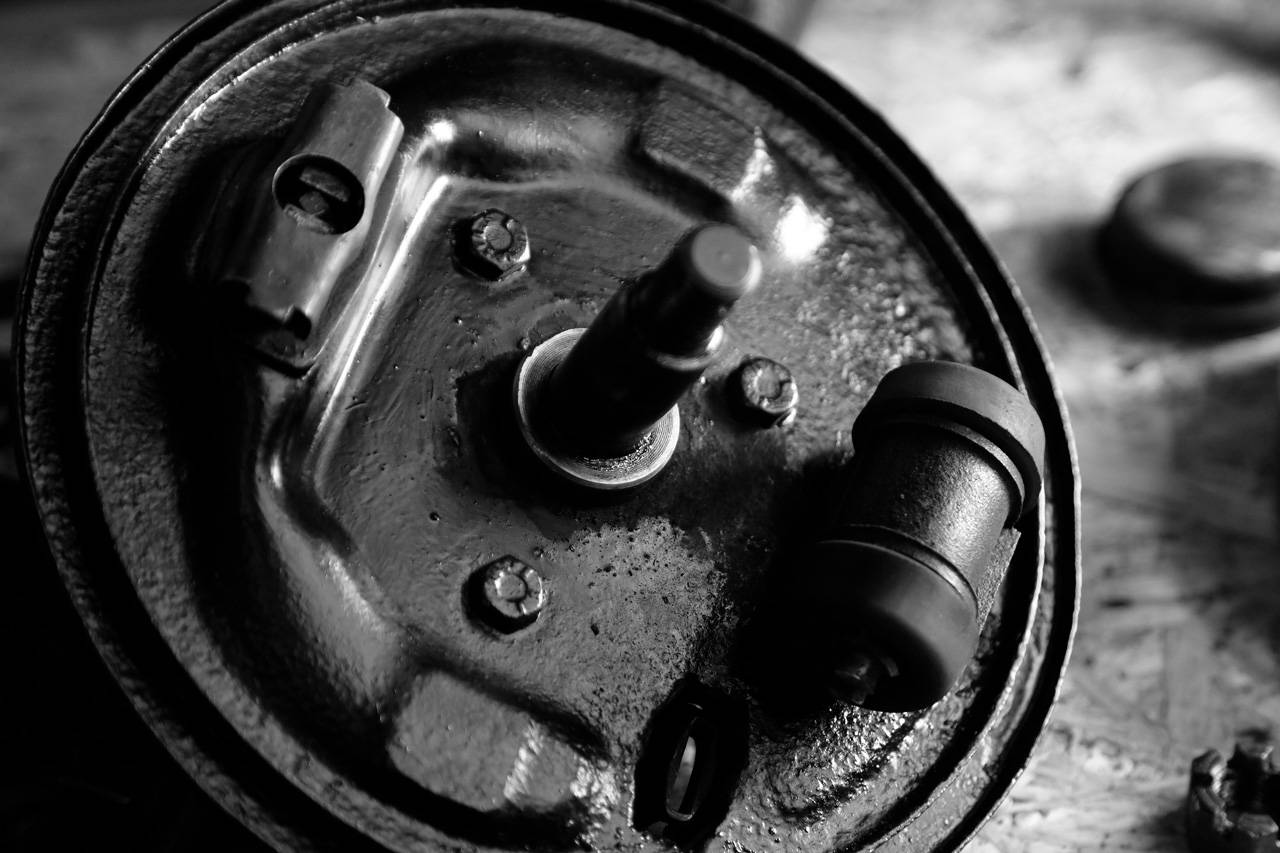
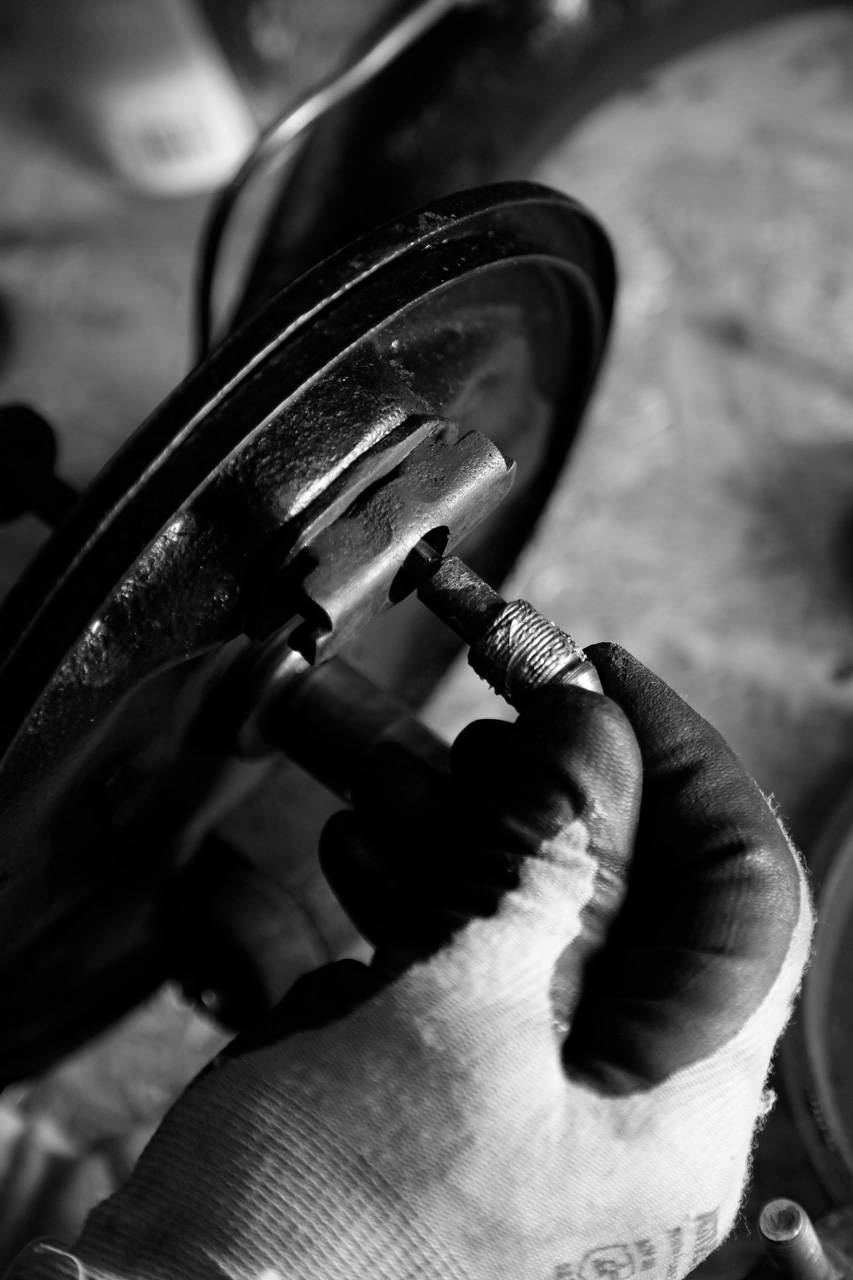
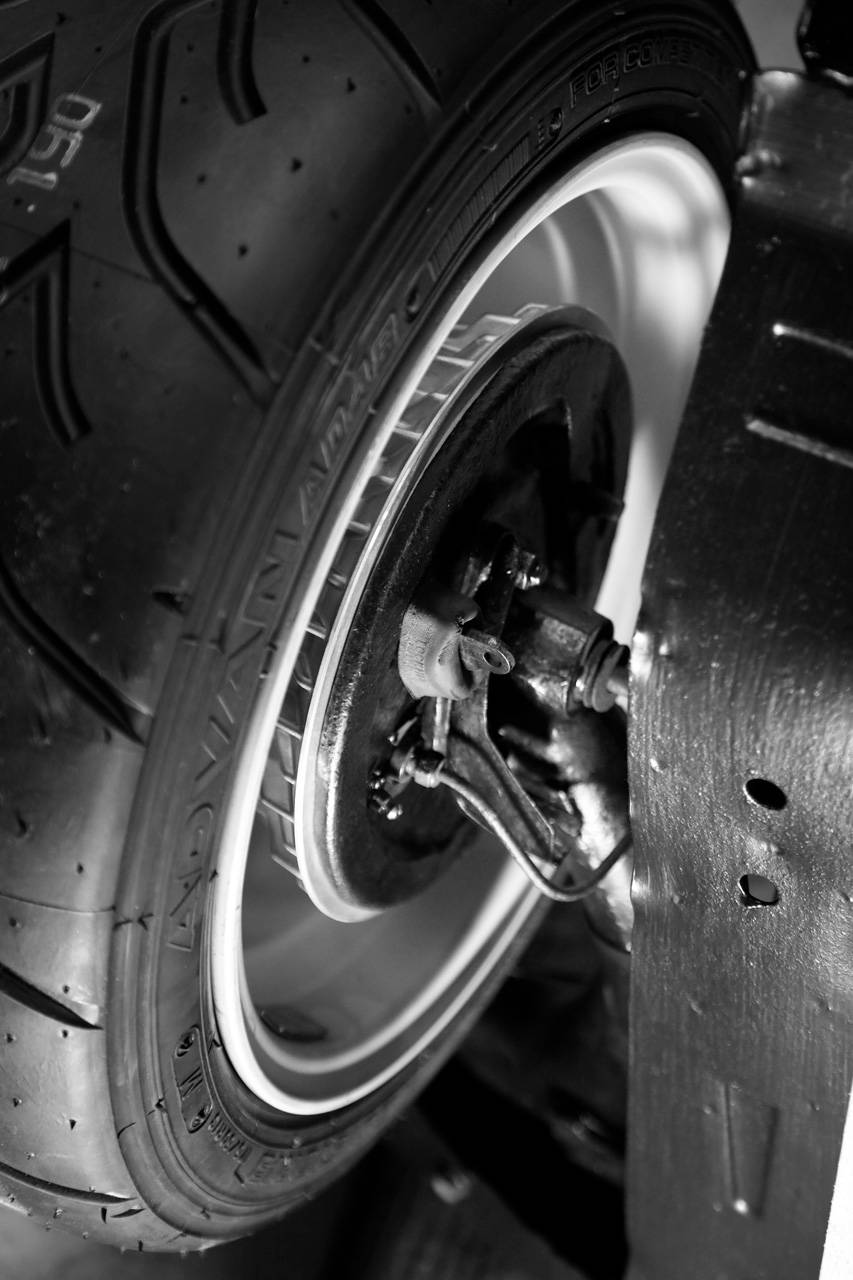
– Hjullagerna bak demonterade, rengjorda, smorda och återmonterade
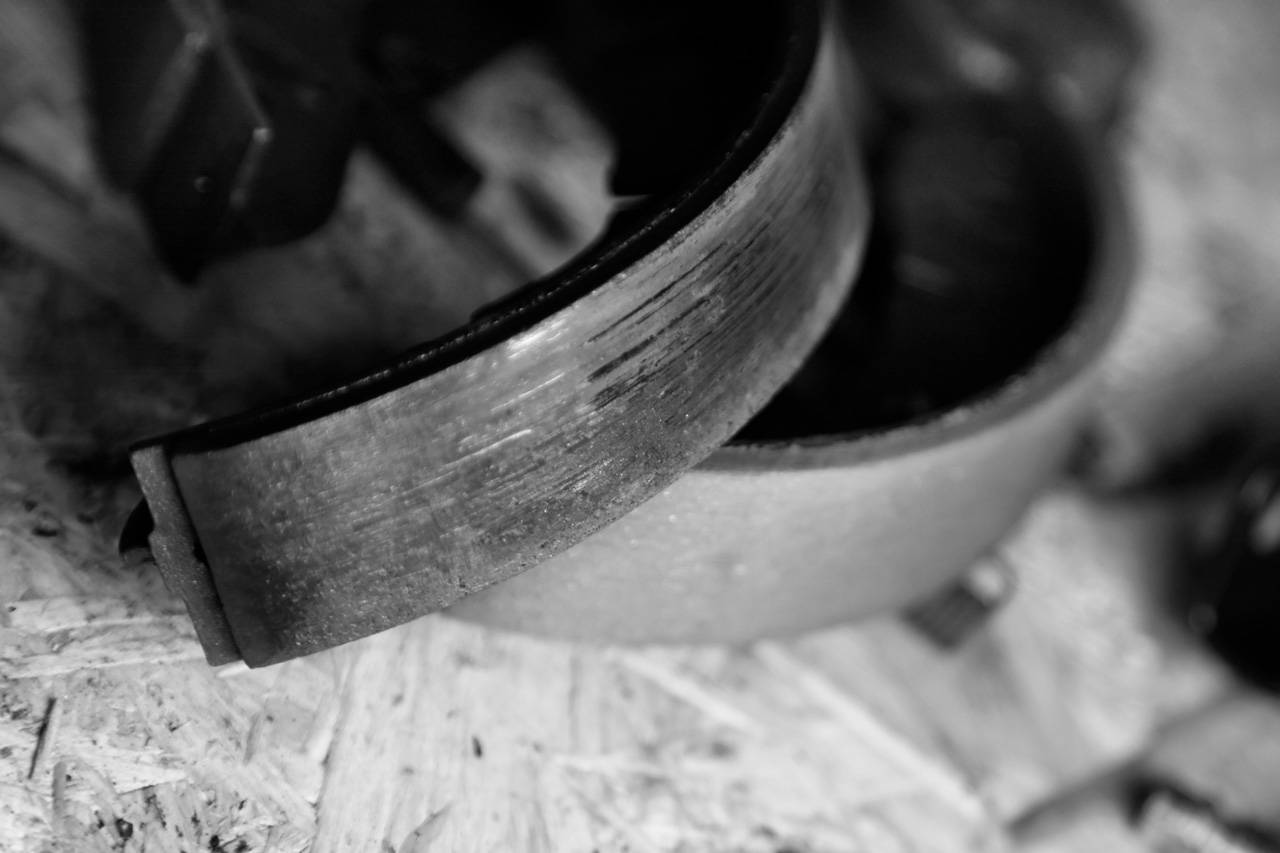
– Bromsbackar slipade
– Justerbara skruvar (djävulens påfund då de ofta kärvar) för bromsbackarna är rengjorda och smorda
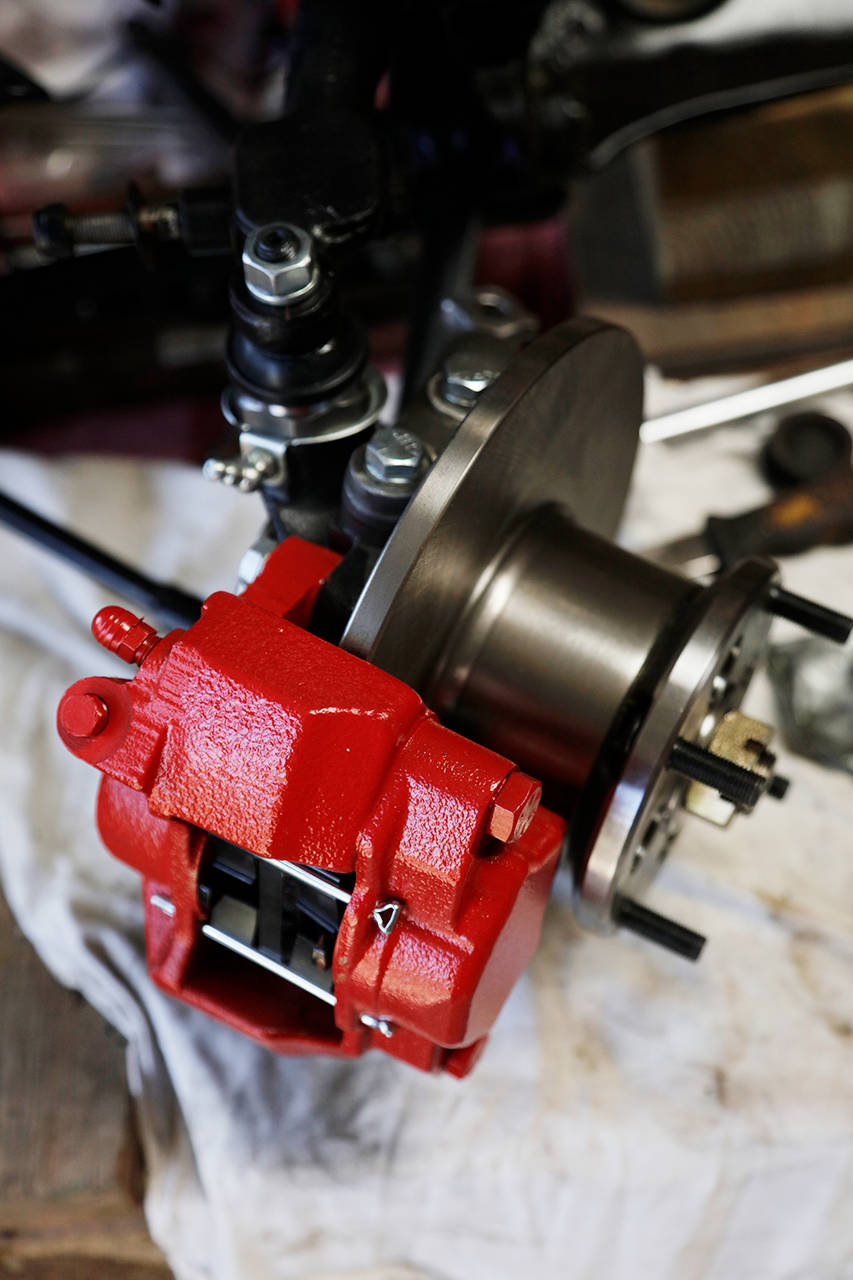
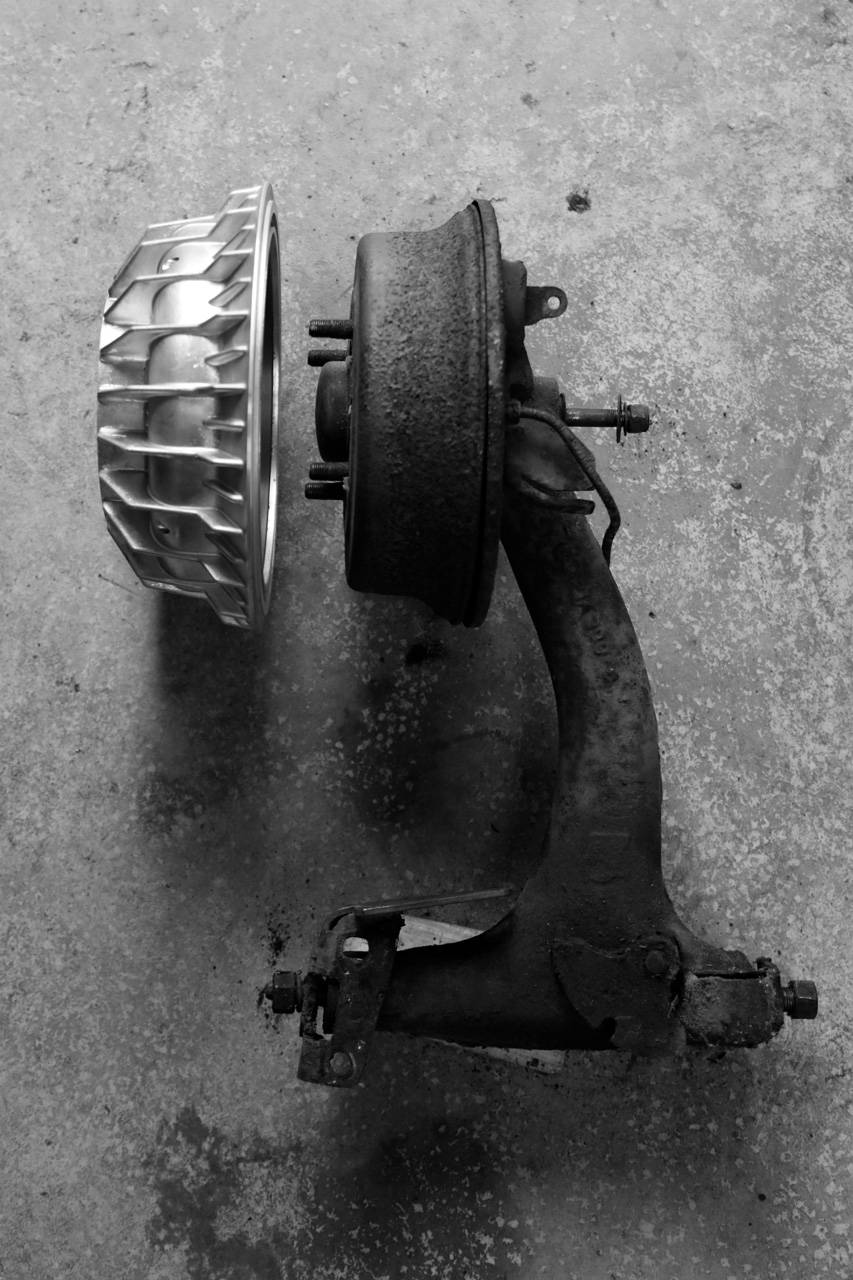
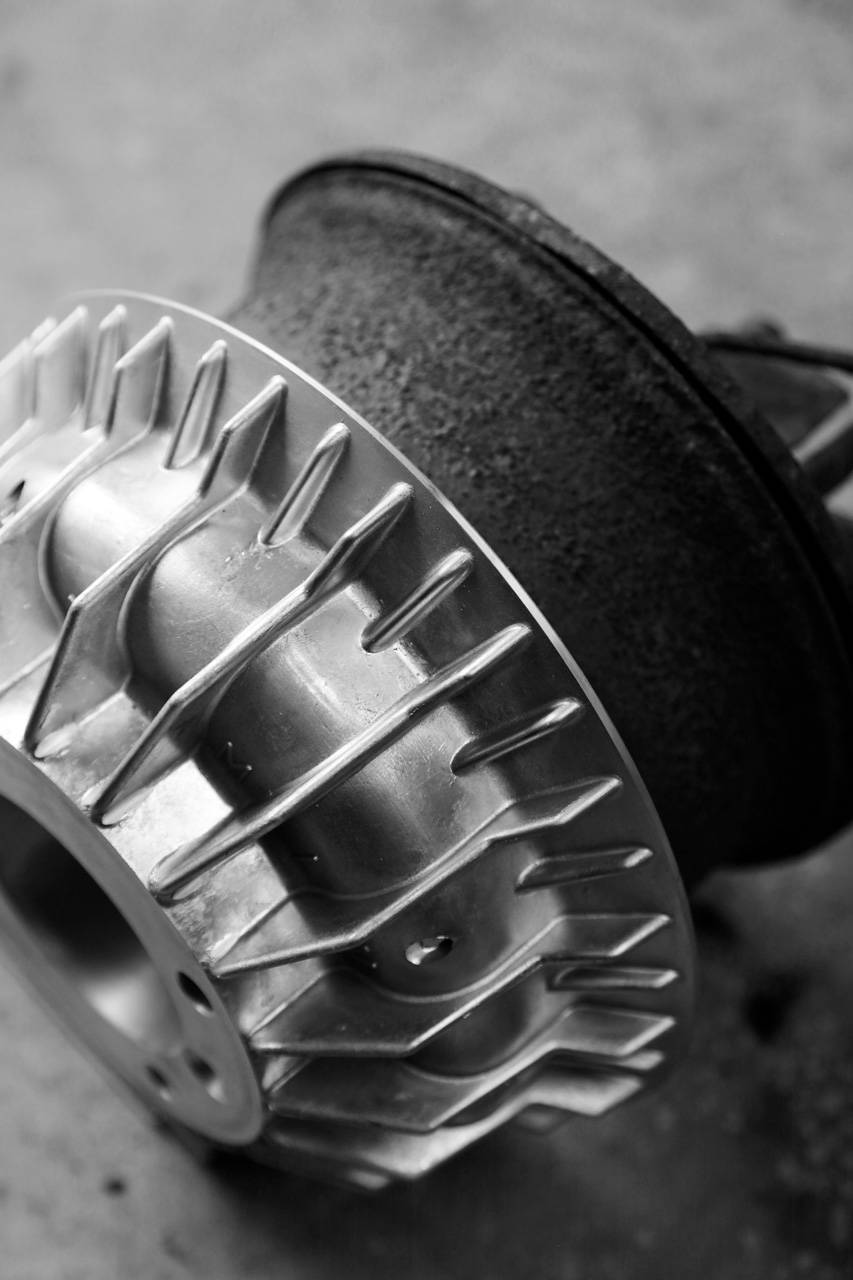
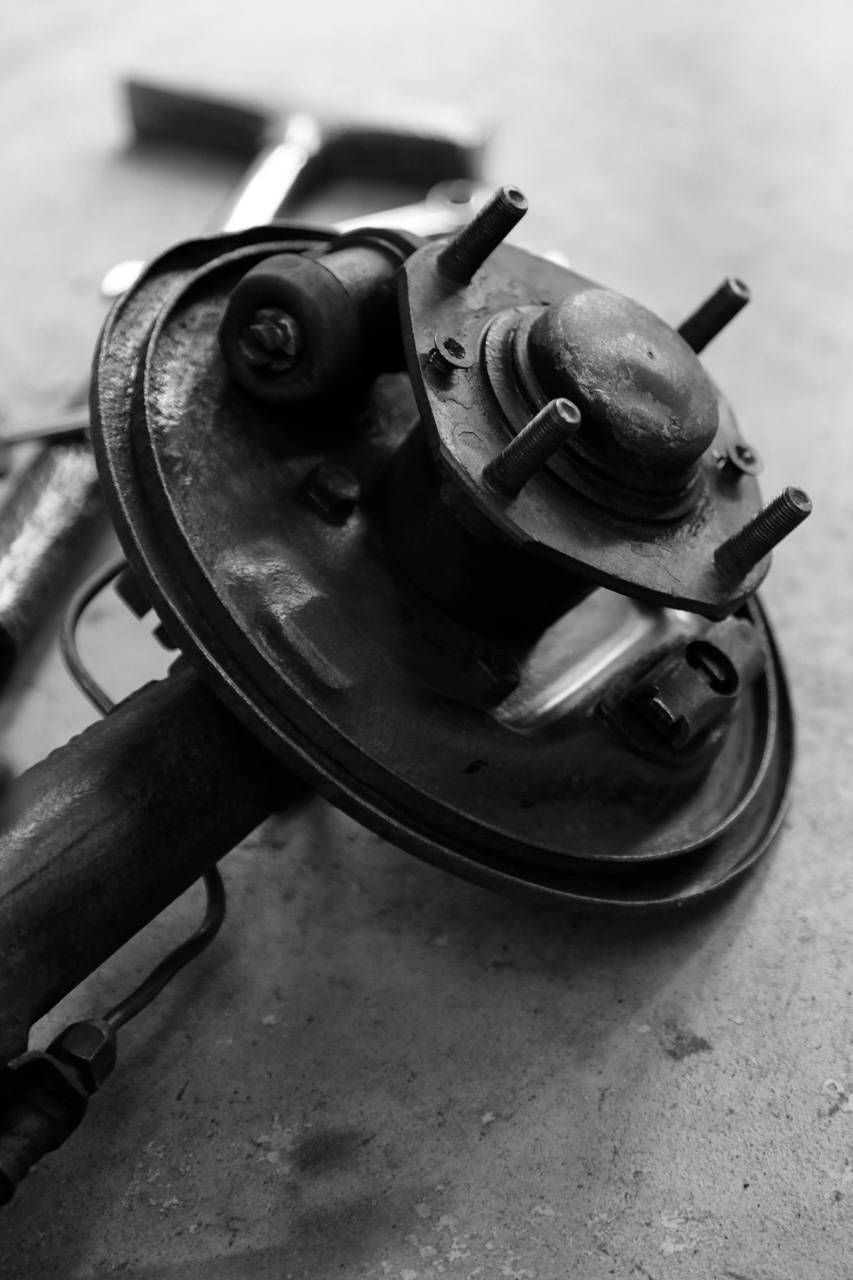
– Nya bromstrummor monterade
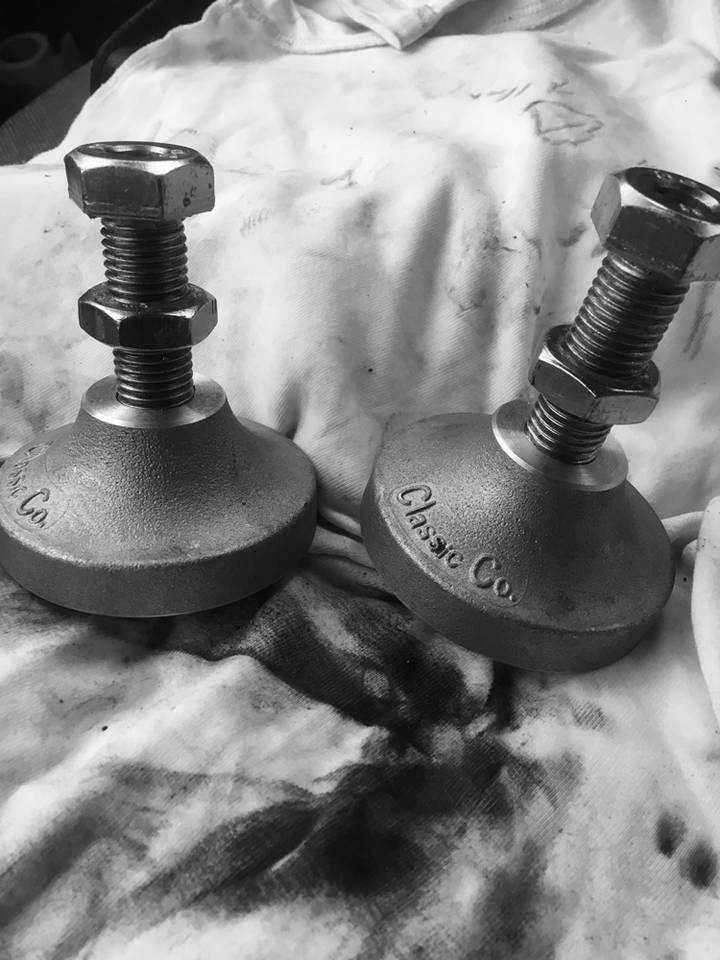
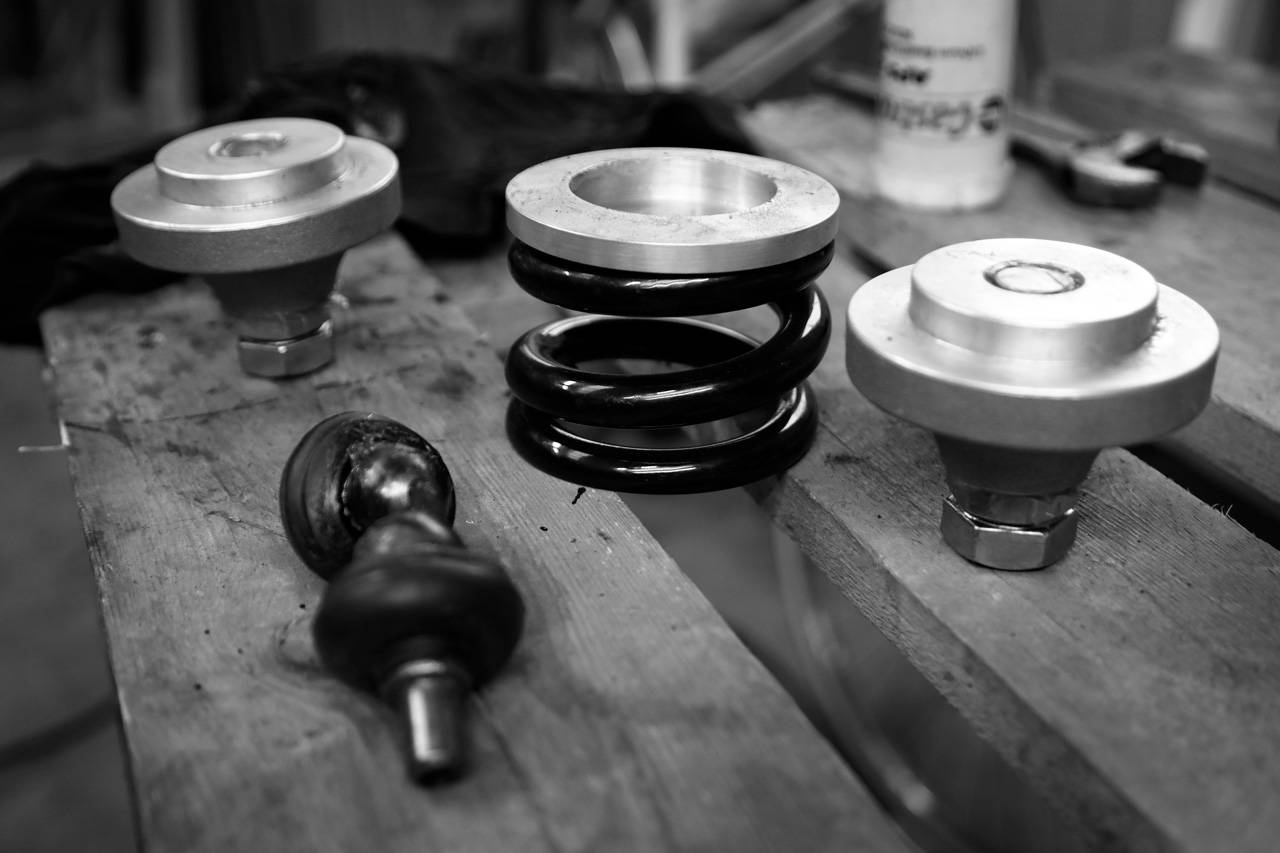
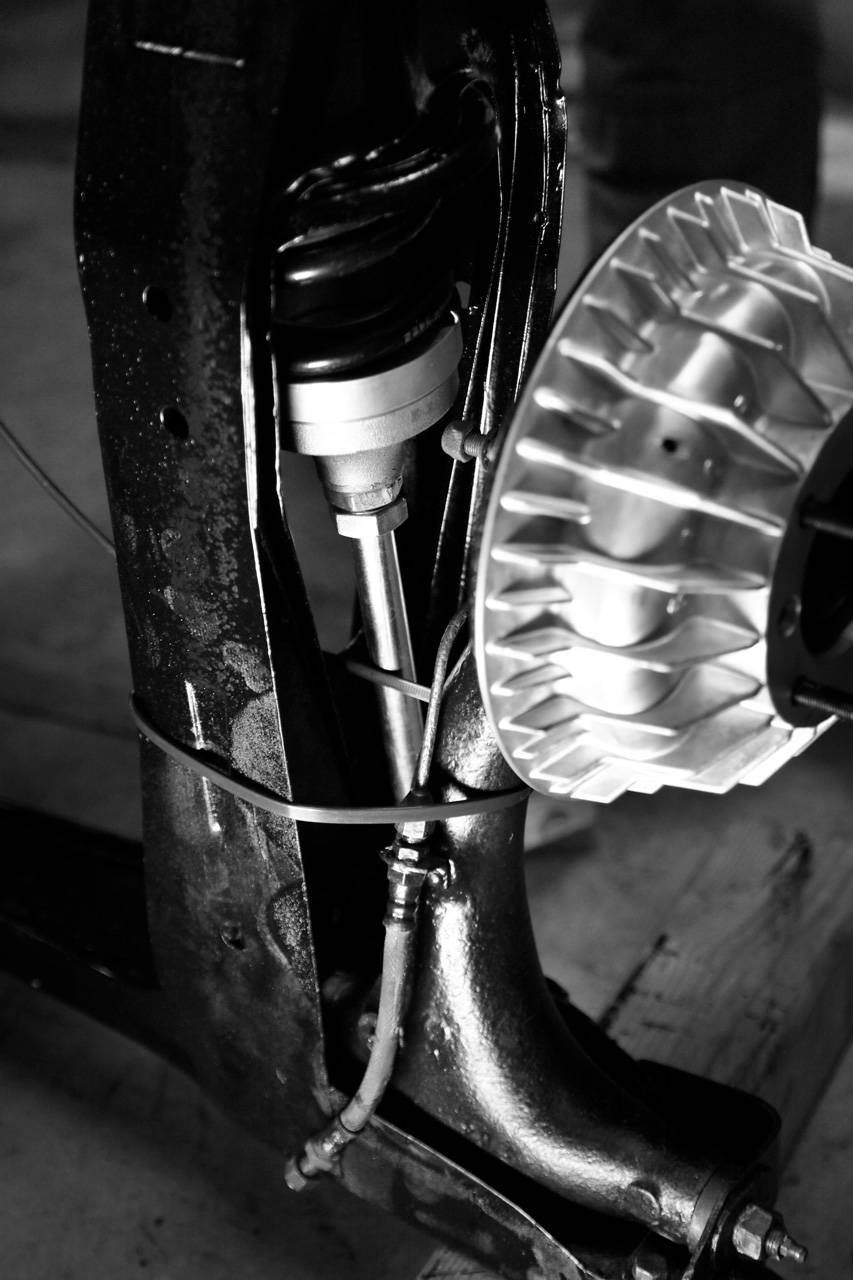
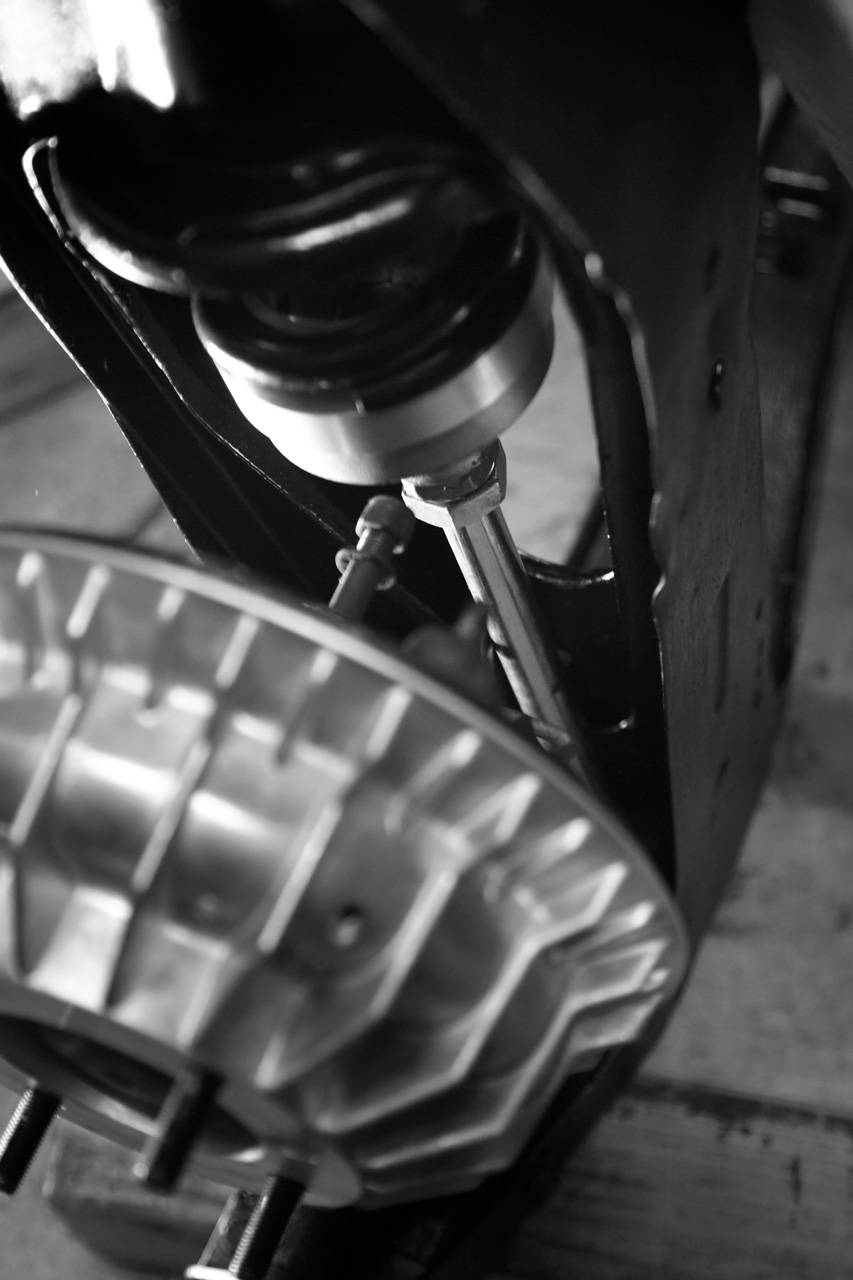
– I med fjädrarna i framvagnen (har vi inte gjort det typ 4 ggr redan?!) med rätt fjäderlängd i denna gång
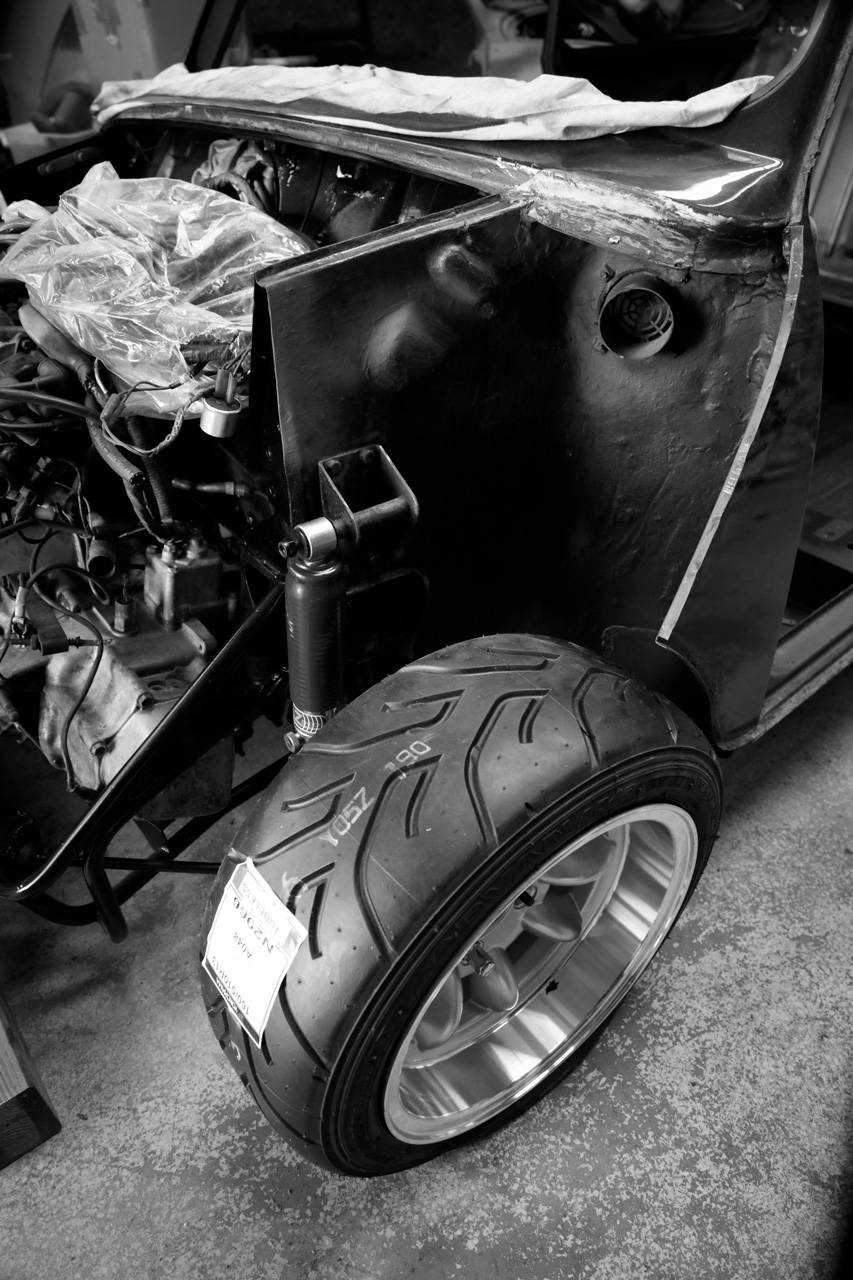
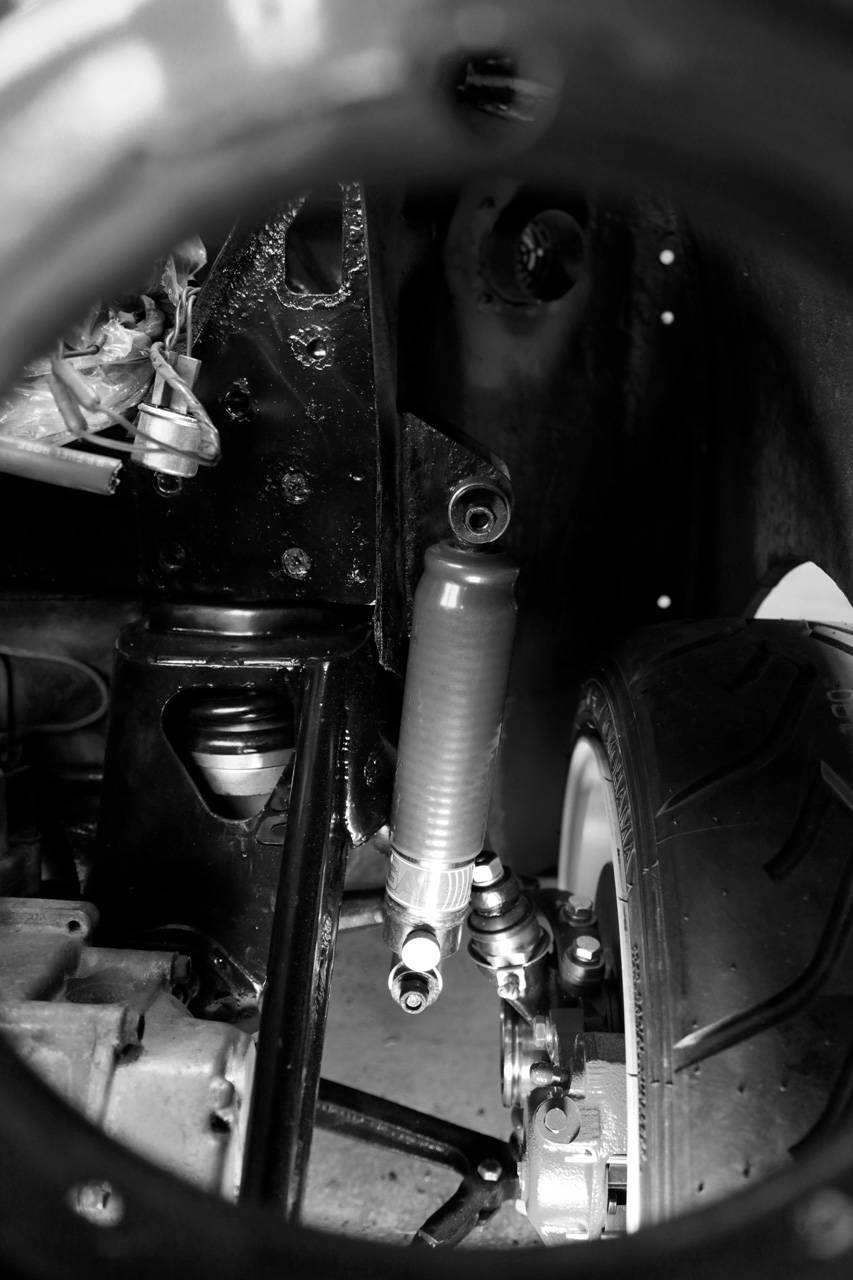
– Den välvda delen på fästena i tornen är avkapade, vilket sänker bilen ytterligare 2,5 mm (du läste rätt, två komma fem millimeter)
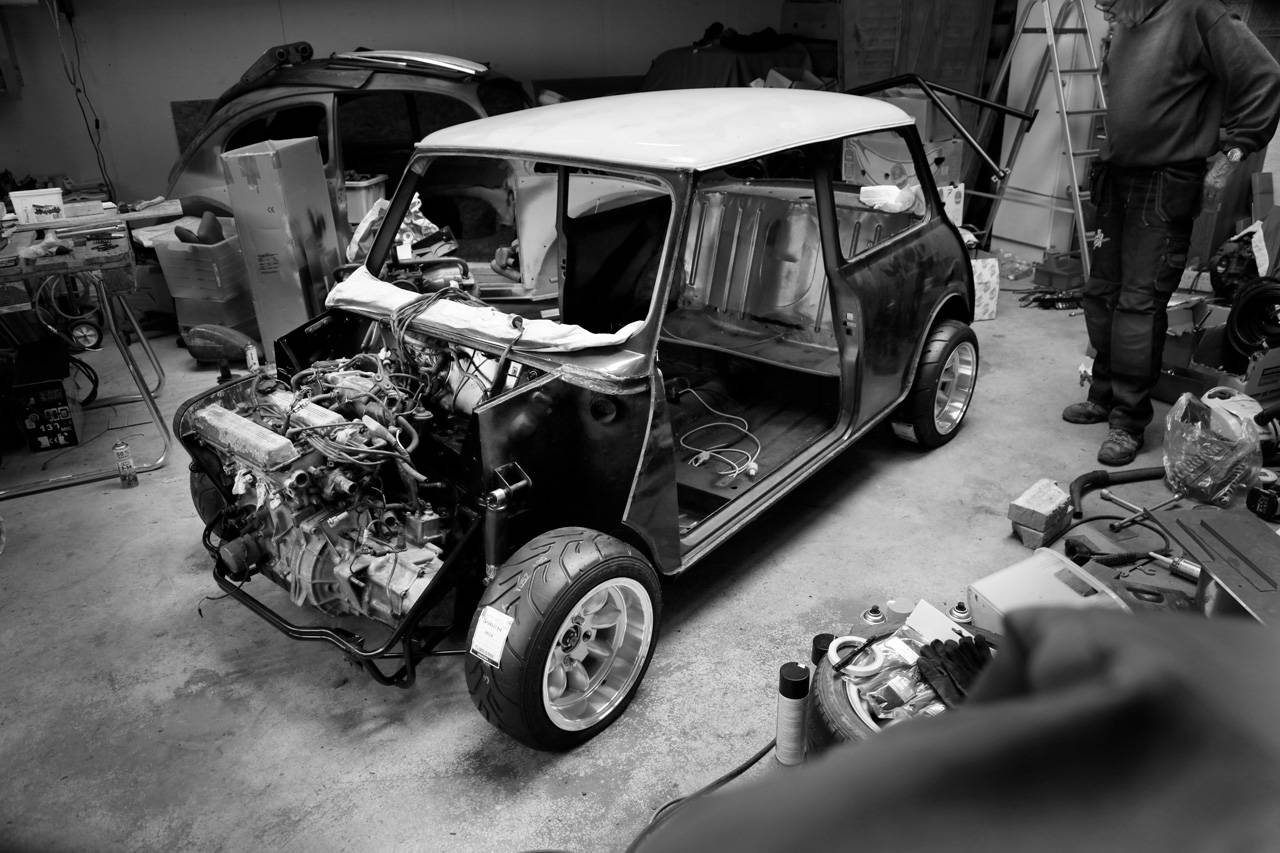
– Ner på backen med framvagnen och visst är den lägre nu!
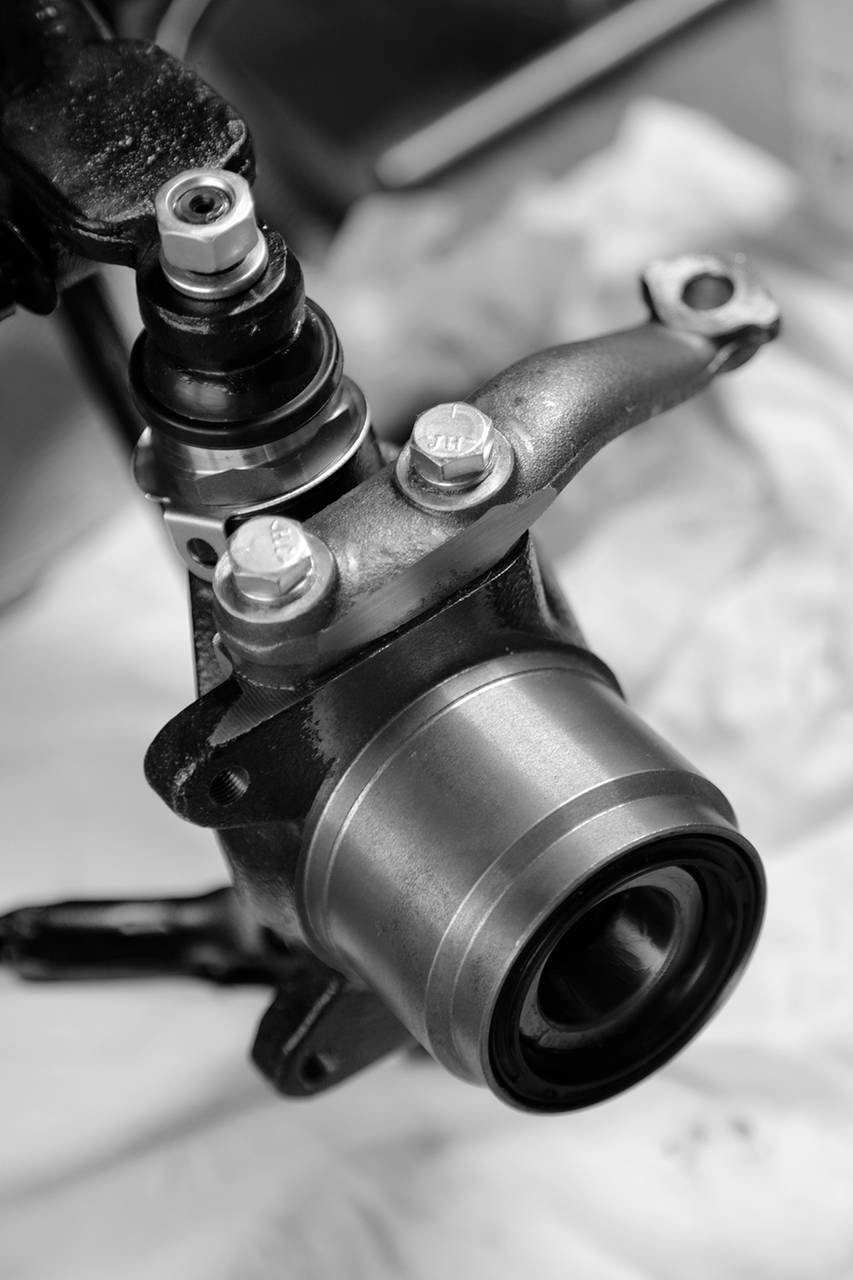
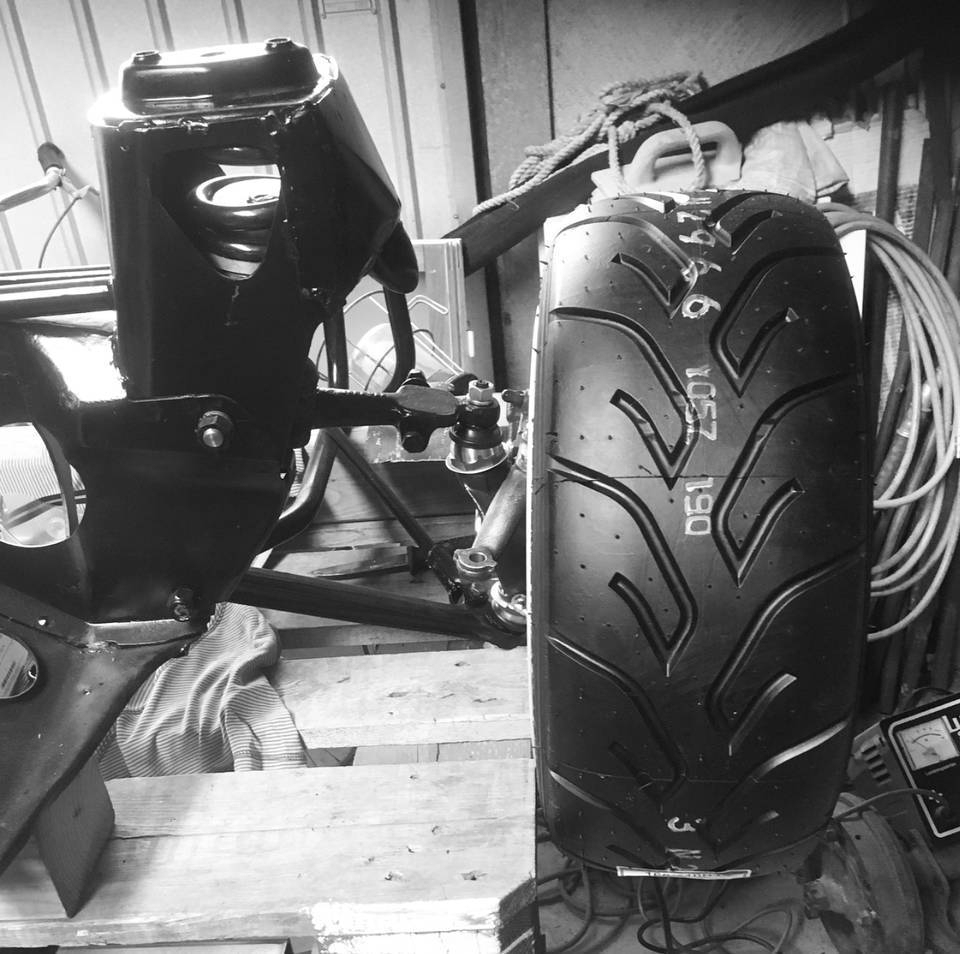
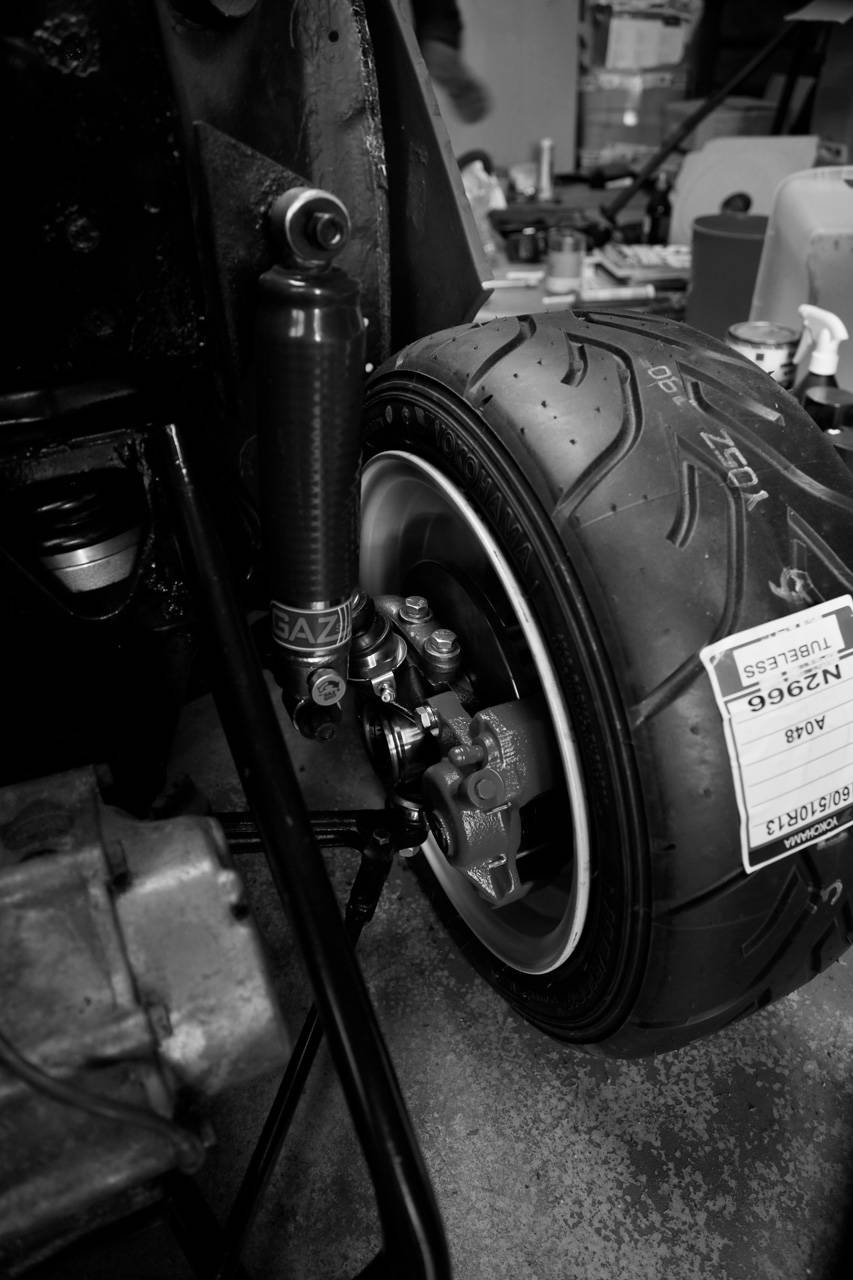
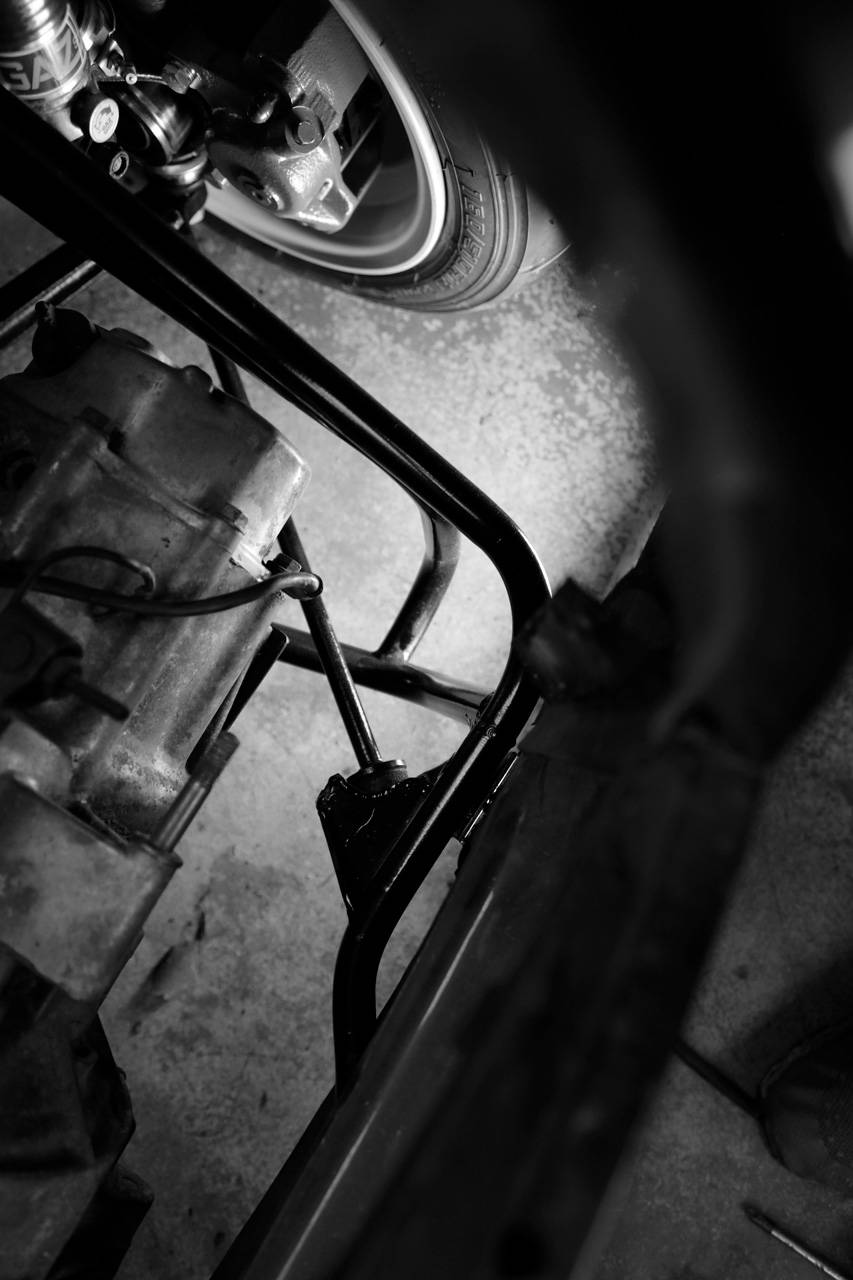
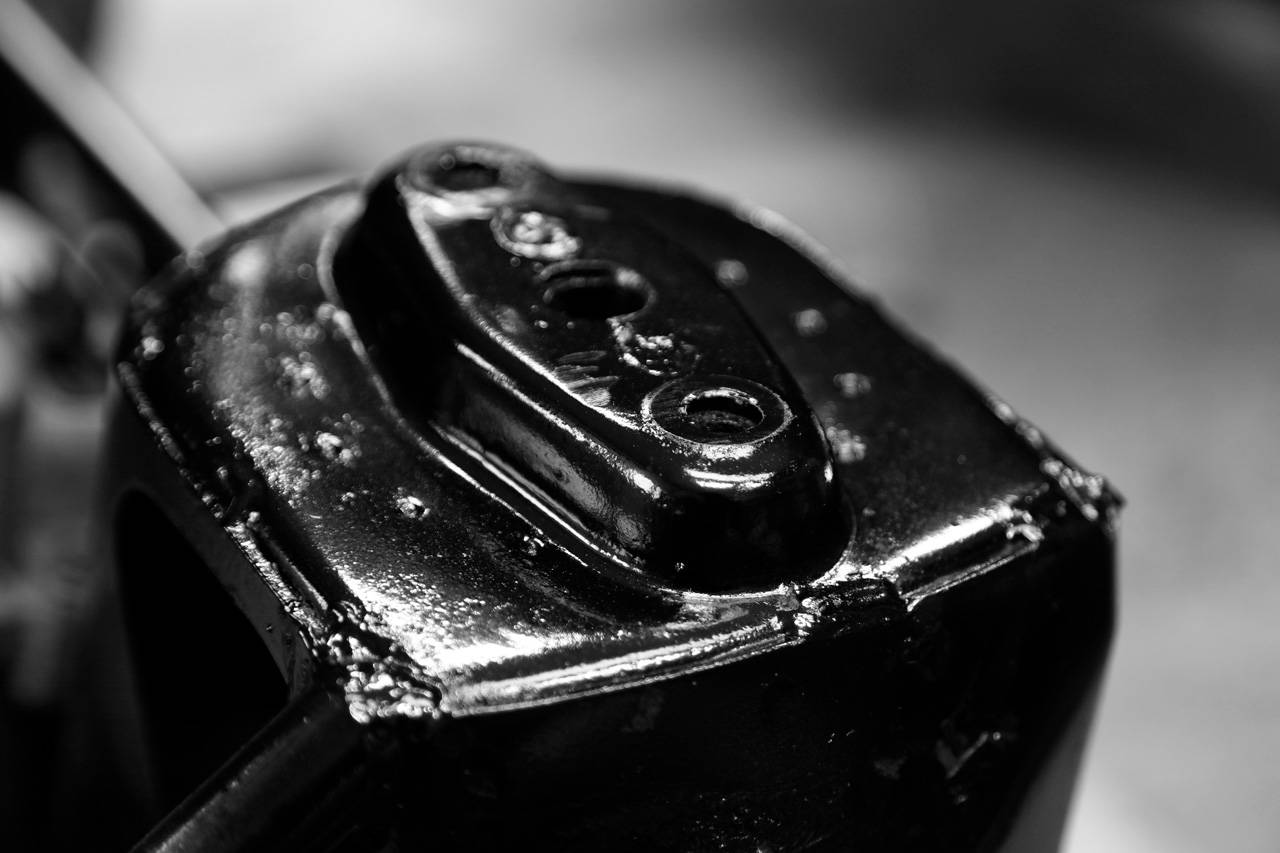
– Svingarmarna monterade i bakvagnen
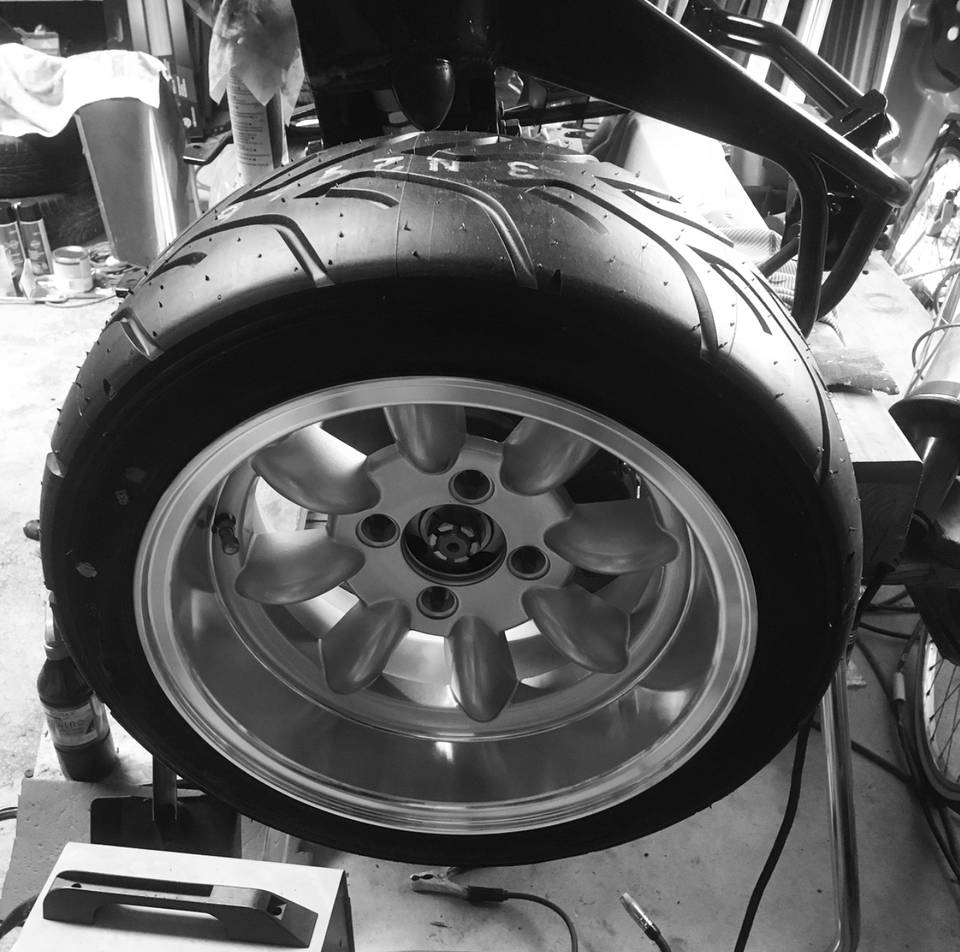
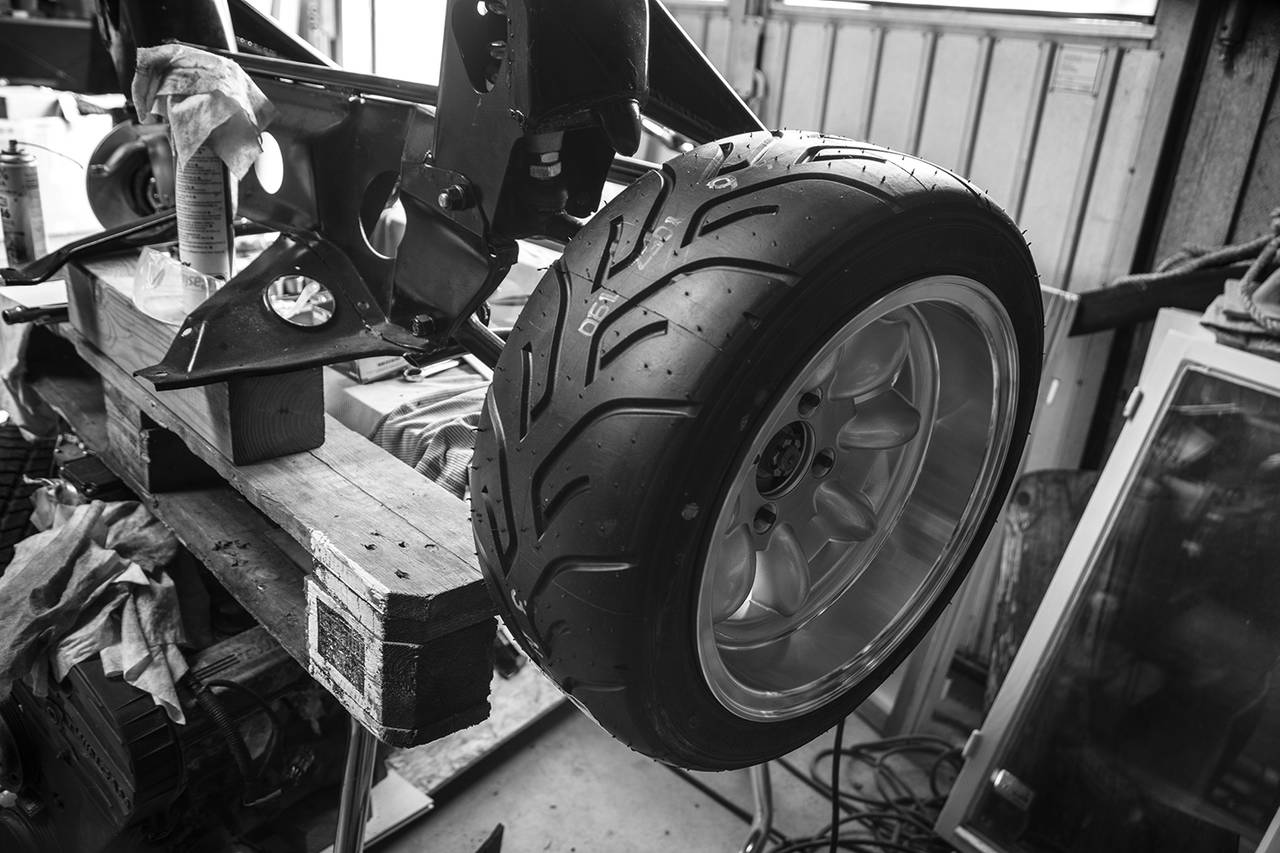
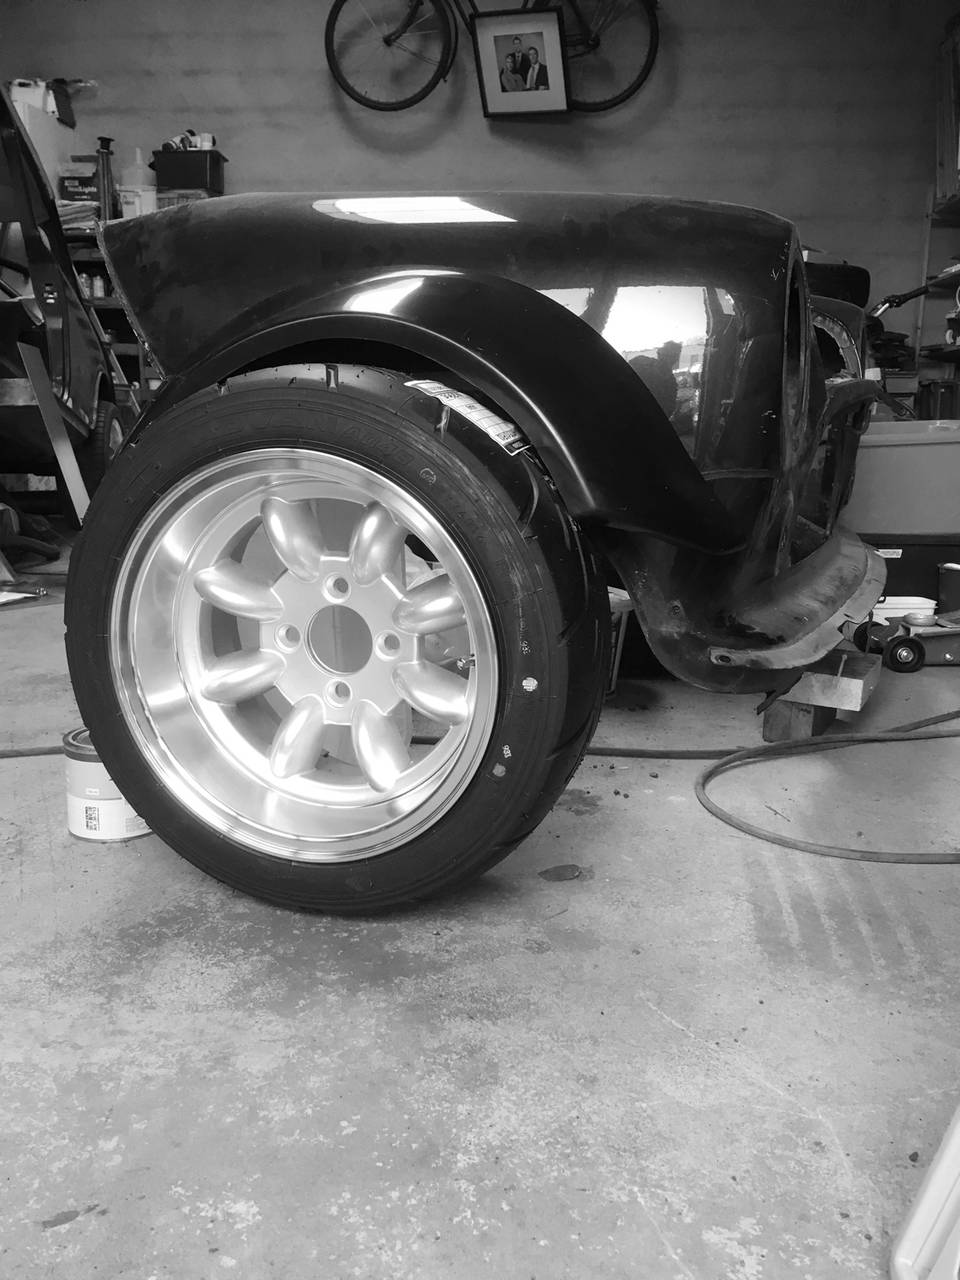
– På med trummorna och dit med ett däck, jösses vad lågt (får nog höja lite)
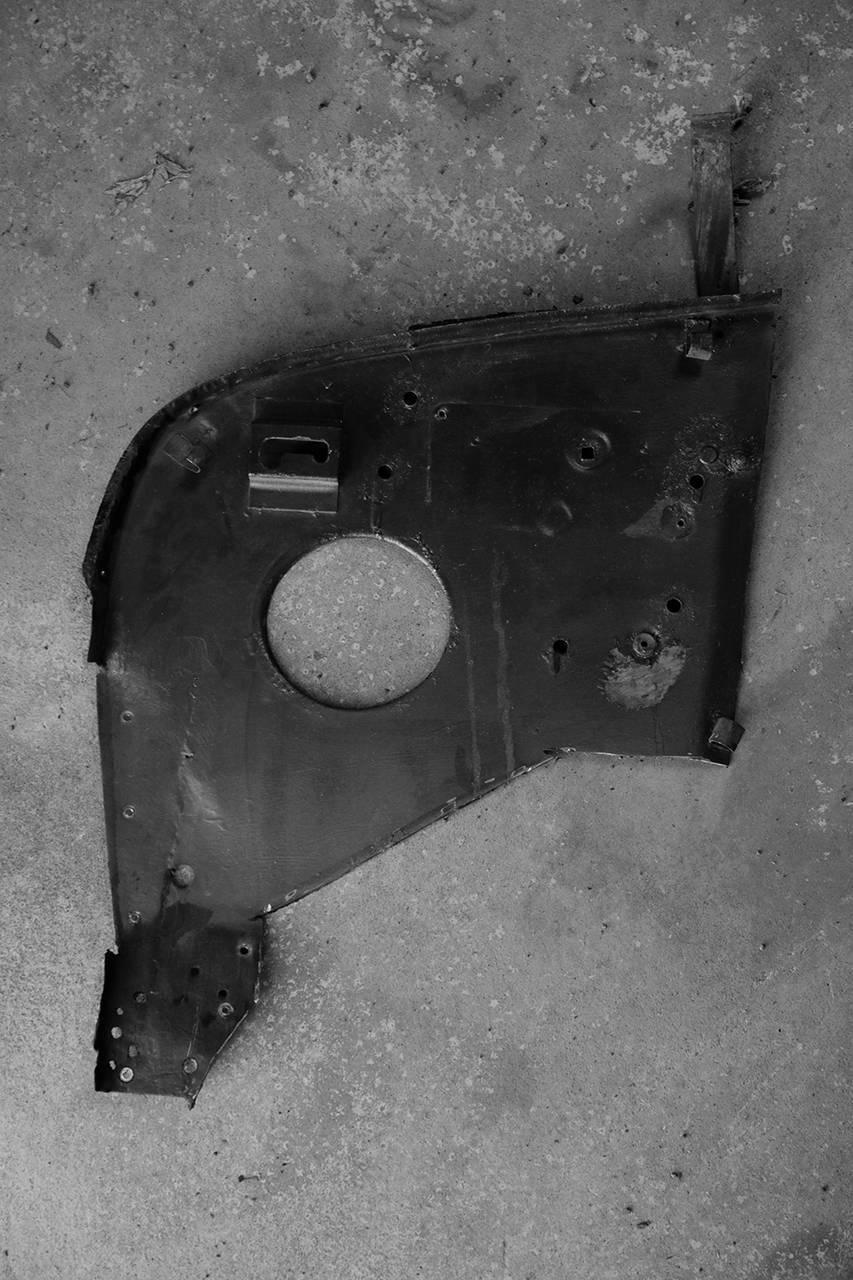
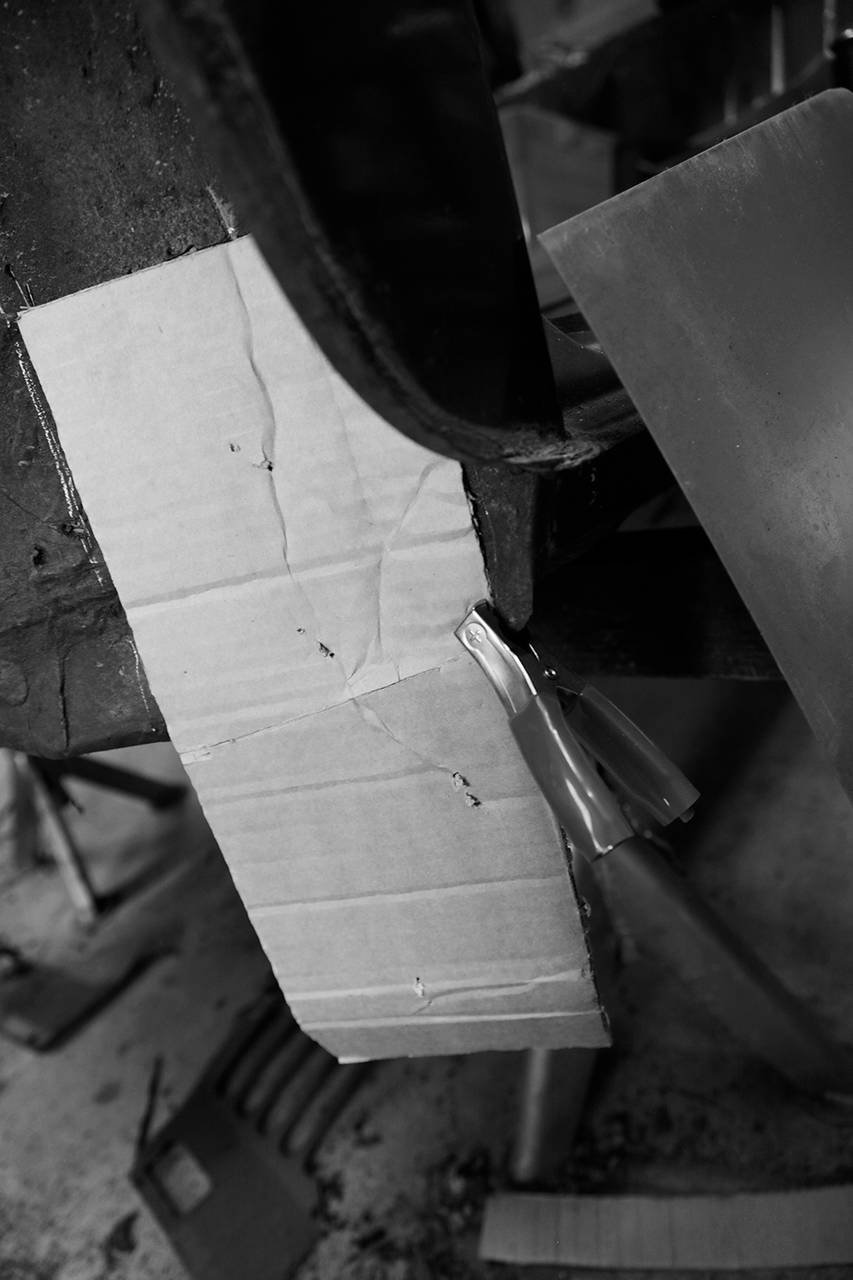
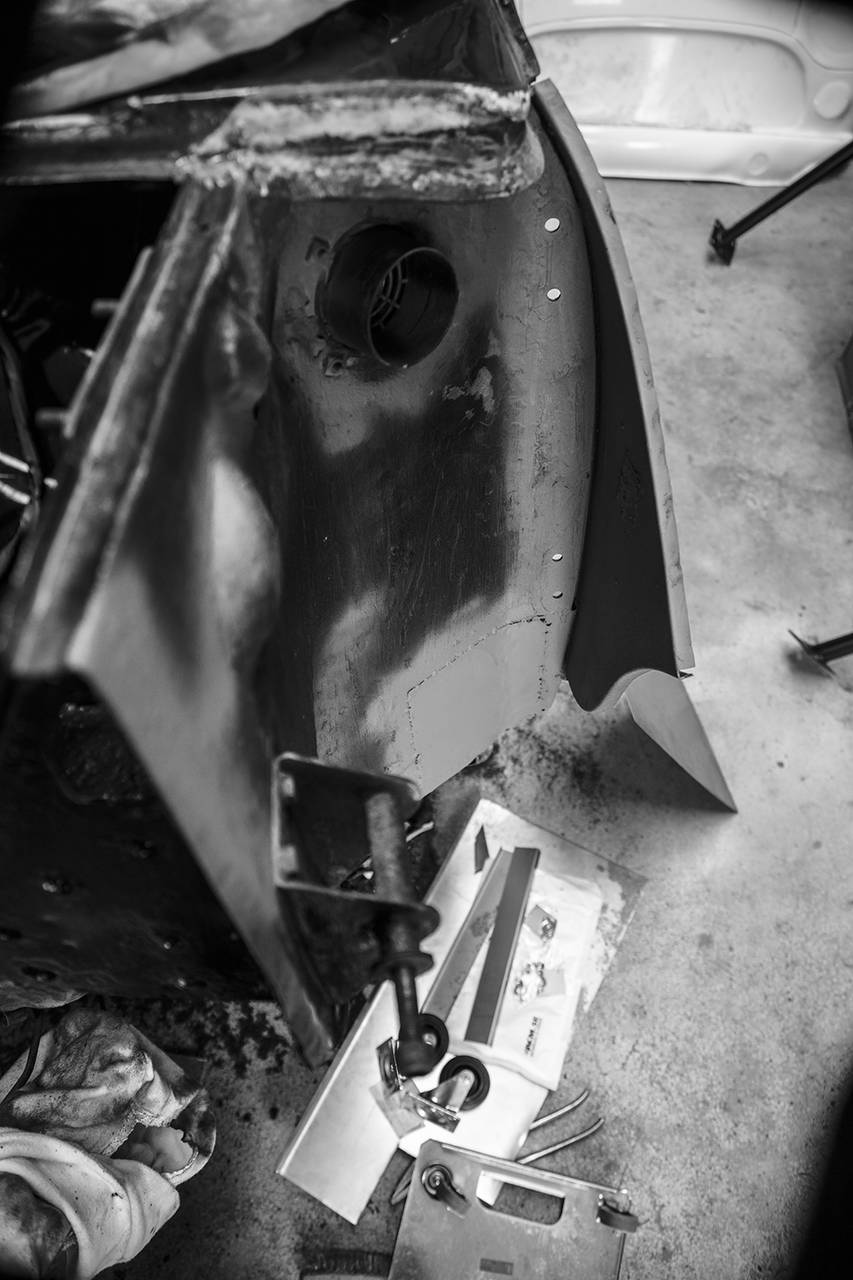
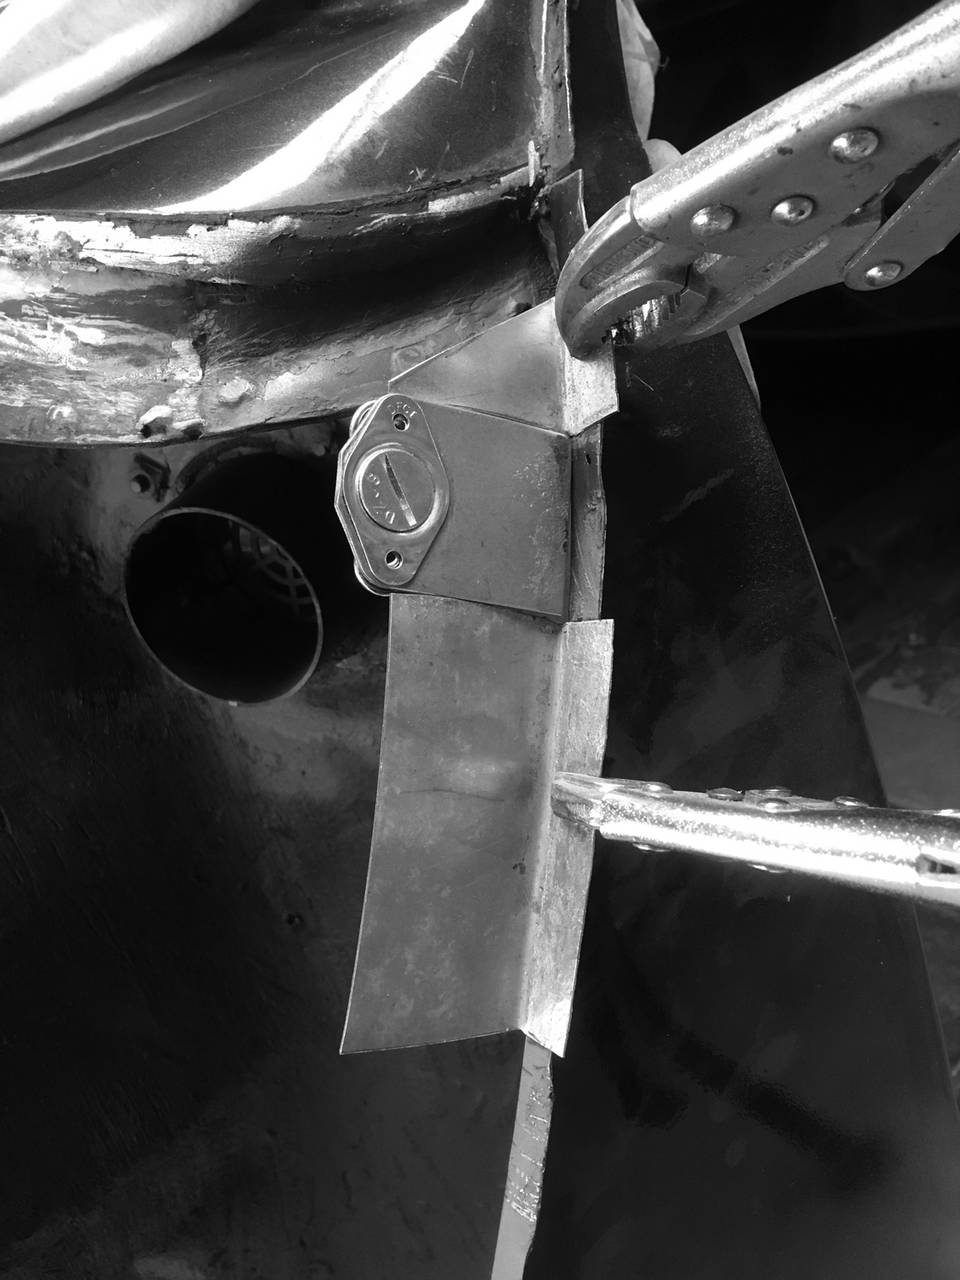
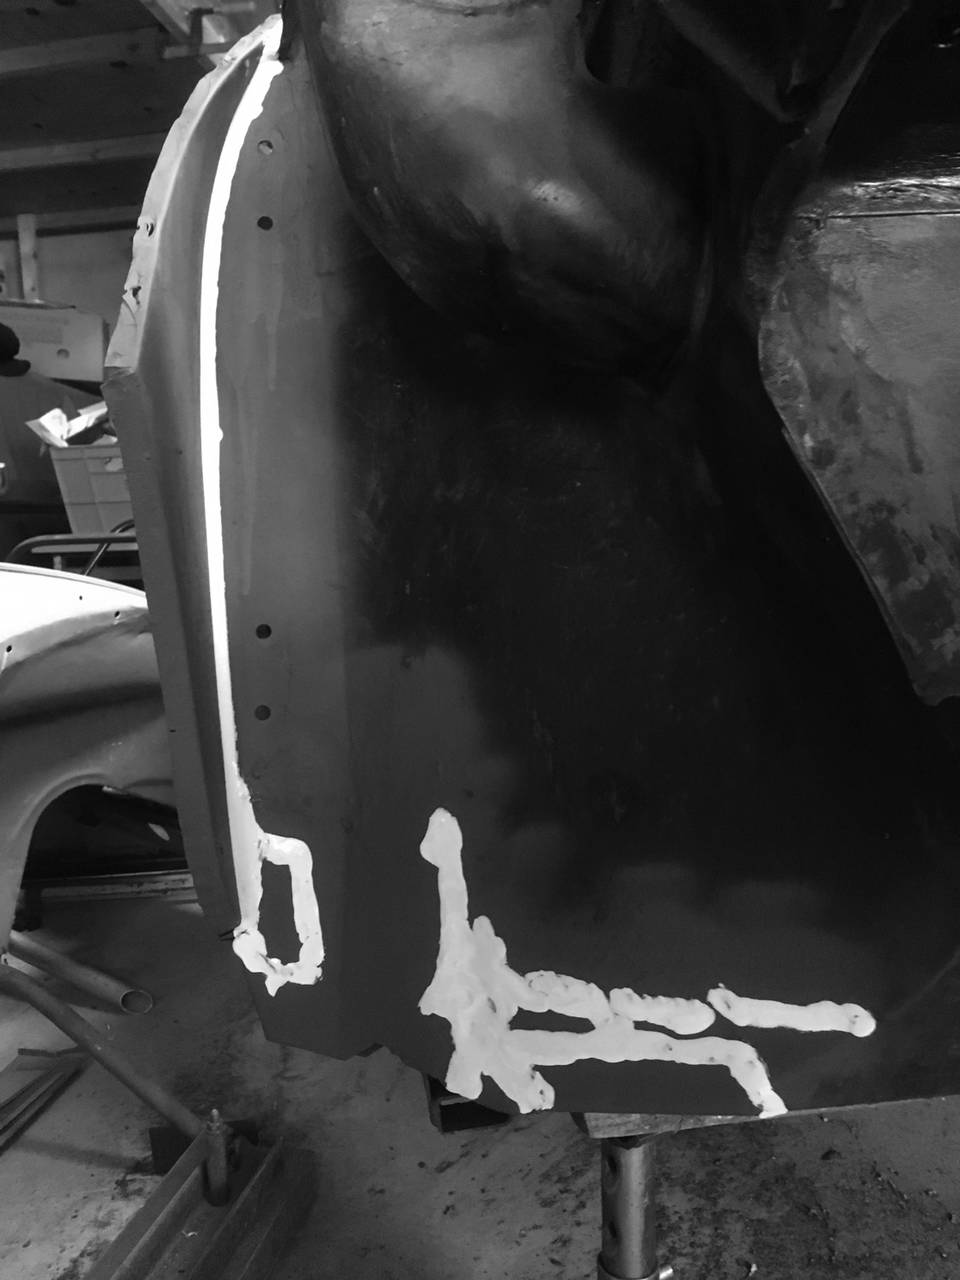
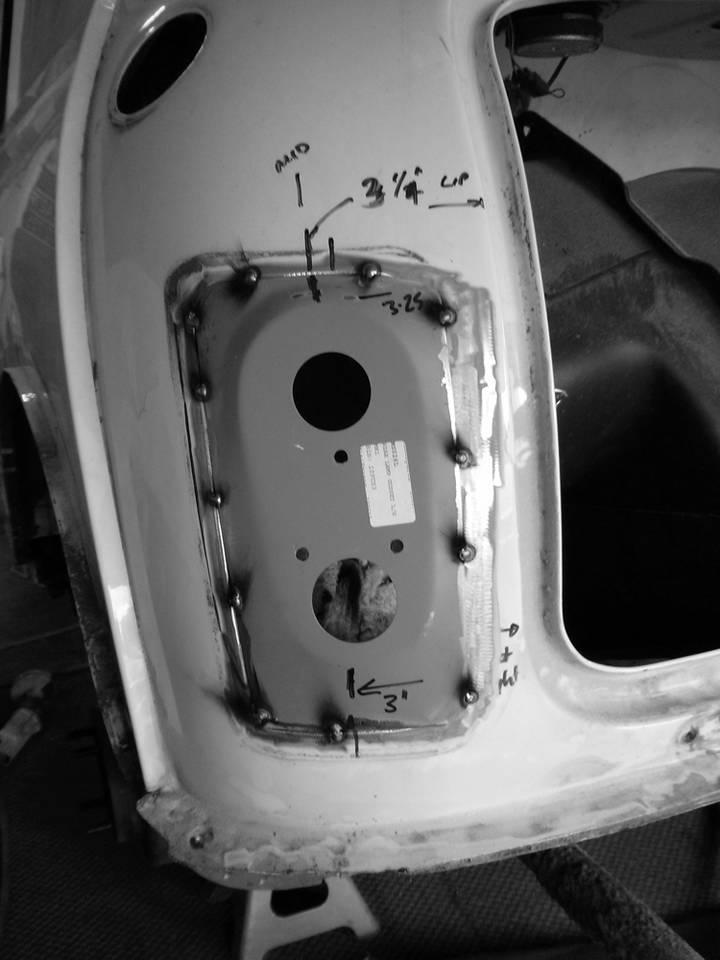
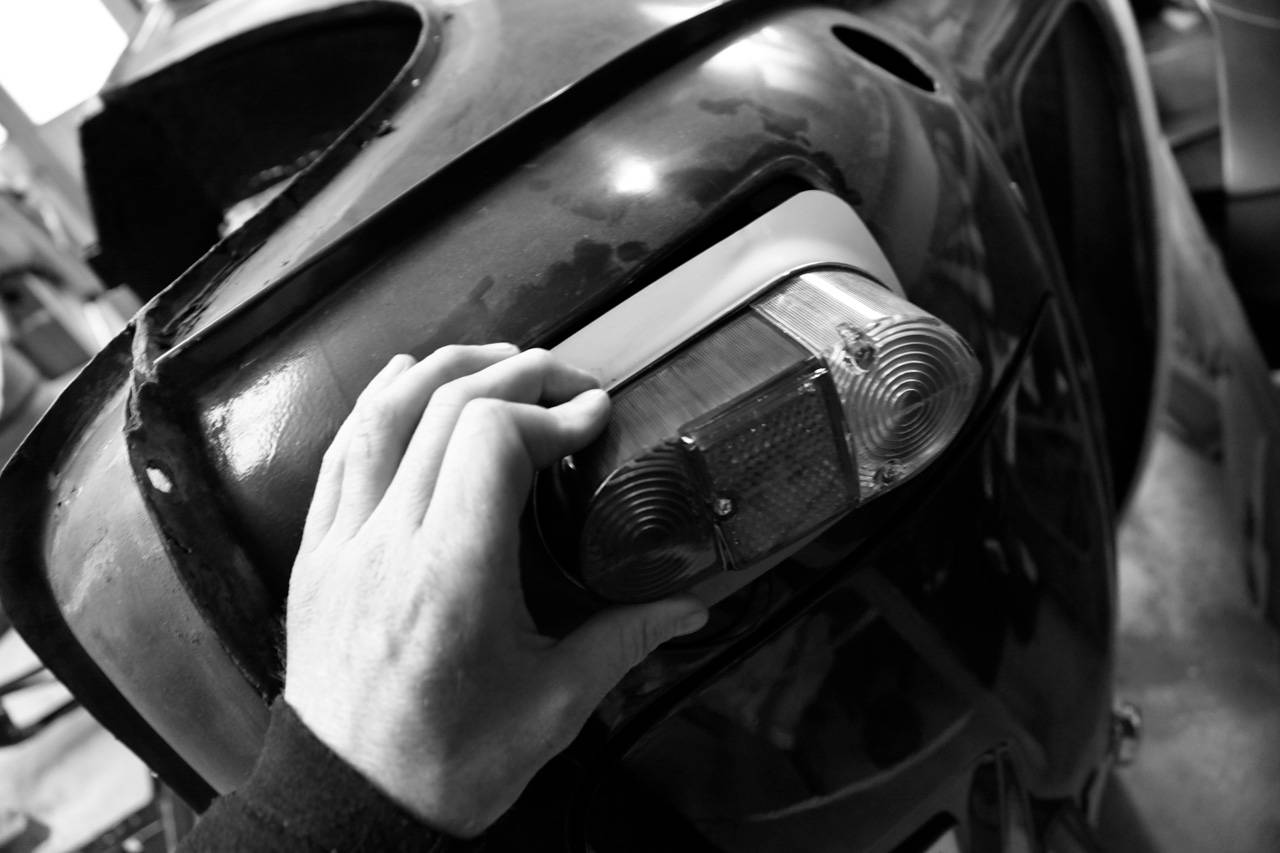
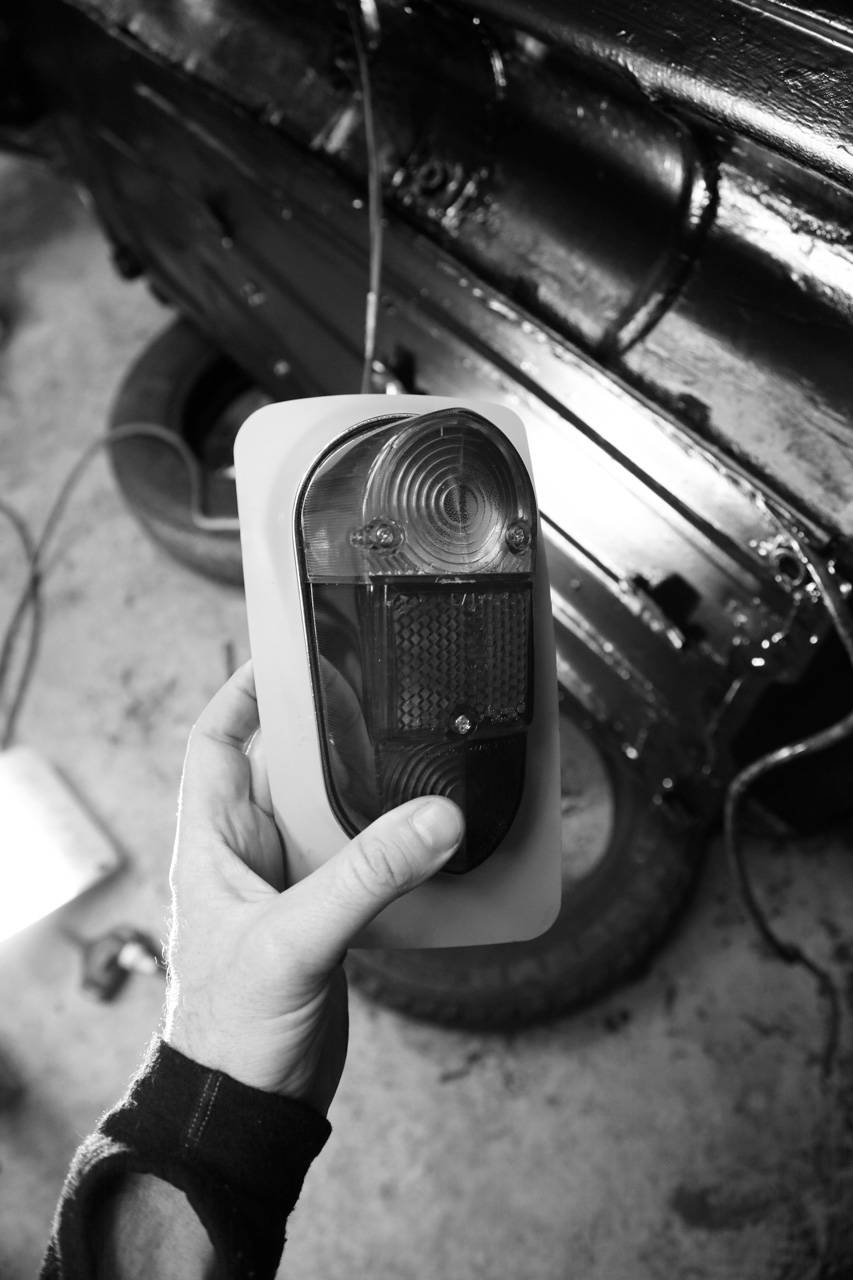
– Bakljusena i Mk1-stuk (modell äldre) lär nog bli bra när konverteringsplåten finjusterats och blivit ditsvetsad
– Nämnde jag att vi satt dit fjädrarna fram för fjärde gången? Spännverktyget för fjädern har jobbat hårt.

Imorrn monterar vi bakvagnen på bilen, välter ner den från sidoläge och monterar även framvagnen. Och då, först då, lär vi se hur mycket lägre bilen har blivit.

På återseende!

• • • TRANSLATION • • •

Answer to post: The vision is spot on, looks really cool!

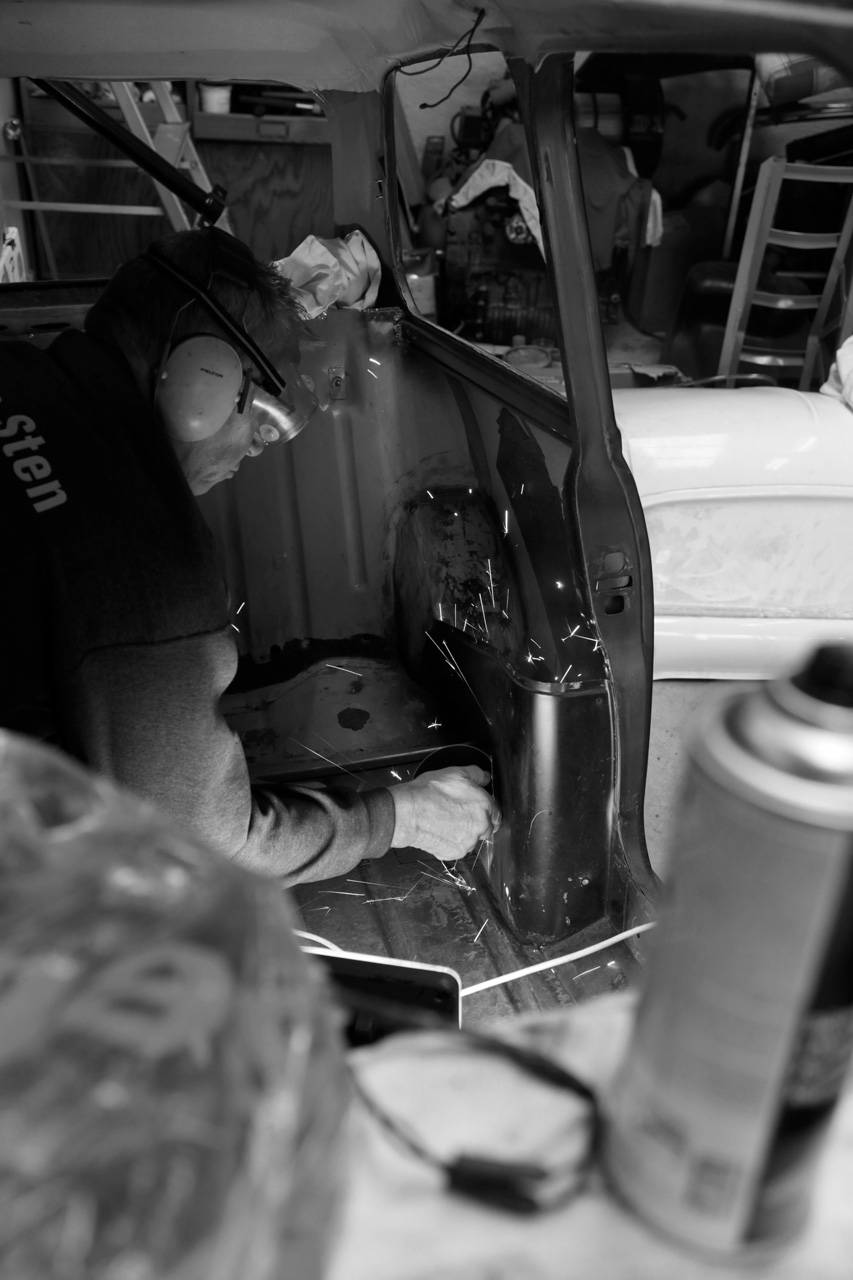
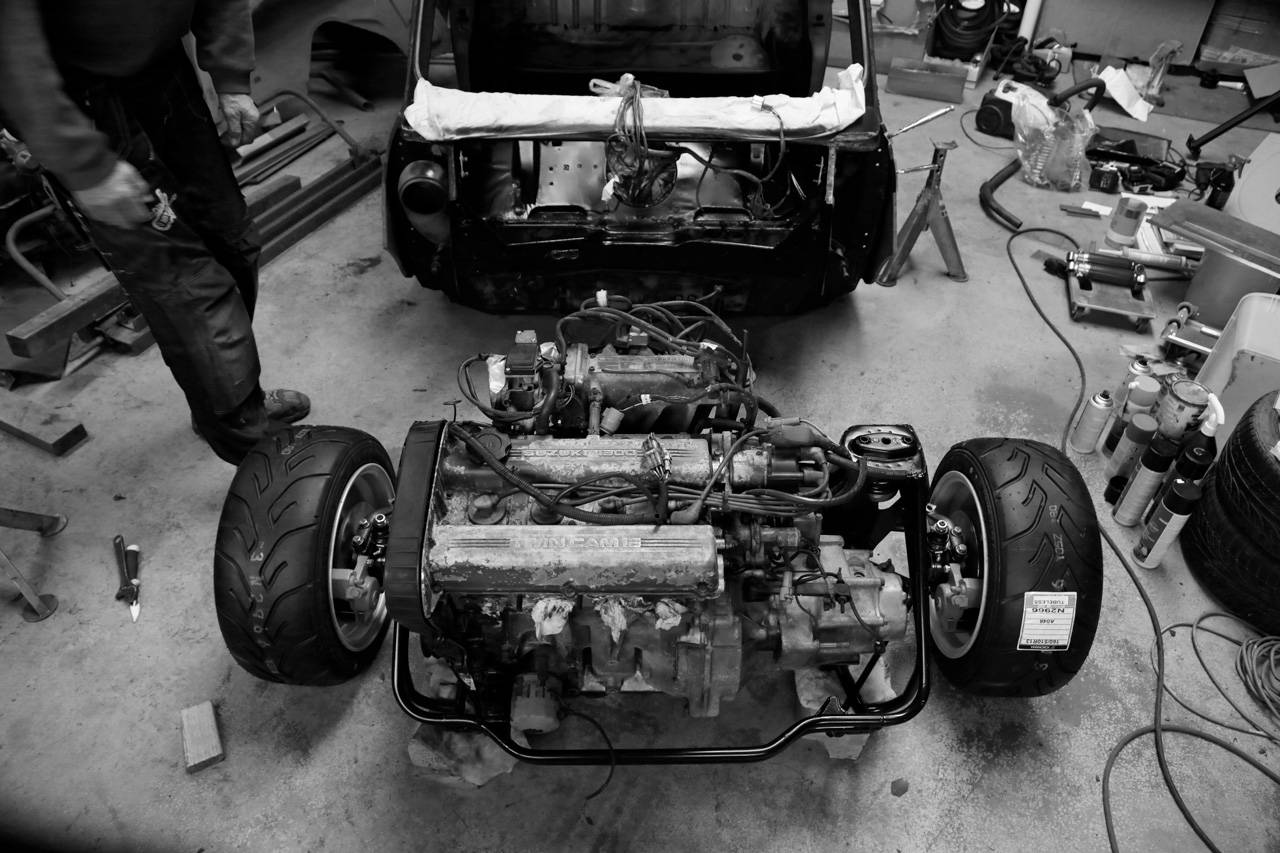
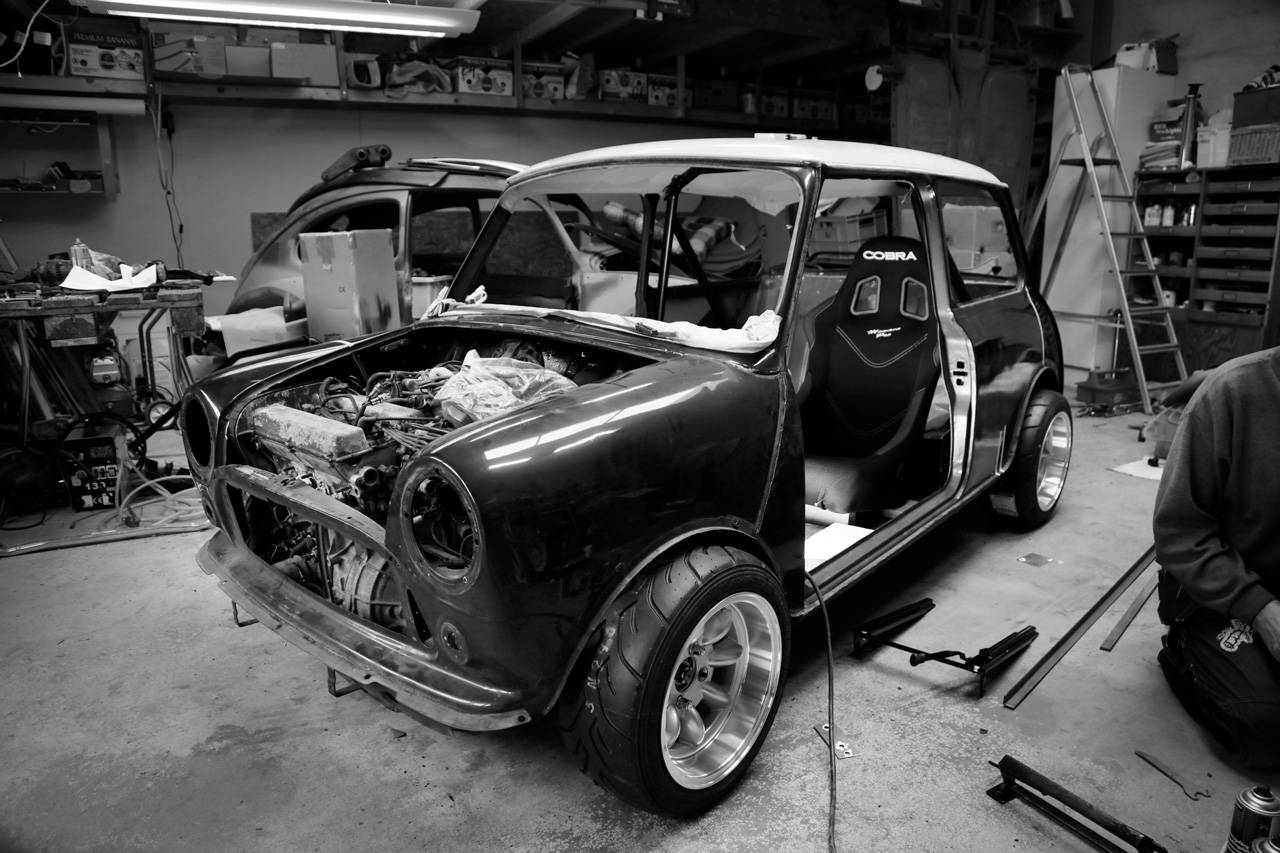
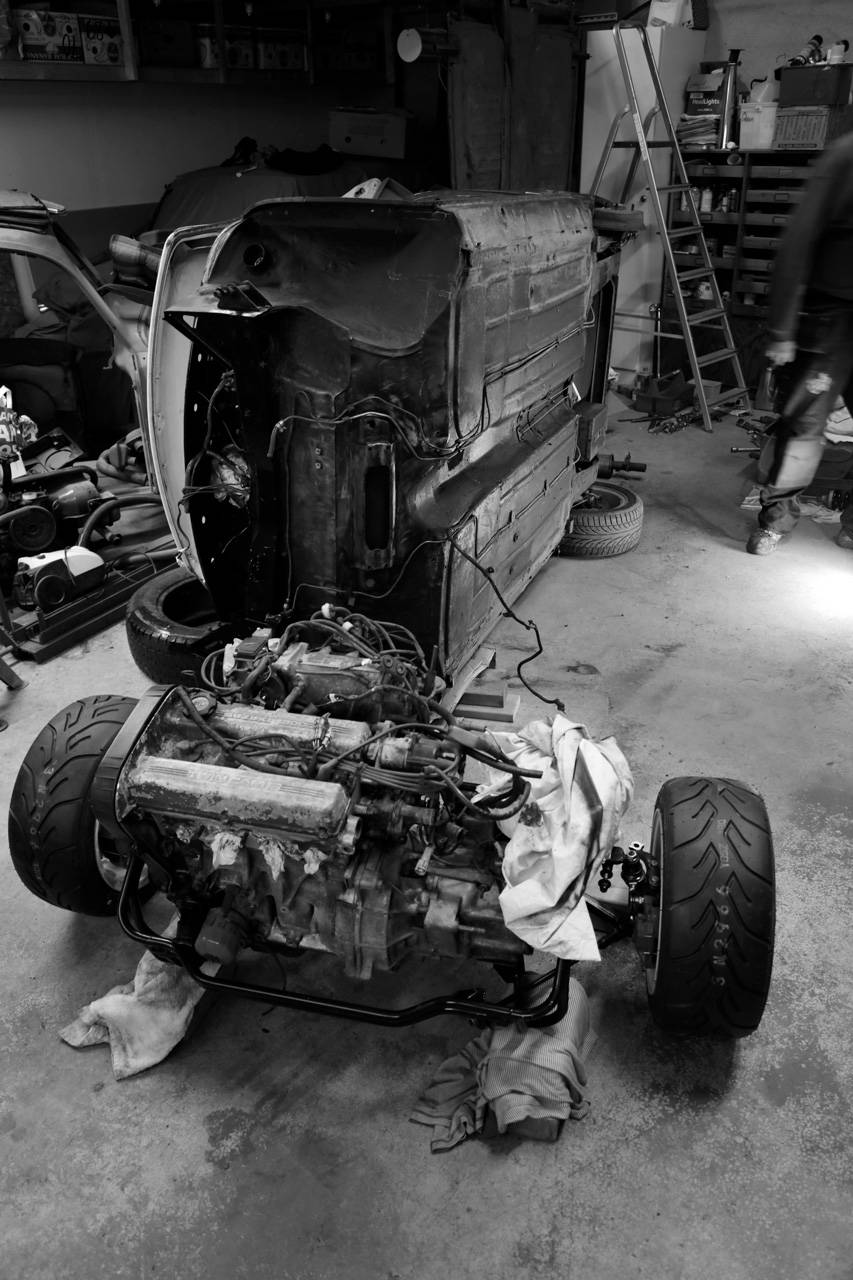
Today, just about a month later, we continue the build of the Mini Swift GTi!

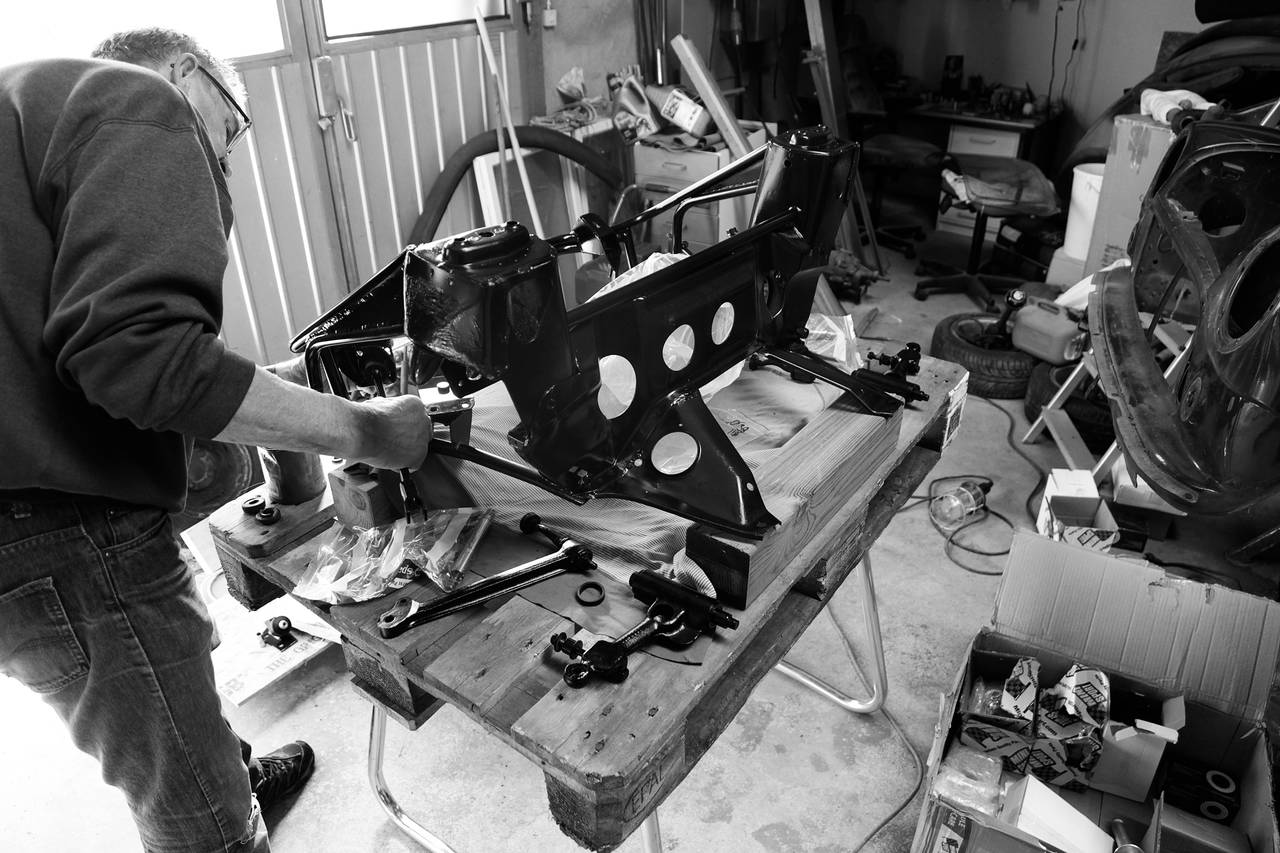
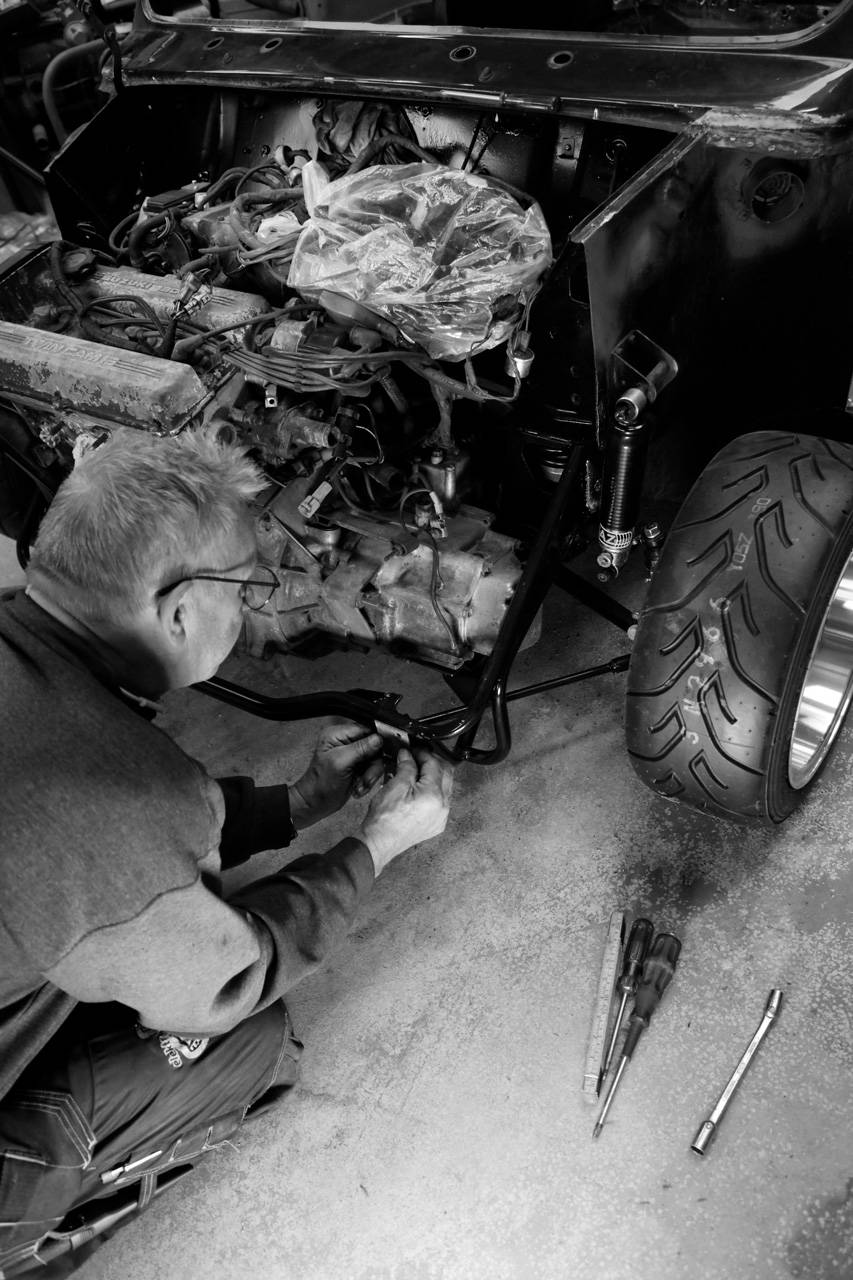
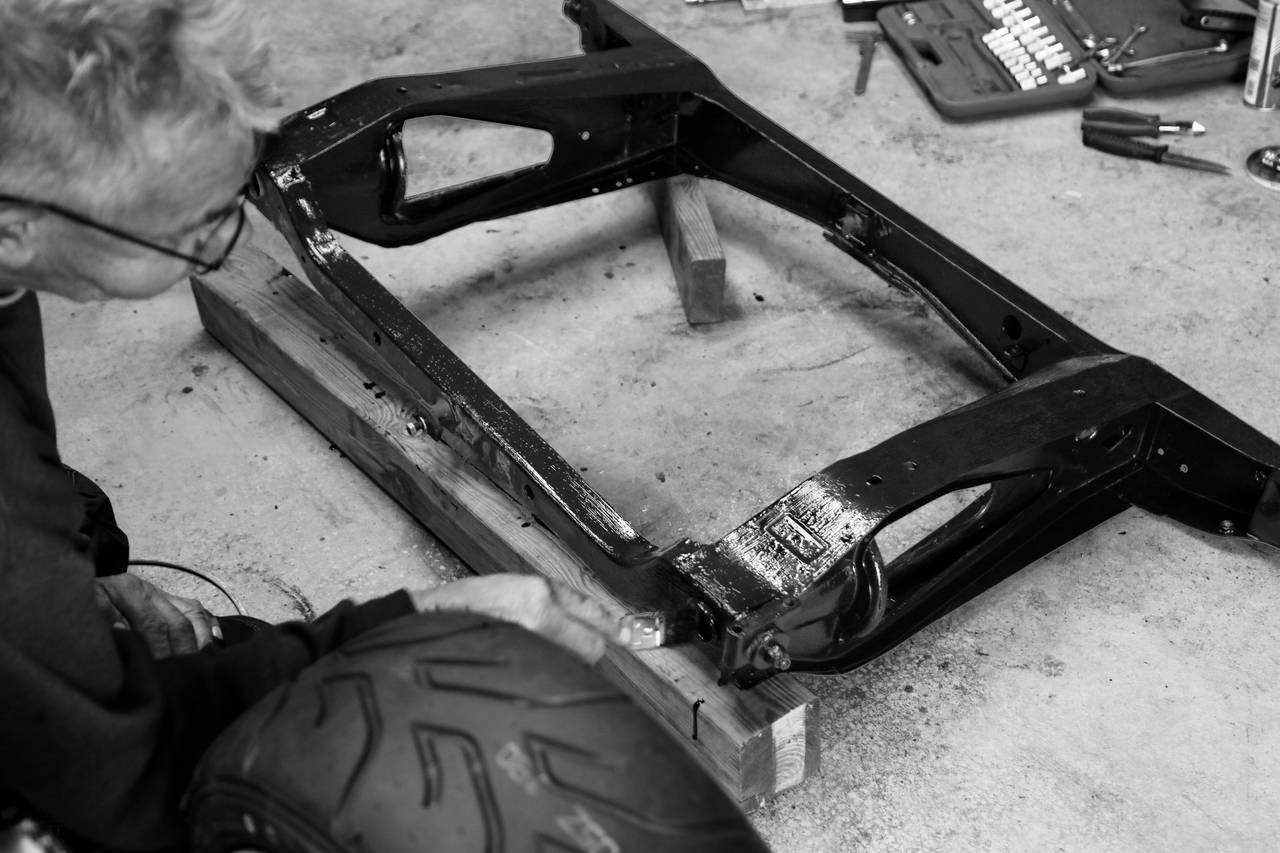
The shipment from the UK has arrived, and my father has been working on rust-proofing the undercarriage and swing arms, among other things.

What did we tinker with today?

- Rear wheel bearings disassembled, cleaned, lubricated, and reassembled.
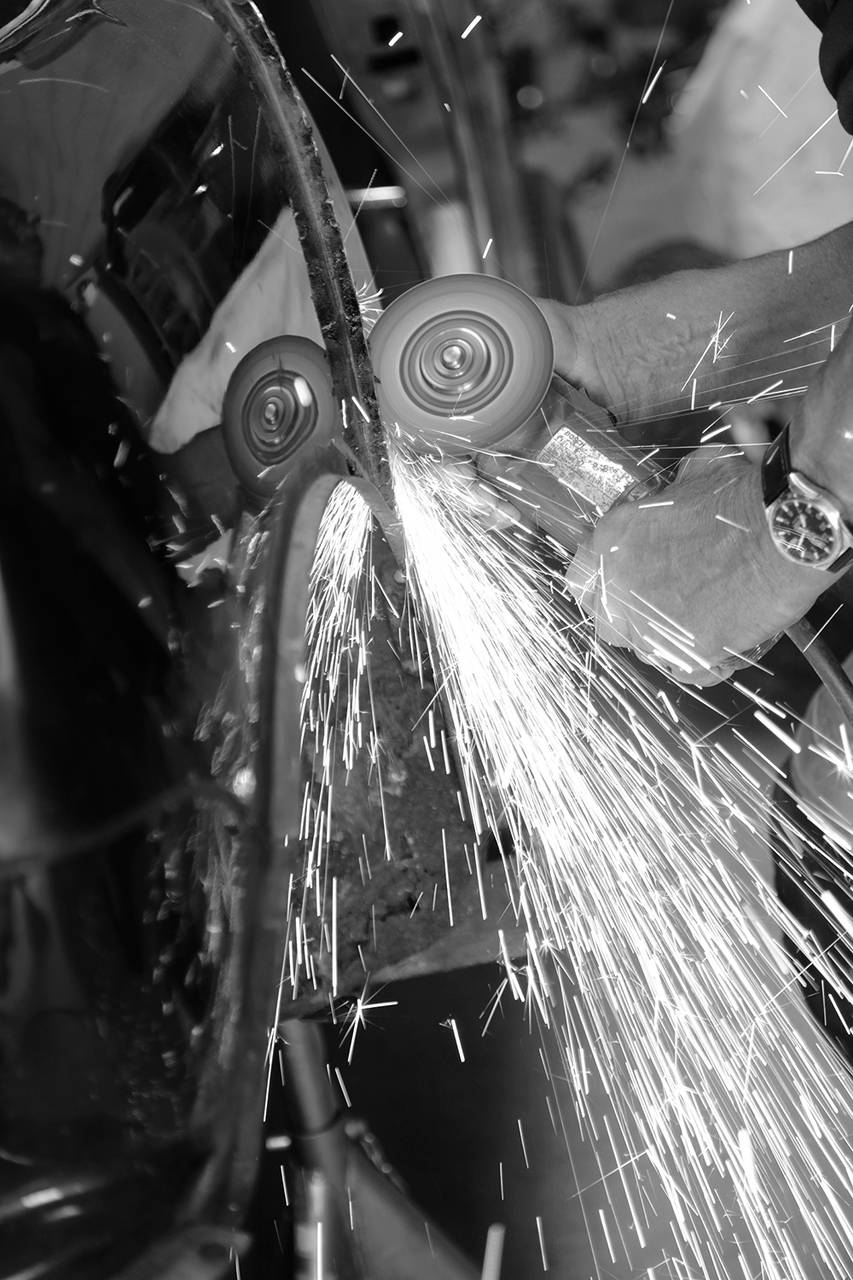
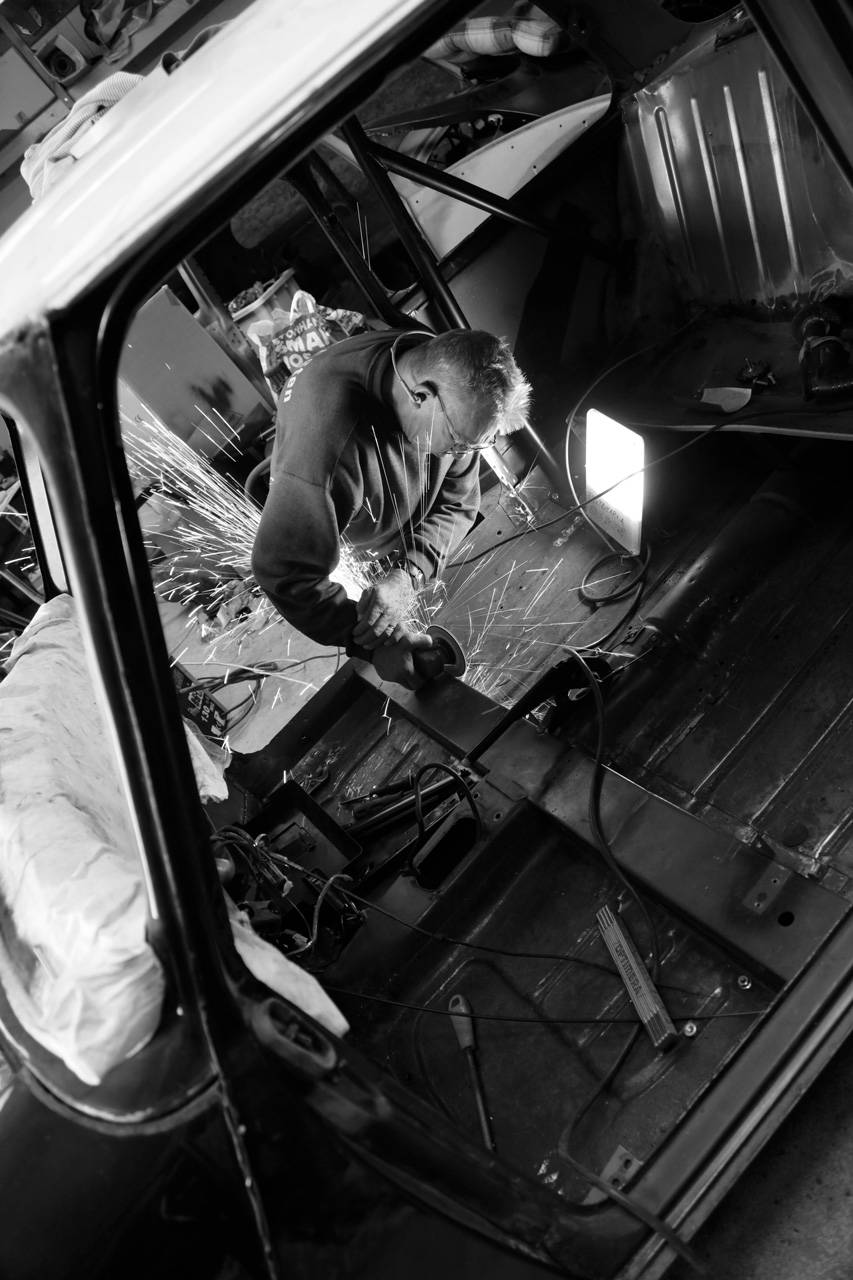
- Brake shoes sanded.
- Adjustable screws (a bit of a devil's invention as they often get stuck) for the brake shoes cleaned and lubricated.
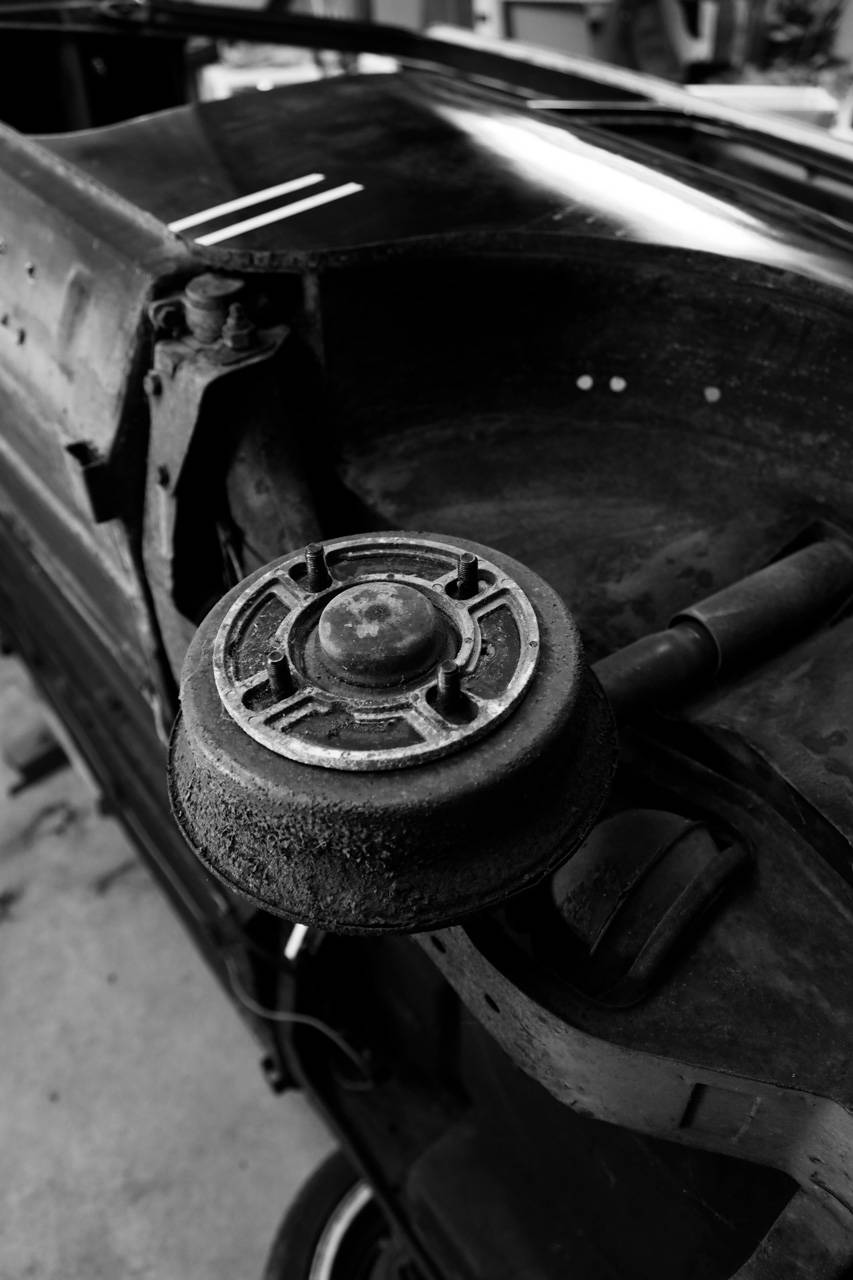
- New brake drums installed.
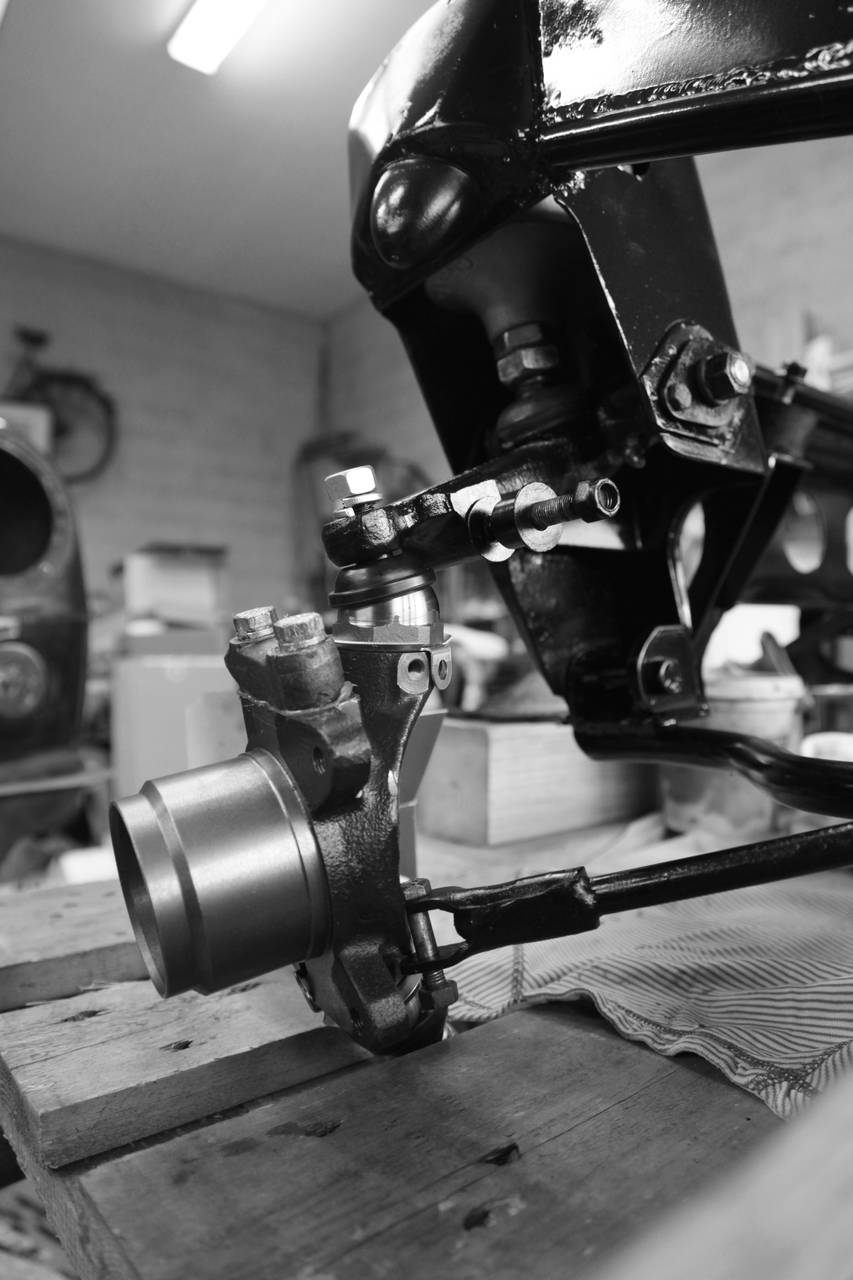
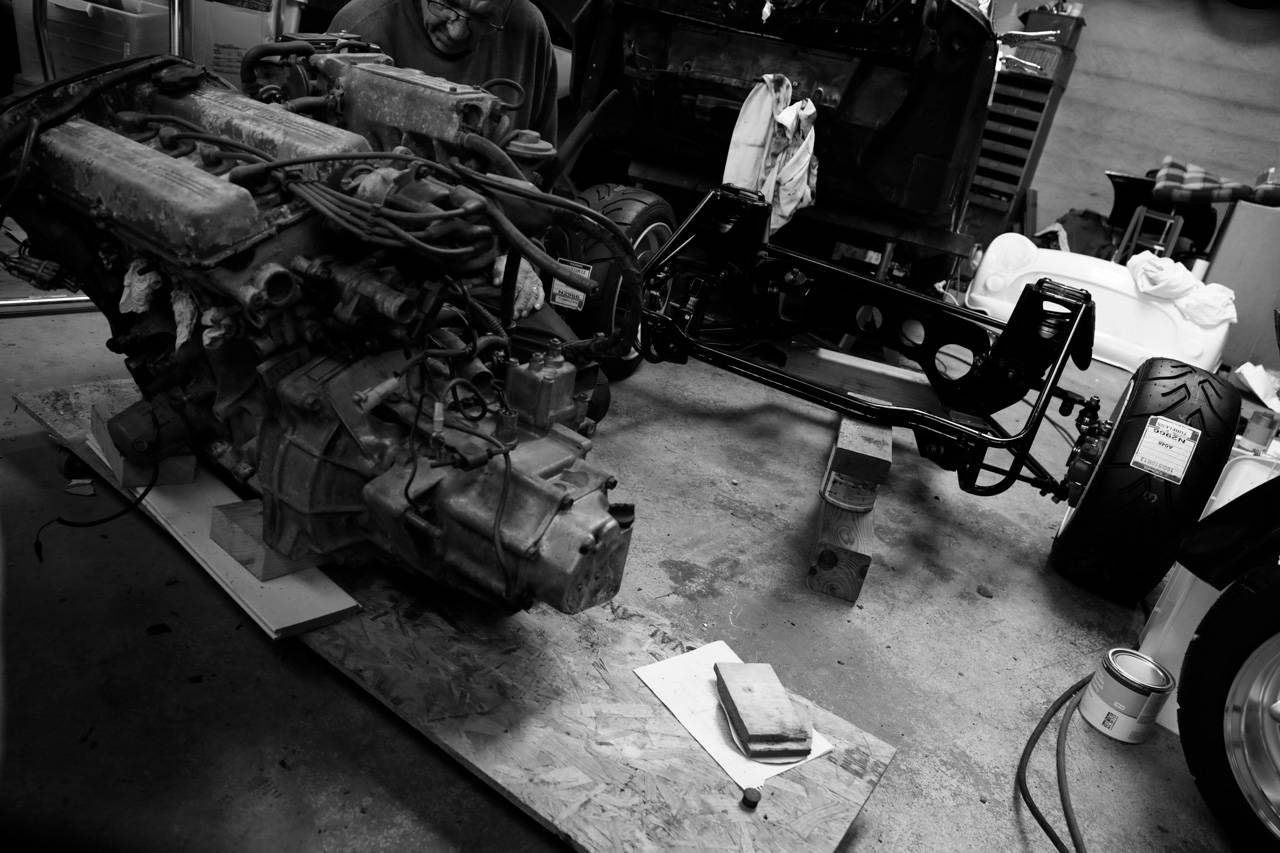
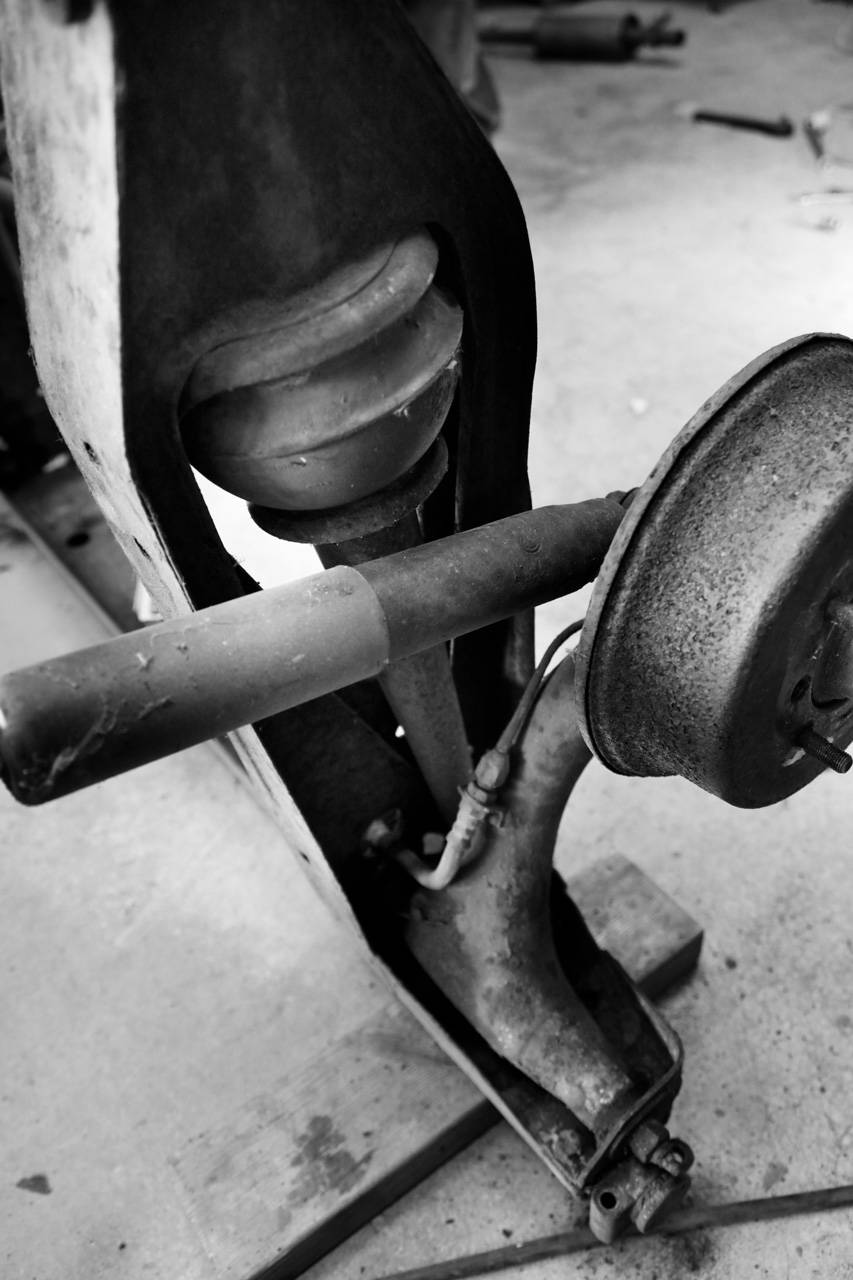
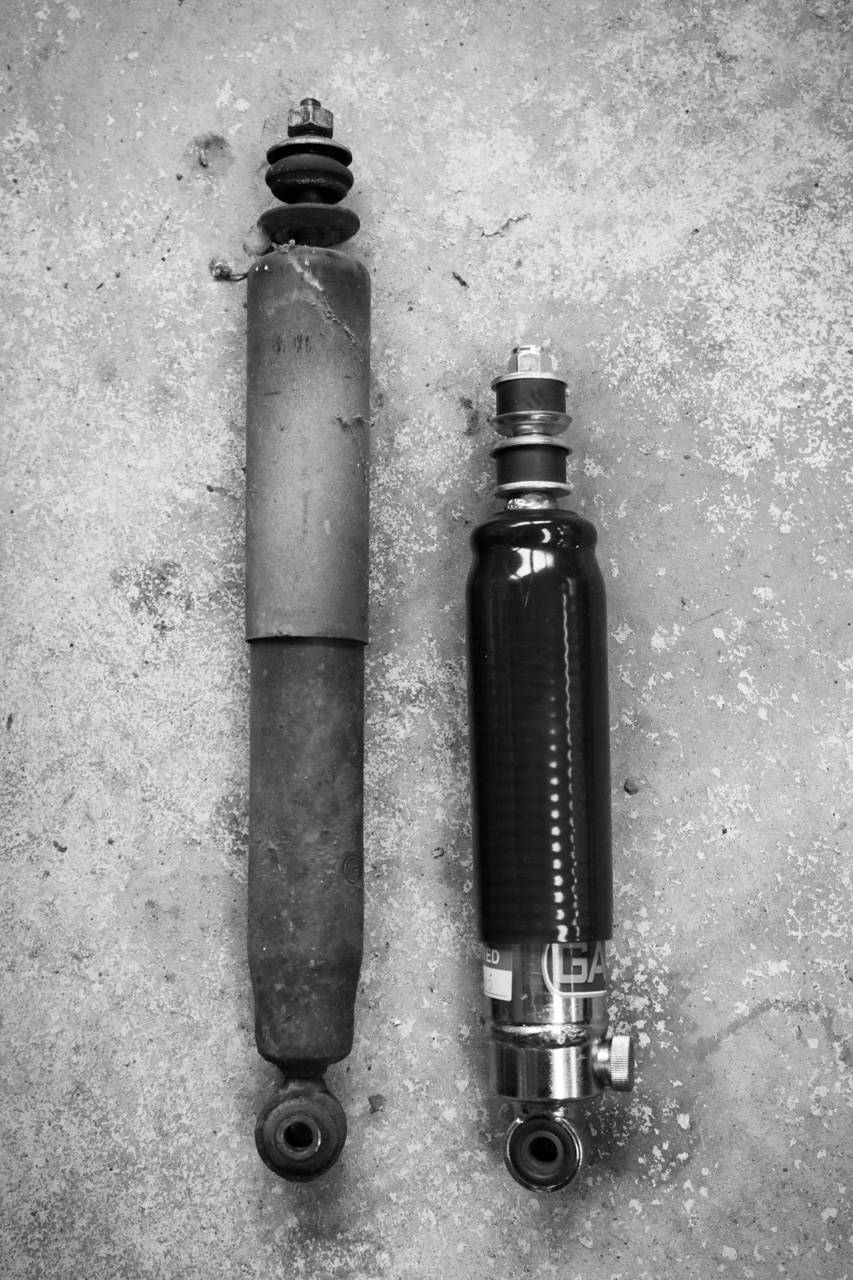
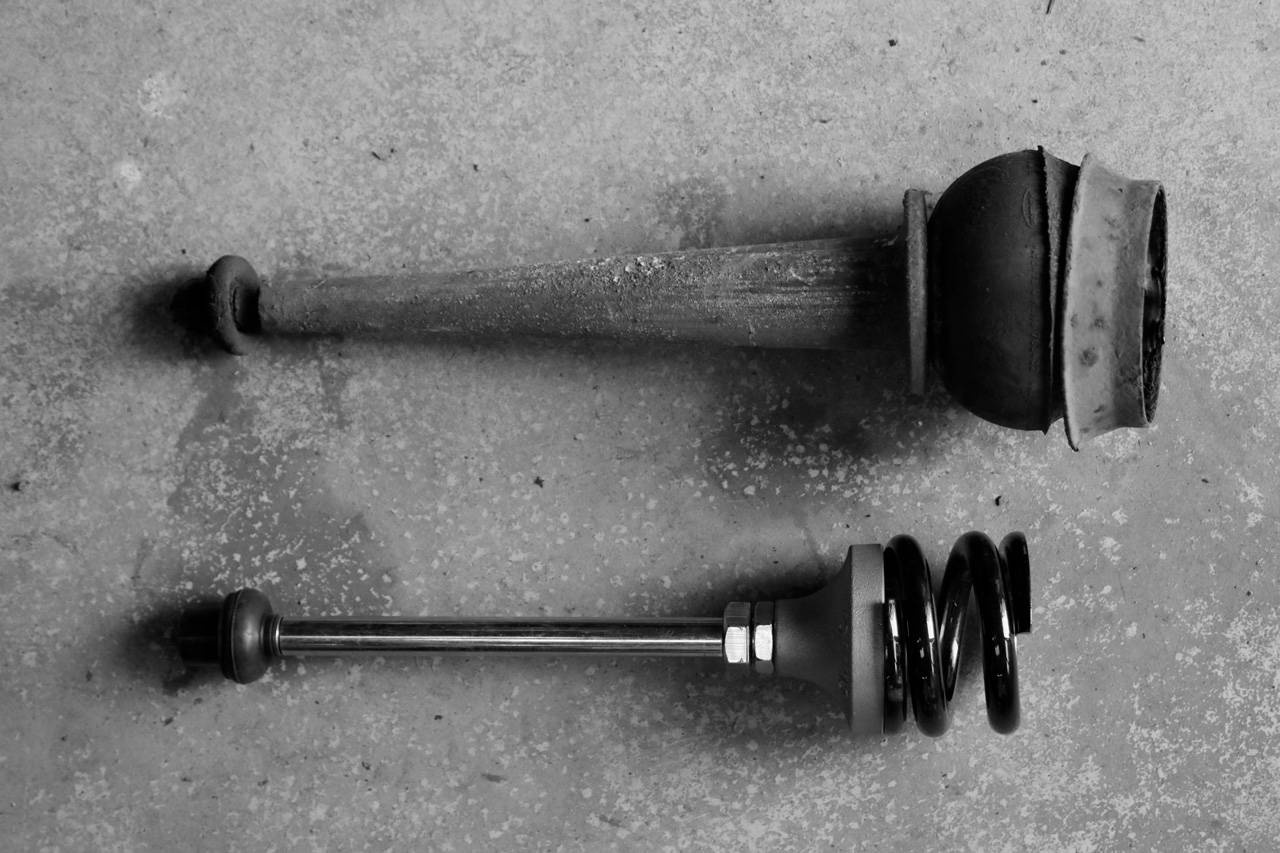
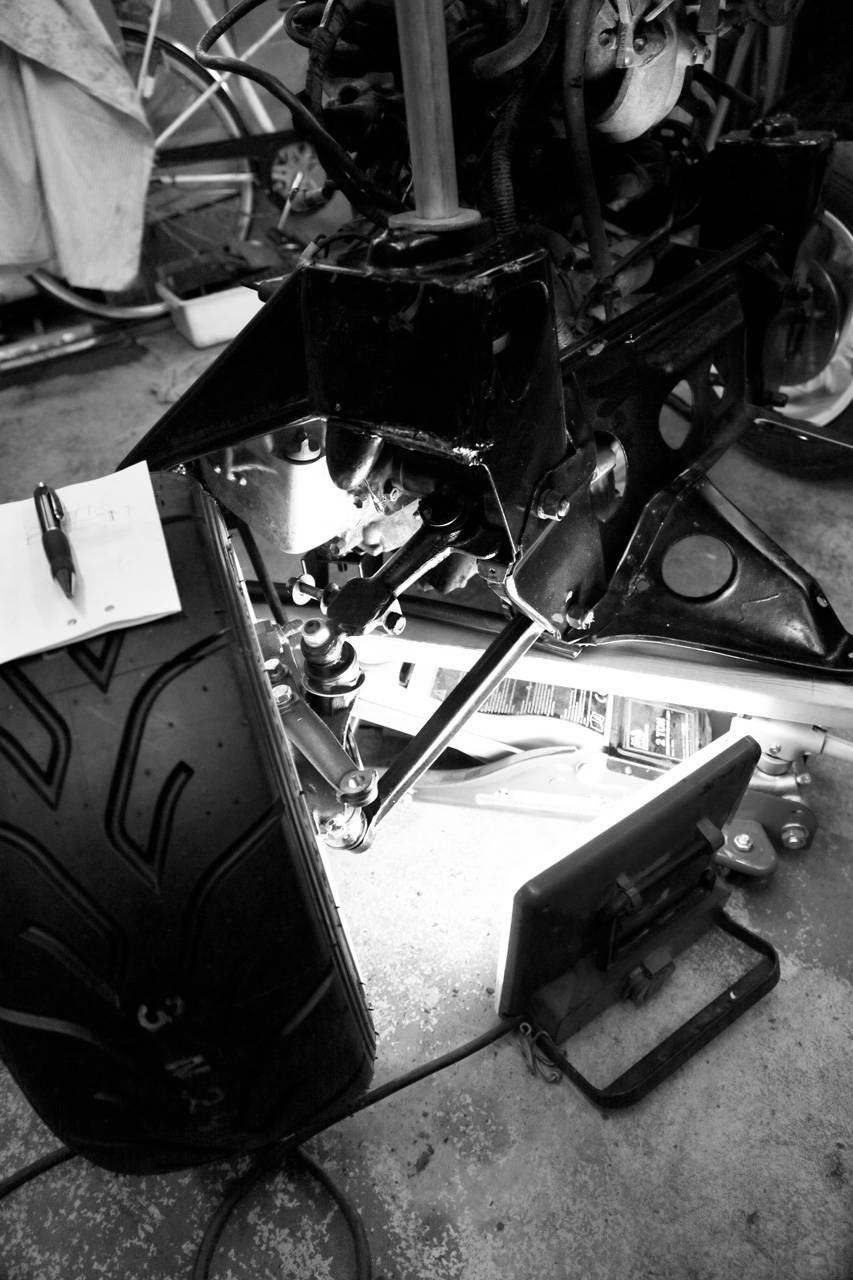
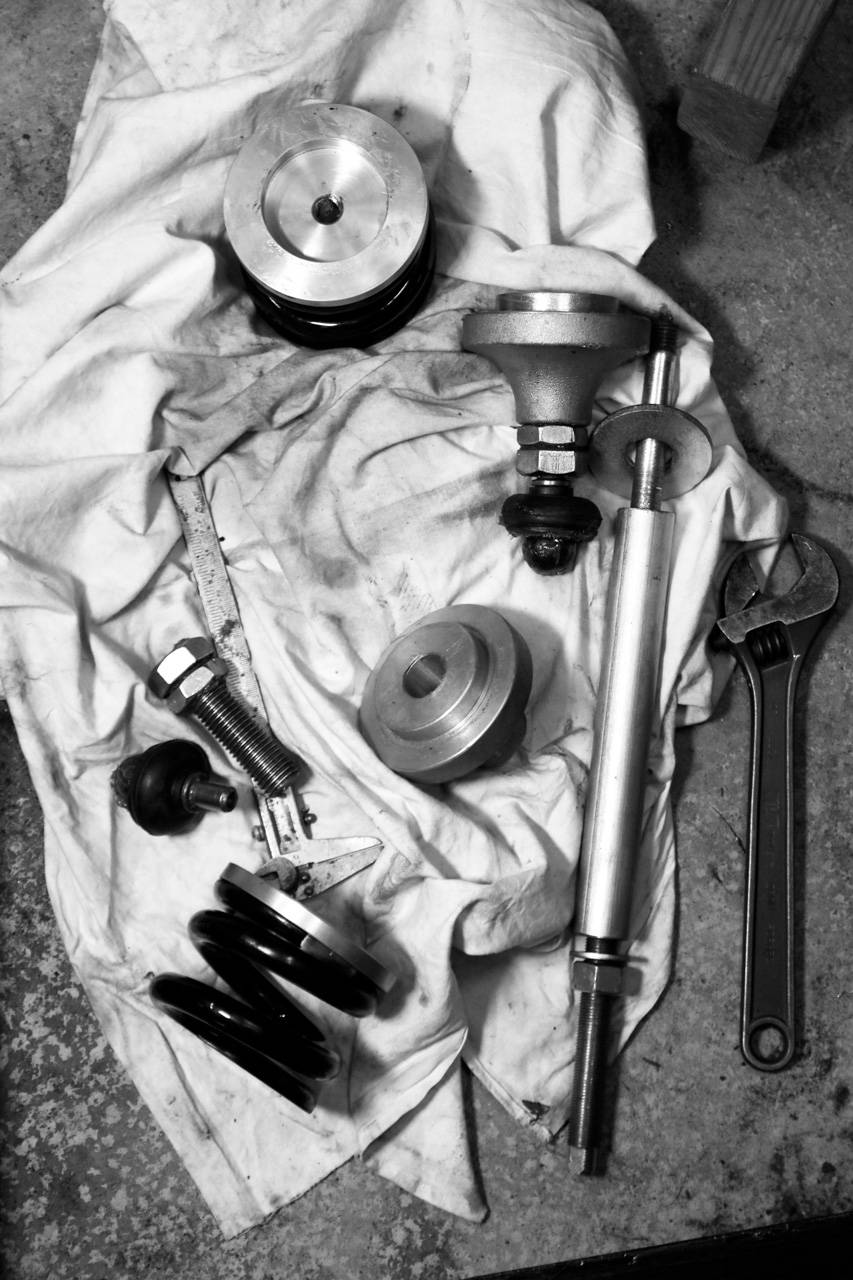
- Front springs installed (haven't we done this like 4 times already?!) with the correct spring length this time.
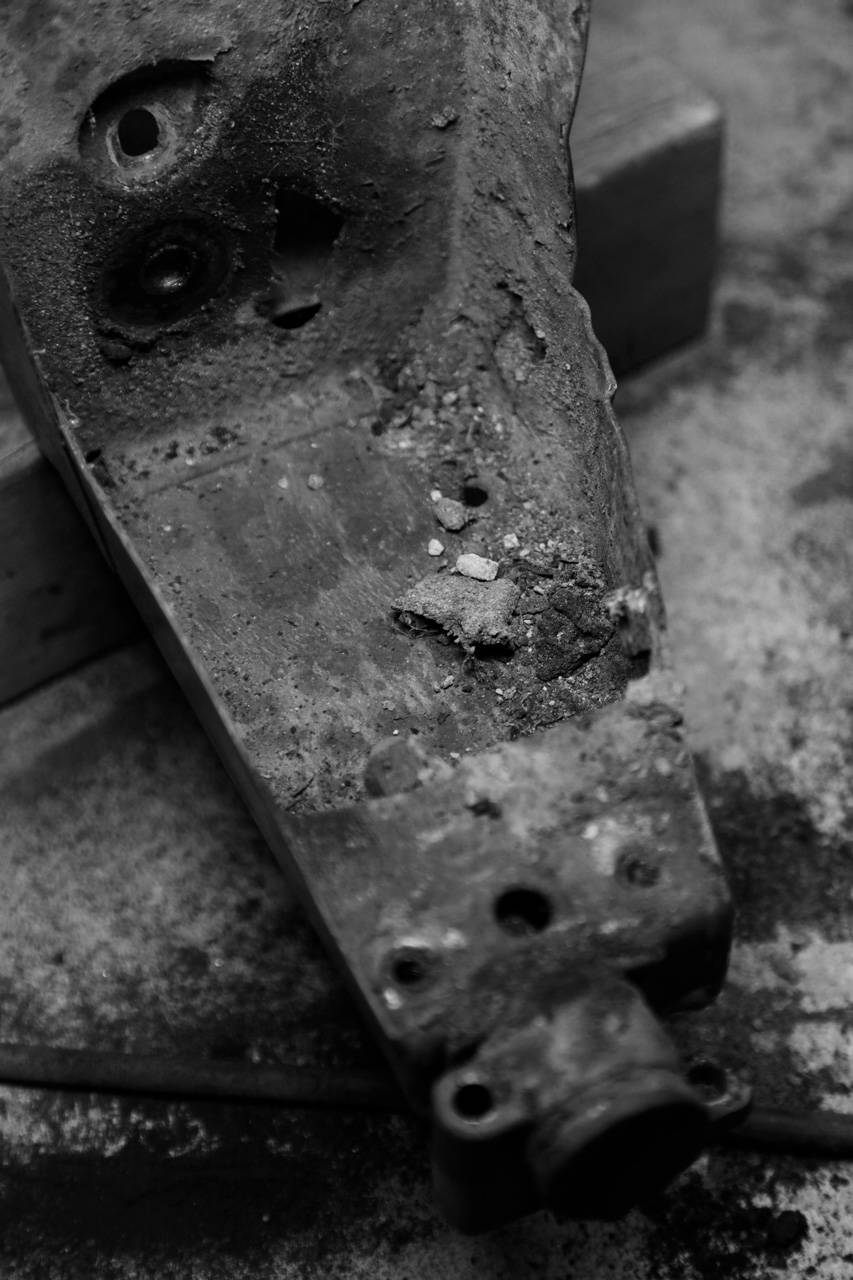
- The curved part on the mounts in the towers is cut off, lowering the car by an additional 2.5 mm (yes, you read that right, two point five millimeters).
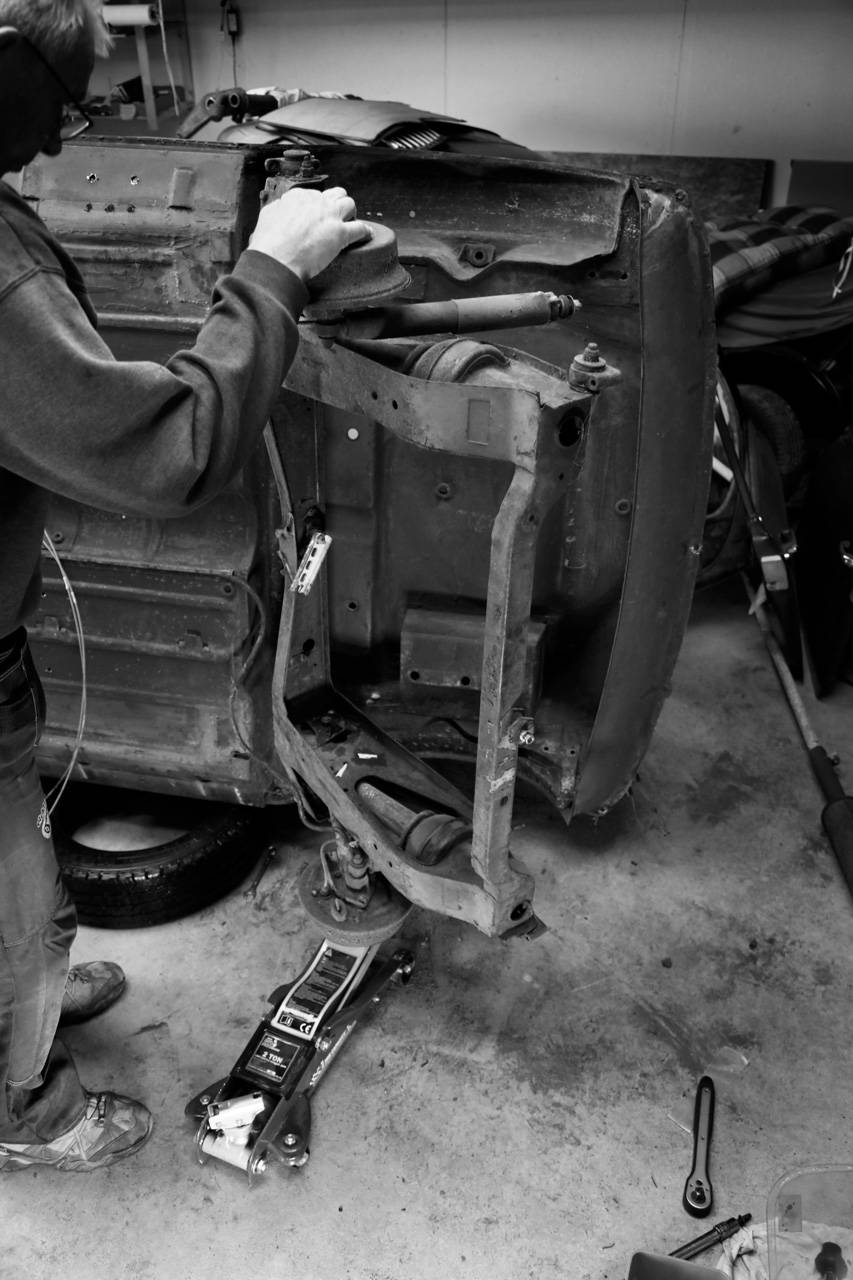
- Lowered the front suspension, and it's definitely lower now!
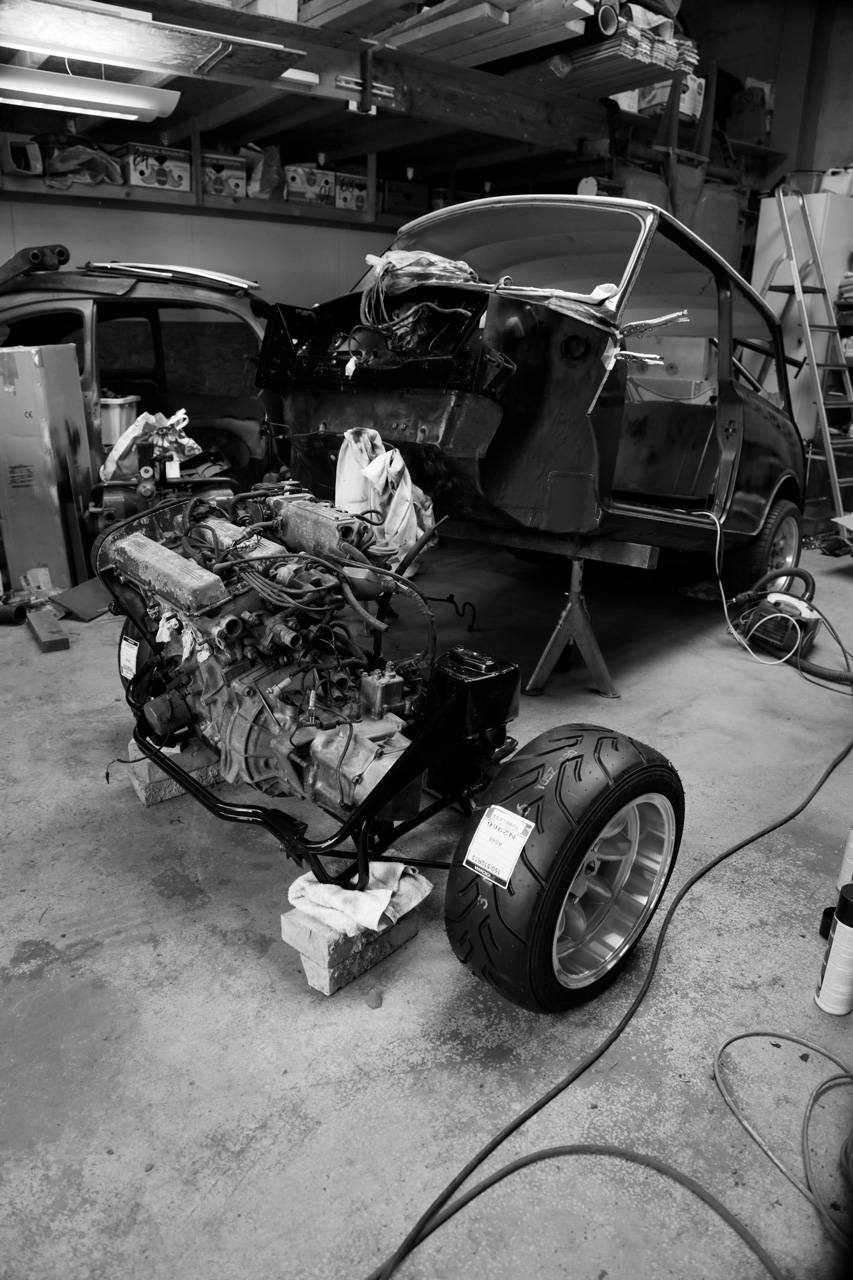
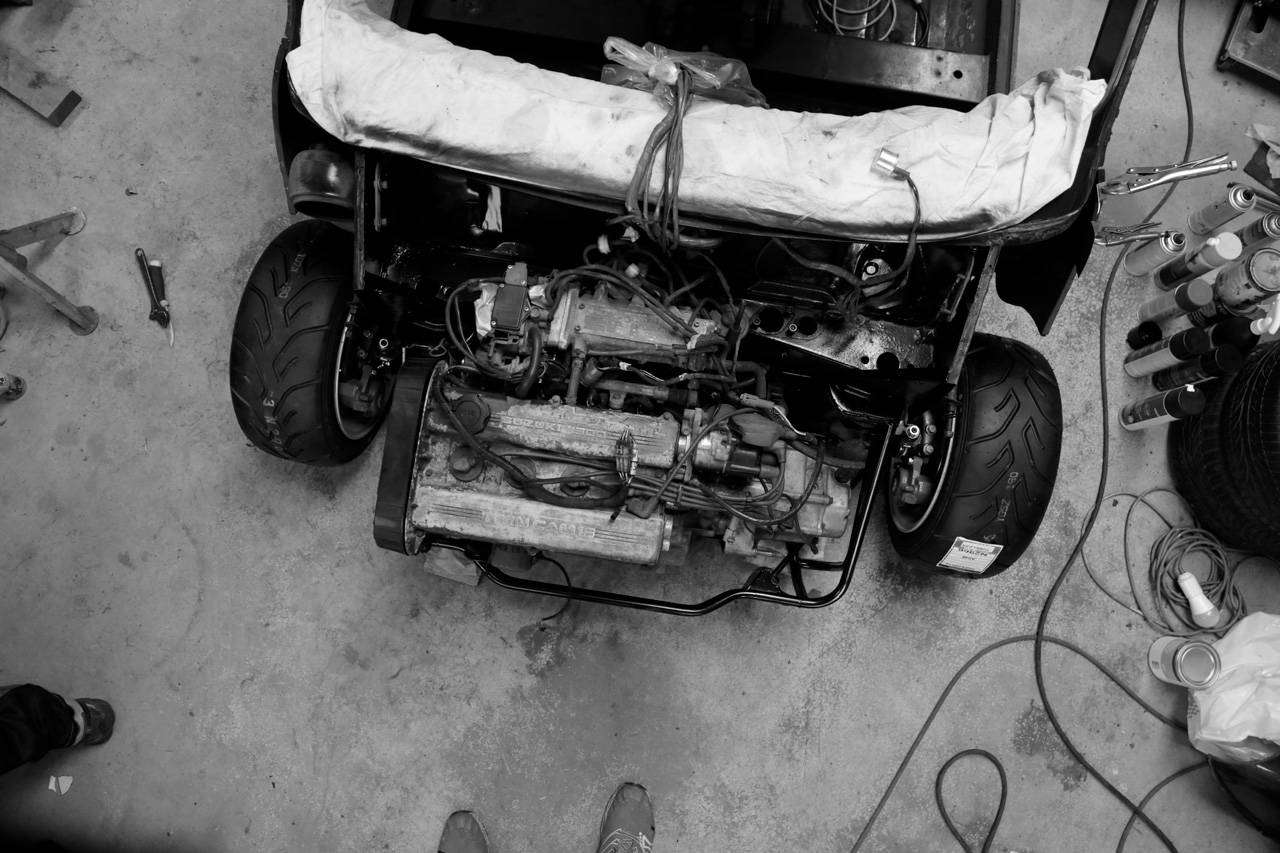
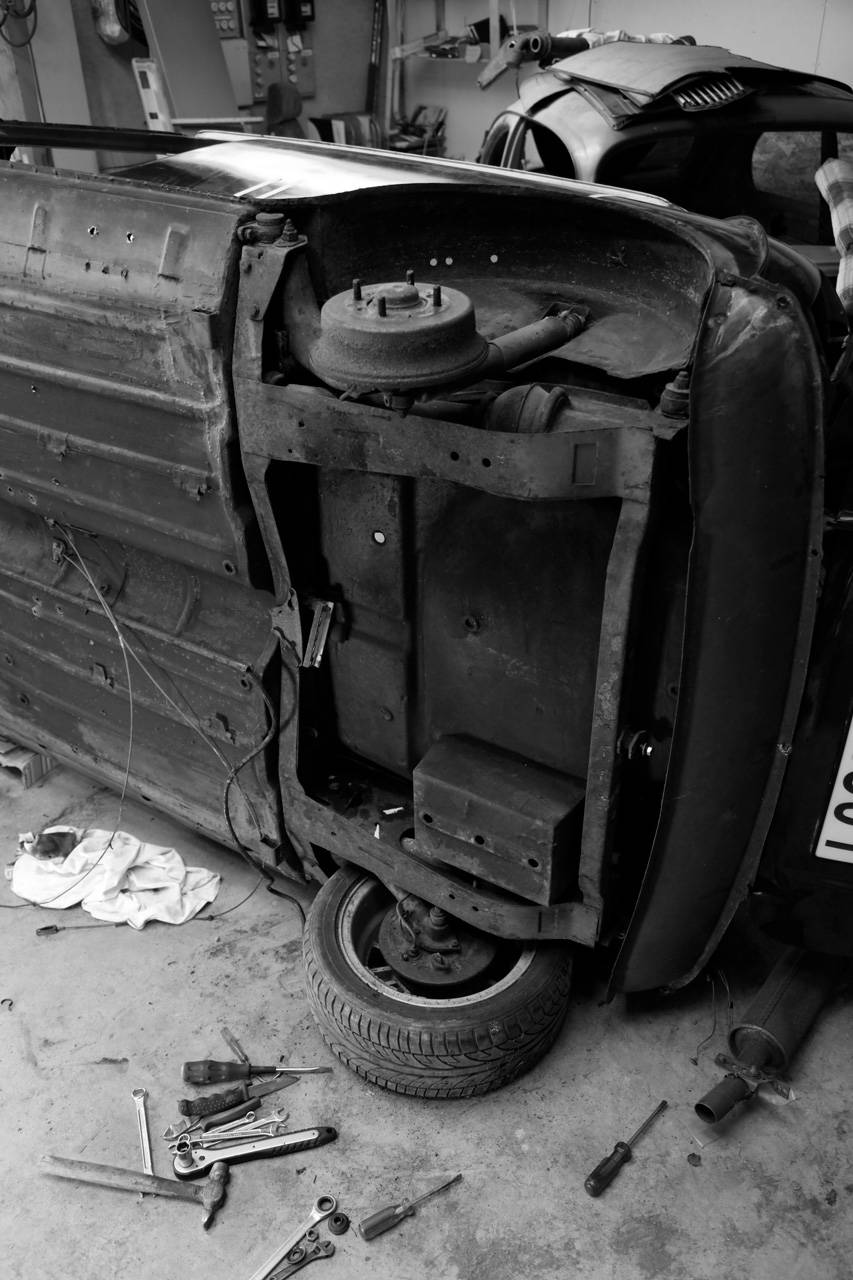
- Swing arms installed in the rear suspension.
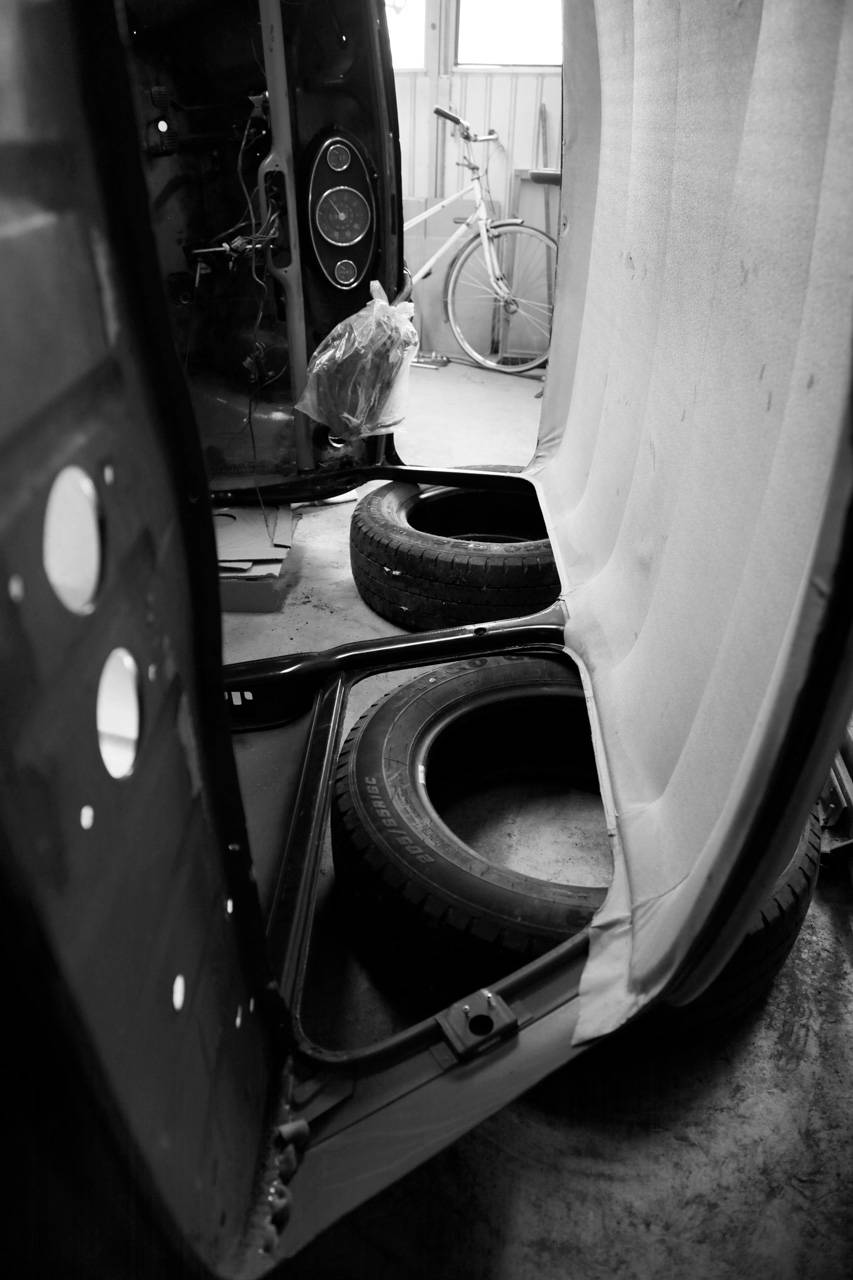
- Drums on, and one tire in place. Wow, it's really low (might need to raise it a bit).
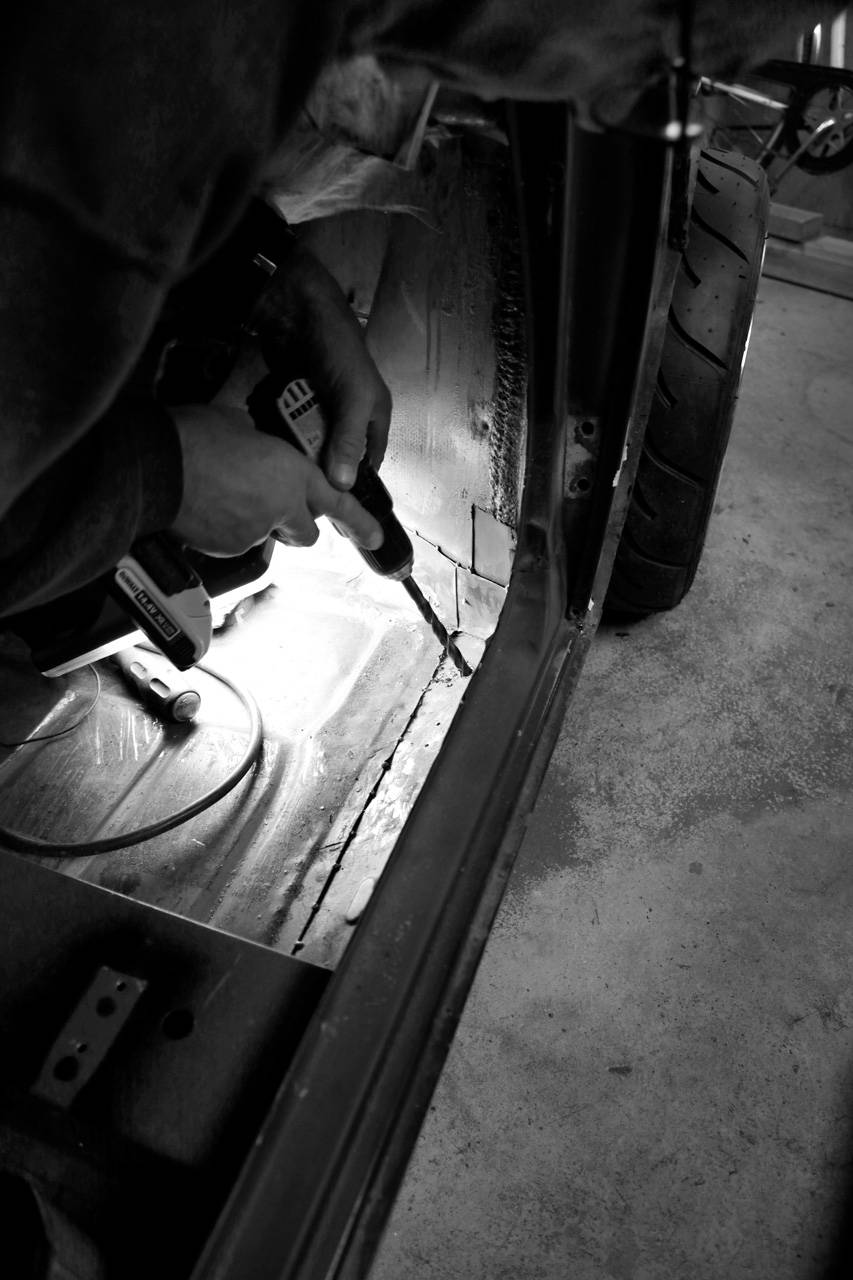
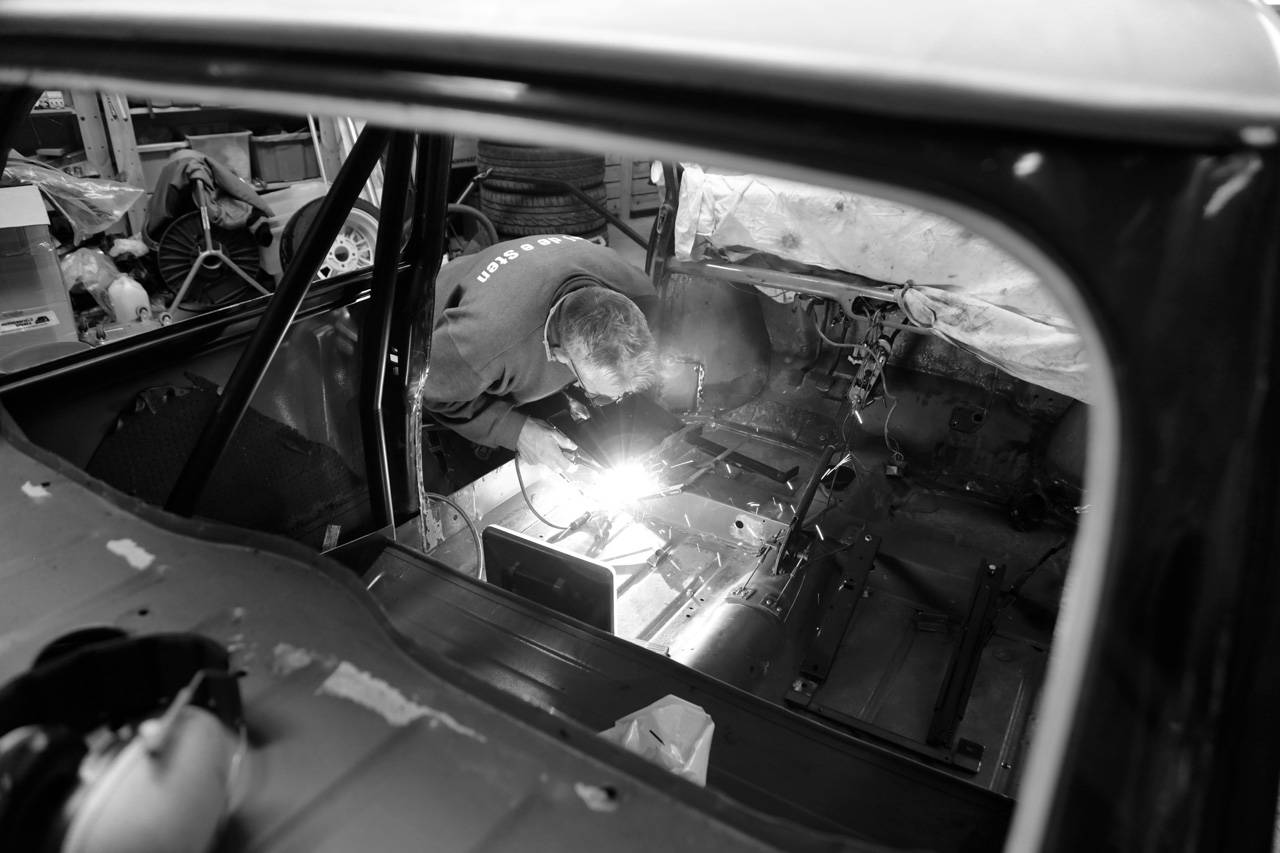
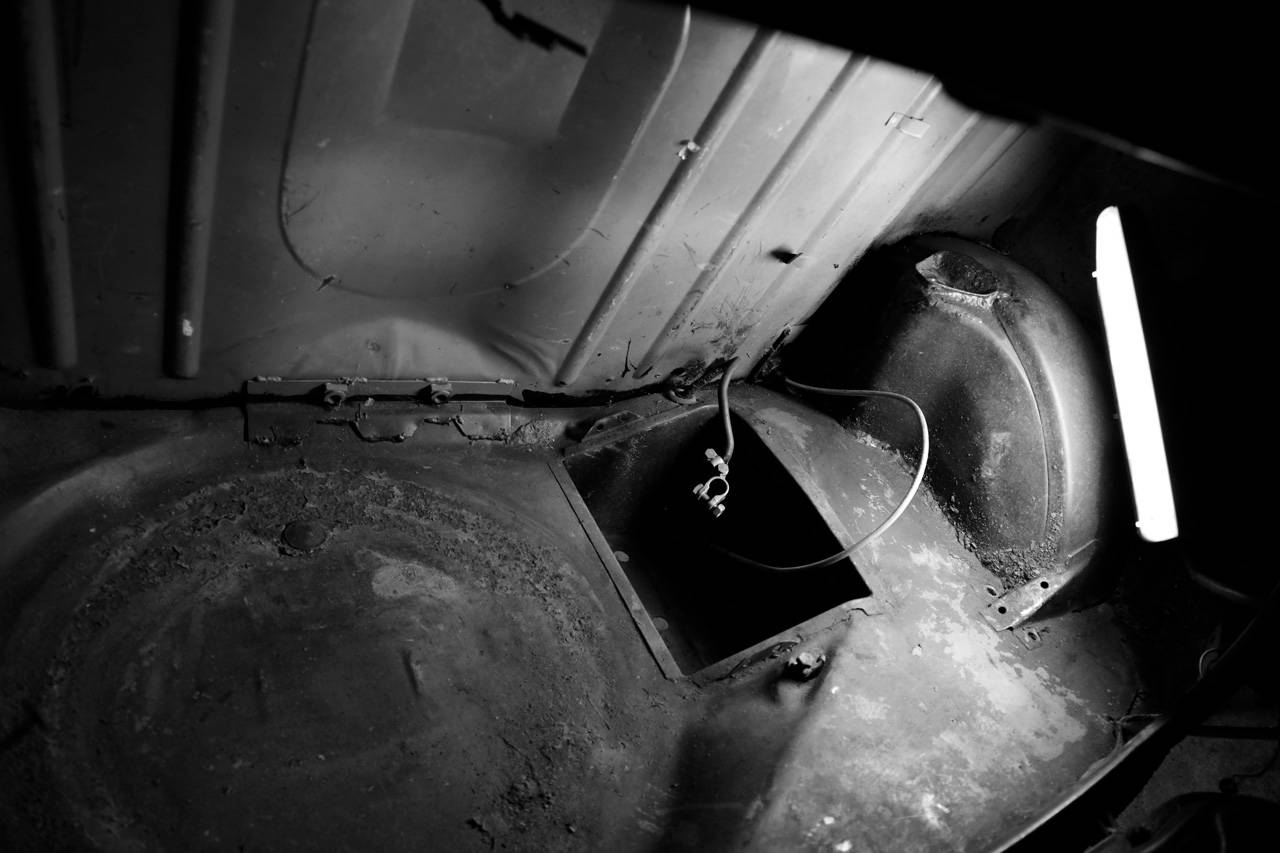
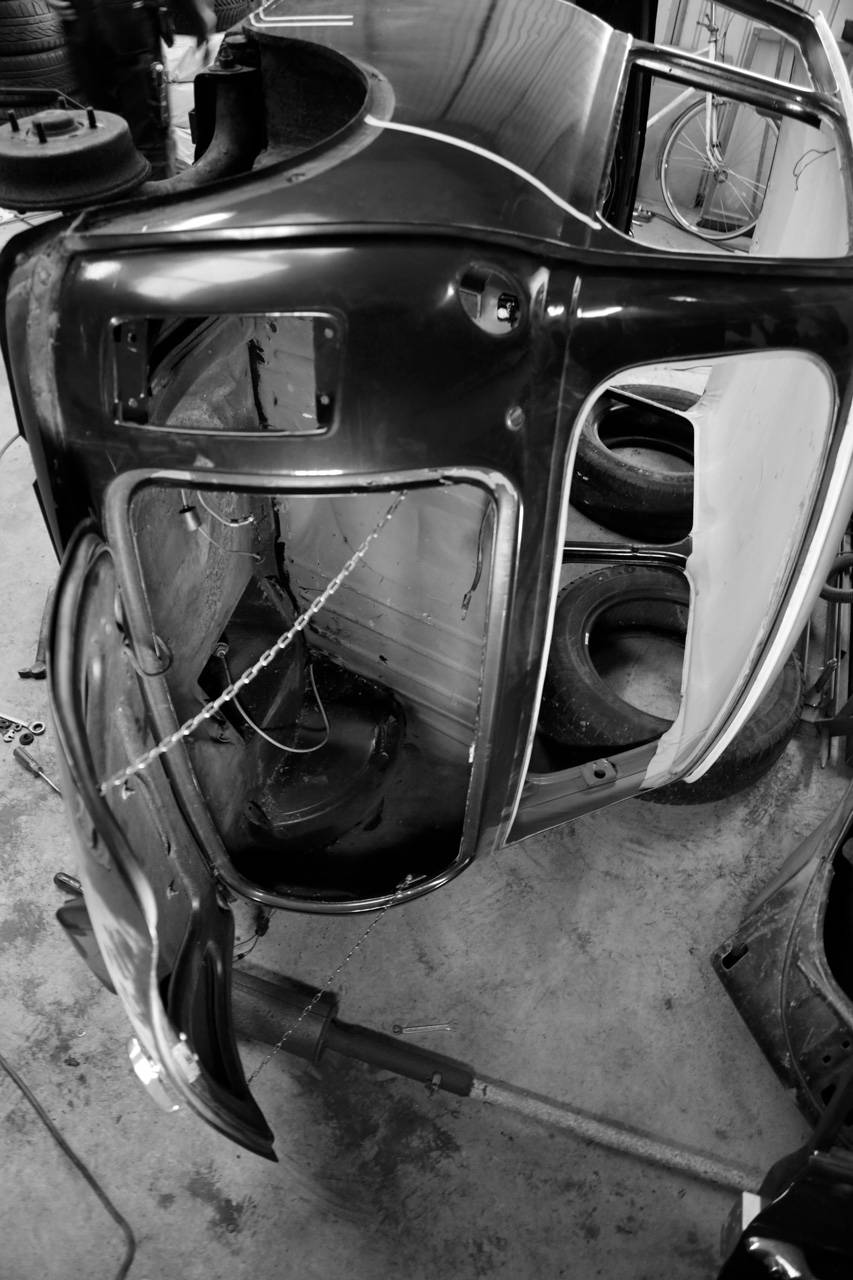
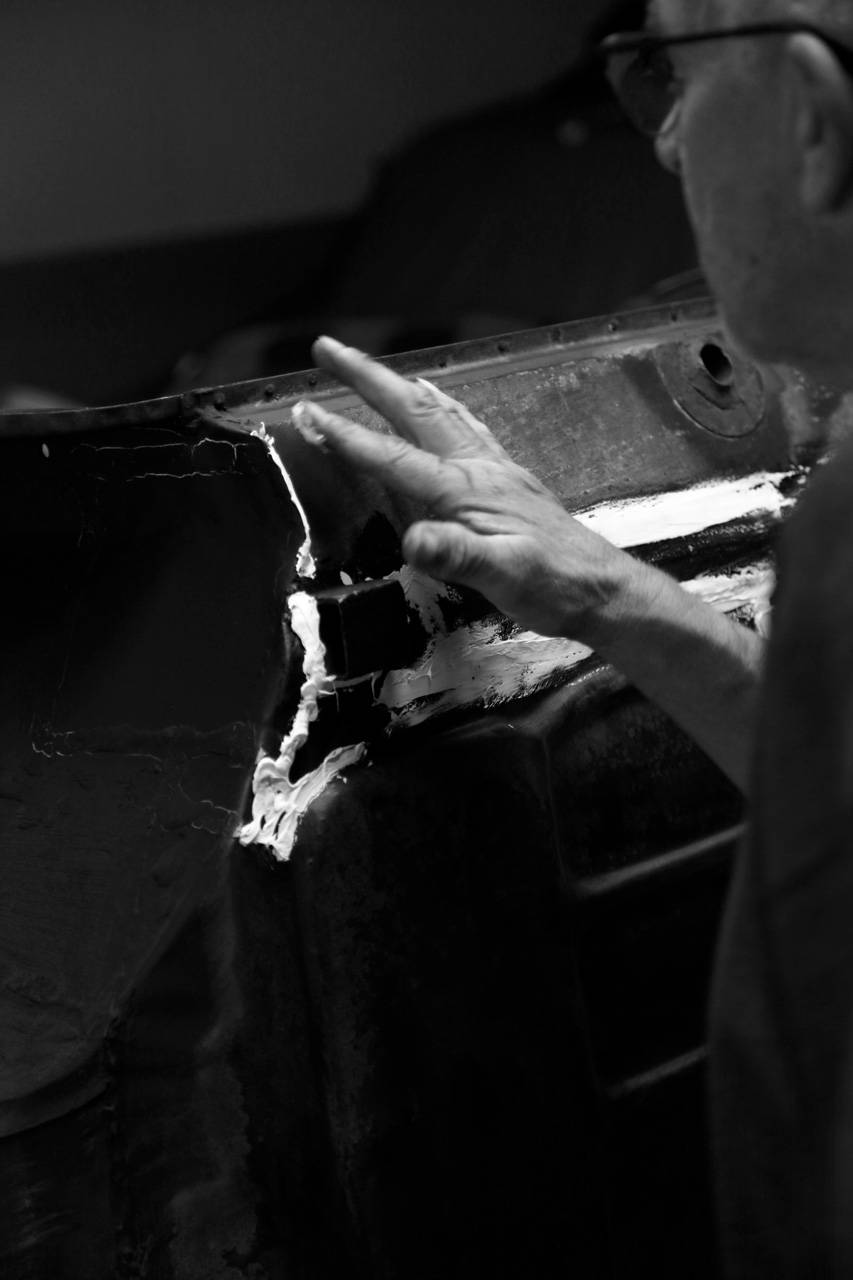
- Mk1-style taillights (older model) should look good once the conversion plate is fine-tuned and welded in place.
- Did I mention that we put the front springs on for the fourth time? The spring compressor tool has been working hard, haha!

Tomorrow, we'll mount the rear suspension on the car, tip it down from the side, and also install the front suspension. And then, only then, we'll see how much lower the car has become.

Until next time!

https://www1.garaget.org/gallery/images/219/218366/218366-1267de9a4497bf69d47467723f492641.jpg
https://www1.garaget.org/gallery/images/219/218366/218366-dbbdf9479753e0c66da1ee8b71212159.jpg
https://www1.garaget.org/gallery/images/219/218366/218366-67777d8e54c45b23b5f7817160cc7b98.jpg
https://www1.garaget.org/gallery/images/219/218366/218366-75f96281642ae29c32c7a21901503585.jpg


https://www1.garaget.org/gallery/images/219/218366/218366-c2774ff373f2b9f274c5c2b70d2020f2.jpg
https://www1.garaget.org/gallery/images/219/218366/218366-b415b3b7d813d76e76b306fc2e8a3ef9.jpg
https://www1.garaget.org/gallery/images/219/218366/218366-f329ecf1be0ff9dc8e8f7393160a3756.jpg
https://www1.garaget.org/gallery/images/219/218366/218366-3b024dac29b3369f79f9d98eb31043c5.jpg
https://www1.garaget.org/gallery/images/219/218366/218366-e369cfb38bf41fd0941a22ffa202f571.jpg


https://www1.garaget.org/gallery/images/219/218366/218366-bed86bbf193635fb43a3273ce4becaec.jpg
https://www1.garaget.org/gallery/images/219/218366/218366-0ce397a47486ebe48e21a331bfb7ac79.jpg
https://www1.garaget.org/gallery/images/219/218366/218366-a144905eaecabb7c9d6ec4567787f134.jpg

https://www1.garaget.org/gallery/images/219/218366/218366-9b557f837a793c773f6e00f9198bdc1b.jpg
https://www1.garaget.org/gallery/images/219/218366/218366-3567a0e5ed09eb08e65dc86a55b1e76c.jpg
https://www1.garaget.org/gallery/images/219/218366/218366-1abfb9eab8df7532441637a148c0c154.jpg
https://www1.garaget.org/gallery/images/219/218366/218366-955d3b41892162f11b8a5a4b50748fa0.jpg
https://www1.garaget.org/gallery/images/219/218366/218366-b2b7f185cbca3e46b1d130d1d59b6671.jpg
https://www1.garaget.org/gallery/images/219/218366/218366-17132aa62f8b9af9bee5c5615b270a35.jpg
https://www1.garaget.org/gallery/images/219/218366/218366-29390ef2367e6730e3413178b3a46b67.jpg

Senast redigerat av martinhejdesten (27 december 2023)

Senast i forumet
Diskussionsforum
Projekt
Evenemang